User Manual

1
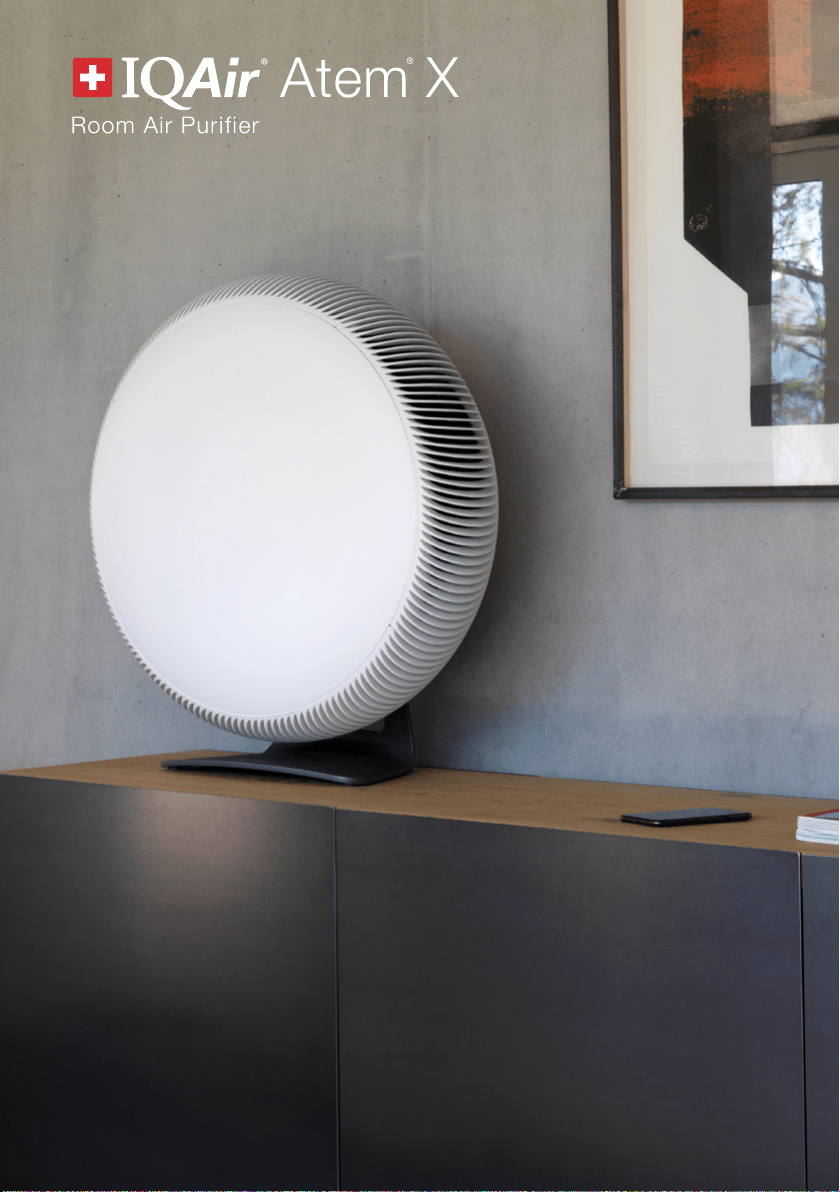
IQAir Atem X is an air purifier for those who care about the air they breathe. We hope you will enjoy
its powerful yet quiet operation, space-saving design and smart functionality as much as we enjoyed
designing and manufacturing it for you.
Use the IQAir AirVisual app to control your purifier from your smartphone. Atem X features built-in
sensors that drive the purifier’s smart mode for automatic fan speed control, optimal air cleaning
performance and energy efficiency. The purifier’s advanced filter monitoring system maximizes filter life
and performance, thus minimizing waste and filter replacement cost.
Contents
Swiss Design. Made in Germany.
1. Important safety instructions .........................................................................1
2. Product overview ...........................................................................................3
3. Getting started ................................................................................................5
Scan the QR code to connect ............................................................................6
Fitting the mobile base ......................................................................................6
4. The control panel ............................................................................................7
Power ..............................................................................................................8
Smart mode .....................................................................................................8
Fan speed selection .......................................................................................... 9
Air quality indicator ........................................................................................... 10
Light dimming ..................................................................................................10
Wi-Fi................................................................................................................11
Schedule ..........................................................................................................11
Filter status ......................................................................................................12
Control panel lock .............................................................................................12
5. Filter replacement ..........................................................................................13
6. Cleaning the impactors ..................................................................................16
7. Technical specifications .................................................................................17
8. Additional information ....................................................................................18
EN

1
1. Important safety instructions - Read and save these instructions
Danger
• Never immerse the appliance in water.
• Do not allow any kind of liquid to spill
on, enter or come into contact with the
appliance, including, but not limited to
water, detergents or flammable solvents.
• Do not spray any flammable materials
such as insecticides, fragrance or
perfumes into or around the appliance.
Warning
• This appliance can be used by children
aged 8 years and above and by persons
with reduced physical, sensory or mental
capabilities, or lack of experience and
knowledge only when supervised or
instructions concerning the safe use of the
appliance have been given by a person
responsible for their safety and these
persons understand the hazards involved.
• Children shall be supervised to ensure that
they do not play with the appliance.
• Cleaning and other user maintenance
must not be performed by children except
when aged 8 years and above
and supervised.
• Prior to cleaning, servicing or other
maintenance, the appliance must be
disconnected from the supply mains.
• The appliance must be securely fixed
when placed on a bench-top surface or
table.
• Do not use the appliance if the plug, the
power cord, or the appliance itself is
damaged. If the power cord is damaged,
you must have it replaced by IQAir, a
service center authorized by IQAir, or
similarly qualified persons in order to
avoid a hazard.
• Do not place the appliance in an area
where it can be affected by dripping
condensation, e.g. directly below an
air conditioner.
• Do not place the appliance in or below an
open window.
• Check that the voltage and frequency
indicated on the appliance corresponds
to the local mains voltage and frequency
before connecting. Only plug the appliance
into a suitable and easily accessible
mains socket.
• In addition, for USA: This appliance has a
polarized plug (one blade is wider than the
other). To reduce the risk of electric shock,
this plug is intended to fit in a polarized
outlet only one way. lf the plug does not
fit fully in the outlet, reverse the plug.
lf it still does not fit, contact a qualified
electrician. Do not attempt to defeat this
safety feature.
• Do not run the power cord under
carpeting. Do not cover the power cord
with throw rugs, runners or similar
coverings.
• Do not route the power cord under
furniture or appliances. Arrange the power
cord away from traffic area and where it
will not be tripped over.
• Do not operate this appliance with a
damaged cord or plug. Discard appliance
or return to an authorized service facility
for examination and/or repair.
• In case of needing instructions contained
in electronic format as printed copy
download from www.iqair.com and print or
request at local dealer.
EN

2
• To reduce the risk of fire or electric shock,
do not use this appliance with any solid-
state speed control device.
• In addition, for Canada: This appliance
is not suitable for use with solid-state
speed controls.
• Do not place the power cord under strain.
• Do not unplug the appliance by pulling on
the power cord. To unplug, grasp the plug,
not the power cord.
• Never sit or stand on the appliance. Sitting
or standing on the appliance may lead to
potential injury and appliance damage.
• Do not place any objects on the appliance.
• Make sure that foreign objects do not fall
into the appliance.
• Never introduce a foreign object or finger
into airflow openings.
• Do not use the appliance with any opening
blocked; keep free of dust, lint, hair, and
anything that may impede airflow.
Caution
• Use only indoors and in dry environments.
• This appliance is intended for use in living
and office environments.
• Do not use near furnaces, fireplaces,
stoves or other high temperature heat
sources.
• This appliance contains high precision
technology. Do not drop, tamper with nor
expose to impact.
• Floor standing installation of the appliance
shall be on a stable, level, and horizontal
surface.
• Disconnect the appliance from the mains
socket before moving it.
• Always lift the appliance by the intended
strap. Do not lift the appliance by the stand
or by grasping the grille.
• Do not move the appliance by pulling its
power cord.
• The appliance, when mounted on the
supplied caster base, is easy to move.
When moving the appliance with its caster
base, do it slowly and do not push
it rapidly.
• Only use this appliance in conjunction
with its intended IQAir accessories and
consumables.
• Only use this appliance in an atmosphere
appropriate for permanent human
habitation. Not suitable for use in toxic or
explosive environments, or for protection
against hazardous airborne substances.
This appliance is not a substitute for
proper ventilation, regular vacuum
cleaning, or use of an extractor hood
or fan while cooking.
For more information also refer to:
www.iqair.com
Important safety instructions
EN
3
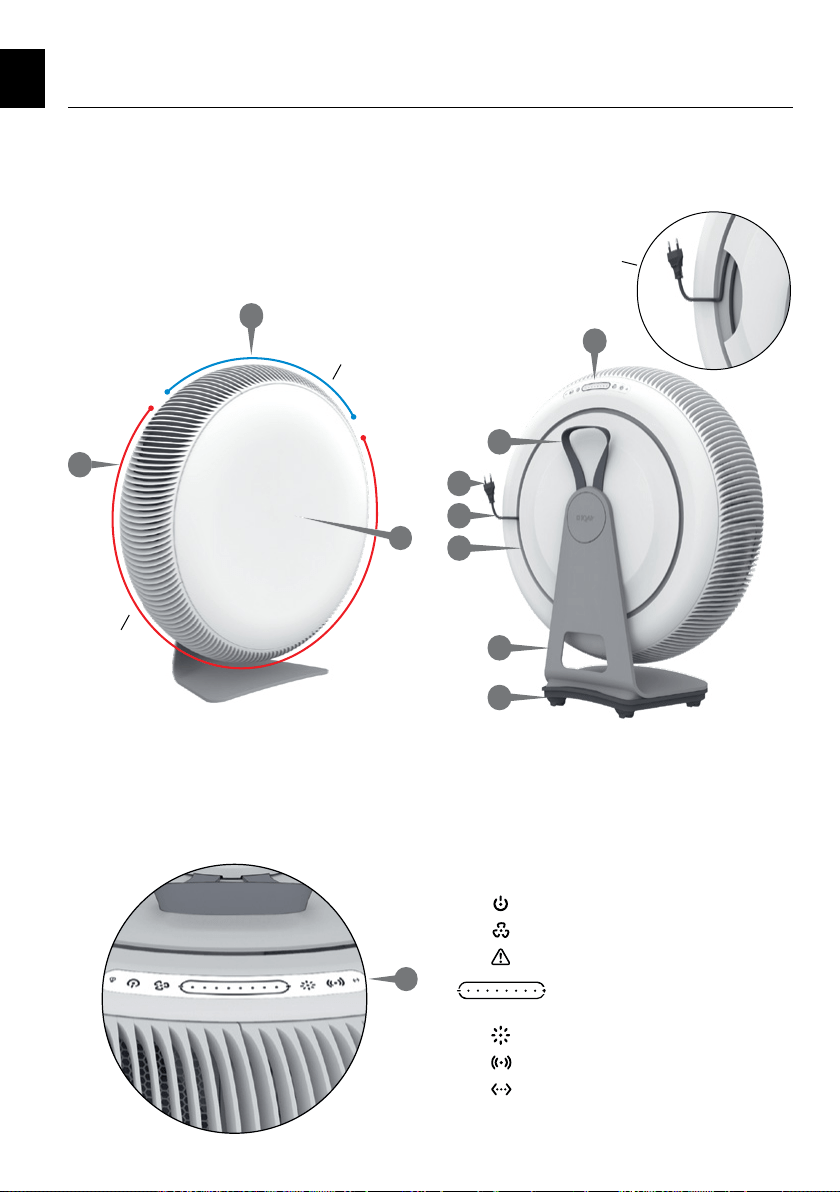
A. Air outlet grille
B. Air inlet grilles
C. Front cover
D. Control panel
E. Strap
F. Plug
G. Power cord
H. Cord channel
I. Stand
J. Mobile base
2. Product overview
The power cord is stowed
in the cord channel
Air outlet section
Air inlet section
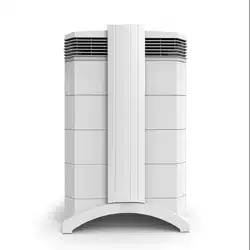
Atem X has a minimalist, round design. Its air inlet
and outlet are arranged on the circumference of the
air purifier.
The front of the air purifier is free of functional
elements. The control panel is unobtrusively located on
the back rim of the air purifier.
Power button
Smart mode button
Filter warning
Fan speed slider &
air quality indicator
Light dimming button
Wi-Fi button
Ethernet indicator
A
D
E
F
G
H
I
J
B
D
C
EN

4
A. Air outlet grille
B. Air inlet grilles
K. Fan window
L. Locking levers
M. Impactor
N. Filter
O. Orientation tab
P. Type label
Product overview
Room air is drawn into the air purifier through three air
inlet grilles and purified air is delivered through the air
purifier’s air outlet grille.
The three air inlet grilles can be removed for cleaning
and to change the filters. The air outlet grille, which is
positioned adjacent to the control panel is fixed and
cannot be removed.
Power button
Smart mode button
Filter warning
Fan speed slider &
air quality indicator
Light dimming button
Wi-Fi button
Ethernet indicator
A
B
B
B
NM
P
K
O
O
L
L
EN
5
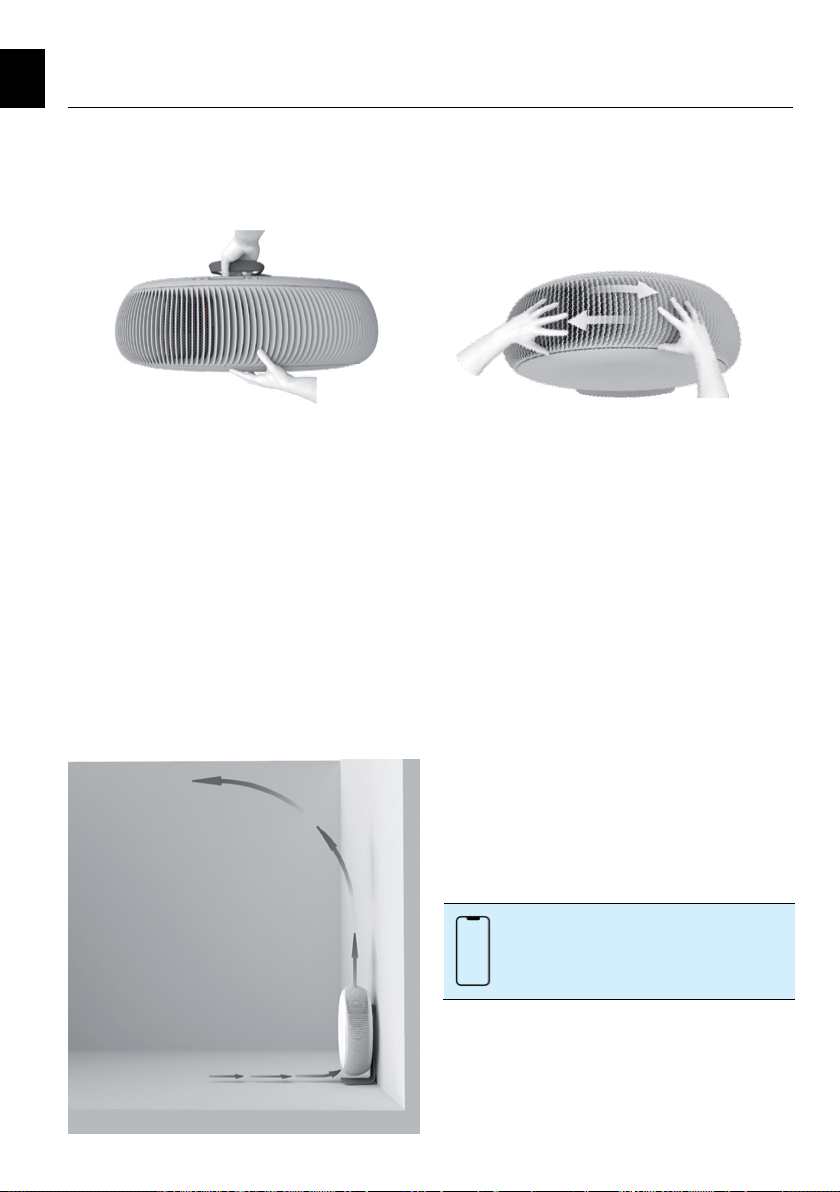
Positioning
Take care when lifting the purifier. Use one hand to
grasp the strap and the other to apply a balancing
force onto the front cover.
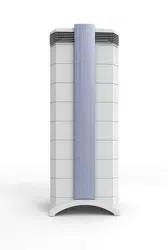
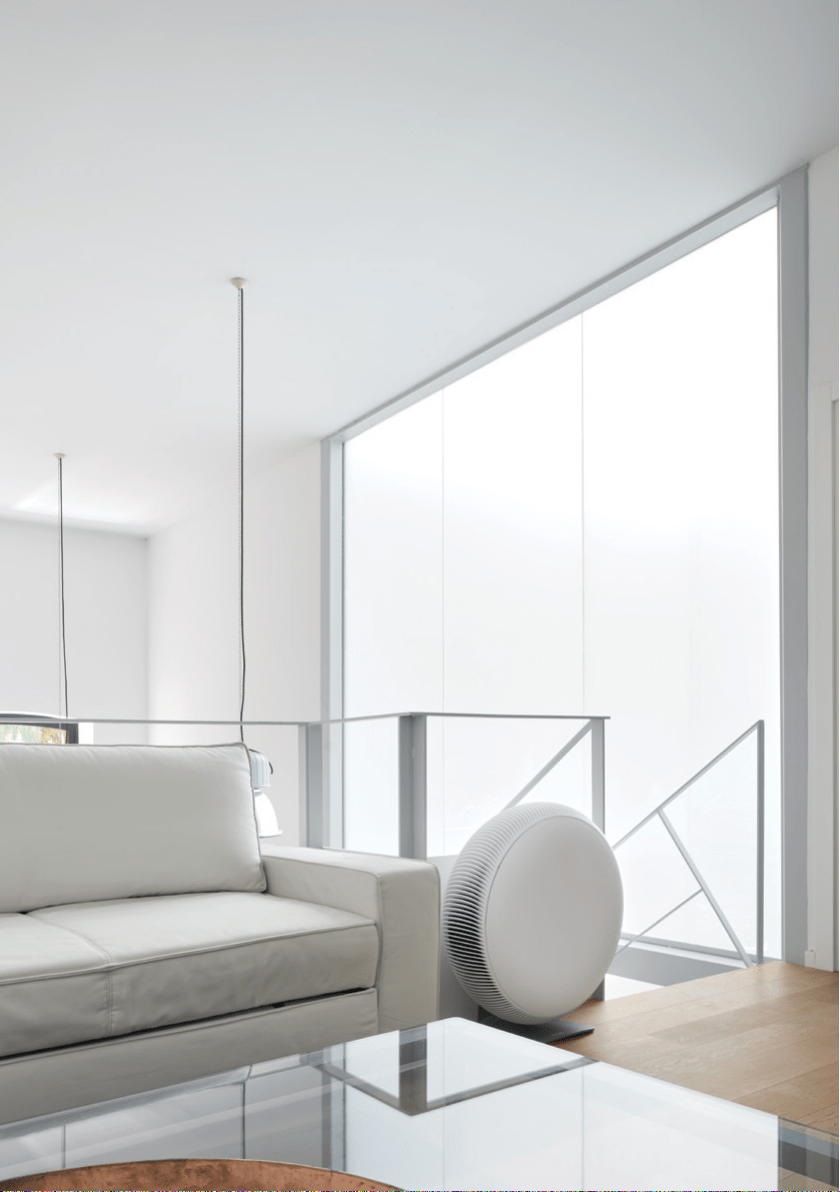
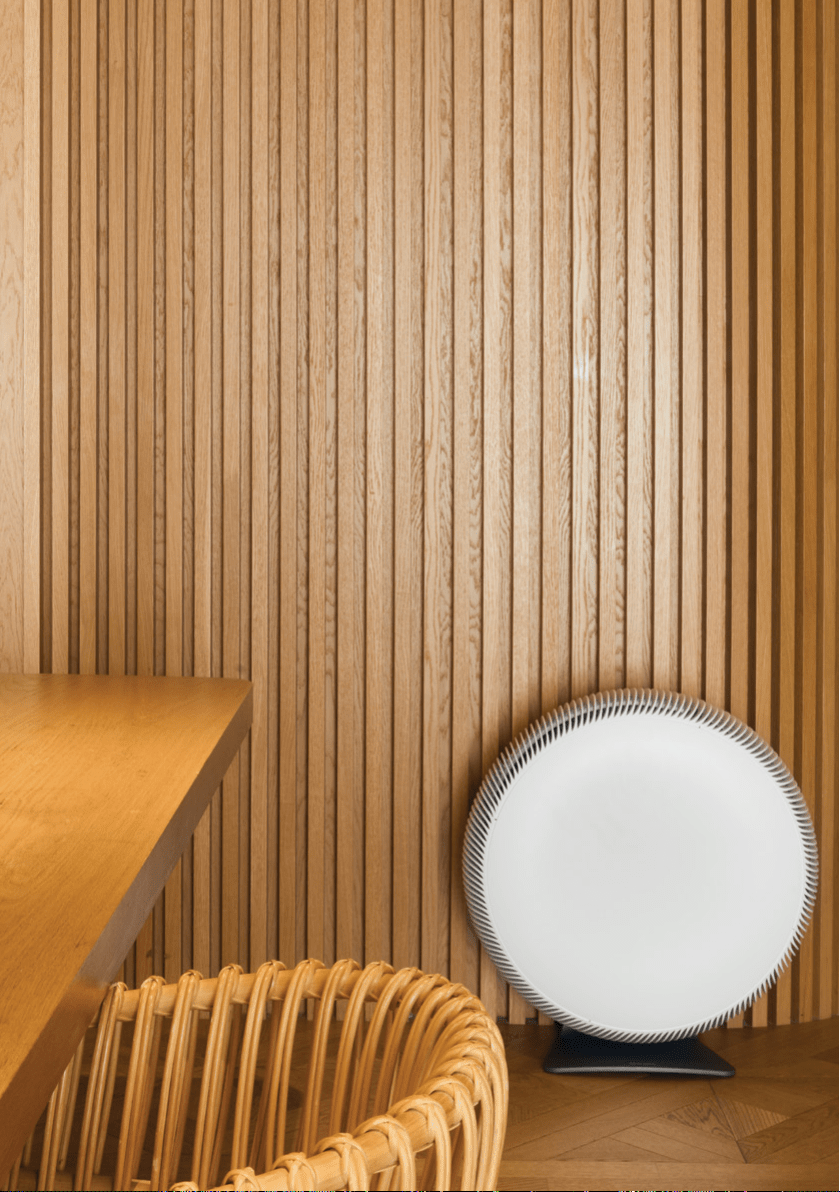
Atem X can be placed directly against a wall or any
other vertical surface, such as a cupboard or beside a
sofa. It does not have to be positioned in the middle of
the room.
When placing the purifier on the floor, the stand’s
non-slip feet ensure a steady stance on most surfaces.
A mobile base is supplied, in case you regularly need
to move the air purifier. Refer to Fitting the mobile base
for more information (page 6).
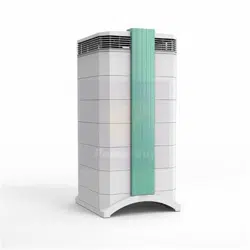
Air flow direction
Rotate the purifier to change the direction of the air
flow as desired. When the control panel is facing
upward, i.e. at the 12 o’clock position, Atem X
directs air upwards, to circulate and clean the air in
the whole room.
Connect to power
Insert the plug into a suitable power socket. Arrange
the power cord where it will not be tripped over, away
from traffic areas. Excess cord can be stowed in the
cord channel.
Using your air purifier
Atem X is in standby mode the first time you connect
it to power. The purifier’s control panel is located on
the rear rim, behind the outlet grille. Press the power
button to turn on the purifier. It will start up in smart
mode, i.e., Atem X will immediately start to measure
the air quality in your room and adjust the fan speed
accordingly.
You can control your Atem X from your smart phone
with the IQAir AirVisual app. The app also provides
useful information about your indoor and outdoor air
quality. Outdoor air quality information comes either
from the nearest public outdoor monitoring station
or your very own outdoor air monitor, such as the
AirVisual Outdoor.
3. Getting started
The smartphone icon in this guide
indicates features that are available only
in the app.
EN
6
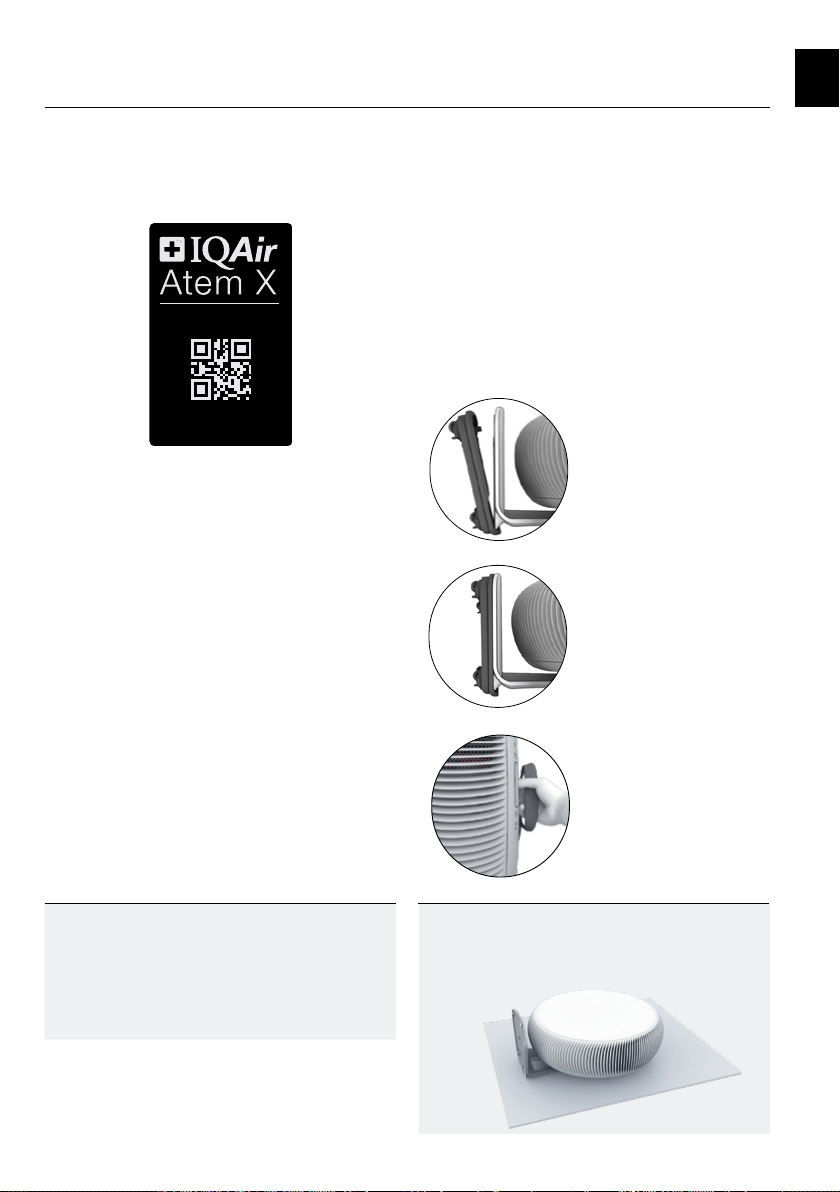
Scan the QR code to connect
Scan the QR code to download the app and start the
connection process. The app will guide you through the
steps to connect with your Atem X.
Your purifier’s QR code is printed on its ID Card, the
Certificate of Performance and on the type plate, which
is located in the inlet area, below the filter.
Getting started
Fitting the mobile base
You can mount your Atem X onto the supplied mobile
base. This will allow you to easily move the purifier on
smooth, hard surfaces. The mobile base is not suited
for use on rough or carpet surfaces.
CAUTION: Do not use the mobile base where there
is the risk for the air purifier to fall or be pushed
over the edge of a surface, e.g., stairs, table top,
sideboard, etc.
Tilt the purifier backwards and carefully lay it flat on
the rear of the stand.
Grasp the purifier by its strap and
lift it back to the upright position.
Position the mobile base so that
the stand’s heel fits into groove
underneath the IQAir logo.
Tip
Before you start be sure to have ready:
• a 2.4 GHz Wi-Fi network
• your Wi-Fi network name (SSID)
• and Wi-Fi password
Tip
Use a towel or similar protective sheet to prevent
any damage to your floor or the purifier’s stand.
Pivot the mobile base to snap
onto the purifier’s stand.
EN
S
N 040A-B123-4567-8
1234
5
6
S
can to connec
t
Pairin
g
Cod
e
7
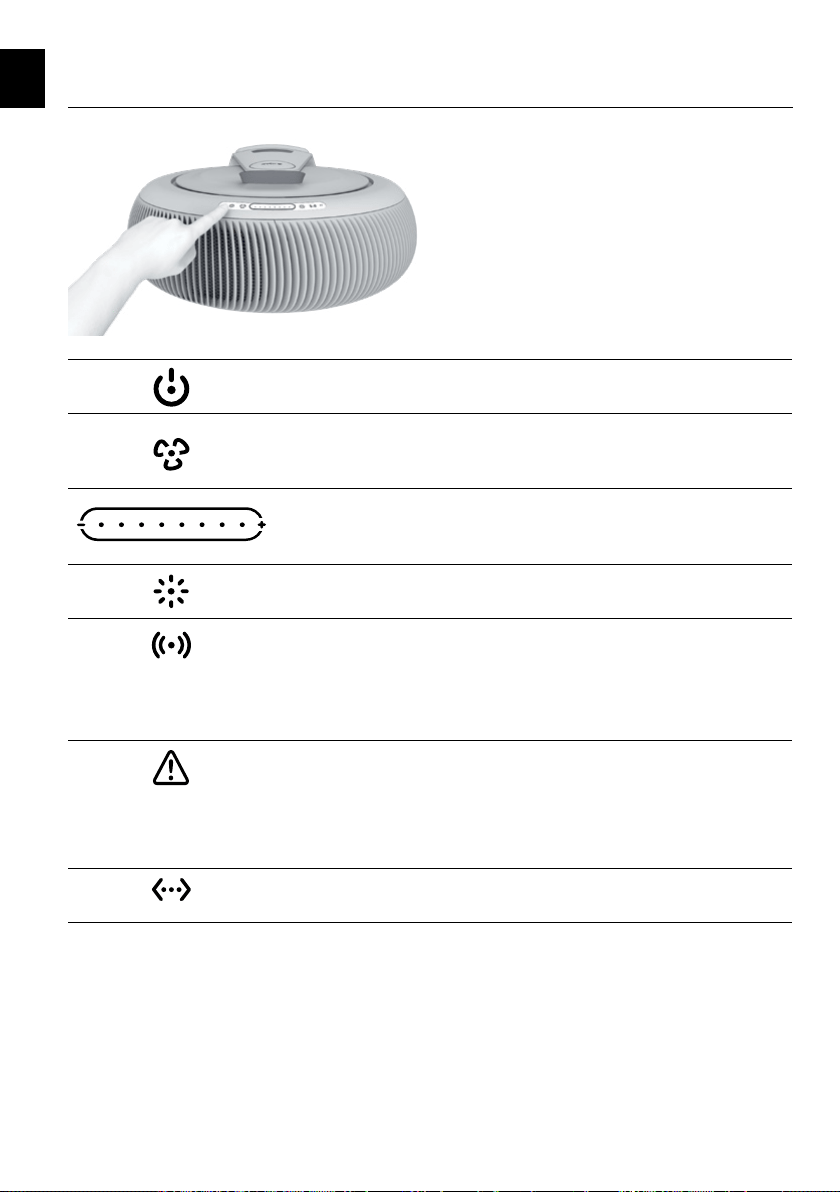
4. The control panel
The purifier’s control panel is located on the rear rim,
behind the outlet grille.
Power button
Touch to turn ON, touch again for standby.
Smart mode button
Touch to toggle between smart mode for automatic fan speed control and the
manual fan speed setting.
Fan speed slider & air quality indicator
Touch the slider to set the fan speed. After 5 seconds the display reverts back
to show the current air quality index (AQI) color.
Light button
Touch to turn the control panel lighting on/off.
Wi-Fi button
Touch and hold for 2 seconds to deactivate the purifier’s Wi-Fi, touch again
to reactivate.
The button is also used to initiate Wi-Fi connection, refer to the in-app
instructions after scanning the purifier’s QR code.
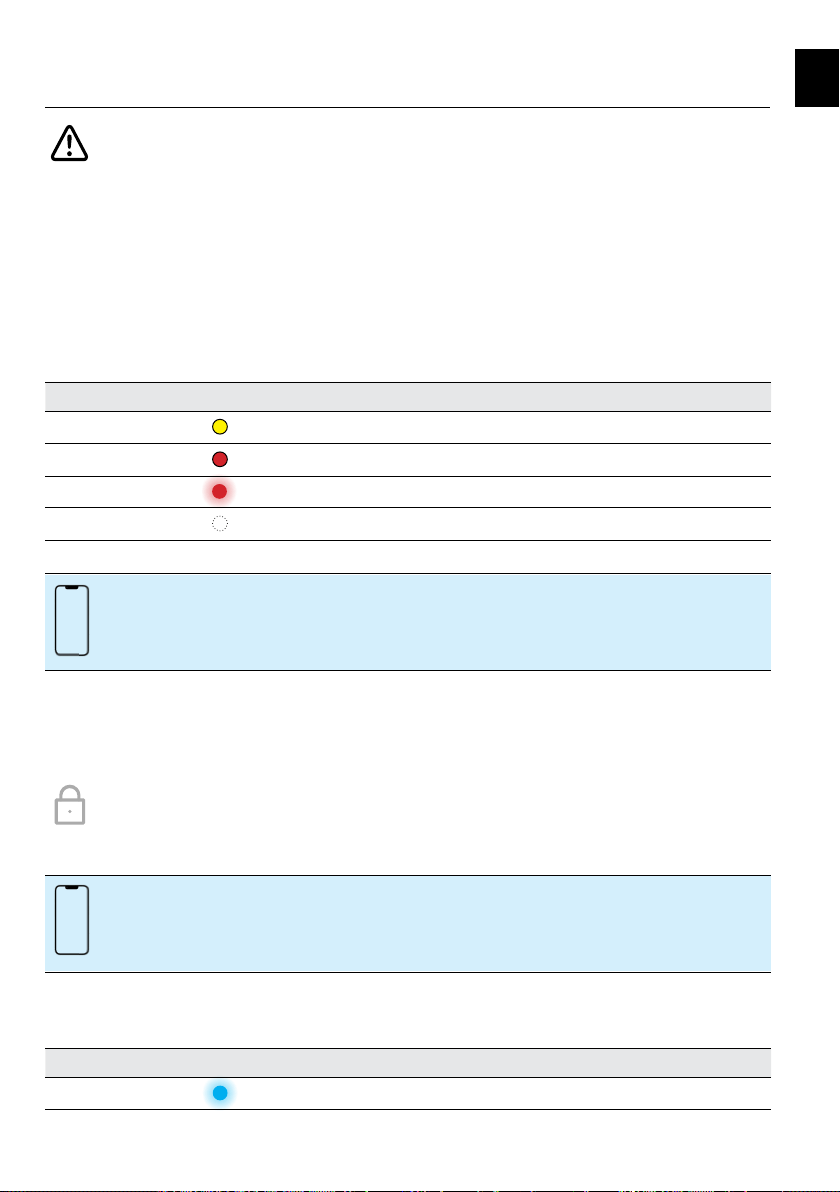
Filter status
Off: Enough filter life remaining, no action required.
Yellow: Low remaining filter life, replace your filters soon.
Red: Replace your filters.
Flashing: No filter detected.
Ethernet
Status of the Ethernet connection (only for models with Ethernet port).
EN
8
The control panel
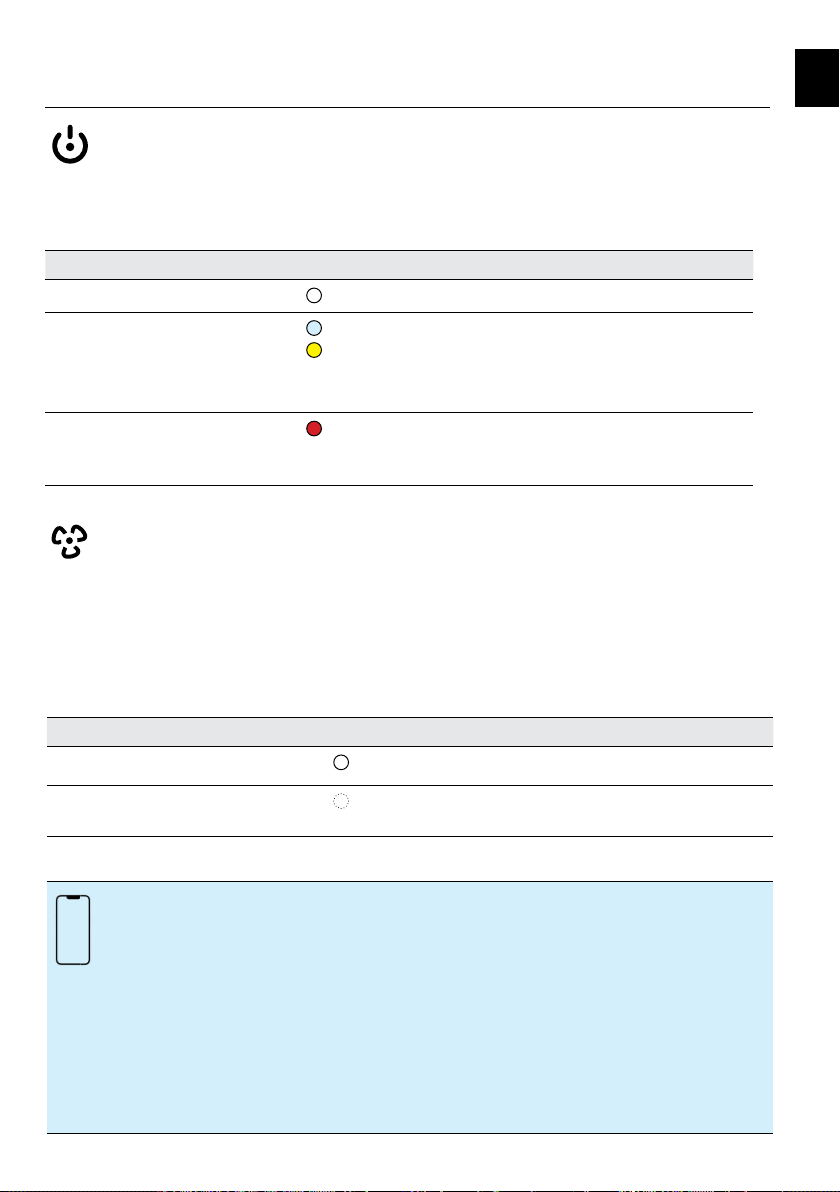
Power
Touch the power button to turn on your purifier, touch again to switch to standby. When in standby, the purifier
can be turned on from the app.
All other buttons on the control panel are disabled when the purifier is in standby.
Indicator color Power status
White
ON - Fan is running, sensors are active.
Blue
Yellow
Standby
Scheduled standby (refer to Schedule on page 11).
Fan is off, sensors remain active. The purifier can be turned on
from the app.
Red
OFF - Touch and hold the power button for 5 seconds to turn
the purifier off. Fan, Wi-Fi and sensors are off. The purifier
cannot be controlled from the app.
Smart mode
The smart mode automatically adjusts the purifier’s fan speed according to the air quality. It utilizes real-time
measurements from the air quality sensors to increase the fan speed when pollution levels rise and reduces the
speed as the air gets cleaner.
Touch the smart mode button to activate/deactivate smart mode. Smart mode is also deactivated by touching
anywhere on the fan speed control.
Indicator color Smart mode status
White
Smart mode is active, the fan speed is controlled automatically.
Off
Smart mode is deactivated, the fan speed is controlled
manually.
You can customize the Smart mode’s automatic fan speed control to suit your environment by
selecting one of the three smart modes in the app.
Quiet mode: For noise-sensitive environments such as bedrooms. Quiet mode steadily
controls fan speed and limits the maximum fan speed to level 5.
Balanced mode: For normal living and working environments. Balanced mode limits the
maximum fan speed to level 7.
Max mode: For living and working environments that require the highest level
of air purification during episodes of high air pollution. Max mode
rapidly changes the fan speed and does not limit the maximum
fan speed.
EN
9
The control panel
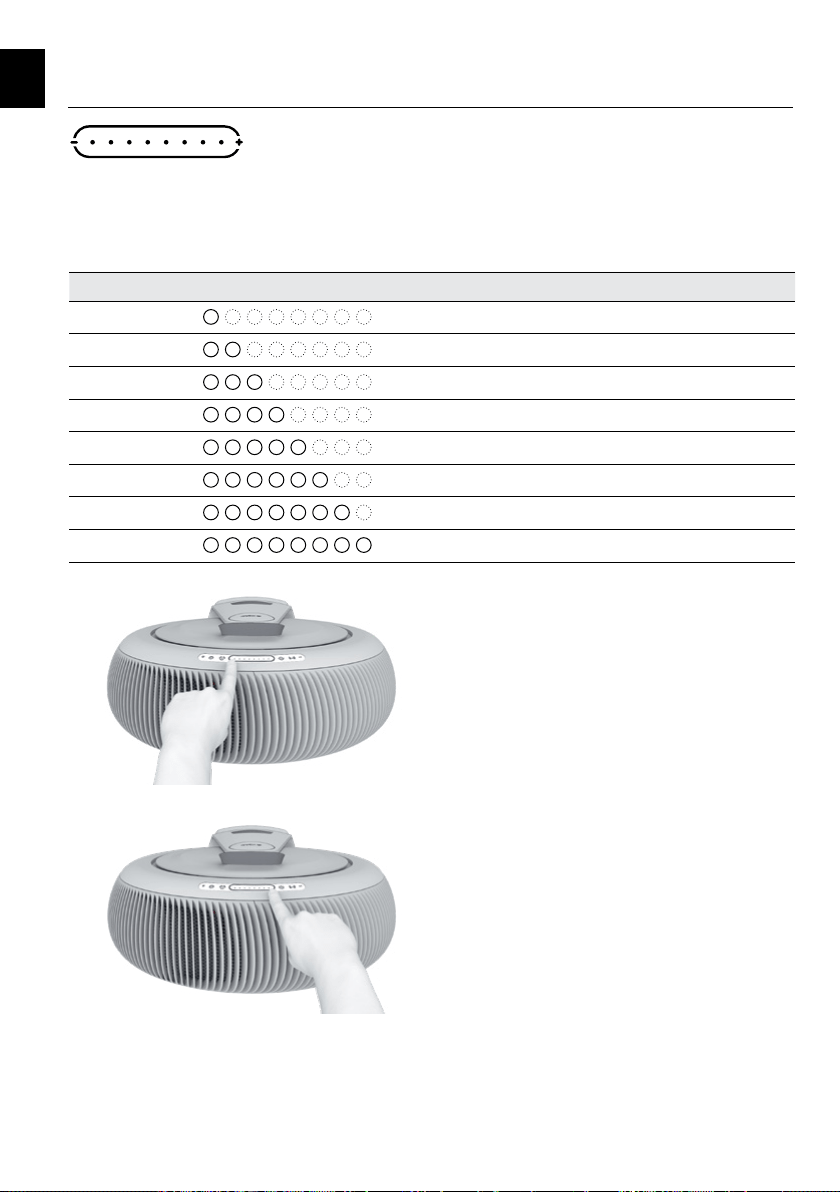
Fan speed selection
Atem X has eight fan speed levels. Tap the control slider to show the current fan speed. Touch again to set the
fan speed. The selected speed corresponds to the number of illuminated indicator dots. The indicators revert to
display air quality after about 5 seconds.
Indicator Fan speed
1 dot
Fan speed 1 (Minimum)
2 dots
Fan speed 2
3 dots
Fan speed 3
4 dots
Fan speed 4
5 dots
Fan speed 5
6 dots
Fan speed 6
7 dots
Fan speed 7
8 dots
Fan speed 8 (Maximum)
Touch anywhere on the control slider to set the fan speed.
Touching next to the minus symbol sets fan speed 1.
Touching next to the plus symbol sets fan speed 8 for
maximum air cleaning performance.
EN
10
The control panel
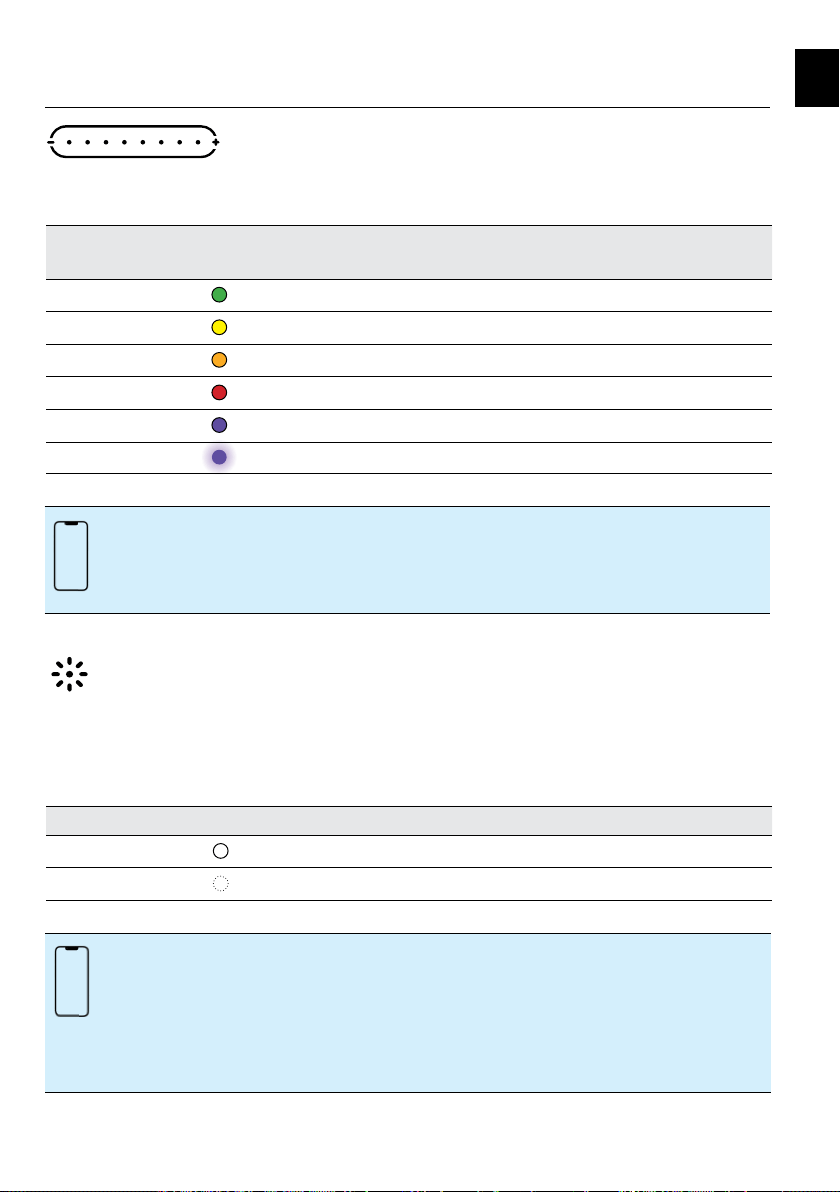
Air quality indicator
Air quality is displayed as a color on the control panel slider.
Indicator color Air quality description
according to US AQI
Air quality description
according to Chinese AQI
Green
Good Excellent
Yellow
Moderate Good
Orange
Unhealthy for Sensitive Groups Lightly polluted
Red
Unhealthy Moderately polluted
Purple
Very Unhealthy Heavily polluted
Purple, flashing
Hazardous Severely polluted
Light dimming
Touch the light button to turn the control panel lighting on or off. When the purifier is in standby, the standby
light will remain on. Note: Pressing any button on the control panel is acknowledged by a brief fade in/out of all
indicators. This brief fade in/out occurs, also when the control panel lighting is turned off.
Indicator color Light status
White
ON - Indicators on the control panel remain on.
Off
OFF - Indicators on the control panel fade out.
• Choose between US AQI and Chinese AQI in the app’s Settings menu.
• The app provides a detailed display of your real-time and historical air quality.
Adjust the control panel lighting by selecting one of the three brightness levels in the app.
Low: Lighting is dimmed to a low brightness level, ideal for dark environments.
Medium: Medium brightness level for dimly lit environments.
High: Maximum control panel brightness for well-lit environments.
EN
11
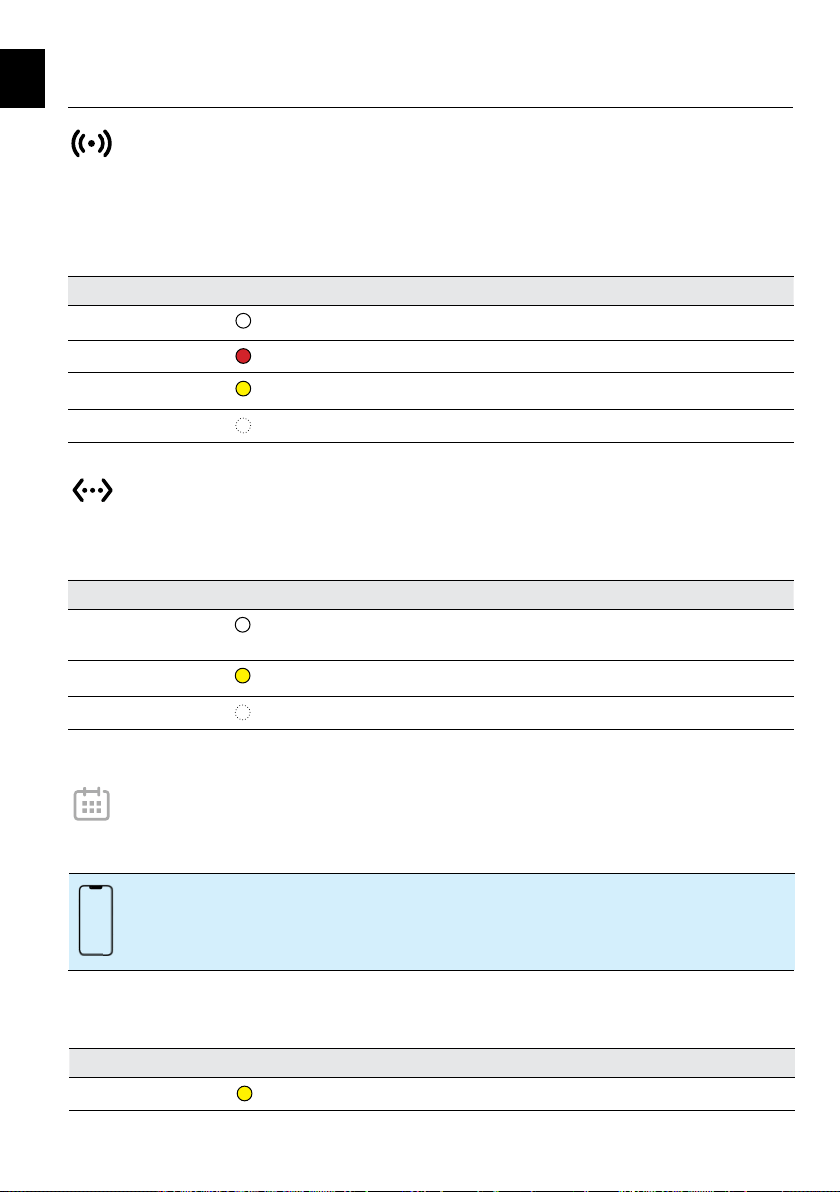
Wi-Fi
Atem X can be connected to a Wi-Fi network to enable remote control via the app. The Wi-Fi button allows you
to turn Wi-Fi on and off. To turn off Wi-Fi touch and hold for 2 seconds. The button is also used to connect the
purifier to a Wi-Fi network.
Indicator color Wi-Fi status
White
Connected to the Internet via Wi-Fi. The air purifier can be controlled via the app.
Red Searching for a Wi-Fi network. Control via the app is not possible.
Yellow
Connection in progress. It may take a few minutes to establish a connection.
Off
Wi-Fi is deactivated. Touch to reactivate.
Ethernet
Some Atem X models feature an Ethernet socket for wired network connection.
Indicator color Ethernet status
White
The purifier is connected to the Internet via Ethernet and can be controlled via
the app.
Yellow
Connection in progress. It may take a few minutes to establish a connection.
Off
No Ethernet.
Create a schedule to automatically turn the purifier on at specific times. You can set the required fan speed or
Smart mode for each scheduled time slot. The power button on the purifier’s control panel will light up yellow to
indicate a scheduled standby.
Indicator color Schedule status, power button indicator
Yellow
The schedule function has switched the purifier to standby.
You can use the app to define a schedule for your purifier.
Schedule
The control panel
EN
12
The purifier’s control panel can be locked / unlocked from the app.
Filter status
Atem X features smart filters that contain identification and performance parameters and store the filter’s usage
history. Atem X calculates the filter’s life as a function of its capacity, the measured real-time airborne pollutant
levels and fan speed.
The warning symbol on the control panel will inform you when the filters need to be replaced. A yellow warning
symbol means the filter set needs to be replaced soon and should be reordered. A red warning symbol tells you
that the filter set is full and should be replaced.
When filters have been replaced, Atem X automatically recognizes the new set and resets the filter status.
Indicator color Filter status
Yellow
Your filters need to be replaced soon.
Red
Filters need to be replaced.
Red, flashing
No filters detected.
Off
Sufficient filter life available, no action required.
Get detailed information about your remaining filter life in the app.
When the control panel is locked, all buttons are deactivated. Touching any of the buttons will cause all indicators
to flash briefly in blue, but result in no other action. A locked control panel will be unlocked if the Internet
connection is lost, and automatically lock again as soon as the Internet connection is reestablished.
Indicator color Panel lock status
Blue, flashing
Control panel lock is active.
Control panel lock
The control panel
EN
13
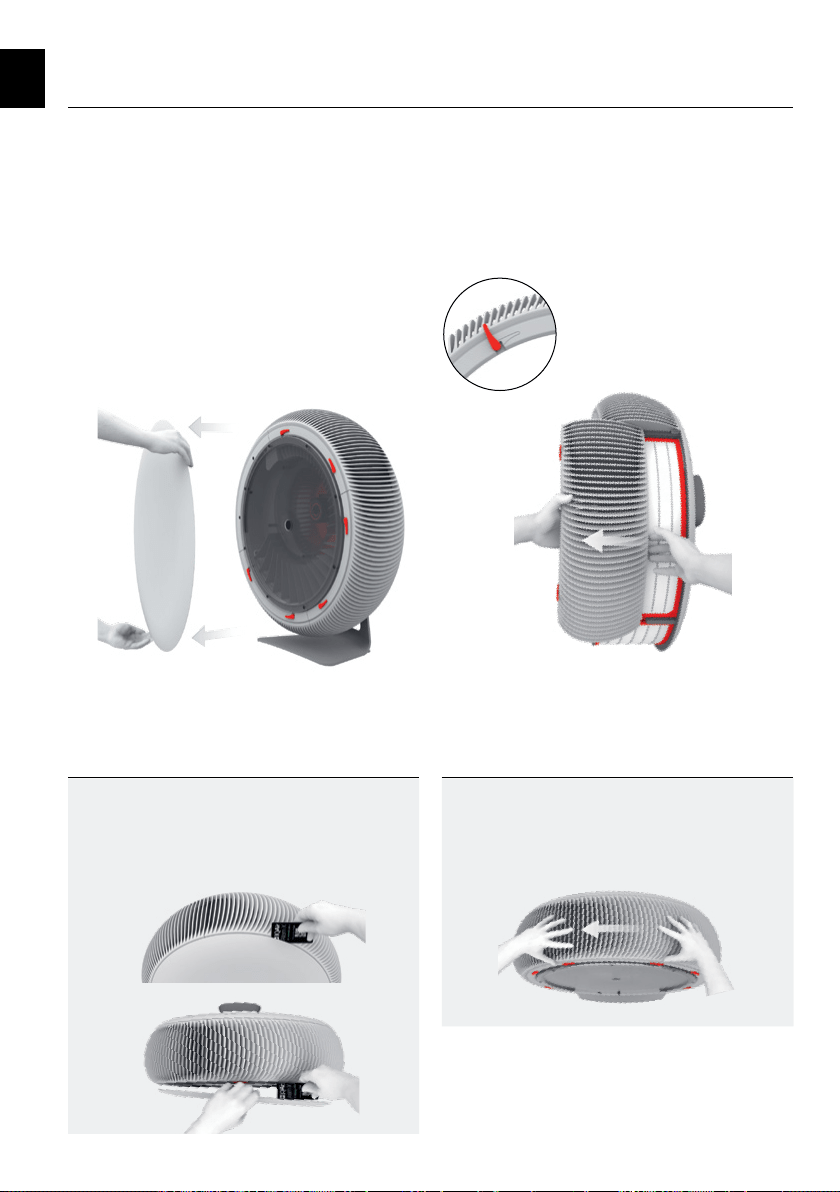
5. Filter replacement
Open the locking levers
Tip
You can use the purifier’s ID Card to pry off the
front cover - pry it off far enough to easily grasp
and pull the cover off by hand.
Tip
Rotating the purifier gives you easy access to each
of the filters. Unplug the power cord before rotating.
Step 1
Remove the front cover
Pull and detach the front cover from the purifier.
Step 2
Remove the three inlet grilles
Open the locking levers. Slide out the inlet grilles to
reveal the filters. Carefully set aside the inlet grilles
Detach the front cover Slide out the inlet grilles
EN
14
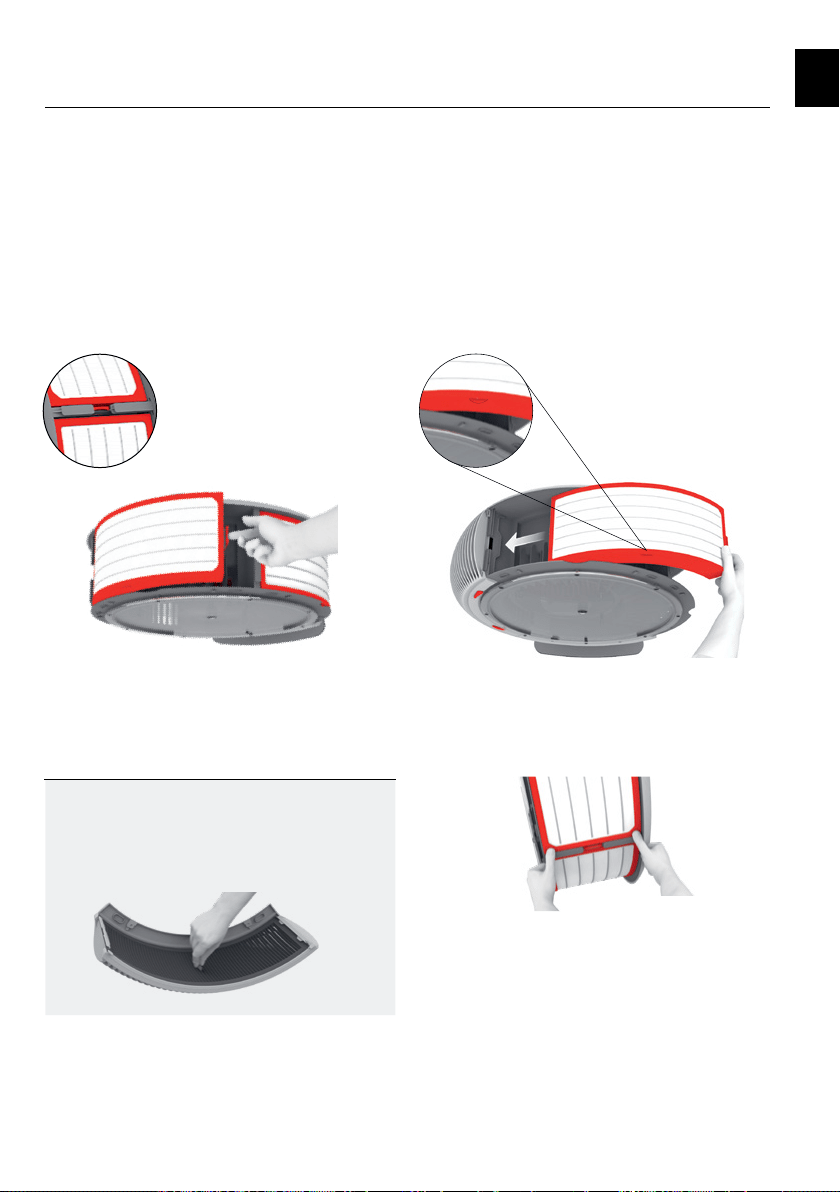
Step 3
Remove the three used filters
Press the latch towards the filter to unlock and remove
the filter.
Do not try to clean and/or reuse the filters. Filters
should be disposed with household waste.
Step 4
Insert the three replacement filters
Make sure that the filter’s orientation tab is facing
towards the front of the purifier.
Insert the filter into the inlet opening. Slide the filter
towards the left.
Press on the two ribbed corners until the filter snaps
into place.
Tip
You should clean the impactors before replacing
your filters. Refer to Cleaning the impactors
(page 16).
Filter replacement
Slide the new filter towards the left
Latch location
Press the latch towards the filter
Press down on the ribbed corners to snap the filter into place
Orientation tab
EN
15
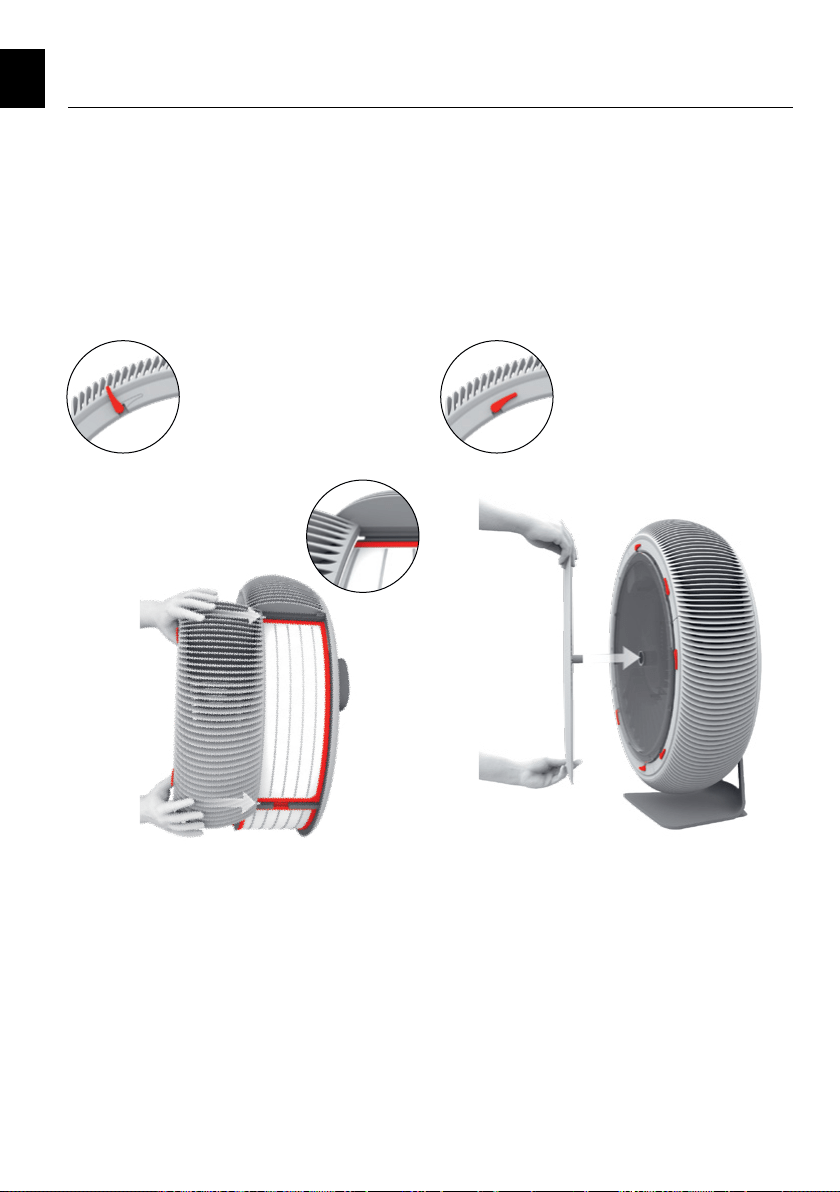
Step 5
Replace the inlet grilles
Check that the locking levers are still in the
open position.
Ensure that the tabs on the inlet grille slide into the
grooves on both sides of the inlet opening. Gently
push the inlet grille back into position.
Rotate the locking levers into the closed position.
Step 6
Replace the front cover
Align the spigot in the center of the front cover with
the socket in the fan window. Push the front cover
until it snaps into place.
Filter replacement
Slide in the grilles
Push the front cover into place
Closed locking levers
EN
Open locking levers
16
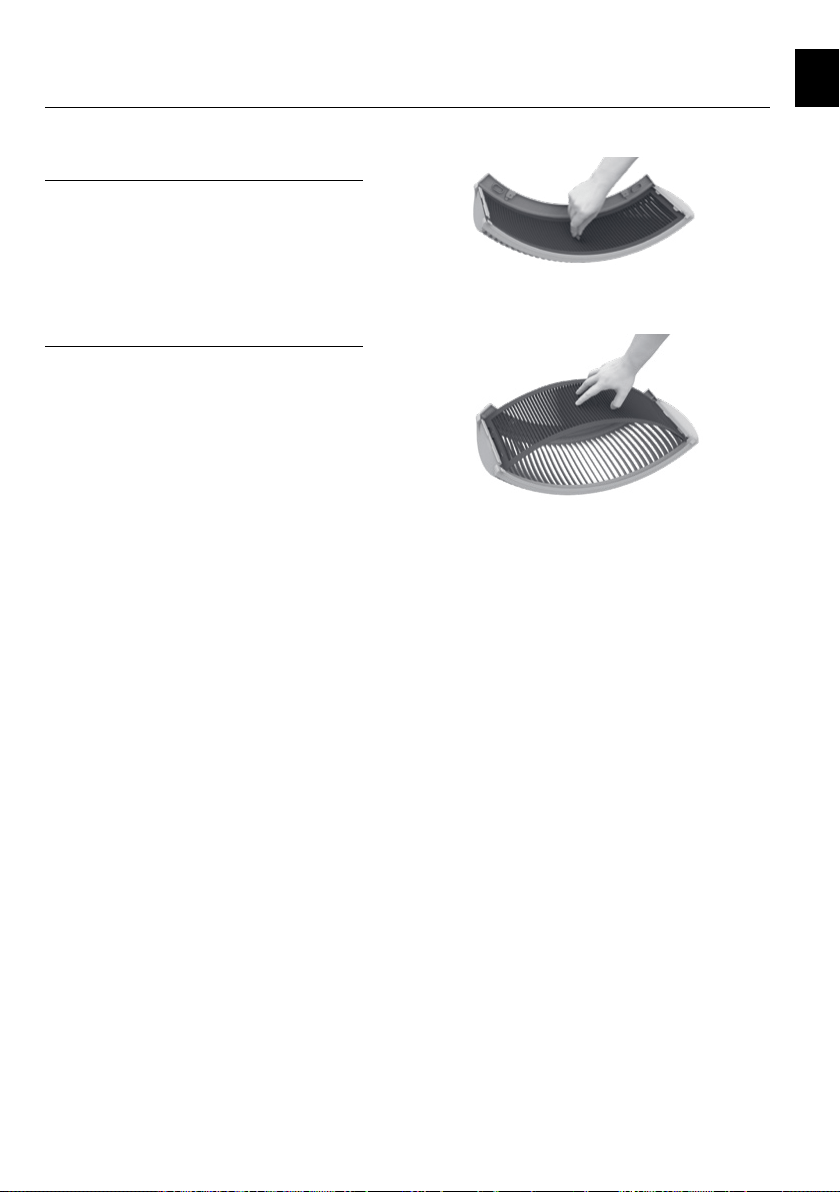
6. Cleaning the impactors
Atem X impactors collect large particles, fibers,
and lint.
An impactor is a momentum-based particle filter.
Particles in the air stream are forced to make a
sharp turn when passing through the impactor.
The momentum of large particles prevents
them from making the turn and they impact the
collection surfaces. Small particles stay entrained
in the air stream and get caught in the main filter.
It is recommended to clean the impactors every
time filters are changed. You might need to check
and clean the impactors more frequently if you
have pets or if you use Atem X in a very dusty
environment. Simply look into the inlet grilles. If
you see hair and fluff clogging the impactors, they
should be cleaned.
Remove and clean the impactors
Remove the front cover and air inlet grilles as
shown in steps 1 & 2 of the filter replacement
section (page 13).
Remove each impactor by pulling the center tab.
Once removed, the impactors can be cleaned with
a soft brush, or a vacuum cleaner fitted with a
brush attachment. If required, the impactors can
be cleaned further by rinsing under running water
and then letting them dry.
Insert the dry, cleaned impactor back into the inlet
grille. Ensure that the slots on the impactor match
the tabs on the inner side of the grille. Hook the
impactor slots underneath the grille’s tabs – the
impactor will arch outwards. Press downwards
onto the center of the impactor.
Replace the inlet grilles and front cover as shown
in steps 5 & 6 of the filter replacement section
(page 15).
Pull the center tab to remove the impactor
Replace and press downwards onto the center
of the impactor
EN
17
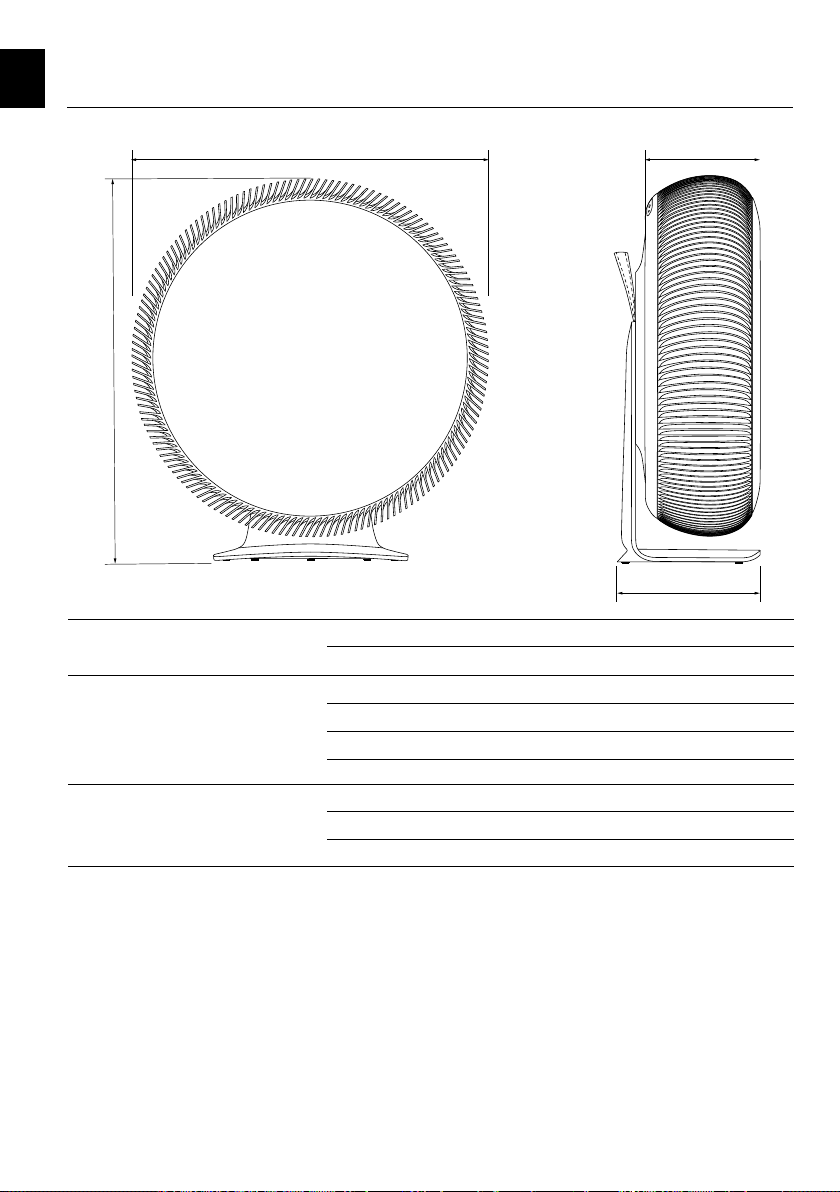
7. Technical specifications
Input voltage
(Refer to the type label on your device)
230 Volt version 220-240 V~ 50-60 Hz
110 Volt version 100-120 V~ 50-60 Hz
Power rating Rated power input 110 W
Networked standby (Wi-Fi on) < 1.8 W
Standby (Wi-Fi off) < 0.7 W
Off < 0.5 W
Weight & dimensions Height 688 mm 27.1 in
Depth 254 mm 10 in
Weight
1
13 kg 28.7 lb
640
688
220
255
1
Weight may vary depending on the filter configuration
EN

18
Cleaning and storage
Use a lint-free cloth to clean external surfaces. Use a
vacuum cleaner fitted with brush attachment to remove
any loose dust from the inlet grilles.
When not in use, store your Atem X in a clean, dry
place. Use the original packaging for optimal storage.
Environment
Help to preserve the environment. Filters may be
disposed of with household waste. Do not burn used
filters as fuel in a fireplace or for similar purpose.
Standards
For China:
The appliance has been tested and approved
according to the following standards:
GB4706.45-2008, GB4706.1-2005, GB4343.1-2018,
GB/T4343.2-2020, GB17625.1-2012, GB/T17625.2-
2007.
Electromagnetic Compatibility (EMC)
For USA:
FCC Statement
Any changes or modifications not expressly approved
by the party responsible for compliance could void the
user’s authority to operate the equipment.
Note: This equipment has been tested and found to
comply with the limits for a Class B digital device,
pursuant to part 15 of the FCC Rules. These limits
are designed to provide reasonable protection against
harmful interference in a residential installation. This
equipment generates, uses and can radiate radio
frequency energy and, if not installed and used in
accordance with the instructions, may cause harmful
interference to radio communications. However, there
is no guarantee that interference will not occur in a
particular installation. If this equipment does cause
harmful interference to radio or television reception,
which can be determined by turning the equipment
off and on, the user is encouraged to try to correct the
interference by one or more of the following measures:
- reorient or relocate the receiving antenna;
- increase the separation between the equipment
and receiver;
- connect the equipment to an outlet of a
circuit different from that to which the receiver
is connected;
- consult the dealer or an experienced radio/TV
technician for help.
For Canada:
ISED RSS notice
This device complies with ISED license-exempt RSS
standard(s). Operation is subject to the following two
conditions: (1) this device may not cause interference
and (2) this device must accept any interference,
including interference that may cause undesired
operation of the device.
ISED Radiation Exposure Statement
This equipment complies with ISED RF radiation
exposure limits set forth for an uncontrolled
environment. This transmitter must not be co-located
or operating in conjunction with any other antenna or
transmitter. Any changes or modifications not expressly
approved by the party responsible for compliance could
void the user’s authority to operate the equipment. The
type label showing the FCC ID 2AMBQ-ATEMX04/IC
22813-ATEMX04 is placed inside the device below the
filter and visible during every filter change.
For South Korea:
EMC statement
This device is a household (class B) electromagnetic
compatibility device. It is intended for home use and
can be used in all areas.
RF statement
Since this radio device shows the possibility of radio
wave interference it must not provide services related
to human safety.
8. Additional information
Instructions pertaining to a risk
of fire, electric shock, or injury to
persons: unplug the power plug before
cleaning or storing your Atem X.
EN

19
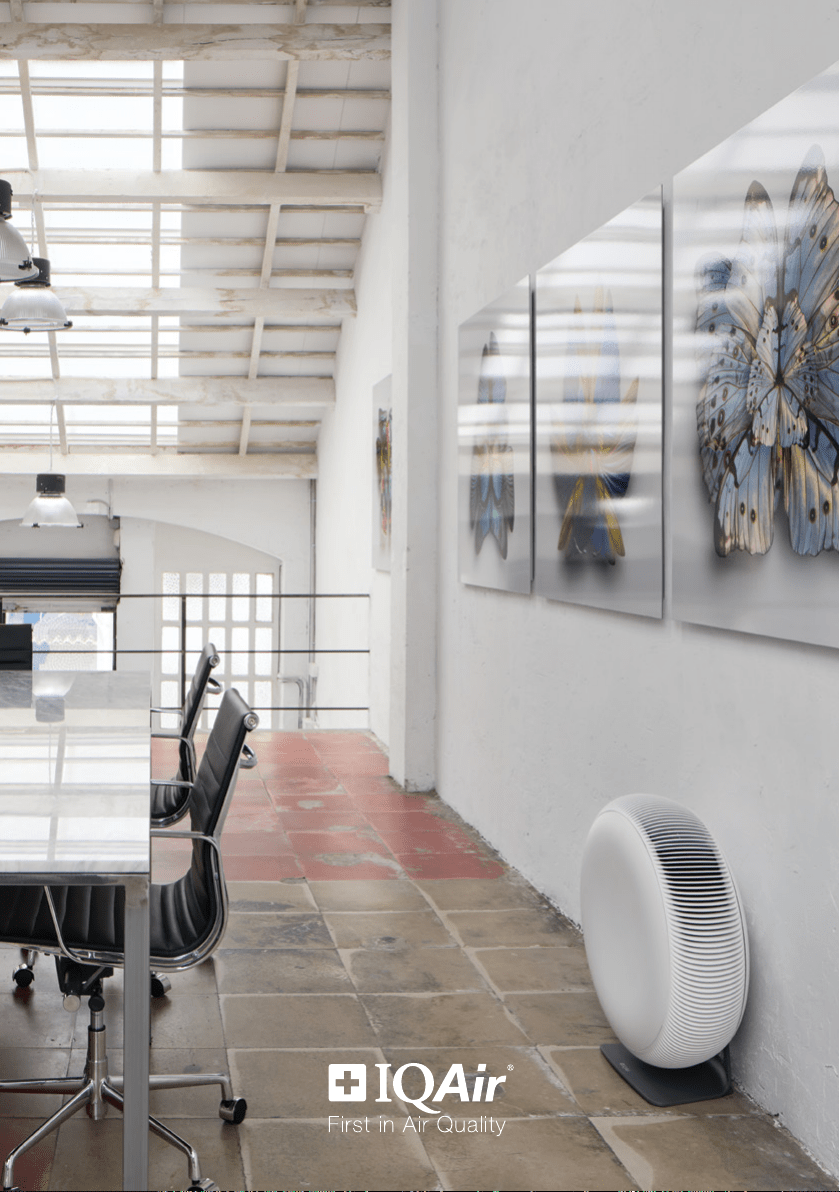
Powerful. Beautiful. Quiet.
275.83.00.01 EN_IQAir Atem X User Manual_v00.55 02.06.2022