Loading ...
Loading ...
Loading ...
,
3.
,
Move the generator to a flat, level surface.
Turn the release knob at the bottom of the air
cleaner assembly (see Figure 35) counterclockwise
until the air cleaner cover can freely move outward.
Slowly lift up and disengage the top tabs of the air
cleaner cover (see Figure 35). Clean the air cleaner
cover with a clean rag and place on a clean surface.
,
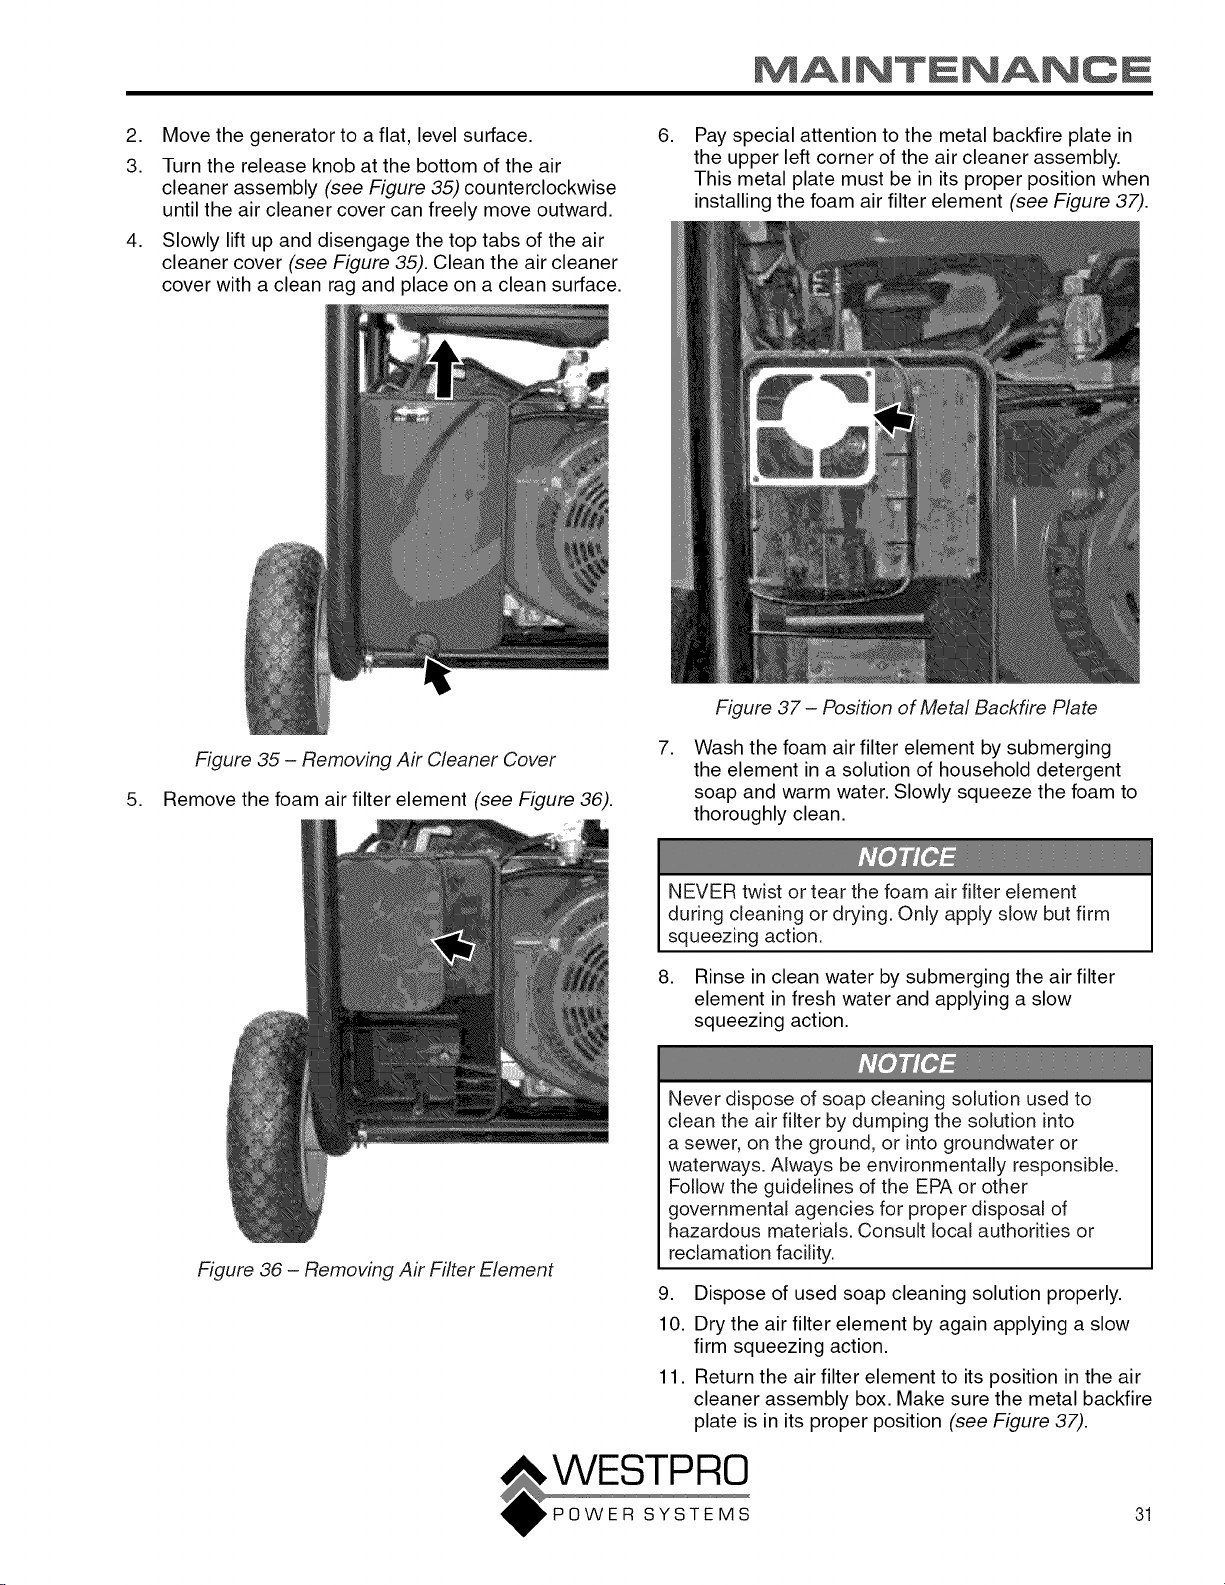
Pay special attention to the metal backfire plate in
the upper left corner of the air cleaner assembly.
This metal plate must be in its proper position when
installing the foam air filter element (see Figure 37).
,
Figure 35 - Removing Air Cleaner Cover
Remove the foam air filter element (see Figure 36).
,
Figure 37 - Position of Metal Backfire Plate
Wash the foam air filter element by submerging
the element in a solution of household detergent
soap and warm water. Slowly squeeze the foam to
thoroughly clean.
NEVER twist or tear the foam air filter element
during cleaning or drying. Only apply slow but firm
squeezing action.
8. Rinse in clean water by submerging the air filter
element in fresh water and applying a slow
squeezing action.
Figure 36 - Removing Air Filter Element
Never dispose of soap cleaning solution used to
clean the air filter by dumping the solution into
a sewer, on the ground, or into groundwater or
waterways. Always be environmentally responsible.
Follow the guidelines of the EPA or other
governmental agencies for proper disposal of
hazardous materials. Consult local authorities or
reclamation facility.
9. Dispose of used soap cleaning solution properly.
10. Dry the air filter element by again applying a slow
firm squeezing action.
11. Return the air filter element to its position in the air
cleaner assembly box. Make sure the metal backfire
plate is in its proper position (see Figure 37).
31
Loading ...
Loading ...
Loading ...