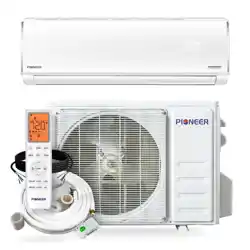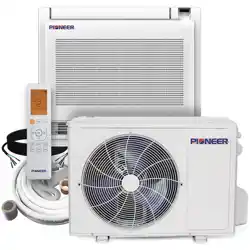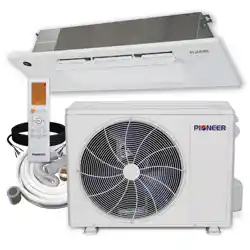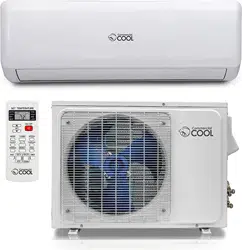
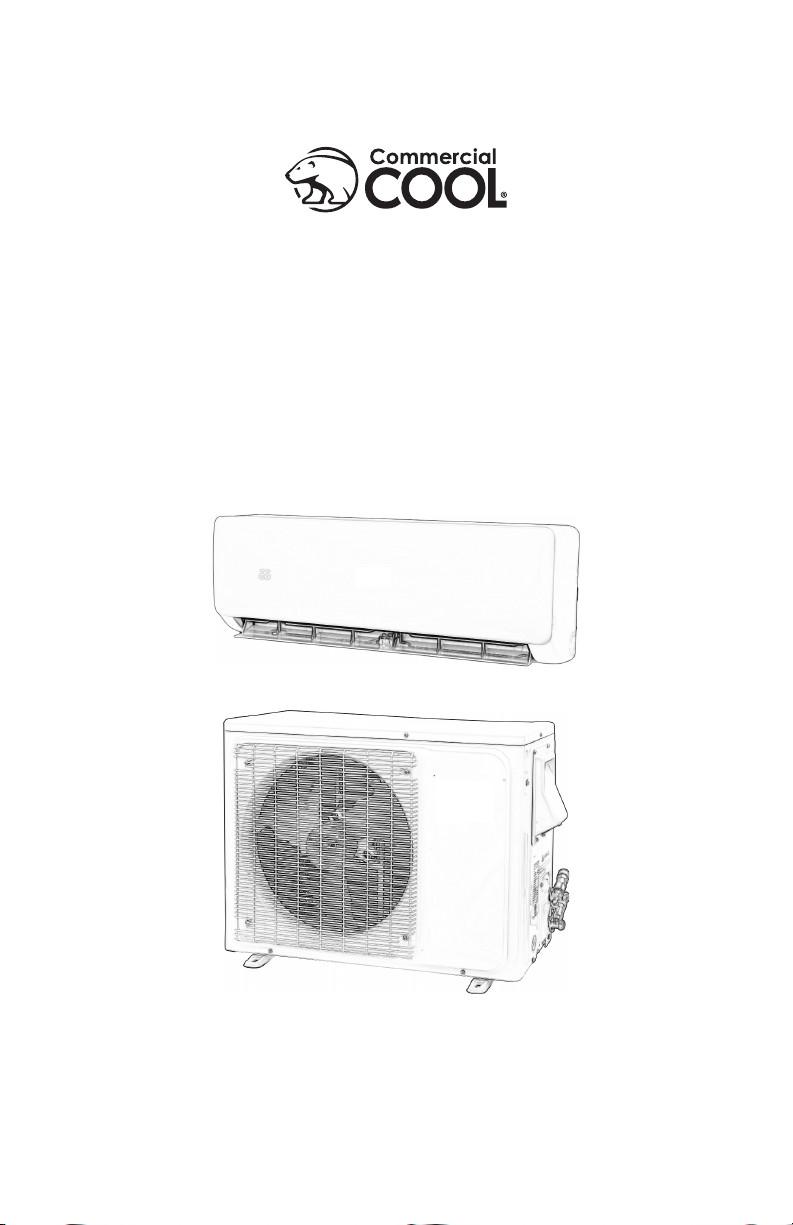
Split Air Conditioner
CSAH1215AC, CSAH1220AC,
CSAH1820AC, CSAH2420AC


Thank you for purchasing our
Commercial Cool product. This
easy-to-use manual will guide you
in getting the best use of your split
AC.
Remember to record the model and
serial numbers. They are on a label
in the rear.
Staple your receipt to your manual.
You will need it to obtain warranty service.
Model number
Serial number
Date of purchase
PRODUCT REGISTRATION
CONTENTS
SAFETY INFORMATION ........................................................................................................................... 4-8
SET UP & USE
Operating Conditions ........................................................................................................................................................9-10
INSTALLATION
Parts & Features .........................................................................................................................................................................11
Notices ...........................................................................................................................................................................................12
Indoor Unit Installation .................................................................................................................................................... 13-22
Outdoor Unit Installation ...............................................................................................................................................23-27
Install the Refrigerant Pipe ...........................................................................................................................................28-35
REMOTE CONTROL MANUAL .................................................................................................... 36-43
TEST OPERATION ............................................................................................................................................... 44
CLEAN & CARE .................................................................................................................................................45-46
TROUBLESHOOTING & WARRANTY ..............................................................................47-49
Page 3
Page 4
SAFETY INFORMATION
IMPORTANT SAFETY INSTRUCTIONS
• Read this guide before installing and using the appliance.
• All electrical connections, wiring and installation should be performed by
a licensed electrician. Otherwise, it may cause personal injury or damage.
• This appliance is not intended for use by children without responsible adult
supervision. Proper care should be taken to ensure safety.
• Heat pumps, air conditioners & heating equipment should be installed,
started up, and serviced only by qualied installers and service technicians.
Air conditioning, heat pumps and refrigeration systems are hazardous
due to high voltage electrical components, high refrigerant pressures, and
moving parts.
• Disconnect electrical power to the indoor and outdoor units before
performing any maintenance or cleaning.
• Do not attempt to repair the system yourself. Incorrect repairs may cause
electric shock or re. Contact a qualied service technician for all service
requirements.
• Keep combustible materials away from the unit.
• DO NOT share the electrical circuit with other appliances. Improper or
insufcient power supply can cause re or electrical shock.
• When connecting refrigerant piping, DO NOT let substances or gases
other than the refrigerant enter the unit. The presence of other gases or
substances will lower the unit’s capacity, and may cause abnormally high
pressure in the operation cycle. This may cause explosion and injury.
• DO NOT allow children to play with the air conditioner. Children should be
supervised around the unit at all times.
• Installation must be performed according to installation instructions.
WARNING
WARNING - Hazards or unsafe
practices which COULD result in
severe personal injury or death
DANGER
DANGER - Immediate hazards
which WILL result in severe
personal injury or death
CAUTION
CAUTION - Hazards or unsafe
practices which COULD result in
minor personal injury
WARNING
When using electrical appliances, basic safety precautions
should be followed, including the following:

Page 5
SAFETY INFORMATION
Improper installation may cause water leakage, electrical shock, re, or
may void the warranty.
• In North America, service or repair must be performed in accordance with
the requirement of NEC and CEC (by authorized personnel or authority
having jurisdiction only.) Contact an authorized service technician for
repair or maintenance of the unit.
• Only use the included accessories and specied parts for installation. Using
non-standard parts can cause water leakage, electrical shock, or re and
may cause the unit to fall.
• For all electrical work. Connect cables tightly, and clamp them securely to
prevent external forces from damaging the terminal. Improper electrical
connections may overheat causing re and/or electrical shock.
• All wiring must be properly arranged to ensure that the control board
cover can close properly. If the control board cover is not closed properly,
it can lead to corrosion and cause the connection points on the terminal to
overheat, causing re and / or electrical shock.
• In certain functional environments, such as kitchens, server rooms, etc., the
use of specially designed air-conditioning units is highly recommended.
• This appliance can be used by children aged 8 years and above and
persons with reduced physical, sensory or mental capabilities or lack
of experience and knowledge if they have been given supervision or
instruction concerning use of the appliance in a safe way and understand
the hazards involved. Children should not play with the appliance. Cleaning
and user maintenance should not be made by children without supervision.
SAVE THESE INSTRUCTIONS
HOUSEHOLD USE ONLY
NOTE: Your actual air conditioning & heating system and related devices
may differ from the images shown in this manual.

Page 6
• Do not put hands or any objects into the air inlets or outlets. This may
cause personal injury or damage to the unit.
• When cleaning, be careful not to splash water on the unit. Doing this may
cause electric shock or damage to the unit.
• Do not use or place any ammable, combustible or noxious substance
next to the unit.
• In the event of a failure (burning smell, etc.), immediately disconnect all
electrical power to indoor and outdoor units.
• Never try repairing the system yourself; contact a qualied service
technician for all repairs.
• During the installation of the indoor and outdoor units, access to the
working area should be off limits to children. Unforeseeable accidents can
occur.
• Make sure that the base of the outdoor unit is securely installed and stable
before use.
• Check that air cannot enter the refrigerant system and check for
refrigerant leaks when moving the air conditioner.
• Do not install the appliance closer than 50cm from ammable substances
(alcohol, etc.) or pressurized containers(e.g. spray cans).
• If the appliance is used in areas without the possibility of ventilation,
precautions must be taken to prevent any leaks of refrigerant gas from
remaining in the environment to avoid creating a re hazard.
• The packaging materials are recyclable and should be disposed of in
separate waste bins. The air conditioner itself must be taken to a special
waste collection center for proper disposal.
• Only use the air conditioner as instructed in this booklet. These
instructions are not intended to cover every possible condition or
situation. As with only electric household appliance, common sense and
caution are therefore always recommended for installation, operation, and
maintenance.
• The appliance must be installed In accordance with NEC and local codes.
• Before accessing the terminals, all the power circuits must be
disconnected from the power supply.
• Do not try to install the air conditioner alone; always contact trained,
experienced personal.
CAUTION
Please read the following before operation. Safety Rules and
recommendations for the installer.
SAFETY INFORMATION

Page 7
SAFETY INFORMATION
• Cleaning and maintenance must be carried out by a trained and
experienced individual or technician. Make sure to disconnect the
appliance from the main’s electrical supply prior to cleaning or
maintenance of the unit.
• Never remain directly exposed to the ow of cold air for extended periods.
Direct and prolonged exposure to cold air could be dangerous to your
health.
• Particular care should be taken in rooms where there are children, elderly,
or sick individuals.
• If the appliance gives off smoke or there is a burning smell, immediately
disconnect the power supply and contact the Service Center. Prolonged
use of the device afterword could cause re or electrocution.
• Have repairs or maintenance carried out only by licensed mechanical
contractor. Incorrect repair could expose the user to risk of electric shock,
re hazard, etc..
• The air conditioner itself must be taken to a special waste collection center
for proper disposal.
• This appliance has been made for air conditioning domestic environments
and must not be used for any other purpose, such as for drying clothing,
cooling food, etc..
• Always use the appliance with the air lter mounted. The use of the
conditioner without the air lter could cause an excessive accumulation
of dust or waste on the inner parts of the device with possible subsequent
failures.
• The user is responsible for having the appliance installed by a licensed
mechanical contractor.
• Disable automatic functions if you foresee not using the device for on
extended period of time. The air ow direction must also be properly
adjusted.
• Check all building codes for applicable building permits or requirements.
• Only use the air conditioner as instructed in this manual. These instructions
are not intended to cover every possible condition or situation.
• Ensure that the appliance is disconnected from the power supply when
it will not be in operation for an extended period and before carrying out
any cleaning or maintenance.
• Do not use extension cords.
• Do not touch the appliance when barefoot or parts of the body are wet or
damp.
• Do not obstruct the air inlet or outlet of the indoor or outdoor units.
Obstruction of these openings causes a reduction in the operating
efciency of the air conditioner and can lead to consequent failures or
damages.

Page 8
SAFETY INFORMATION
• Do not alter the characteristics of the appliance in any way.
• Do not install the appliance in environments where the air could contain
gas, oil or sulphur or near sources of heat.
• This appliance is not intended for use by persons [including children] with
reduced physical, sensory, or mental capabilities, or lack of experience
and knowledge unless they have been given supervision or instruction
concerning use of the appliance by a person responsible for their safety.
• Do not climb onto or place any heavy or hot objects on top of either the
indoor or outdoor unit.
• Do not leave windows or doors open for long when the air conditioner is in
operation.
• Do not direct the ow of cold air onto plants or animals. Prolonged direct
exposure to cold air produced by the air conditioner could have negative
effects on plants and animals.
• Do not put the air conditioner in contact with water. The electrical
insulation could be damaged and lead to electrocution.
• Never insert a stick or similar object into the appliance. Such misuse can
lead to injury or damage to the operation of the units.
• Children should be supervised to ensure that they do not play with the
appliance.
• DO NOT install the unit in a location that may be exposed to combustible
gases. If combustible gas accumulates around the unit, it may cause re.
• DOT NOT operate your air conditioner in a wet room such as a bathroom
or laundry room. Too much exposure to water may cause electrical
components to short circuit.
• DO NOT operate the air conditioner with wet hands. This may cause
electrical shock.
• DO NOT climb onto or place objects on top of the outdoor unit.
• The product must be properly grounded during installation, or electrical
shock may occur.
• Install drainage piping according to the instructions in this manual.
Improper drainage may cause water damage to your home and property.
Page 9
SAFETY INFORMATION
OPERATING CONDITIONS
• Within the temperature range provided in following table, the air
conditioner may stop running and other anomalies may arise.
• When the temperature is too high, the air conditioner may activate the
automatic protection device, so that the air conditioner could be shut
down.
• When the temperature is too low, the heat exchanger of the air
conditioner may freeze, leading to water leakage or other malfunction.
• In long-term cooling or dehumidication with a relative humidity
of above 80% (doors and windows are open), there may be water
condensation or dripping near the air outlet.
NOTES FOR HEATING
• The fan of the indoor unit will not start running immediately after the heating is
started to avoid blowing out cool air.
• When it is cold and wet outside, the outdoor unit will develop frost over the
heat exchanger which will compromise the heating capacity. This is when the air
conditioner will start to defrost.
• During defrost, the air conditioner will stop heating for about 5-12 minutes. Vapor
may come out from the outdoor unit during defrost. This is not a malfunction, but a
result of fast defrost.
• Heating will resume after defrost is complete.
Cooling
Outdoor
> 109.4˚F (Apply to T1)
> 125.6˚F (Apply to T3)
Indoor < 64.4˚F
Heating
Outdoor
> 75.2˚F
< 19.4˚F
Indoor > 80.6˚F
Page 10
SET UP & USE
NOTE FOR TURNING OFF
• When the air conditioner is turned off, the main controller will
automatically decide whether to stop immediately or after running for
dozens of seconds with lower frequency and lower air speed.
NOTICES FOR USE
Emergency Operation
• If the remote control is lost or broken,
use force switch button to operate the air
conditioner.
• If this button is pushed with the unit OFF,
the air conditioner will operate in Auto
mode.
• If this button is pushed with the unit ON,
the air conditioner will stop running.
Airflow Direction Adjustment
• Use up-down swing and left-right swing, buttons on the remote
control to adjust the airow direction.
• For models without left-right swing function, the louvers have to be
moved manually.
WARNING
• Move the louvers before the unit is in operation, or your finger might
be injured.
• Never place your hand into the air inlet or outlet when the air
conditioner is in operation.
PARTS & FEATURES
INDOOR UNIT
OUTDOOR UNIT
INSTALLATION INSTRUCTIONS
Air Inlet
Air Inlet Grill
Panel
Air Filter
Air Louver
Air Vent
Air Outlet
Grill
Air Outlet
Air Outlet
Force Switch
Pipe
Protection
Ring
Remote
Control
Refrigerant Pipe
157.5 inches
Drain Hose
78.7 inches
Page 11
Condensate
drain
Insulation
sleeve
Mounting
Plate

Page 12
NOTICES:
• A split system air conditioner is a great option for keeping your home
cool and comfortable in the summer months. These units are also
quieter, easier to install, and may be more energy efcient than some
central air conditioning.
• This type of A/C is ductless, so all you have to do is install the cooling
unit inside and the compressor and condenser unit outside, then run
piping and a power cable between the units.
• A licensed electrician is recommended to install the wiring and
perform all the electrical work.
WARNING - Building permits are required. Installation must be in
accordance with NEC and other local codes.
• Each air conditioning unit is unique to its manufacturer, but the
general installation process is the same.
• See rating label of outdoor unit for electrical service requirements.
SUGGESTED TOOLS FOR INSTALLATION (Not included)
• Adjustable wrenches
• Electric or Manual Screwdriver
• Hole saw
• Tape measure
• Power drill
• Hammer
• Wall anchors and screws
• Insulated tape
• AAA batteries
NOTE: Save Instructions for future reference.
INSTALLATION INSTRUCTIONS
Page 13
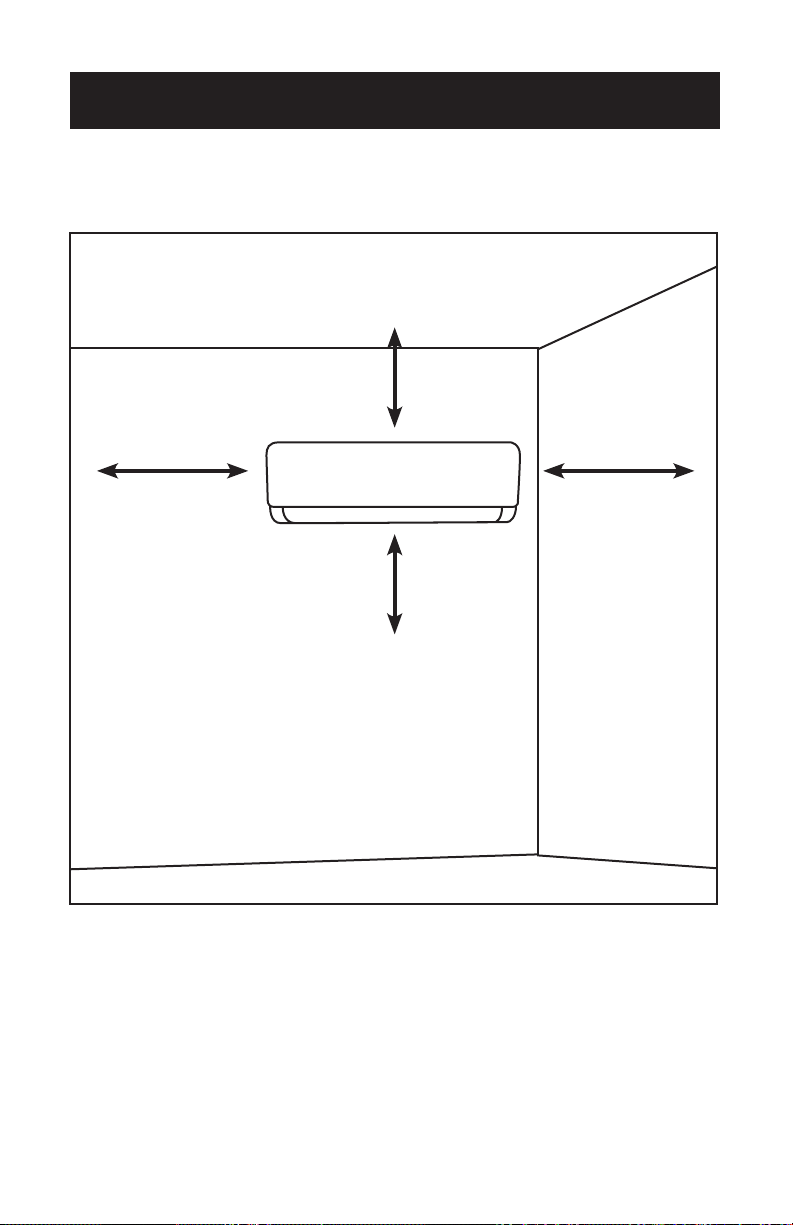
1. Select an unobstructed location on your interior wall to
mount the indoor unit.
• You’ll need to cut a hole through the wall to feed the pipes from the
indoor unit to the outdoor unit, so make sure the location you choose
will allow you to do so. Choose a spot away from direct sunlight.
INDOOR UNIT INSTALLATION
INSTALLATION INSTRUCTIONS
Space to the ceiling
5.9 inches
Space to the wall
7.9 inches
Space to the wall
7.9 inches
Space to the floor
78.7 inches

Page 14
CAUTION
• Choose a location with studs to ensure the wall is strong enough to
hold the weight of the unit.
• Install the unit at least 3.3 feet (1.0 m) away from antennas and power
or connecting lines that are used for television, radio, home security
systems, intercoms, or telephones. The electrical noise from these
sources could cause operational problems for your air conditioner.
• Avoid locations where gas may leak or where oil mist or sulfur exists.
• These units have remote controls so that you can easily turn them on
or off and adjust the temperature even if they’re mounted high on the
wall.
Tip: Choose a central location for the indoor unit where the
cool air can easily flow through your home, such as in the
living room.
INSTALLATION INSTRUCTIONS
Page 15
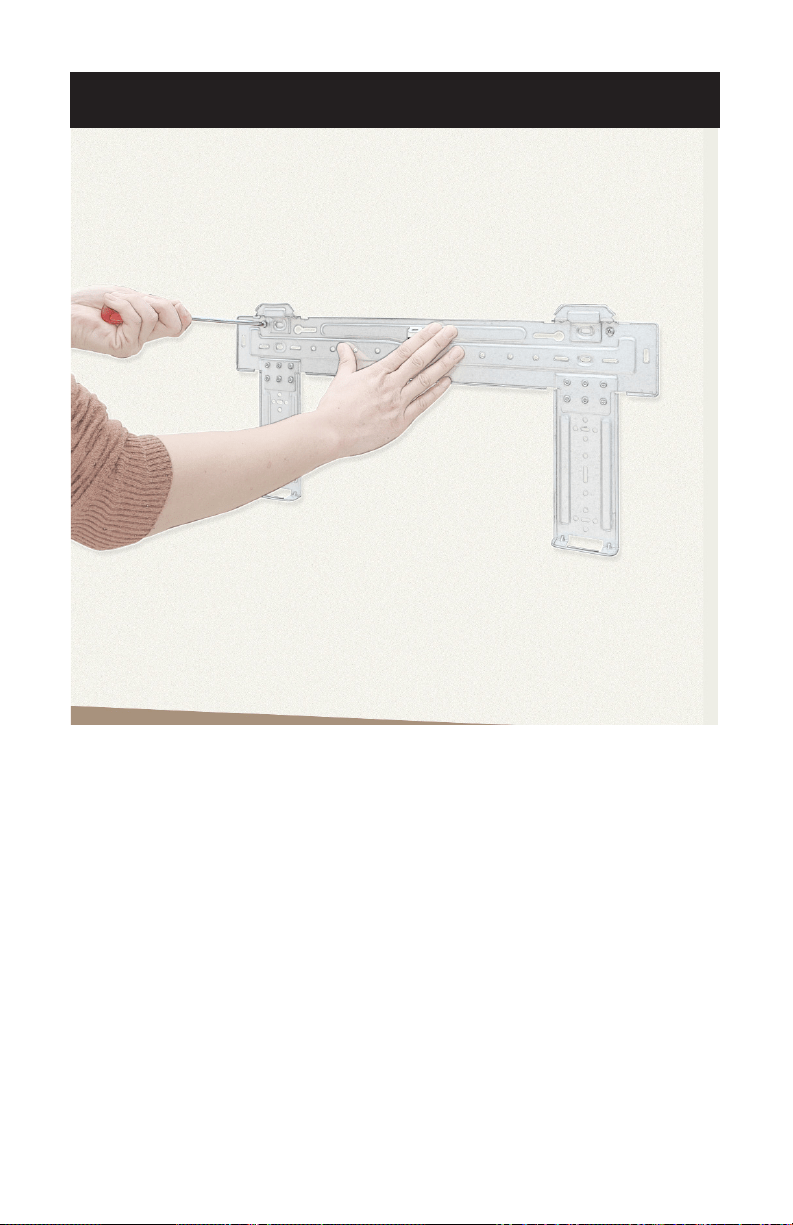
2. Secure the mounting plate to the interior wall.
• Hold the mounting plate against the wall where you want to install
the indoor unit. Use a level to make sure it is both horizontally
and vertically level. Use a pencil to mark the locations of the screw
holes, remove the plate, then drill a hole into the wall where each
screw will go.
• Position the plate so it matches up with the holes, insert anchors into
the holes, and secure the plate to the wall with tapping screws (not
included). It is recommended that the bracket is secured to framing
members (studs) to ensure adequate mounting.
INSTALLATION INSTRUCTIONS
Page 16
INSTALLATION INSTRUCTIONS
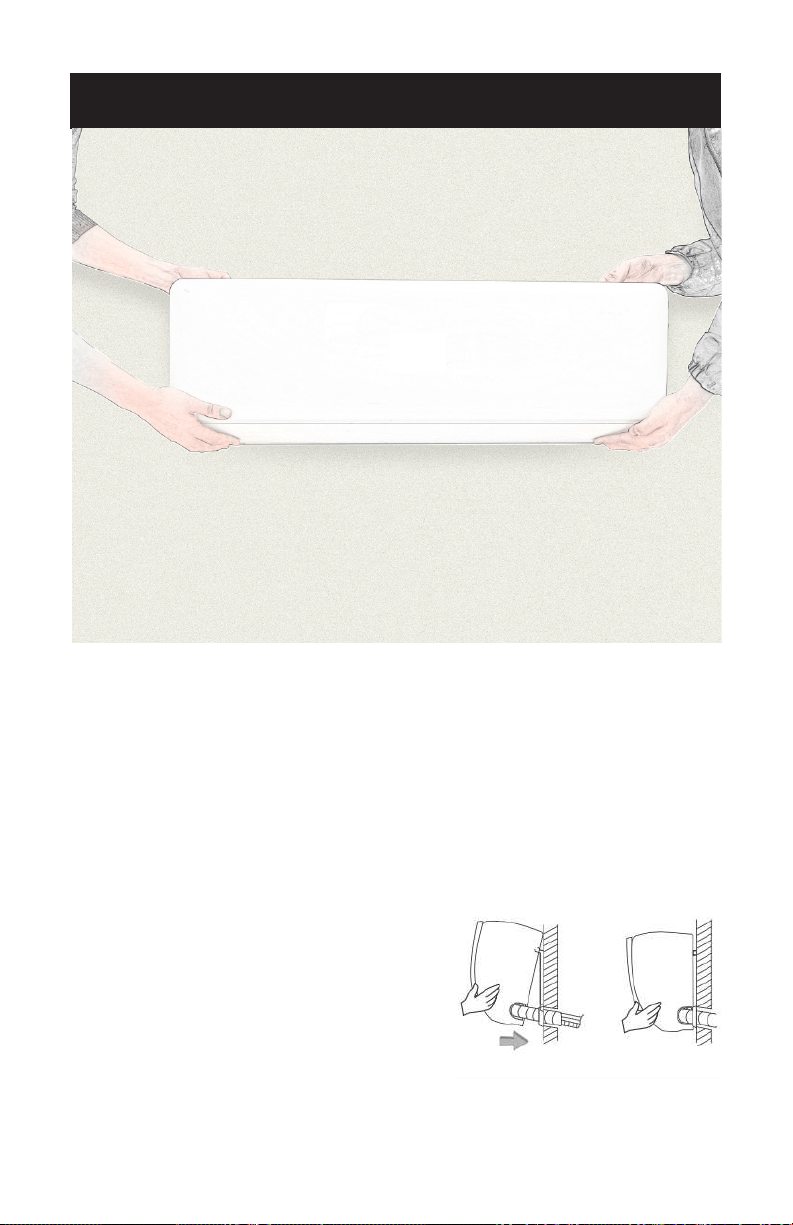
3. Secure the indoor unit to the mounting plate.
• To attach the air conditioner to the wall, simply align the female
connections on the back of the unit with the male connections on the
mounting plate and press rmly to secure the unit in place. Make sure
the unit tilts backward 2-3 degrees so that water can ow out of the
drain hose.
• It may help to have a friend hold the unit in place while you secure
the connections.
Fixing the Indoor Unit
• Hang the indoor unit on the mounting
plate, and move the unit from left to
right to ensure that the hook is properly
positioned in the peg board.
• Push toward the lower left side and the
upper right side of the unit toward the
plate, until the hook is embedded in the
slot and makes a “click” sound.
Page 17
INSTALLATION INSTRUCTIONS
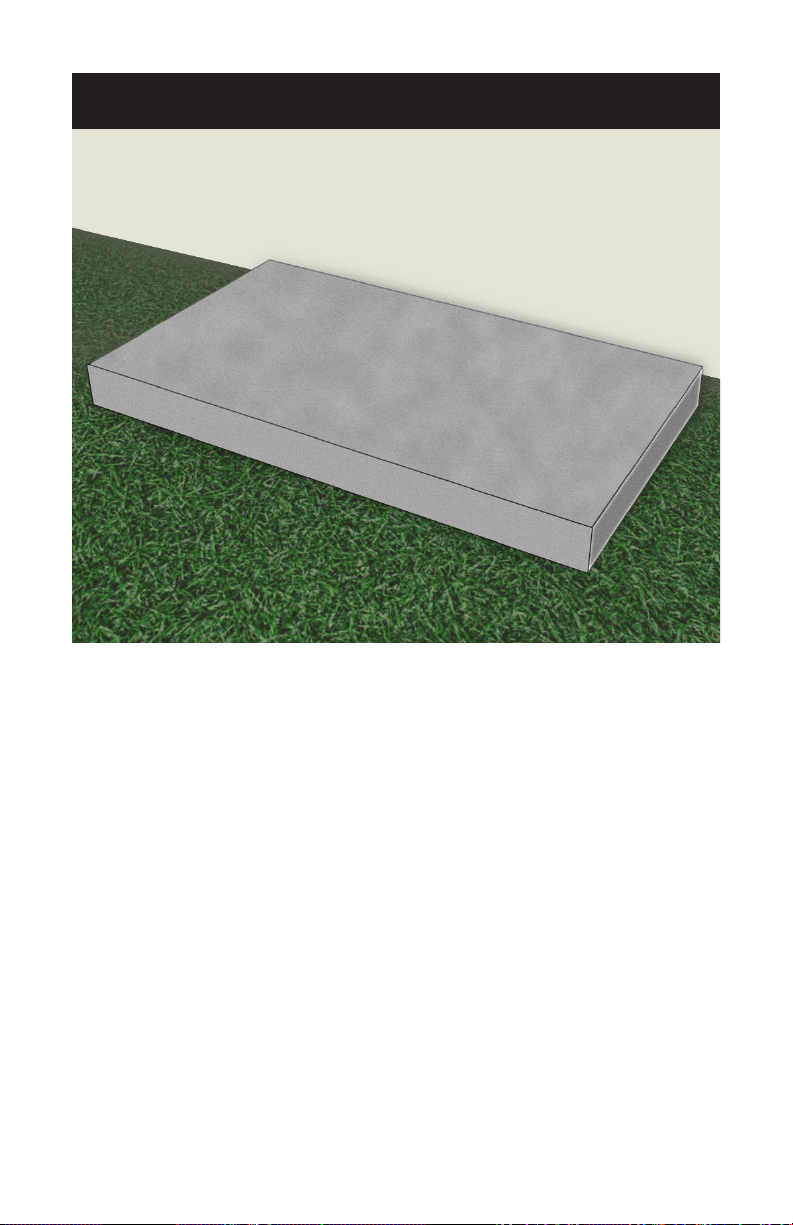
4. Lay a concrete pad on the ground.
• Don’t place the outdoor unit directly on the ground, as it’s heavy
and can shift around on dirt or rocks.
Tip: Situate the concrete pad so that it’s high enough to keep
the unit out of any water that may puddle on the ground
due to rain or snow.
Page 18
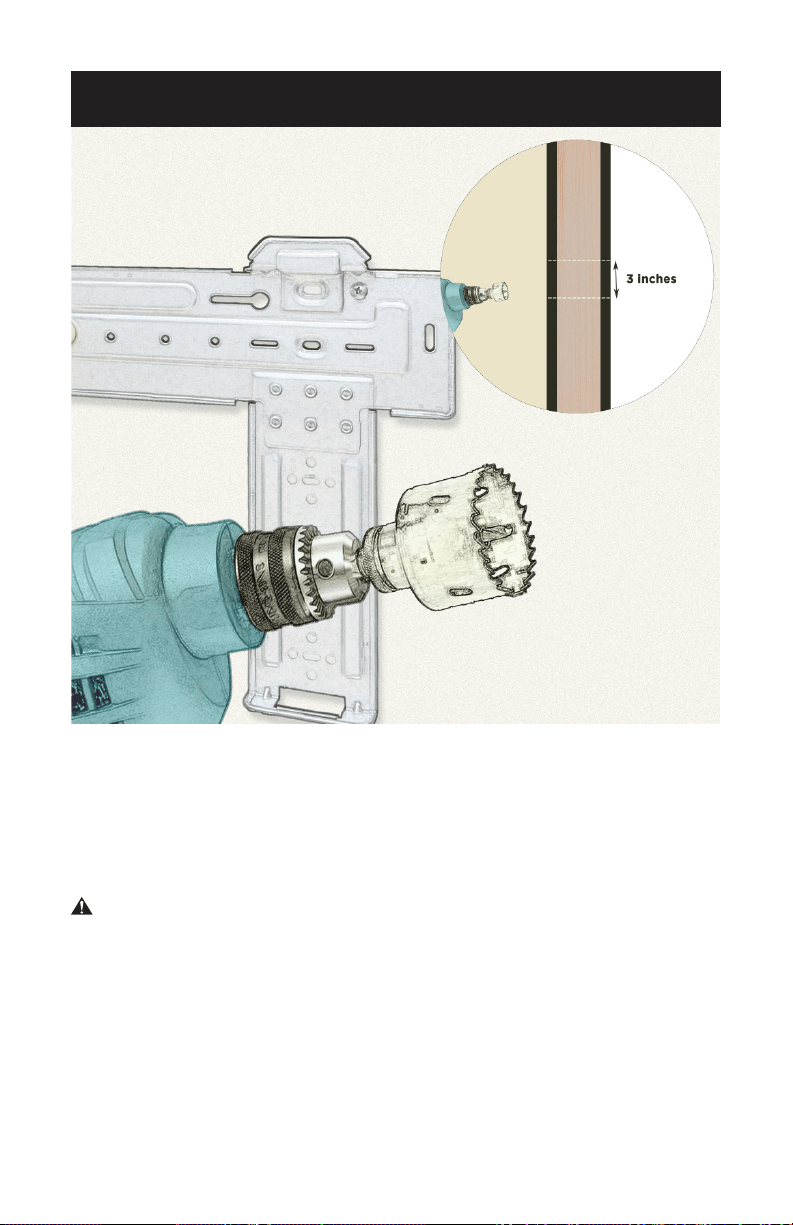
INSTALLATION INSTRUCTIONS
5. Drill a 3 in. (7.6 cm) hole through the wall so you can feed
the refrigerant lines and condensate drain hose outside.
• Make a mark in the center of the hole in the mounting plate. Use a
keyhole saw or a drill with a hole-cutting attachment to create a
circular 3 in. (7.6 cm) opening through the wall that slopes slightly
downward toward the ground to ensure adequate drainage.
WARNING - Make sure there are no pipes or wires behind the wall
before drilling or cutting the hole.
Page 19
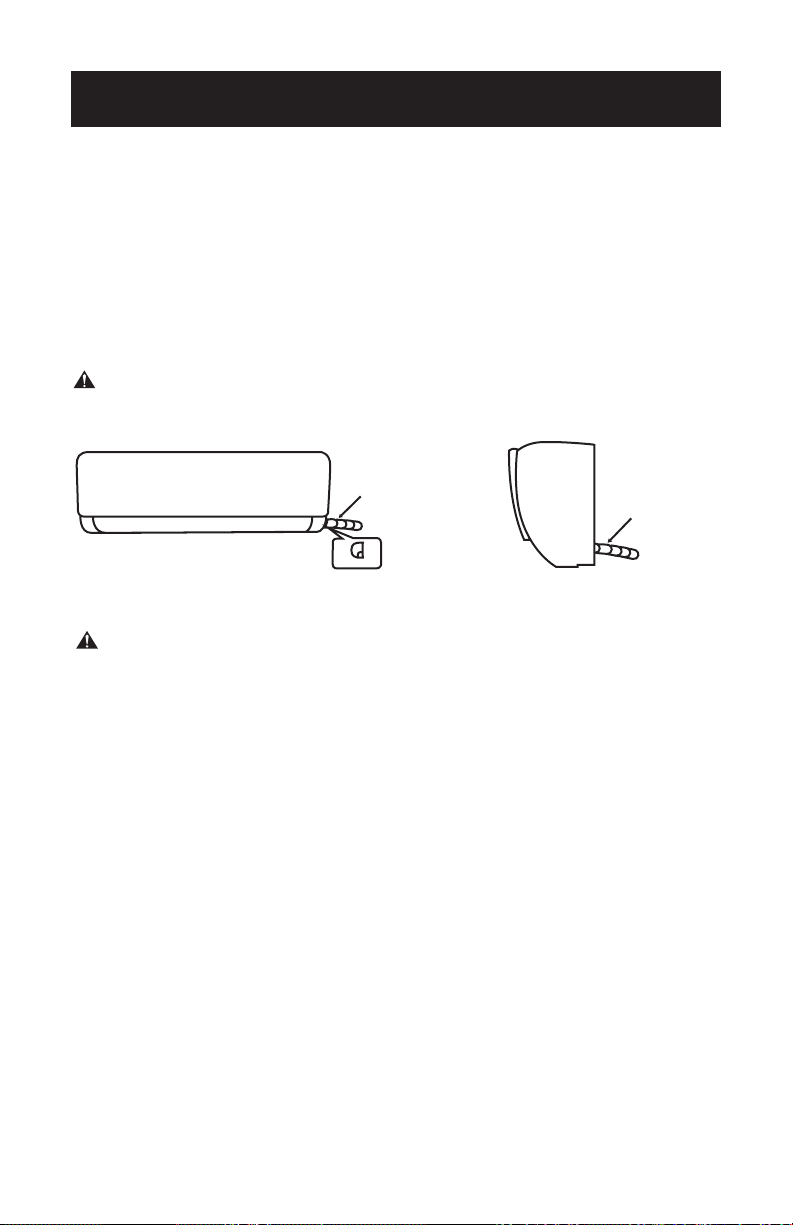
6. Check the electrical connections on the indoor unit.
Route of Pipeline
• Depending on the position of the unit, the piping may be routed
sideway from the left or the right (Fig. 1), or vertically from the back
(Fig. 2) (depending on the pipe length of the indoor unit). The indoor
unit will draw it’s power from the exterior unit. In the case of sideway
routing, cut off the outlet cutting stock of the opposite side.
WARNING - All exterior wiring must be in LFNC-B or equivalent in
accordance with NEC requirements.
Fig. 1
Fig. 2
Refrigerant pipe
Drain Hose and
Cables
Refrigerant pipe
Drain Hose and
Cables
Outlet material preparation
INSTALLATION INSTRUCTIONS
WARNING - All interior wiring must be compliant articles
200-300 of NEC.
Page 20
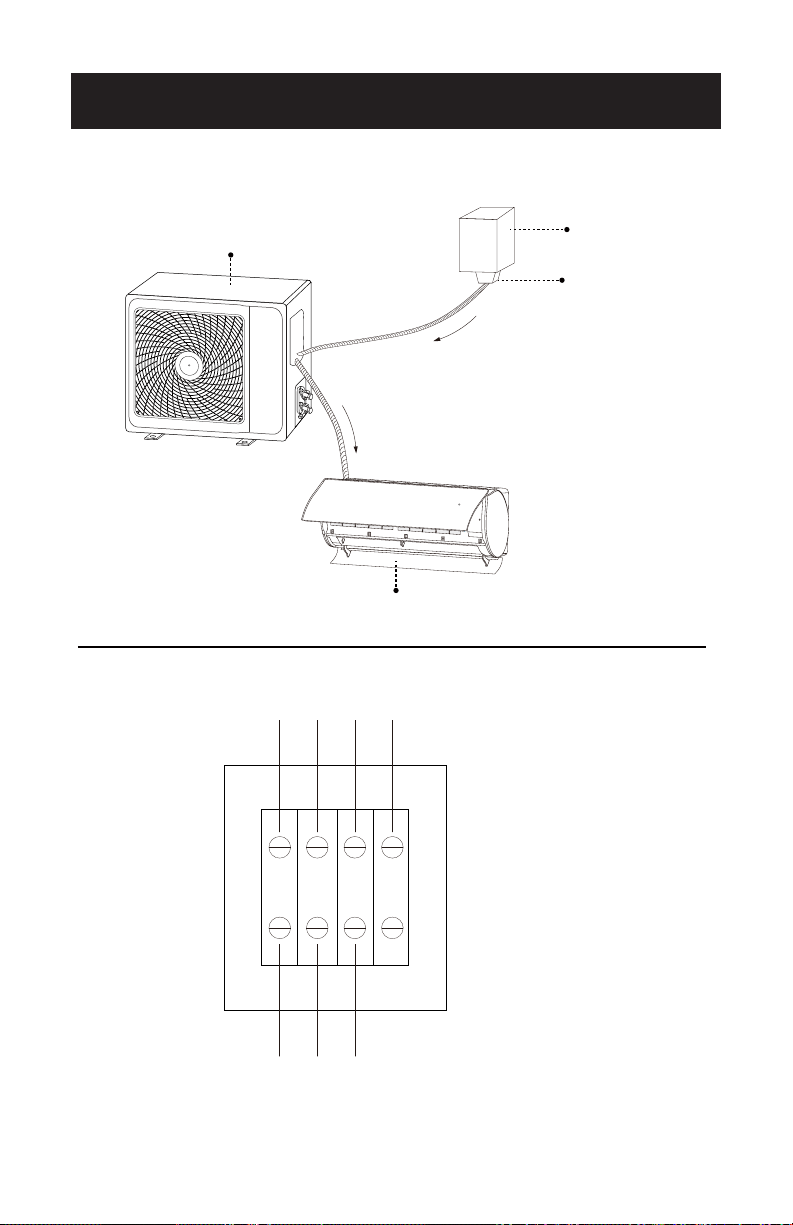
INSTALLATION INSTRUCTIONS
ELECTRICAL
DISCONNECT
POWER FLOW
AC MAINS
WEATHER PROOF
FITTINGS
OUTDOOR UNIT
TO INDOOR UNIT
FROM DISCONNECT
VIEW OF ELECTRICAL
CONNECTIONS
AT UNIT OUTDOOR
L N G S
LIQUID TIGHT
NON-METALLIC
CONDUIT
INDOOR UNIT

Page 21
INSTALLATION INSTRUCTIONS
Wiring Diagram
• Connection is needed in accordance with the wiring diagram.
NOTE:
• This manual usually includes the wiring mode for the dierent kinds
of A/C. We cannot exclude the possibility that some special type of
wiring diagrams are not included.
• The diagrams are for reference only. If the entity is dierent than this
wiring diagram, please refer to the detailed wiring diagram adhered on
the unit which you purchased. (Inside of exterior wiring cover)
• See wiring diagram on inside of e-parts cover for your specific model.
Page 22
INSTALLATION INSTRUCTIONS
7. Run the refrigerant lines and drain hose through the hole in
the wall.
• Then secure them to the designated spots on the indoor unit.
• Place the drain hose on the bottom to ensure a free ow of water.
• Each line comes pre-insulated, so you don’t have to worry about
adding extra insulation,then connect them to the unit.
• Secure the included copper pipes, and drain hose together with elec-
trical tape.
• Do your best to minimize how much the pipes and cable bend to
ensure that the unit performs well.
• Make sure that the drainage pipe allows water to drain in an
appropriate place.
Page 23
INSTALLATION INSTRUCTIONS
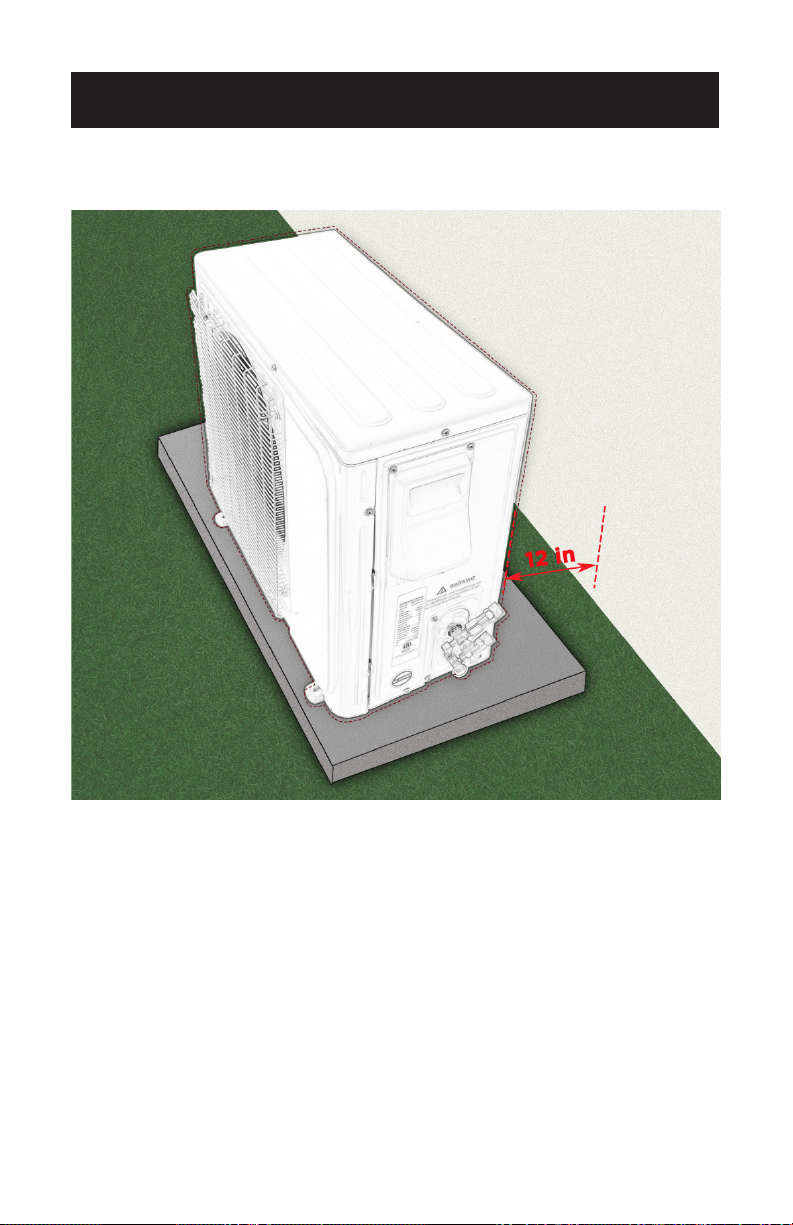
1. Position the outdoor unit away from any heavily trafcked,
dusty, or hot areas.
• Find the hole you drilled through the mounting plate for the
interior unit and position the exterior unit within 50 feet (15 m) so the
piping and cable can easily be attached. Choose a location with at
least 12 inches (30 cm) of space surrounding its perimeter to ensure
proper functioning. If possible, select a shady location that’s sheltered
from the wind in addition to dust and trafc to keep your unit
functioning at its best.
• Make sure that no antenna of a radio or television is within
10 feet (3.0 m) of the outdoor condenser.
OUTDOOR UNIT INSTALLATION
Page 24
INSTALLATION INSTRUCTIONS
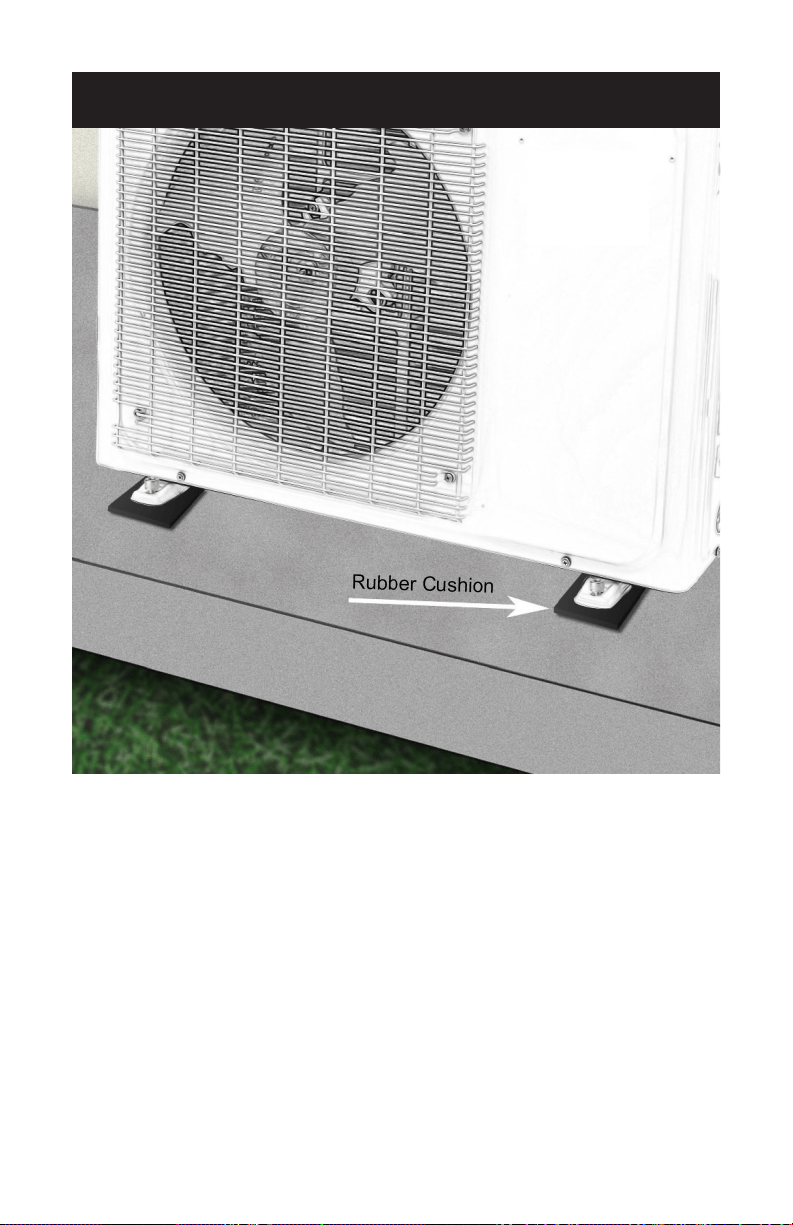
2. Secure the outdoor unit on top of the concrete pad.
• Lay a rubber cushion (Not included) on top of the pad to minimize
vibration, then set the outdoor condenser unit on top of the pad.
Secure the unit to the concrete with anchor bolts.
Page 25
INSTALLATION INSTRUCTIONS
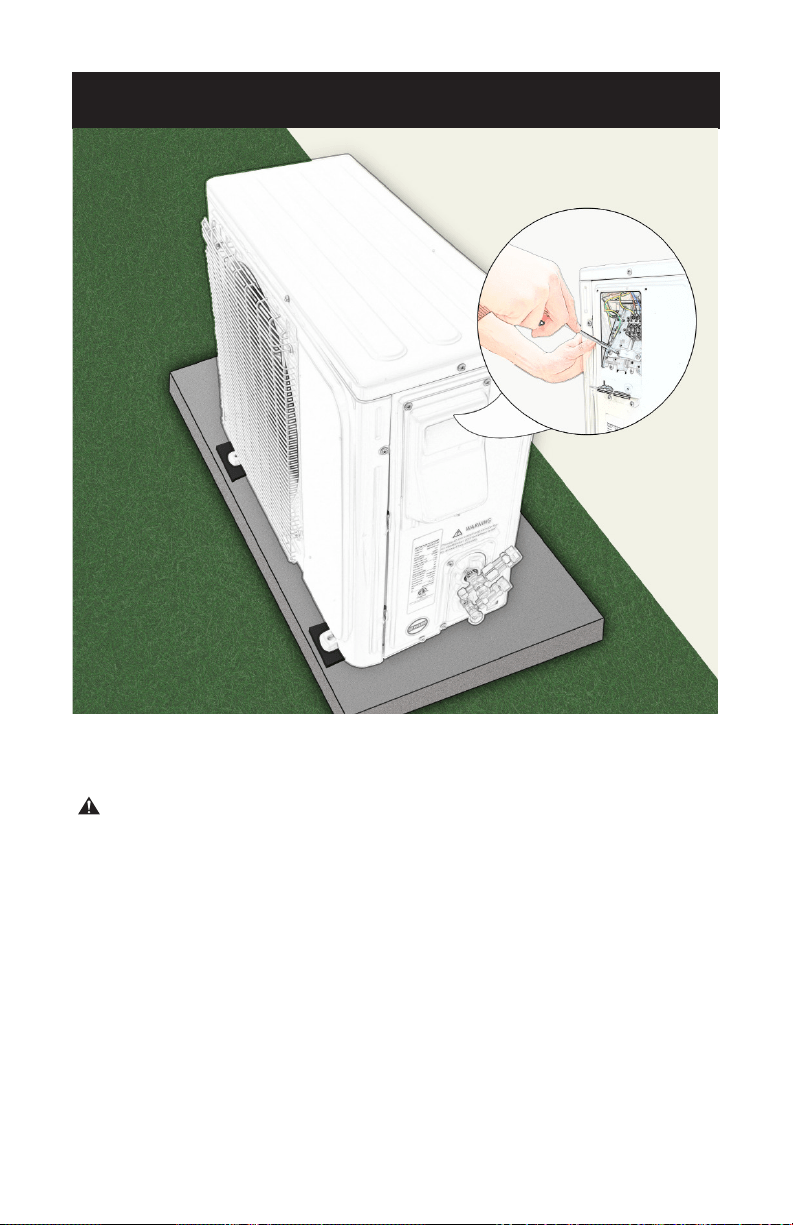
3. Wiring electrical unit.
WARNING - All electrical connections, wiring and
installation should be performed by a licensed
electrician. Otherwise, it may cause personal
injury or damage.
• Electrician shall read rating plate for proper circuit breaker and
conductor size.
• The use of suitable conductors is recommended.
• It is also recommended that the conductors terminate with UL listed
closed loop ring terminals or spade terminals. The small terminal
black screws may not accommodate solid conductors without
terminals.

Page 26
INSTALLATION INSTRUCTIONS
Wiring Diagram
NOTE:
• This manual usually includes the wiring mode for the dierent kinds
of A/C. We cannot exclude the possibility that some special type of
wiring diagrams are not included.
• The diagrams are for reference only. If the entity is dierent than this
wiring diagram, please refer to the detailed wiring diagram adhered on
the unit which you purchased.
• See wiring diagram on inside of e-parts cover for your specific model.
To PowerTo Power
To Power
To Power
To Power
To Power

Page 27
INSTALLATION INSTRUCTIONS
4.Connect the piping and cable to the outdoor unit.
• Use are nuts to secure the 2 copper pipes from the indoor unit to the
outdoor unit as per the instruction manual. Connect the power cable
that runs from the indoor unit to the outdoor unit as well.
Page 28
INSTALL THE REFRIGERANT PIPE
(the unit with the quick connectors)
NOTE: All the illustrations in this manual are for explanation purpose
only. Your air conditioner may be slightly different. The actual
shape shall prevail. They are subject to change without notice for
future improvement.
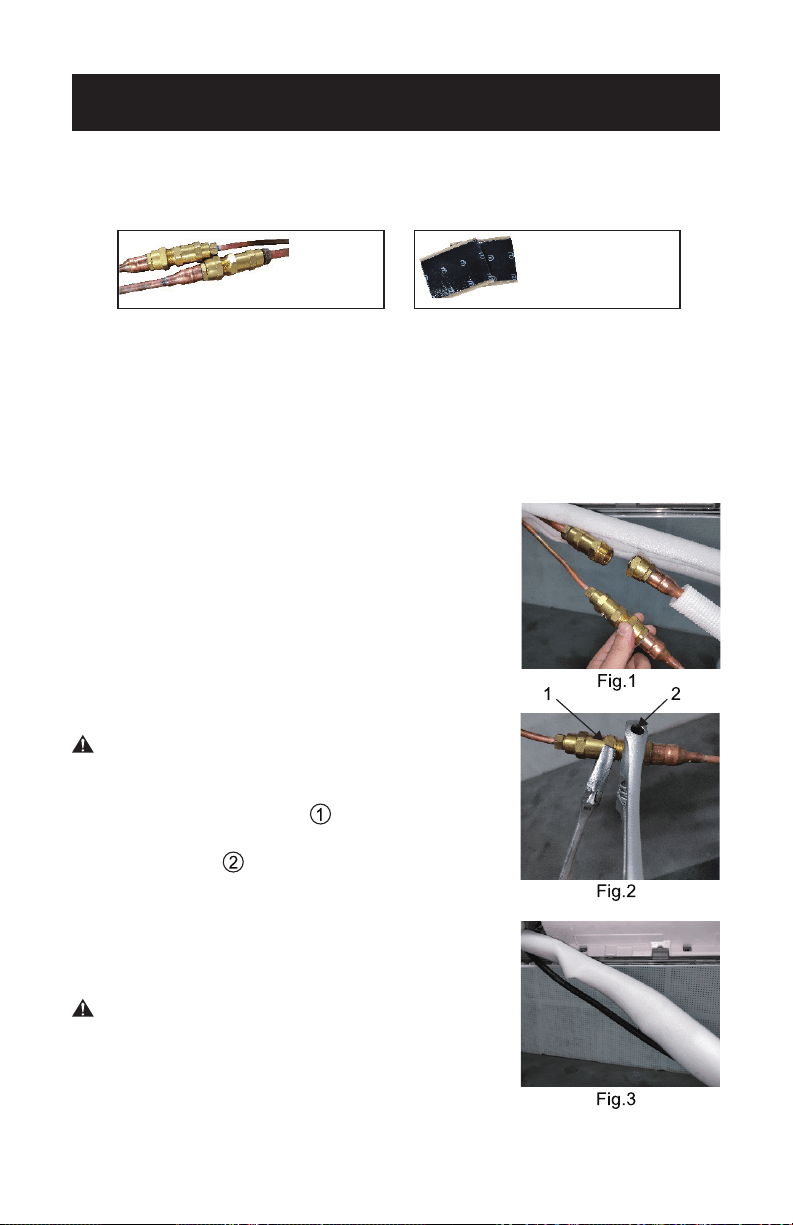
Connecting the Refrigerant Pipe to Indoor Unit
• Do not remove the plastic seals from the
indoor equipment and the appropriate
refrigerant pipe until immediately before you
connect them.
• Align the refrigerant pipes correctly, make
sure the dimensions of the connecting the
refrigerant pipe are the same. Place the screw
connector on the refrigerant pipes just on
to the thread on the indoor equipment and
tighten the rst few threads by hand. See Fig. 1.
CAUTION – Before you continue, it is
essential that read the following
instructions carefully.
• Hold the points marked “ ” using an open-
ended spanner and turn the nuts only at the
points marked “ ” using an open-ended
spanner (Select the appropriate spanner
according to the dimensions of the connector).
See Fig.2.
• Ensure that the screw connectors do not skew
as you tighten them and work quickly.
CAUTION – Since the coupling works with
tapping rings, it may leak if you
undo and reconnect the pipes.
This will also void the warranty.
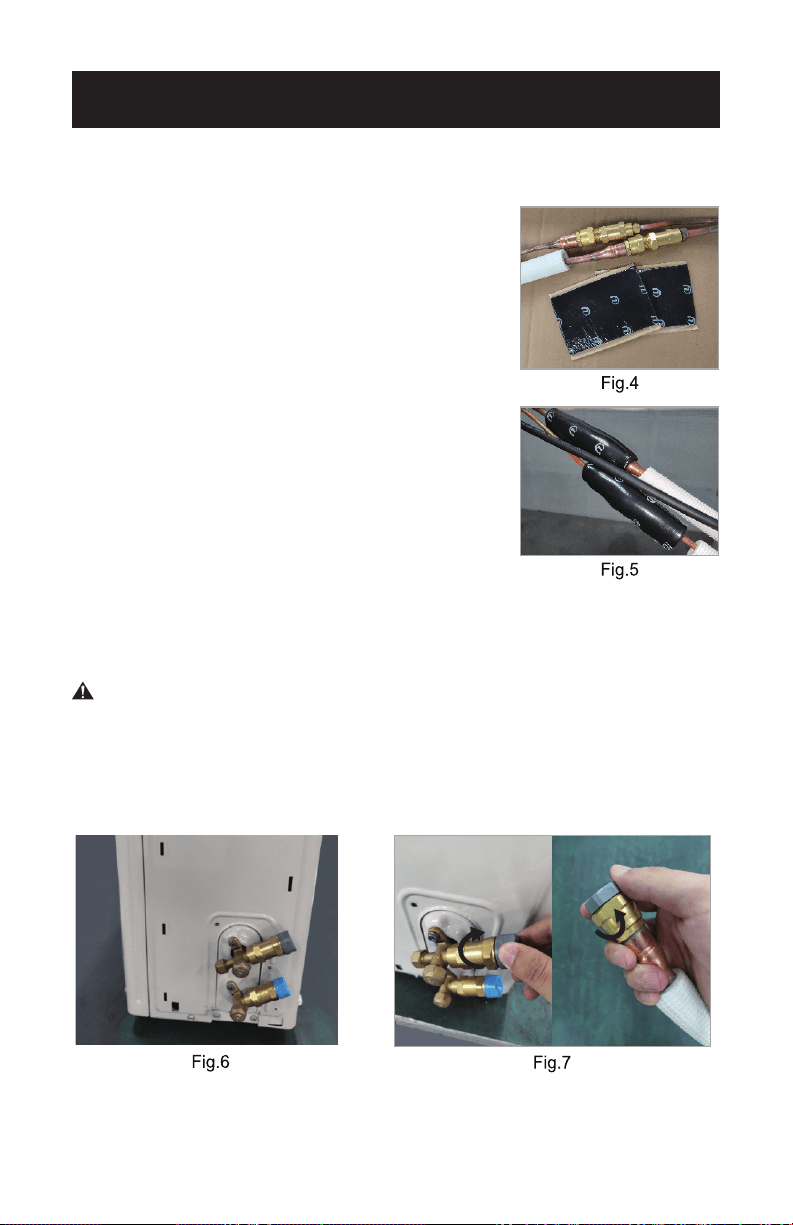
• After nishing the connection, use the tape to
wrap the refrigerant pipe and connecting cable together. See Fig.3.
Quick Connectors
Sound
Deadening Pads
(Not included)
INSTALLATION INSTRUCTIONS
Page 29
INSTALLATION INSTRUCTIONS
• After nishing connecting the couple of the
quick connectors, pass drain hose and the
refrigerant pipes through the wall hole.
NOTE: The quick connector parts must be
placed outside of room. Using wall hole
sleeve, cap and neoprene to seal the
wall hole.
• In order to prevent the quick connector parts
from being exposed in the air, the sound
deadening pads are supposed to be used
during installation, see Fig. 4.
• Wrap up the quick connectors with the sound
deadening pads, pack down the pads solid as
tightly as shown in Fig. 5.
• At last, use the tape to wrap the connection
pipe and connecting cable together.
Connecting the Refrigerant Pipe to Outdoor Unit
CAUTION – For your safety, always wear goggles and work
gloves when connecting the pipes.
• The outdoor unit as shown in Fig.6.
• Do not remove the plastic seals from the outdoor unit and the
appropriate the refrigerant pipes until immediately before you
connect them, Fig.7.
Page 30
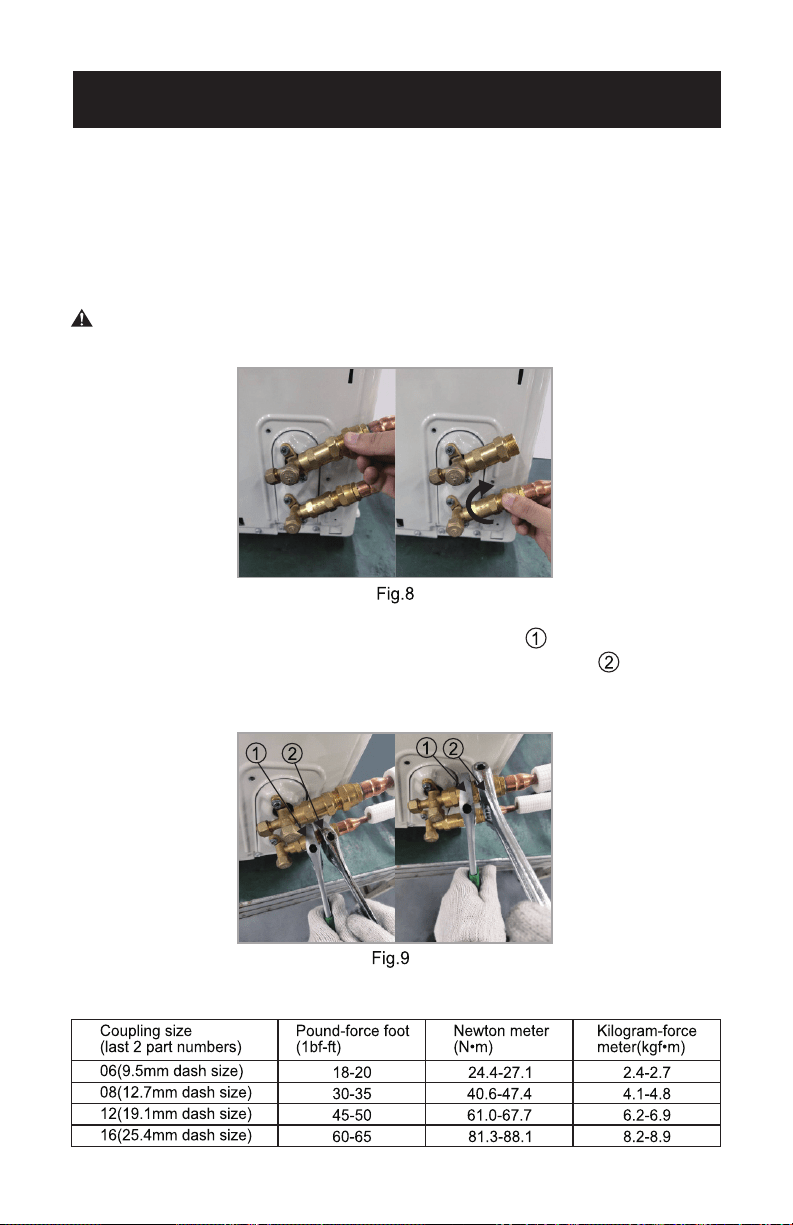
• Align the refrigerant pipes correctly so that they line up with the
valves and are not stressed. Place the screw connector on the
refrigerant pipes just on to the thread on the outdoor unit and
tighten the rst few threads by hand, Fig. 8.
NOTE: The refrigerant pipes must be connected to the valves on the
outdoor unit with as little stress as possible.
CAUTION – Before you continue, it is essential that you read the
following instructions carefully.
• Now tighten the bottom screw connector rst and then the top screw connector
using the open-ended spanner. Hold the points marked “ ” using an
open-ended spanner and turn the nuts only at the points marked “ ” using
an open-ended spanner ( Select the appropriate spanner according to the
dimensions of the connector). see Fig. 9.
Ensure that the screw connectors do not skew as you tighten them and work quickly.
See the table for the proper torque.
INSTALLATION INSTRUCTIONS
Page 31
INSTALLATION INSTRUCTIONS
IMPORTANT: Since the coupling works with tapping rings, it may leak
if you undo and reconnect the pipes. This will also void
the warranty. After completing steps 1-4, check that all
the connections are sealed correctly using leak detection
spray or soap suds. If any bubbles form, the system has a
leak and the screw connectors must be re-tightened using
an open-ended spanner.
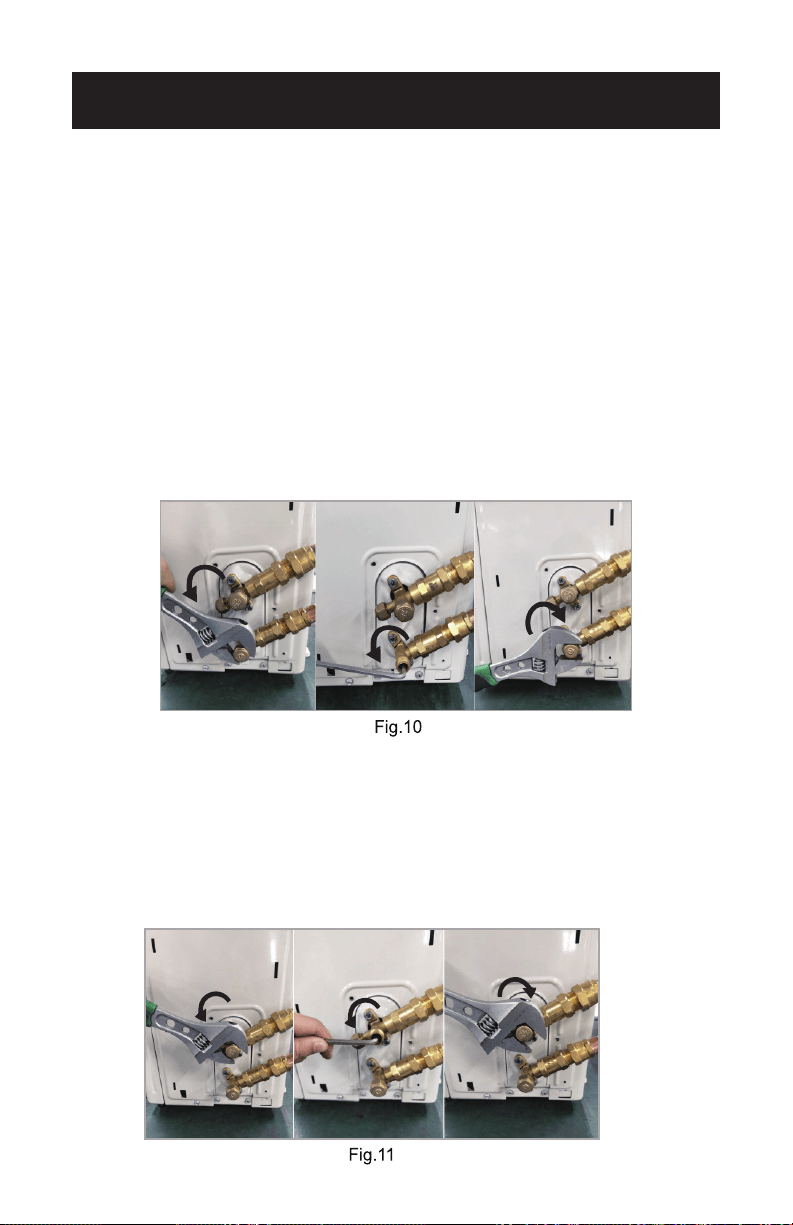
• Now remove the cover on the bottom valve using a open-ended
spanner. Open the valve by turning it counter-clockwise as far as
it will go using a 5 mm Allen key. The valve is now open. Screw the
cover back on to the bottom valve and tighten it well to ensure that it
is properly sealed. See Fig. 10.
NOTE: If the valve is not opened fully, the system may malfunction and
suffer damage.
• Now remove the cover on the top valve using an open-ended
spanner. Open the valve by turning it counter-clockwise as far as
it will go using a 5 mm Allen key. The valve is now open. Screw the
cover back on to the top valve and tighten it well to ensure that it is
properly sealed. See Fig. 11.
NOTE: If the valve is not opened fully, the system may malfunction and
suffer damage.
Page 32
INSTALLATION INSTRUCTIONS
CAUTION – The conical ring on the valve has an important sealing
function together with the sealing seat in the caps.
Ensure that you do not damage the cone and that you
keep the cap free of dirt and dust.
• After completing steps 1-6, check that all the connections are sealed
correctly using leak detection spray or soap suds. If any bubbles form,
the system has a leak and the screw connectors must be retightened
using an open-ended spanner.
• Start the equipment so that the operating pressures build up inside it.
Check all the connectors again for signs of leaks: (a) during cooling
mode. (b) in heating mode. If any bubbles form, the system has a leak
and the screw connectors must be re-tightened using an open-ended
spanner.
IMPORTANT: The unit with the quick connectors does not
require vacuum pumping.
Market Sampling Test Guidelines
Pressure-maintaining refrigerant is available in the indoor equipment
and the refrigerant pipe (Different models have different refrigerant
quantities). The installer must use the original refrigerant pipe.
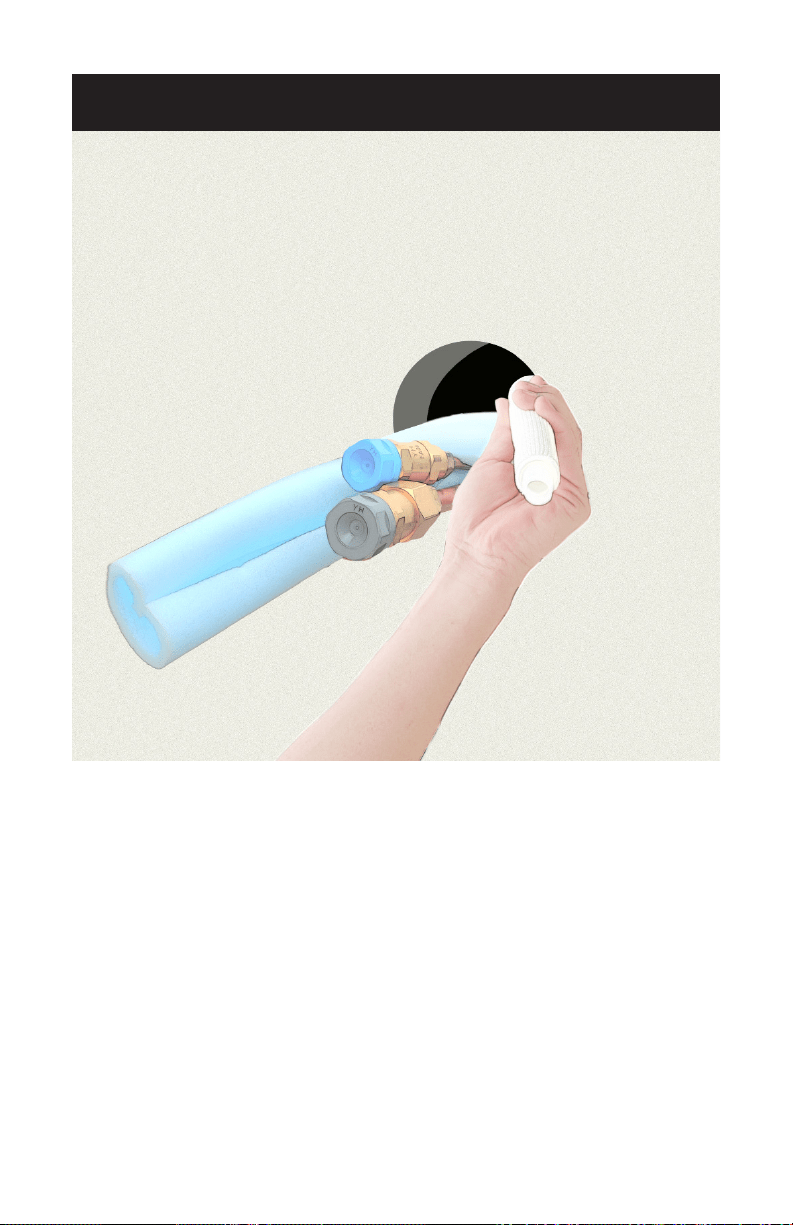
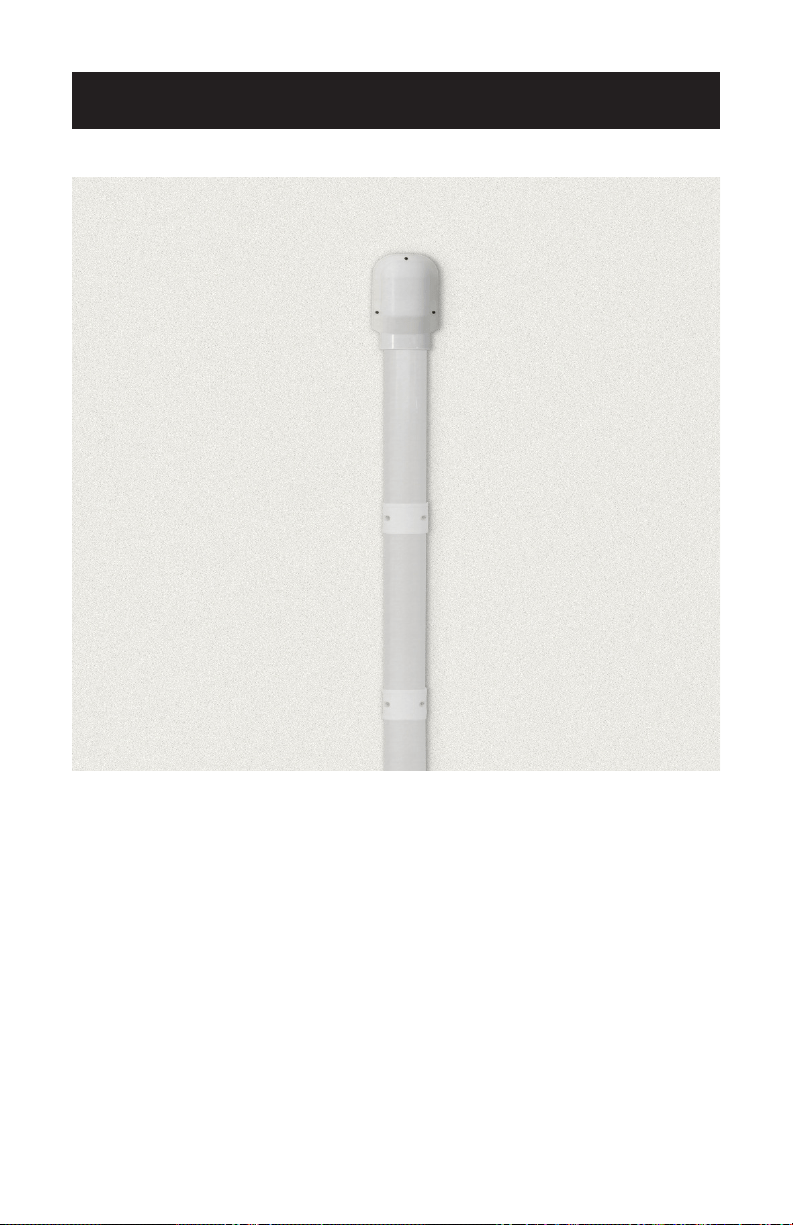
Wrap the Piping
1. Use the insulation sleeve to wrap the joint part the indoor unit and
the refrigerant pipe, and then use the insulating material to pack and
seal insulation pipe, to prevent generation of condensate water on the
joint part.
2. Connect the water outlet with drain hose,
and make the refrigerant pipe, cables, and
the drain hose straight.
3. Use plastic cable ties to wrap the refrigerant
pipes, cables and drain hose. Run the pipe
sloping downward shown in the following table.
Refrigerant Pipe
Drain Hose
and Cables
Page 33
INSTALLATION INSTRUCTIONS
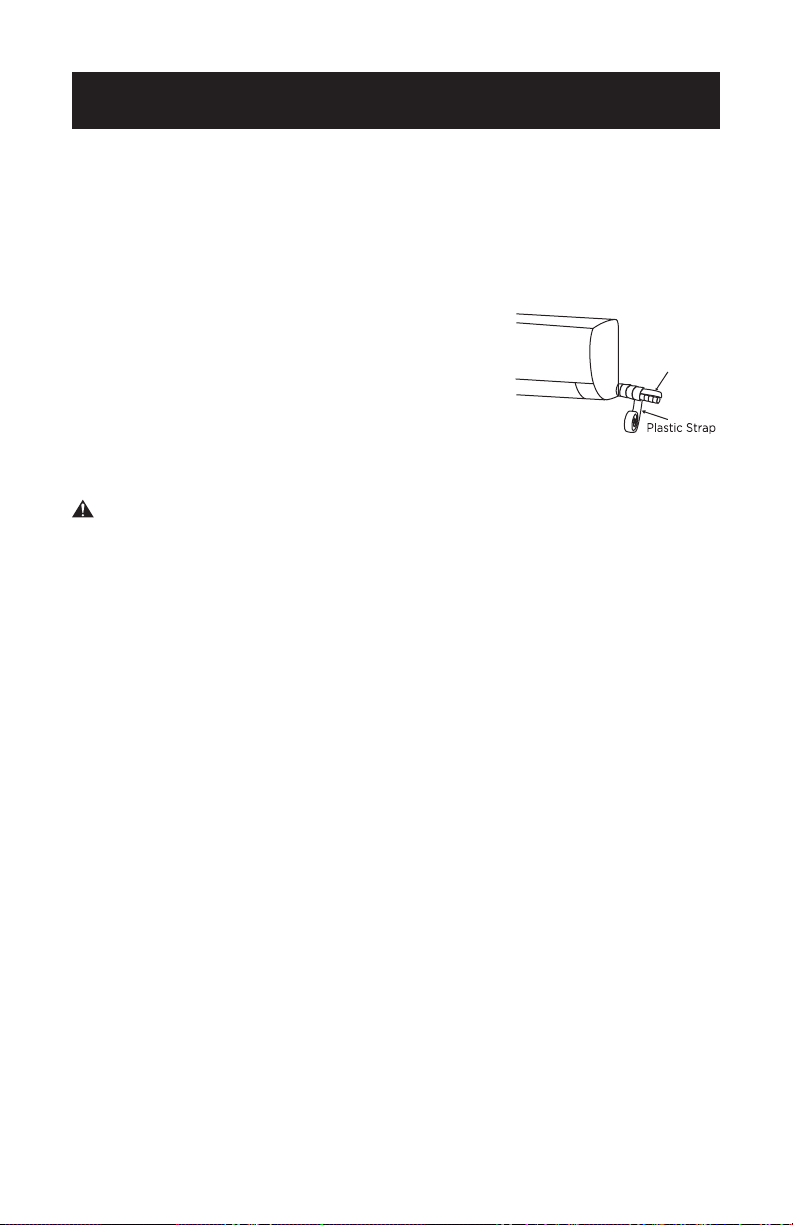
5. Afx the piping to the wall with clamps
(Not included)
• To ensure the pipes and cables don’t move around or become
disconnected, attach them to the exterior wall of your home using
clamps (not included).
Page 34
INSTALLATION INSTRUCTIONS
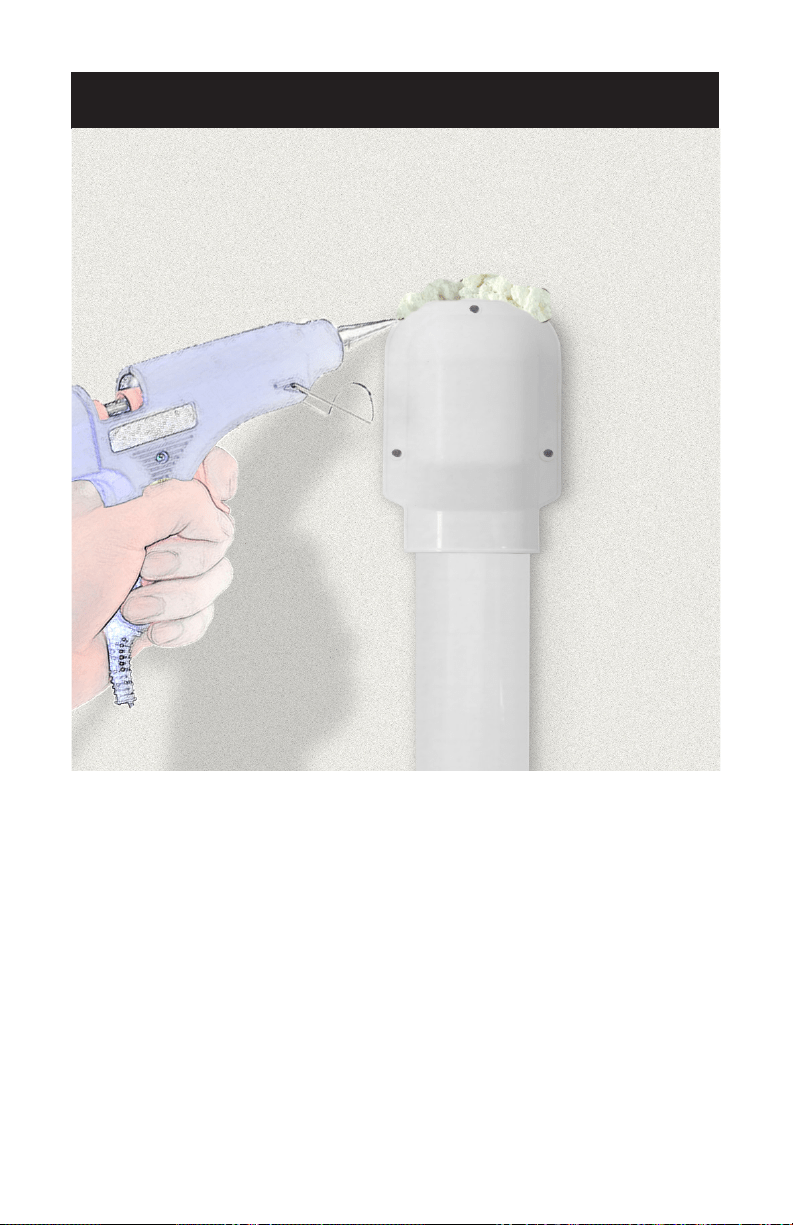
6. Seal up the hole in the wall using expanding polyurethane
foam.
• Spray expanding polyurethane foam into the hole you drilled to feed
the cable and piping through the wall. Make sure the hole is
completely sealed to prevent hot air or insects from getting through.
• Let the foam dry as per the instructions on the label before turning on
your air conditioning.
Page 35
INSTALLATION INSTRUCTIONS
7. Turn on the unit and enjoy the cool air!
• All that’s left to do is to start the A/C, which you can do from the
indoor unit. It should only take a minute or 2 for cool air to start
blowing into your home.

Page 36
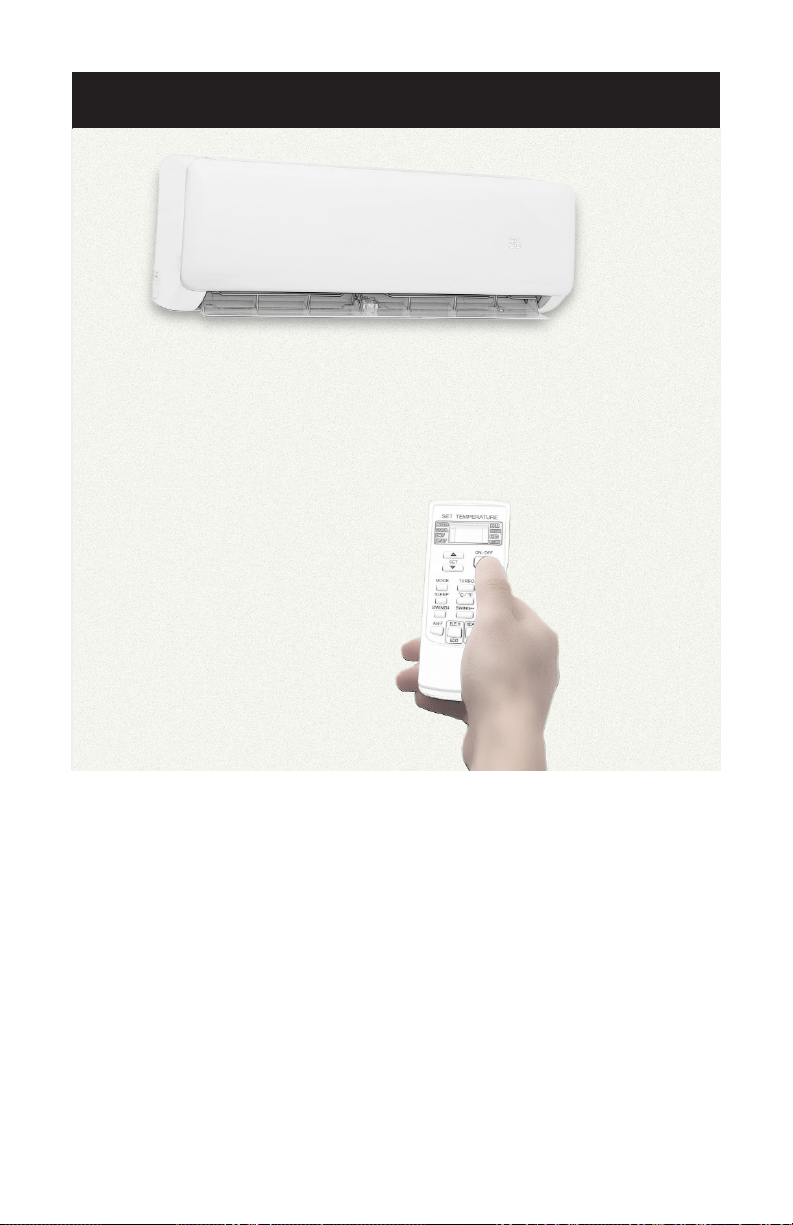
REMOTE CONTROL INSTRUCTIONS
CAUTION
• Before rst time use of the remote control, install the batteries and
ensure that the “+” and “-” poles are correctly positioned.
• Ensure the remote control is pointed to the signal receiving window,
and that there is no obstruction in between and the distance is 8m at
the maximum.
• Do not let any liquid in the remote control.
Do not expose the remote control directly to the sunlight or excessive
heat.
• If the remote control does not work normally, remove the batteries for
30 second before reinstalling them. If that doesn’t work, replace the
batteries.
• When replacing the batteries, do not mix the new batteries with old
ones or mix batteries of different types, which could cause failure of
the remote control.
• If the remote control is not to be used for a long period of time,
remove the batteries rst, lest the leakage from them may damage the
remote control.
• Properly dispose the discarded batteries.
NOTE: This is a universal remote control. Please understand that some
of the buttons may not function, depending on the specic air
conditioner you have purchased. (If a specic function is not
available on the air conditioner, pressing the corresponding but-
ton will simply have no response.)

Page 37
REMOTE CONTROL INSTRUCTIONS
HANDLING ALKALINE BATTERIES
1. NEVER mix alkaline, standard (carbon-zinc), rechargeable (nickel-cadmium)
batteries with this product.
2. Should uid from the battery accidentally get into your eyes, there is a threat of loss
of eyesight, do not rub them. Immediately rinse your eyes with clean tap water and
then consult a physician immediately.
3. Do not put the battery in a re expose it to heat dismantle or modify it. If the
insulation or safety valve is damaged, the battery may leak uid, overheat or
explode.
4. Do not insert the battery with the poles reversed. Doing so may cause some
abnormality or a short and the battery may leak uid, overheat or explode.
5. Keep the battery out of the reach of children. If the battery is swallowed, contact a
physician immediately.
6. If the alkali uid gets in your mouth, rinse your mouth with water and contact a
physician immediately.
7. If the alkali uid gets on your skin or clothes, it may burn your skin, thoroughly rinse
the affected area with tap water. If a chemical burn occurs or if irritation persists,
seek medical attention.
8. Do not mix new and old batteries or other makes of batteries. The different
attributes may cause the battery to leak uid, overheat or explode.
9. This battery was not made to be recharged. Recharging this battery may damage
the insulation or internal structure and may cause the battery to leak uid, overheat
or explode.
10. Do not damage or remove the label on the exterior of the battery. Doing so may
cause the battery to short, leak uid, overheat or explode.
11. Do not drop, throw or expose the battery to extreme impact. Doing so may cause
the battery to leak uid, overheat or explode.
12. Do not alter the shape of the battery. If the insulation or safety valve is damaged,
the battery may leak uid, overheat or explode.
13. Immediately remove batteries when they have lost all power. Leaving the batteries
in the unit for a long time may cause the batteries to leak uid, overheat or explode
due to gas that is generated by the batteries.
14. Remove the batteries from the unit when not using the unit for an extended
period of time. The batteries may leak uid, overheat or explode due to gas that is
generated by the batteries.
15. Do not apply solder directly to the batteries. The heat may cause the batteries to
leak uid, overheat or explode.
16. Do not get the batteries wet. Doing so may cause the batteries to overheat.
17. Store batteries someplace out of direct sunlight where the temperature and
humidity are not high. Not doing so may cause the batteries to leak uid, overheat
or explode. Also, it may cause the life and performance of the batteries to decline.
18. Follow the regulations of the local government when disposing of these batteries.
SAVE THESE INSTRUCTIONS
HOUSEHOLD USE ONLY
WARNING
When handling alkaline, basic safety precautions
should be followed, including the following:

Page 38
REMOTE CONTROL INSTRUCTIONS
1
2
8
10
11
12
13
9
3
4
5
6
7
NOTE: The remote control displays all symbols during power-on and
only those corresponding to current operation the rest of the
time.
Page 39
REMOTE CONTROL INSTRUCTIONS
1. ON/OFF
• Press this button to turn on/off the unit.
• This will clear the existing timer and SLEEP settings.
2.°C/°F
• Press this button to set the temperature display to Fahrenheit, which
is displayed by default in Celsius. The “C” will not be displayed on the
LCD.
• Press this button again to restore the temperature display to Celsius.
NOTE: Temperature display in Fahrenheit is not available for some
models. When temperature is displayed in Fahrenheit on the
remote control, it might be in Celsius on the unit, the function
and operation of which will not be affected.
3. SPEED
• Press this button, you can select the fan speed as follows:
Low Mid High Auto
NOTE: AUTO air speed is not available in FAN mode.
4. DISPLAY
• Press this button to turn on/off the display. This is for the convenience
of users who are unconformable sleeping with the backlight on.
5. iFEEL
• Press this button on the remote control to turn on the iFEEL
function. The remote control has a temperature sensor built-in to
sense its surrounding temperatures. The unit will adjust the room
temperature based on the location of the remote control rather than
the unit itself.
6. TIMER
• With the unit ON, press this button to set OFF timer or with it OFF to
set ON timer.
• Press this button once, an “ON(OFF)”will ash. Press“ ” or “ ” to set
the number of hours in which the unit will be turned ON/OFF, with
an interval of 0.5 hour if less than 10 hours or 1 hour if longer than 10
hours, and a range of 0.5-24 hours.
• Press it again to conrm the setting the “ON (OFF)” will stop ashing.
• If the timer button is not pressed longer than 10 seconds after the “ON
(OFF)” start ashing, the timer setting will be exited.
• If a timer setting is conrmed, pressing this button again will cancel it.
NOTE: When an ON timer is set, all function buttons (except SLEEP,
DISPLAY, and iFEEL can’t be set) are valid and when the ON
time set is up, the unit will operate as preset.
Page 40
REMOTE CONTROL INSTRUCTIONS
7. iCLEAN
• Press this button with the unit OFF, the remote control will display
“CL” and the unit will automatically clean dust off the evaporator and
dry it, to increase the cooling and heating efciency.
• The iCLEAN function runs for approximately 30 minutes, during
which if the unit is turned on with the remote control or this button is
pressed again, the iCLEAN will be deactivated.
8. or
• Each time the “ ” is pressed, the temperature setting will increase by
1°C and each time the “ ” is pressed, it will decrease by 1°C.
• The setting temperature of the remote control ranges from 16°C~32°C
(60°F~90°F).
NOTE: The temperature cannot be set in AUTO or FAN mode, thus
these two buttons are not functional.
9. TURBO
• Press this button only in COOL or HEAT mode to set TURBO on or off
to speed up the cooling or heating.
• When TURBO is on, the air speed is HIGH.
• When TURBO is off, the air speed will restore to previous status.
10. MODE
• Press this button, you can select the running mode as follows:
AUTO COOL DRY HEAT FAN
NOTE: HEAT mode is not available for cool only units.
11. SLEEP
• Press this button to enter SLEEP mode, which the unit will exit after 10
hours of continuous operation and restore to the previous status.
NOTE: The SLEEP function cannot be activated in Fan mode.
12. SWING
• Press this button to activate up/down swing and press it again to x
the swing position.

Page 41
REMOTE CONTROL INSTRUCTIONS
13. FAN ON
• The Fan On functions when the unit is turned off with the remote
control in COOL, DRY, or AUTO mode. It will operate in HEAT mode
(FAN mode for cool units only) with the internal fan running for ad-
ditional time before stopping. On excessive hot and humid days, extra
moisture is accumulated in the indoor Air Conditioner unit. The Fan On
function will continue to run after the unit is shut off for an additional
3 minutes to help get rid of any accumulative moisture.
• This function is not set in the factory. You may set it or cancel it at any
time you want as follows: With both the unit and remote control OFF,
point the remote control at the unit and press the “Fan On” button
once, the buzzer will sound 5 times, indication the function is on. Once
set, this function will remain valid except when the unit is turned off or
until it is cancelled.
• To cancel Fan On:
1. Power off the unit.
2. With both the unit and the remote control OFF, point the
remote control at the unit and press the Fan On button once.
The buzzer will sound 3 times indicating the function is can-
celled.
NOTE: With Fan On activated, it is advised not to turn ON the unit again
before it is fully OFF. Fan On function will be invalid when OFF
timer is set.
Page 42
REMOTE CONTROL INSTRUCTIONS
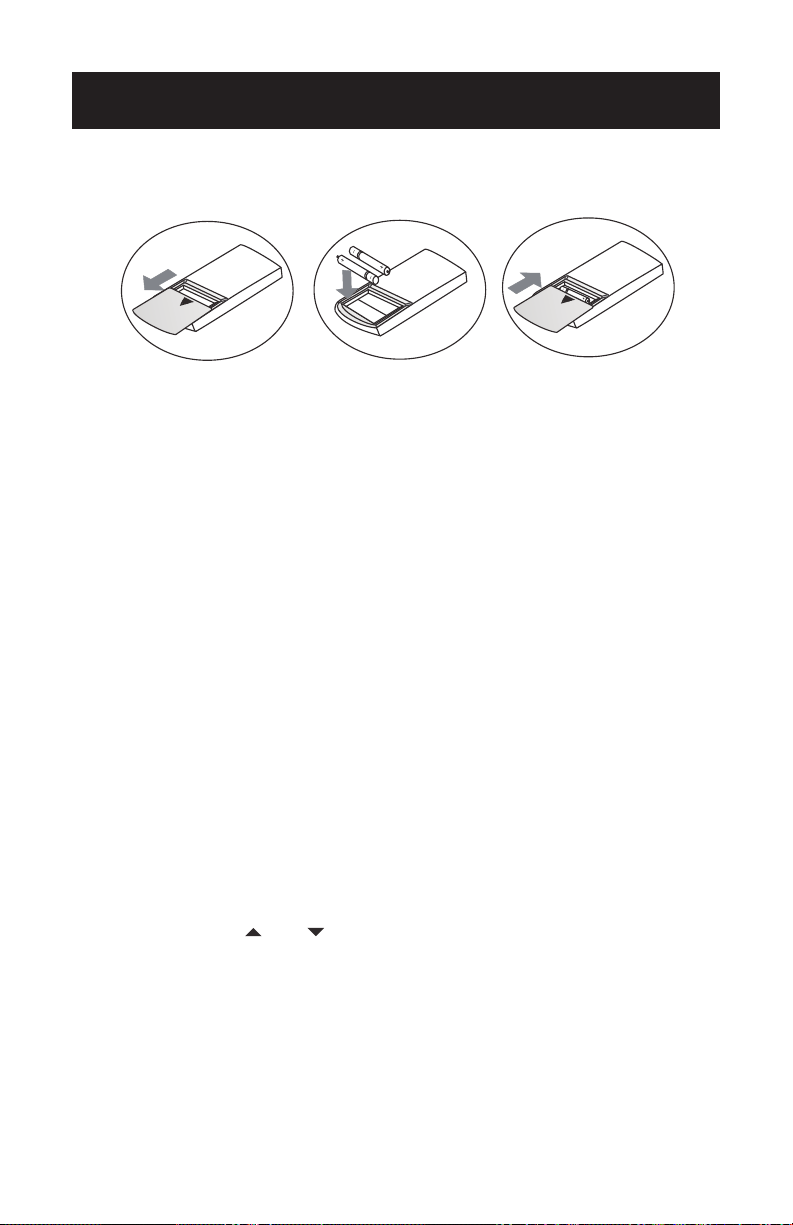
Battery Instructions
1. Slide to open the cover according to the direction indicated by the
arrowhead.
2. Insert two brand new batteries (AAA, not included), and position the
batteries to the right electric poles (+ & -).
3. Put the cover back on.
Automatic operation mode
1. Press the “MODE” button, select the automatic operation mode.
2. By the “SPEED” button, you can select the fan speed from LOW, MID,
HIGH, AUTO.
3. Press the “ON/OFF” button the air-conditioner starts to operate.
4. Press the “ON/OFF” button again, the air-conditioner stops to
operate.
NOTE: In the fan operation mode, the temperature settings is
non-effective.
Cooling/Heating operation mode
1. Press the “MODE” button, select the Cooling or Heating operation
mode.
2. By pressing the “ ” or “ ” button, you can set the temperature, the
display changes as you touch the button.
3. By pressing the “SPEED” button, you can select the fan speed from
LOW, MID, HIGH, AUTO.
4. Press the “ON/OFF” button, the air-conditioner starts to operate.
5. Press the “ON/OFF” button again, the conditioner stops.
NOTE: The cold wind type has no heating function.

Page 43
Fan operation mode
1. Press the “MODE” button select the fan operation mode.
2. By pressing the “SPEED” button, you can select the fan speed from
LOW, MID, HIGH.
3. Press the “ON/OFF” button, the air-conditioner starts to operate.
4. Press the “ON/OFF” button again, the air-conditioner stops.
NOTE: In the fan operation mode, the temperature setting are
non-effective.
Drying operation mode
1. Press the “MODE” button, select the drying operation mode.
2. By pressing the “ ” or “ ” button, you can set the temperature, the
display changes as you touch the button.
3. By pressing the “SPEED” button, you can select the fan speed from
LOW, MID, HIGH, AUTO.
4. Press the “ON/OFF” button, the air-conditioner starts to operate.
5. Press the “ON/OFF” button again, the air-conditioner stops.
Backlight function
• The remote control has a backlight which can be turned on by press-
ing any button for the convenience of operation in darkness. The
backlight will be automatically turned off if there is no operation
within 10 seconds.
REMOTE CONTROL INSTRUCTIONS
Page 44
Check after Installation
Electrical Safety Check
1. If the supply voltage is as required.
2. If there is any faulty or misconnection in each of the power, signal and
grounding wires.
3. If the grounding wire of the air conditioner is securely grounded.
Installation Safety Check
1. If the installation is secure.
2. If the water drain is smooth.
3. If the wiring and piping are correctly installed.
4. Check that no foreign matter or tools are left inside the unit.
Leak test of the refrigerant
Depending on the installation method, the following methods may be
used to check for suspect leak, on areas such as the four connections of
the outdoor unit and the cores of the cut-off valves and t-valves:
1. Bubble method: Apply or spray a uniform layer of soap water over the
suspected leak spot and observe carefully for bubbles.
2. Instrument method: Checking for leak by pointing the probe of the
leak detector according to the instruction to the suspect points of
leak.
Test Operation
Test Operation preparation
• Verify that all piping and connection cables are well connected.
• Conrm that the valves at the gas side and the liquid-side are
fully open.
• Connect the power cord to an independent power socket.
• Install batteries in remote control.
Test Operation method
1. Turn on the power and push the ON/OFF switch button of the remote
control to start the air conditioner.
2. Select COOL, HEAT(not available on cool-only models), SWING
and other operation modes with the remote control and see if the
operation is ok.
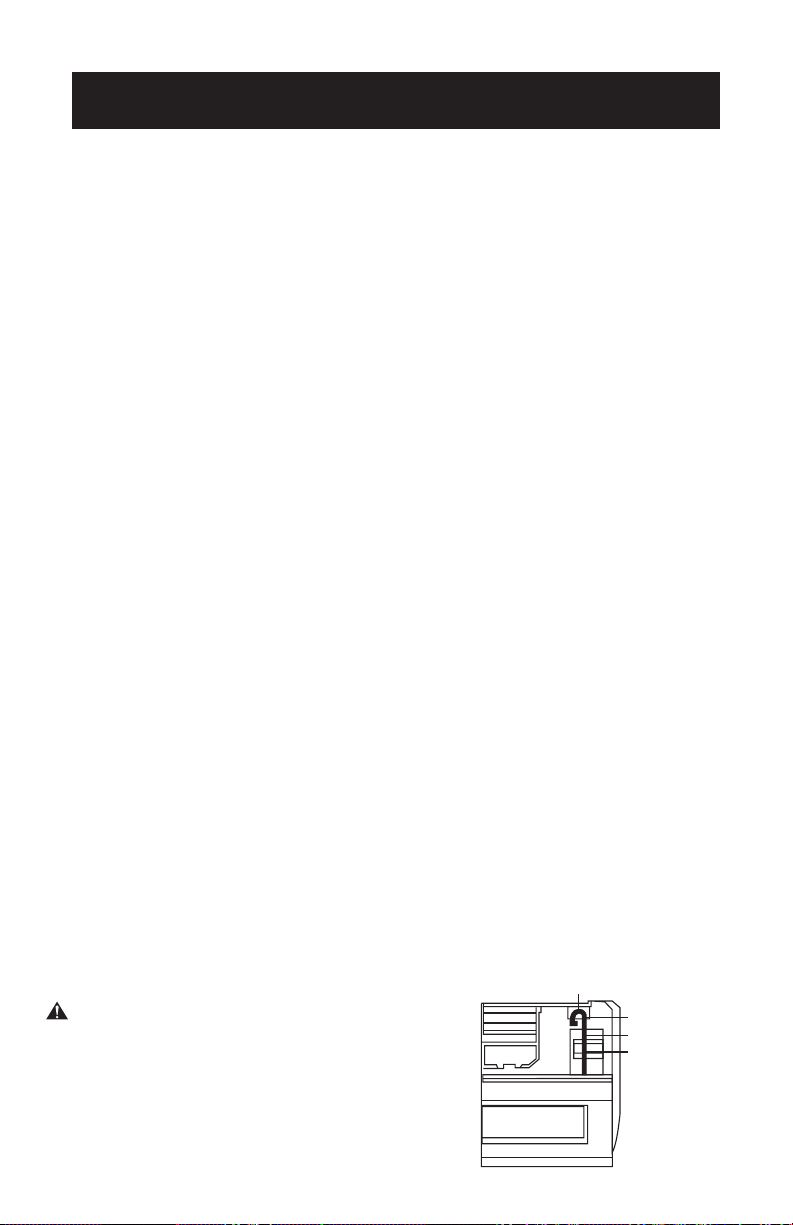
WARNING
1. Open front panel of the indoor.
2. The connector can not touch the terminal
board, and is positioned as shown.
TEST OPERATION
Cable 1
Connector
Cable 2
Terminal board
Page 45
WARNING
• Before the cleaning of the air conditioner, it must be shut down and
the electricity must be cut off for more than 5 minutes, otherwise
there might be the risk of electric shocks.
• Do not wet the air conditioner, which can cause an electric shock.
Make sure not to rinse the air conditioner with water under any
circumstances.
• Volatile liquids such as thinner or gasoline will damage the air
conditioner housing, therefore please clean the housing of air
conditioner only with soft dry cloth and damp cloth moistened with
neutral detergent.
• In the course of usage, pay attention to cleaning the lter regularly, to
prevent the covering of dust which may affect the effect. If the service
environment of the air conditioner is dusty, correspondingly increase
the number of times for cleaning. After removing the lter, do not
touch the louver part of the indoor unit with the nger, so as to avoid
scratching it.
Clean the Panel
• When the panel of the indoor unit is contaminated, clean it gently with
a wrung towel using tepid water below 113°F and do not remove the
panel while cleaning.
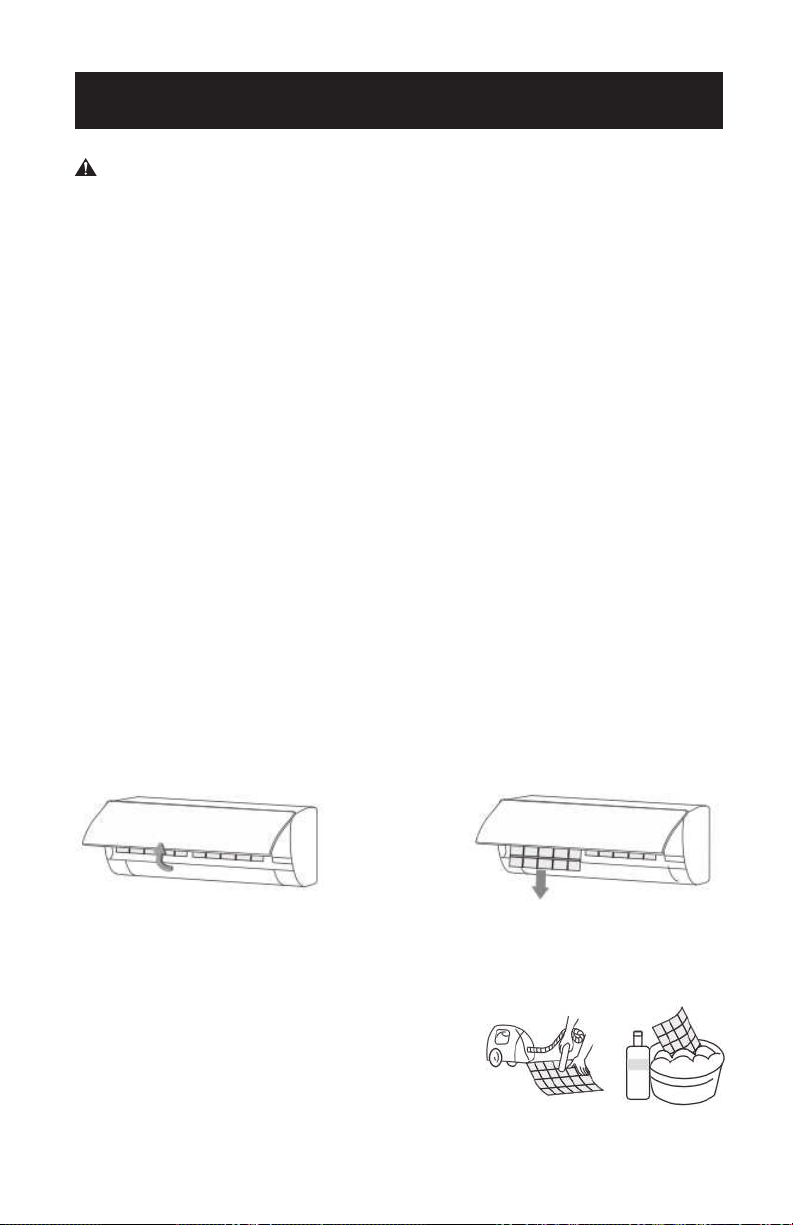
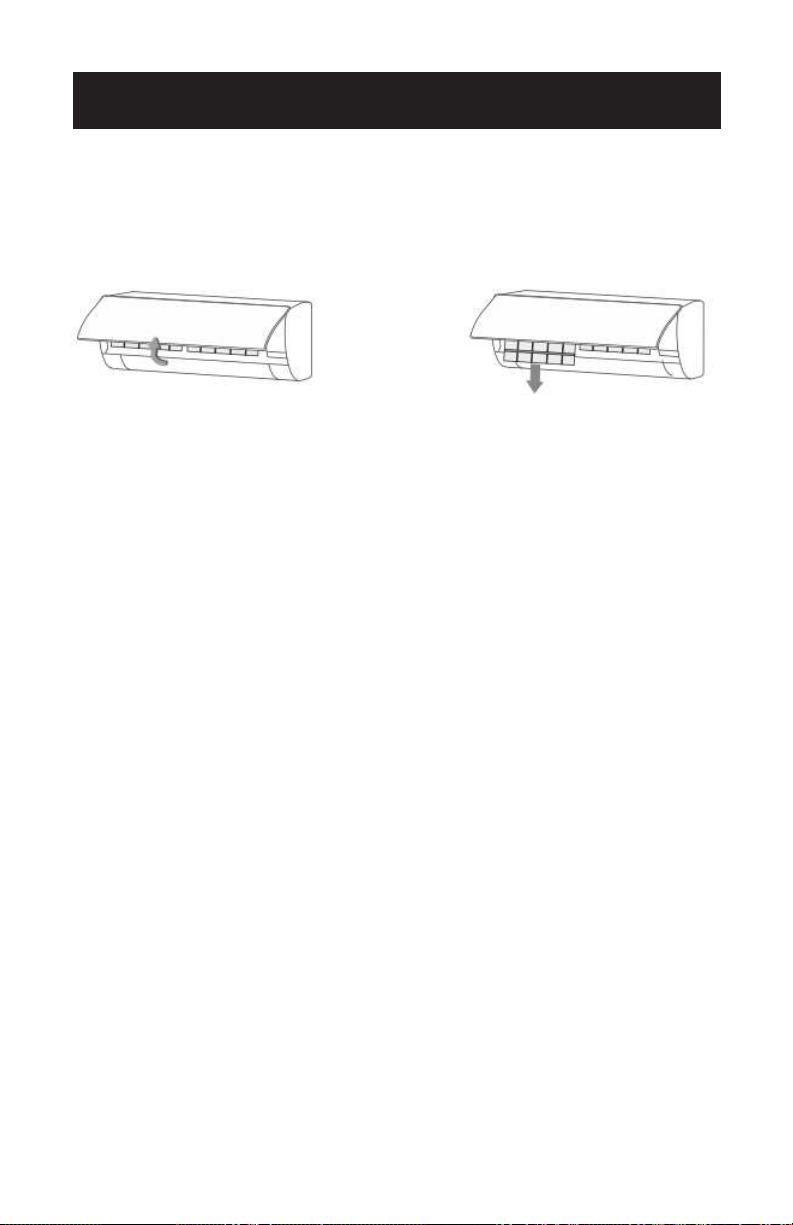
Cleaning the Air Filter
• Remove the air lter.
1. Use both hands to open the panel for an angle from both ends of the
panel in accordance with the direction of the arrow.
2. Release the air lter from the slot and remove it.
• Clean the Air Filter
Use a vacuum cleaner or water to rinse lter,
and if the lter is very dirty (for example with
greasy dirt), clean it with warm water (below
113°F with mild detergent dissolved in, and
then put the lter in the shade to dry in the air.
CLEAN & CARE
Page 46
CLEAN & CARE
Clean the Air Filter
1. Reinstall the dried lter in reverse order of removal, then cover and
lock the panel.
Check Before Use
1. Check whether all the air inlets and outlets of the units are unblocked.
2. Check whether there is blocking in the water outlet of the drain hose,
and immediately clean it up.
3. Check that the ground wire is reliably grounded.
4. Check whether the remote control batteries are installed and whether
the power is sufcient.
5. Check whether there is damage in the mounting bracket of the
outdoor unit, and if any, please contact a local service center.
Maintain After Use
1. Turn off the power source of the air conditioner, turn off the circuit
breaker and remove the batteries from the remote control.
2. Clean the lter and the unit body.
3. Remove the dust and debris from the outdoor unit.
4. Check whether there is damage in the mounting bracket of the
outdoor unit, and if any, please contact a local service center.
TROUBLESHOOTING & WARRANTY
TROUBLE POSSIBLE CAUSE
Air conditioner can not
operate at all.
• Has the power been shut down?
• Is the wiring loose?
• Is voltage too high or too low ?
(measured by professionals)
• Does it reach the set time for start up?
• Does the circuit protection device trip?
Remote control is not
available.
• Is the remote control out of effective dis-
tance to the indoor unit?
• Are there any obstructions between the
controller and the signal receptor?
• Is the battery exhausted?
Cooling (Heating) efciency
is not good.
• Is the setting temperature suitable?
• Is the air inlet or outlet obstructed?
• Is indoor fan speed set at low speed?
• Is there any heat source in your room?
• Is the air lter dirty?
Indoor unit does not operate
Immediately when the air
conditioner is restarted.
If the air conditioner is turned on immediately
after it is turned off, the protective delay
switch will delay the operation for
3 to 5 minutes.
There is unusual smell
blowing from the outlet
after operation is started.
The air conditioner itself does not have an
undesirable odor. If there is an odor, it may be
due to accumulation of the odor in the
environment. Please clean the air lter or
activate the cleaning function.
There is sound of running
water during the running
of air conditioner.
Sometimes the “hissing” sound of running
water can be heard. This is the sound of the
ow of the refrigerant, not a malfunction.
A slight “click” sound is
heard at the of start-up or
shut-down.
Due to temperature changes, panel and other
parts will swell, causing the sound of friction.
This is normal, not a fault.
During the cooling
operation, the indoor unit
outlet sometimes will blow out
mist.
This is because the indoor air is cooled
rapidly. After it runs for some time, the indoor
temperature and humidity will be reduced
and the mist will disappear.
WARNING - Immediately stop all operations and turn off the power
supply, contact a Service center locally in following
situations.
• Shrill sound is heard or an unpleasant odor is emitted during the
operation.
• There is an abnormal heat in power supply cord and power plug.
• Accidentally pour impurities or water into the machine or the remote
control.
• Air switch or protection switch often breaks.
Page 47

Page 48
TROUBLESHOOTING & WARRANTY
BEFORE YOU CALL FOR SERVICE
IF THE AIR CONDITIONER FAILS TO OPERATE:
A) Check to make sure that the air conditioner is plugged in securely. If it is not,
remove the plug from the outlet, wait 10 seconds and plug it in again securely.
B) Check for a blown circuit fuse or a tripped main circuit breaker. If these seem
to be operating properly, test the outlet with another appliance.
C) Check if electricity to the main power switch of the unit appears to be
working.
D) Make sure that both units are in the upright position.
IF NONE OF THE ABOVE SOLVES THE PROBLEM, CONTACT A QUALIFIED
TECHNICIAN.
DO NOT TRY TO ADJUST OR REPAIR THE AIR CONDITIONER
YOURSELF.
CUSTOMER SERVICE
IMPORTANT
DO NOT RETURN THIS PRODUCT TO THE STORE
If you have a problem with this product, please contact the
Commercial Cool Customer Satisfaction Center at
844-299-0879 or [email protected]
DATED PROOF OF PURCHASE, MODEL # AND SERIAL #
REQUIRED FOR WARRANTY SERVICE
WARNING:

Page 49
TROUBLESHOOTING & WARRANTY
LIMITED WARRANTY
Any repair, replacement, or warranty service,
and all questions about this product should be
directed to Commercial Cool at 844-299-0879
from the USA or Puerto Rico.
W Appliance Co warrants to the original purchaser
that the product will be free from defects in material,
parts and workmanship for the period designated for
this product. The warranty commences the day the
product is purchased and covers up to a period of
5 years limited compressor /2 years limited parts
(manufacturing defects only).
W Appliance Co agrees that it will, at its option,
replace the defective product with either a new
or remanufactured unit equivalent to your original
purchase during the warranty period.
Exclusions: This warranty does not apply to the
below:
1. If the appearance or exterior of
the product has been damaged or
defaced, altered or modified in design or
construction.
2. If the product original serial number
has been altered or removed or cannot
be readily determined.
3. If there is damaged due to power line
surge, user damage to the AC power
cord or connection to improper voltage
source.
4. If damage is due to general misuse,
accidents or acts of God.
5. If repair attempts are done by
unauthorized service agents, use of
parts other than genuine parts or parts
obtained from persons other than
authorized service companies.
6. On units that have been transferred
from the original owner.
7. On products that have been purchased
as refurbished, like new, second-hand, in
a “As-Is” or “Final Sale” terms.
8. To products used in a commercial or
rental setting.
9. To products used in settings other than
ordinary household use or used other
than in accordance with the provided
instructions.
10. To damages for service calls for
improper installations.
11. Transportation and shipping costs
associated with the replacement of the
unit.
12. Service calls to instruct you how to use
your product.
13. Service calls to repair or replace the
house fuse, reset the circuit breaker or
correct the wiring in the house.
REPAIR OR REPLACEMENT AS PROVIDED UNDER
THIS WARRANTY IS THE EXCLUSIVE REMEDY OF
THE CUSTOMER; W APPLIANCE CO. SHALL NOT BE
LIABLE FOR ANY INCIDENTAL OR CONSEQUENTIAL
DAMAGES FOR BREACH OF ANY EXPRESS OR
IMPLIED WARRANTY ON THIS PRODUCT, EXCEPT
TO THE EXTENT PROHIBITED BY APPLICABLE LAW.
ANY IMPLIED WARRANTY OF MERCHANTABILITY
OF FITNESS FOR A PARTICULAR PURPOSE ON THIS
PRODUCT IS LIMITED TO THE DURATION OF THE
WARRANTY.
Some states do not allow the exclusion or limitations
of incidental or consequential damages, or limitations
on how long the warranty lasts. In these cases the
above exclusions or limitations may not apply to you.
This warranty gives you specific legal rights and you
may also have other rights which vary from state to
state.
Obtaining Service: To obtain service, product
literature, supplies or accessories please call
844-299-0879 to create a ticket for exchange/repair.
Please make sure to provide the date of purchase,
model number and a brief description of the problem.
Our customer service representative
will contact you or send detailed return instructions.
W Appliance Co does not warrant that the appliance will work
properly in all environmental conditions, and makes no warranty
and representation, either implied or expressed, with respect
to the quality, performance, merchantability, or fitness for a
particular purpose other than the purpose identified within this
user’s manual. W Appliance Co has made every eort to ensure
that this user’s manual is accurate and disclaims liability for any
inaccuracies or omissions that may have occurred. Information
in this user’s manual is subject to change without notice and
does not represent a commitment on the part of W Appliance
Co, we reserve the right to make improvements to this user’s
manual and/or to the products described in this user’s manual
at any time without notice. If you find information in this manual
that is incorrect, misleading, or incomplete, please contact us at
844-299-0879.
W Appliance Co.
1356 Broadway
New York, NY 10018

Page 50
© 2021 W Appliance Company. All Rights Reserved.
1356 Broadway, New York, NY 10018
March 2021