Before you start
You should know about the following features and components before you use your range for the first time.
Display mode
Sleep
After 2 minutes of inactivity (or 1 minute when the oven is in standby mode), the control panel enters Sleep mode. In Sleep mode, the control panel stays inactive until it is reactivated by the user.
Wake-Up
• To activate the control panel, touch the lower area of the screen to wake it up. User preferences are available in this mode including the timer and/or Child Lock.
Clock
It is important to set the clock correctly to ensure automatic features work properly. This product supports two time formats: 12-hour and 24-hour.
To set the clock time
1. Press the Settings button.
2. Press to select Set Time.
3. Tap OK. Press to set the current time and tap OK. Display the AM/PM option, and then choose by pressing .
4. Tap OK to confirm the settings.
To change the time format
1. Press the Settings button.
2. Press to select Time Format.
3. Tap OK and then press to select 24 hr / 12 hr format.
4. Tap OK.
NOTE You can set/change the clock or the kitchen timer before you start a cooking mode or while most cooking modes are operating. However, you cannot set or change the time if a time based function is operating (Time Bake, for example) or the Sabbath option is enabled.
Kitchen timer
The kitchen timer gives you an extra timer you can use to time cooking tasks such as boiling eggs. It does not, however, start or stop any cooking operation. You can set the timer from 1 minute to 9 hours and 59 minutes.
1. Press the Timer button.
2. Press to set the timer.
3. When done, tap OK. To cancel the Timer settings, press the Timer button again for 3 seconds.
4. When the set time elapses, the oven beeps and displays the “Time is up” message. Tap the OK button to delete the message.
Oven vent/Cooling vent
Both the oven vent and the cooling vent are located at the back of the oven range. Proper air circulation prevents combustion problems and ensures good performance.
• Do not block the vent or its surroundings with objects.
• Use caution when placing items near the vent. Hot steam can cause them to overheat or melt.
• Make sure that the oven vent cover sits securely on the cooktop. You can verify that the oven vent cover is in the correct position by confirming that the tabs on the bottom side of the oven vent cover fit into the corresponding slots on the cooktop.
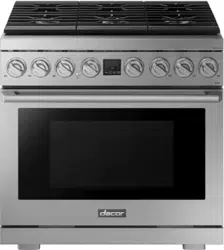
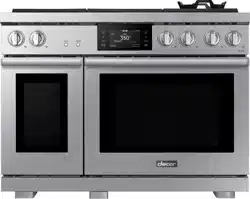
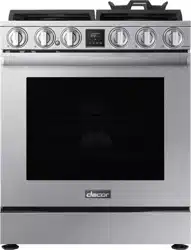
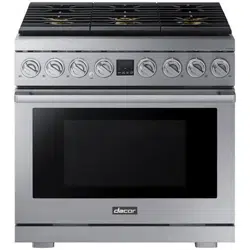
Gas range
- Step 1 Put all ingredients into a cooking container (pan, pot, etc.).
- Step 2 Place the container on a surface burner.
- Step 3 Ignite the surface burner.
Cookware
Requirements
• Flat bottom and straight sides
• Tight-fitting lid
• Well-balanced with the handle weighing less than the main portion of the pot or pan.
Material characteristics
• Aluminum: An excellent heat conductor. Some types of food may cause the aluminum to darken. However, anodized aluminum cookware resists staining and pitting.
• Copper: An excellent heat conductor but discolors easily.
• Stainless steel: A slow heat conductor with uneven cooking performance but is durable, easy to clean, and resists staining.
• Cast-Iron: A poor conductor but retains heat very well.
• Enamelware: Heating characteristics depend on the base material.
• Glass: A slow heat conductor. Use only glass cookware that is specified for range top cooking or oven use.
Wok ring
Woks are often used for stir frying, pan frying, deep frying, and poaching. The provided Wok ring supports 12" to 14" woks.
1. Turn off all burners, and wait until the grates completely cool down.
2. Place the Wok ring on either side grate.
3. Put a wok on the Wok ring. Make sure the wok settles securely on the wok ring.
4. Turn on the burner, and adjust the flame level as appropriate.
CAUTION
• Do not remove the Wok ring until the cooktop grates, surfaces, and Wok ring completely cool down.
• When using the cooktop or oven, the Wok ring on the cooktop may become very hot. Use oven gloves when placing or removing the Wok ring.
• Do not use cookware with a flat bottom or with a diameter less than the wok ring diameter. The cookware may tip over.
• Do not use an oversized wok. The burner flames may spread out, causing damage nearby.
• Use only the supplied Wok ring. This cooktop is not compatible with other manufacturers' wok rings or Wok rings.
• This cooktop is not designed to flame food.
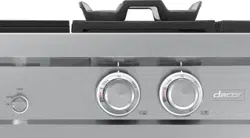
Gas burners
Each burner has a corresponding knob that enables you to set the flame level from LO to HI. In addition, each burner has a Lite setting. Turning a knob to Lite ignites the corresponding burner. The burner indicators are located above the corresponding knob and show which burner the knob controls. Each burner is designed for specific cooking purposes.
Ignition
Make sure all surface burners are properly installed.
1. Push in and turn the control knob to the Lite position. You will hear a "clicking" sound indicating the electronic ignition system is working properly.
2. After the surface burner lights, turn the control knob to shift it out of the Lite position and turn off the electronic ignition system.
3. Turn the control knob to adjust the flame level.
Manual ignition
You can ignite the burner manually in case of a power failure. Use caution when doing this.
1. Hold a long gas grill lighter to the surface burner you want to light.
2. Push in and turn the control knob for that burner to the Lite position. Turn on the grill lighter to ignite the burner.
3. After the burner is lit, turn the control knob to adjust the flame level.