Loading ...
Loading ...
Loading ...
Rinse Aid Dispenser
A measured amount of rinse aid is released during the fi nal rinse. As with detergent, the amount
of rinse aid needed for your dishes depends on the hardness of the water in your area. Too much
rinse aid can result in lather or foaming and can cause cloudiness or streaks on your dishes. If
the water in your area is very soft, you may not need rinse aid. If you do, you can dilute the rinse
aid with an equal amount of water.
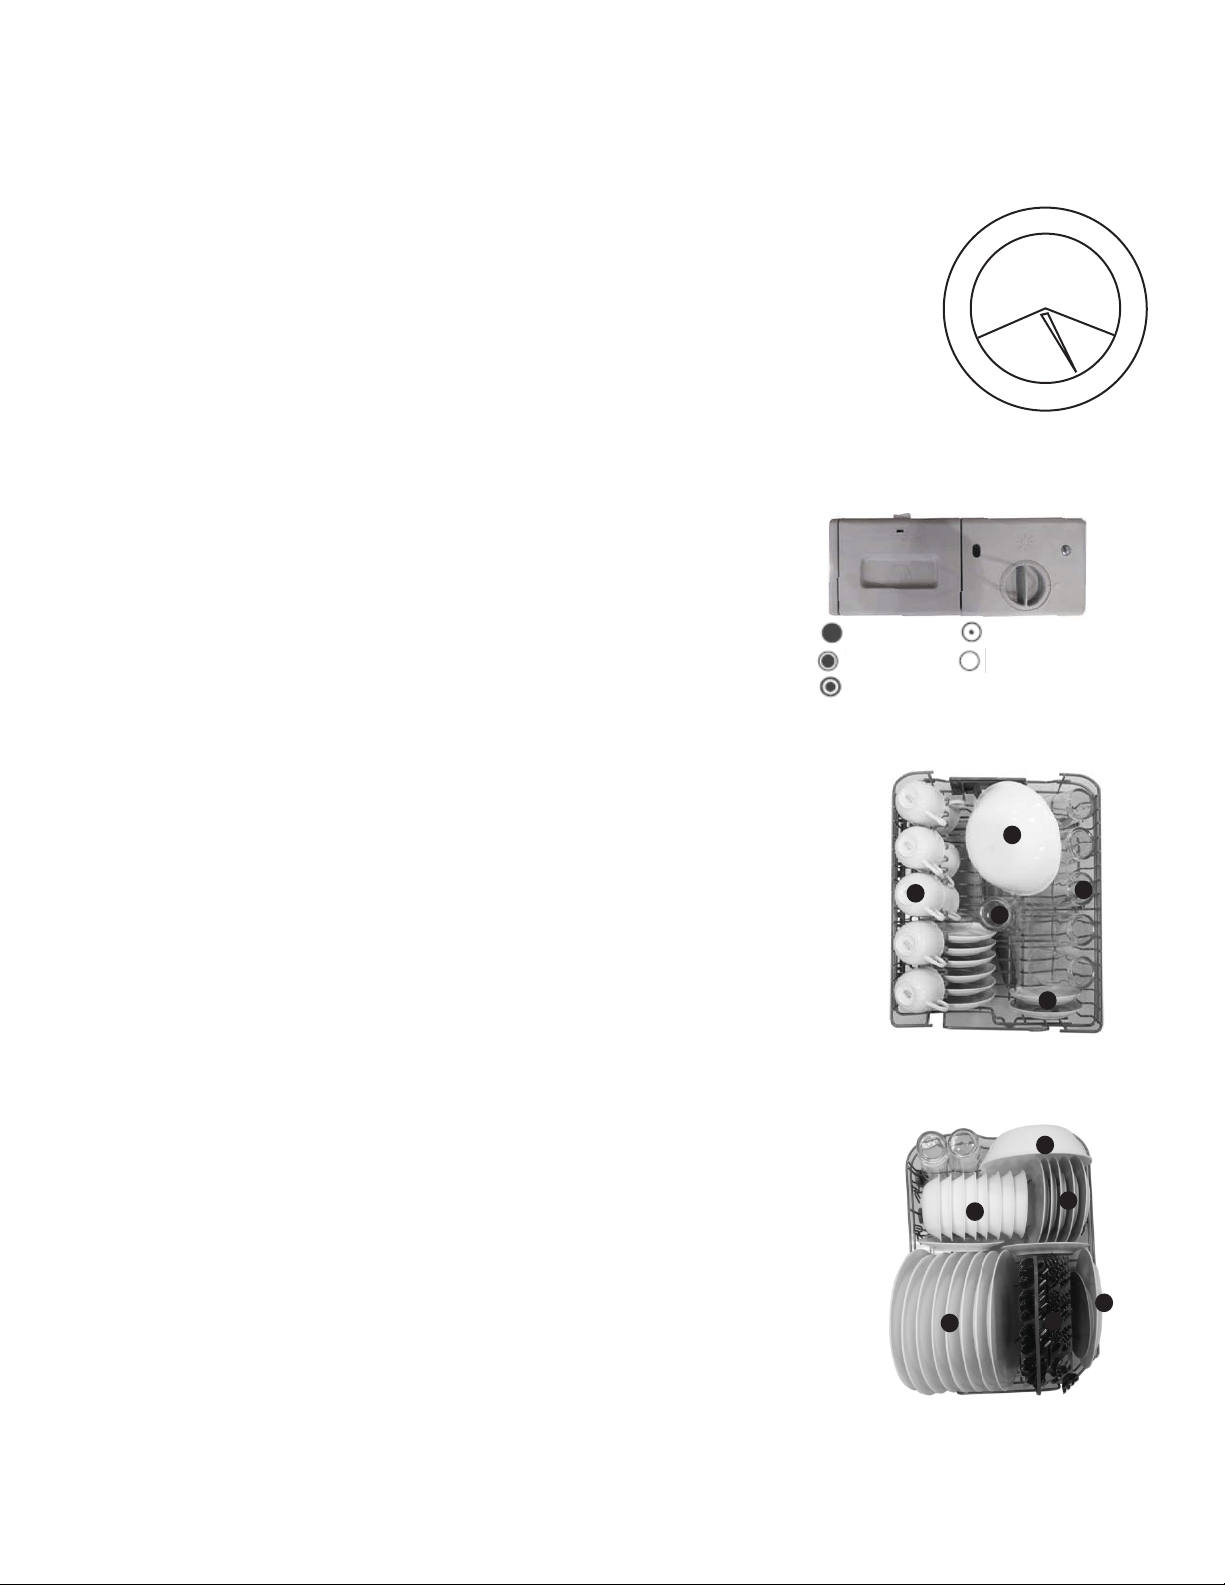
The rinse aid dispenser has four (4) settings. Always start with the dispenser set on “3.” If spots
and poor drying are problems, increase the amount of rinse aid dispensed by removing the dis-
penser lid and rotating the dial to “4.” Increase the dose of rinse aid if there are drops of water or
lime spots on the dishes after washing. Reduce it if there are sticky white stains on your dishes or
a blue tinged fi lm on glassware or knife blades.
Operating Instructions
When to Refi ll the Rinse Aid Dispenser:
If you have a rinse aid warning light, a snowfl ake symbol will appear in the display
screen when the rinse aid dispenser needs to be refi lled.
If there is no rinse aid warning light on the control panel, you can judge the amount
of rinse aid by the following means. The black dot on the rinse aid dispenser indi-
cates the amount of rinse aid in the dispenser. As the rinse aid diminishes, the size
of the black dot decreases. You should never let the rinse aid get below the 1/4 full
level. As the rinse aid diminishes, the size of the black dot on the rinse aid level
indicator changes.
Loading Dishwasher Racks
For best performance, follow these loading guidelines. Features and appearance of
racks and silverware baskets may vary from your model.
How to use the Upper Rack:
The upper rack is designed to hold more delicate and lighter dishware, such as,
glasses, coffee and tea cups and saucers, as well as plates, small bowls and lightly
soiled shallow pans. Position the dishes and cookware so that they do not get
moved by the spray of water. The upper rack can be adjusted for height by moving
the other wheels (that are already on the rack) into the rails.
1. Cups
2. Saucer
3. Glasses
How to use the Lower Rack:
We recommend that you place large items in the lower rack - pots, pans, lids,
serving dishes and bowls, as shown. It is preferable to place serving dishes and
lids on the side of the racks in order to avoid blocking the rotation of the top spray
arm. Pots, serving bowls etc., must always be placed top down. Deep pots should
be slanted to allow water fl ow. The bottom rack features fold down tine rows so that
larger or more pots and pans can be loaded.
4. Serving Bowl
5. Bowl
6. Small Plates
7. Serving Plate
8. Large Plates
9. Silverware Basket
4
3
3
2
1
4
5
6
7
8
9
6
1
2
3
4
MAX
Full 1/4 Full(Refill)
3/4 Full Empty
1/2 Full
Loading ...
Loading ...
Loading ...