Loading ...
Loading ...
Loading ...
9
OPERATIONS MANUAL
WORKTOPS/UNDERCOUNTERS & SANDWICH UNITS
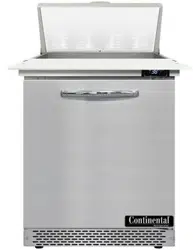
FIGURE 6: Hinge Adjustment
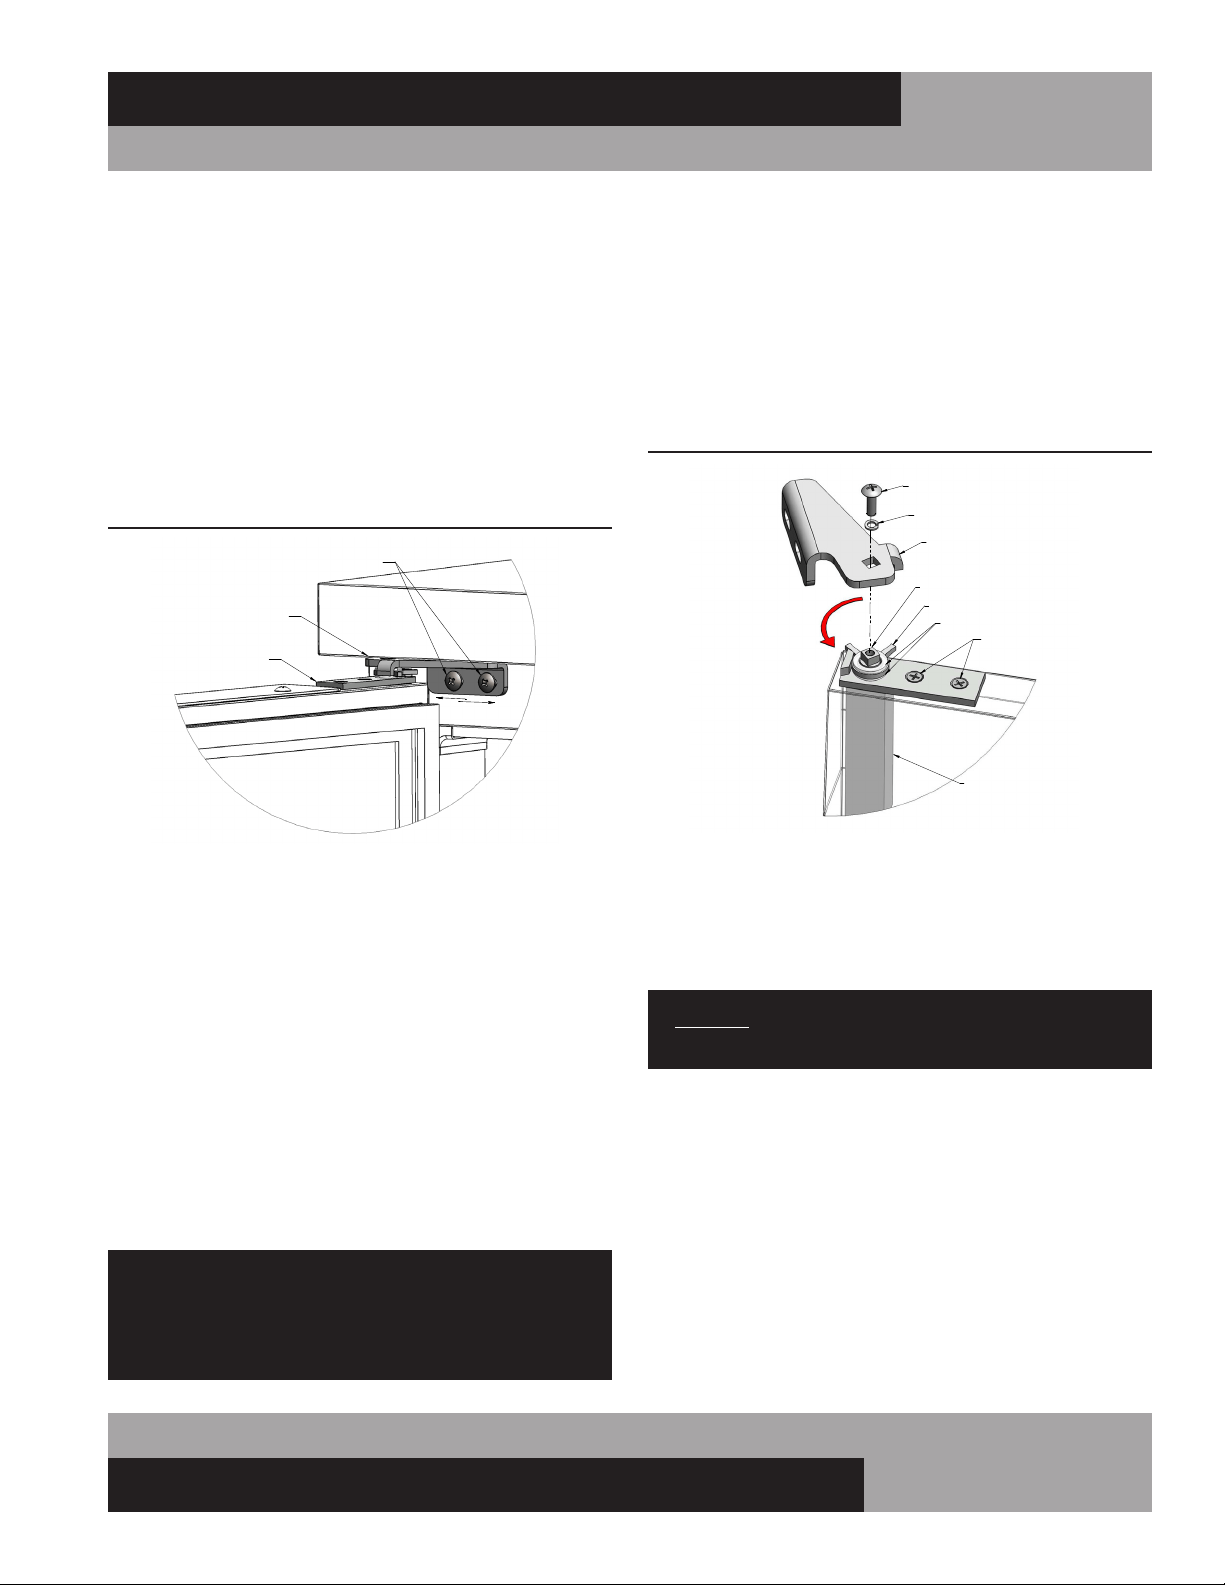
FIGURE 7: Spring-Loaded Hinge Mounting
DOOR ADJUSTMENT
All doors are aligned at the factory, however vibration during
transit may cause them to shift and adjustment may be neces-
sary. If a door requires realignment, carefully open the door
(90°) and loosen, but do not remove the mounting screws
securing both the top (see Figure 6) and bottom (see Figure
8) hinge brackets to the cabinet. Move the door to the desired
position by hand or by gently tapping on the edge with a rubber
mallet. Hold the door firmly in place and tighten all mounting
screws securely, above and below the door. Check alignment
and repeat adjustment if necessary.
HINGE TENSION ADJUSTMENT
The self-closing doors on your unit have a spring-loaded hinge
cartridge concealed in the door (see Figure 7) with a hold-open
feature and a cushioned stop. When the door is fully opened
(115°) the hinge should be tensionfree. When the door is moved
between the open and closed position, the spring-loaded hinge
will automatically rotate the door toward the closed position. For
proper operation, self-closing doors must be installed with the
spring-loaded hinge mechanism set to apply tension in the
proper direction (see Figure 8).
To adjust spring tension, Open the door fully (115°) so it stays
in position when released. Remove the mounting screws secur-
ing the cartridge bracket to the cabinet (see Figure 6). The
bracket should stay in position when released, but if it is moved
or bumped, it may snap into the closed position.
THE HINGE CARTRIDGE IS SPRING LOADED AND MAY
SNAP BACK ON FINGERS WHEN BRACKET IS LOOSE.
WEAR WORK GLOVES AND USE CAUTION WHEN
REMOVING MOUNTING SCREWS!!
Use a hinge cartridge bracket as a wrench by positioning it
upside down with the square hole over the square hub on the
spring mechanism (see Figure 7). Carefully turn the square hub
on the cartridge in the direction shown to tighten the spring.
The mechanism should snap to a neutral position. Remount the
hinge as shown and repeat the procedure described above until
the hinge snaps back when it is moved from the open-door posi-
tion towards the closed-door position.
REMOVAL AND REPLACEMENT OF DOORS
If you need to remove a door from your cabinet, first identify
the location of the spring-loaded hinge cartridge (see Figure 8).
Depending on the age of your cabinet, the cartridge is located
either on the top or the bottom of the door.
CAUTION: THE HINGE CARTRIDGE IS SPRING LOADED
AND THE BRACKET MAY SNAP TOWARDS THE DOOR!
For doors with spring cartridge on the top: Open the door fully
(115°) and remove the mounting screws (see Figure 6) secur-
ing the hinge cartridge bracket to the cabinet above the door.
(The bracket should stay in the open position, but if it is moved
it may snap closed). Pick the door straight up, being careful not
to bump the cartridge bracket, and lift it off the pivot pin bracket
below the door. To reinstall a door, reverse this procedure and
follow the instructions above to set the hinge tension and adjust
the door properly.
Loading ...
Loading ...
Loading ...