Loading ...
Loading ...
Loading ...
6
3
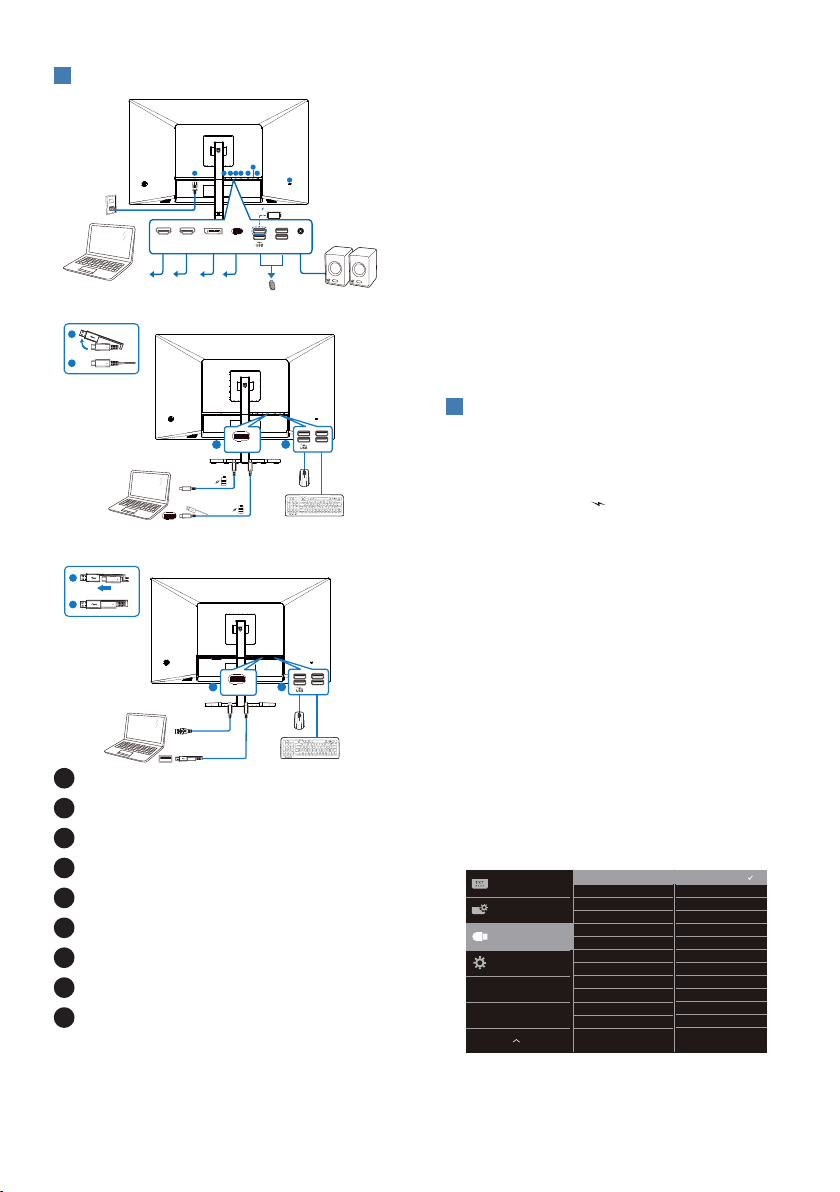
Connecting to your PC
USB C-C
USB A-C
OR
USB Type-C
OR
USB Type-A
a-1
a-2
a-1
a-2
a
b
a
b
HDMI 1 HDMI 2 DP USBC
AUDIO
OUT
1 2 3 4 5 6
7
8
9
USB
USB
USBC
USB
USBC
Fast Charger
1
AC power input
2
HDMI 1 input
3
HDMI 2 input
4
DisplayPort input
5
USB C
6
USB downstream/USB fast charger
7
USB downstream
8
Audio Out
9
Kensington anti-theft lock
Connect to PC
1. Connect the power cord to the back
of the monitor rmly.
2. Turn o your computer and unplug
its power cable.
3. Connect the monitor signal cable to
the video connector on the back of
your computer.
4. Plug the power cord of your
computer and your monitor into a
nearby outlet.
5. Turn on your computer and monitor.
If the monitor displays an image,
installation is complete.
4
USB charging
This display has USB ports capable of
standard power output including some
with USB charging function (identifiable
with power icon
USB
). You can use these
ports to charge your Smart phone or
power your external HDD, for example.
The display must be powered ON at all
times to be able to use this function.
Some select Philips displays may not
Power or Charge your device when
it enters to “Sleep/Standby” mode
(White power LED blinking). In that
case, please enter to OSD Menu and
select “USB Standby Mode”, then,
turn the function to “ON” mode
(default=OFF). This will then keep the
USB power and charging functions
active even when the monitor is in
sleep/standby mode.
Loading ...
Loading ...
Loading ...