Loading ...
Loading ...
3
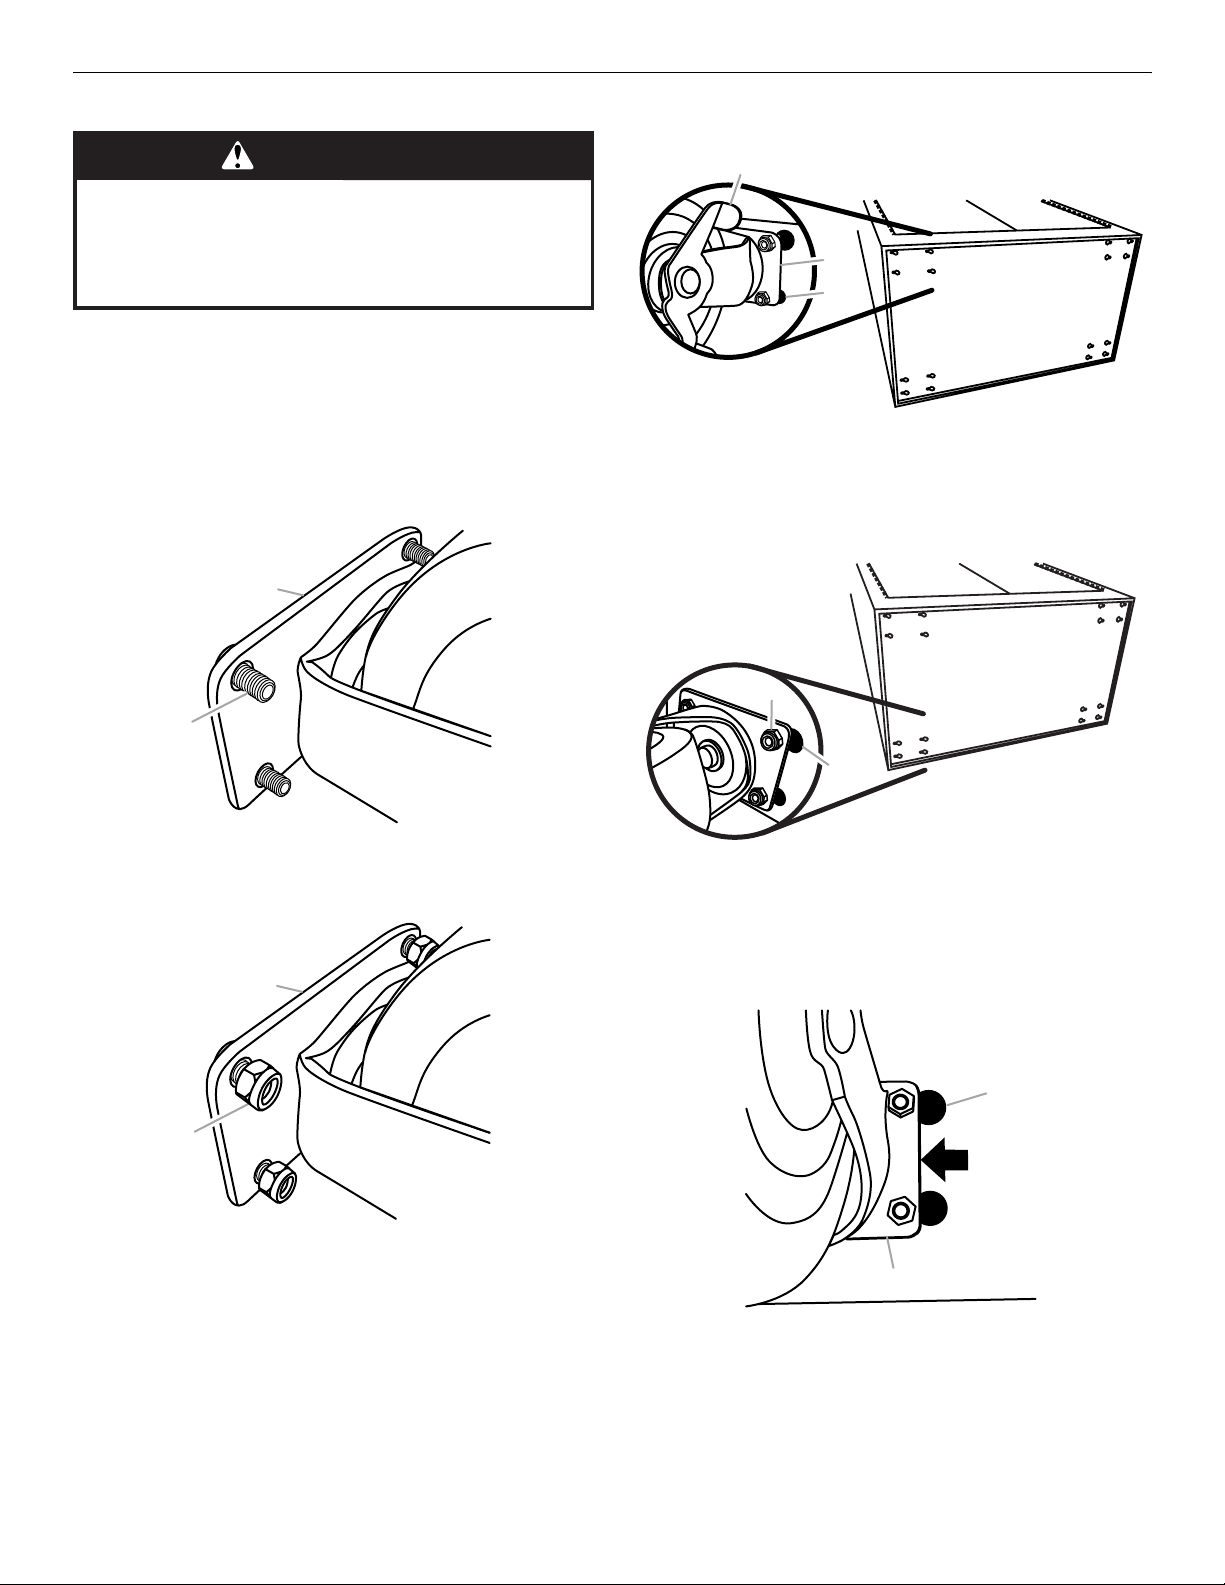
Install the Casters
1. Close and lock the cabinet/locker doors.
NOTE: If you need to open the cabinet/locker doors during
caster assembly, open them slowly and do not put any weight on
the open doors. This avoids damage to the hinges.
2. Using two or more people, place the cabinet/locker on its back
using the cardboard corners to cushion the cabinet/locker.
Dispose of/recycle the cardboard bottom.
3. Insert a carriage-head bolt into the hole in each corner of the
caster plate, so that the head of the bolt will be toward the
bottom of the cabinet.
4. Thread a self-locking nut onto each bolt and hand tighten.
5. Repeat steps 3 and 4 for the other three casters.
6. Position a rigid caster plate, with the brakes toward the inside,
over a group of keyhole slots at the front of the cabinet. Insert the
four bolts into the wide end of the keyhole slots.
7. Repeat Step 6 for the other rigid caster.
8. Position a swivel caster plate over a group of keyhole slots at the
back of the cabinet. Insert the four bolts into the wide end of the
keyhole slots.
9. Repeat Step 8 for the other swivel caster.
10. Slide each caster plate toward the outside of the cabinet, until
the caster is firmly seated in the narrow end of the keyhole slot as
shown.
IMPORTANT: The bolt must be pushed to the very end of the
slot. It may be necessary to rotate the bolts to allow them to slide
freely into the narrow end of the slot.
A. Caster plate
B. Carriage-head bolt
A. Caster plate
B. Self-locking nut
WARNING
Excessive Weight Hazard
Use two or more people to move, assemble or install
cabinet or locker.
Failure to do so can result in back or other injury.
A
B
A
B
A. Brake
B. Caster plate
CKeyhole slot
A. Nut and bolt B. Keyhole slot
A. Keyhole slot
B. Caster plate
A
C
B
A
B
A
B
Loading ...
Loading ...
Loading ...