Loading ...
Loading ...
Loading ...
CLEANING
• Clean engine, battery, seat, finish, etc.
of all foreign matter.
• Keep finished surfaces and wheels free
of all gasoline, oil, etc.
• Protect painted surfaces with auto-
motive type wax.
We do not recommend using a garden
hose or pressure washer to clean your
tractor unless the engine and transmis-
sion are covered to keep water out. Water
in engine or transmission will shorten the
useful life of your tractor. Use compressed
air or a leaf blower to remove grass,
leaves and trash from tractor and mower.
& WARNING: TO AVOID SERIOUS INJURY, BEFORE PERFORMING ANY SER-
VICE OR ADJUSTMENTS:
1. Depress clutch/brake pedal fully and set parking brake.
2. Place gearshift lever in neutral (N) position.
3. Place attachment clutch in "DISENGAGED" position.
4. Turn ignition key to "STOP" and remove key.
5. Make sure the blades and all moving parts have completely stopped.
6. Disconnect spark plug wire from spark plug and place wire where it cannot
come in contact with plug.
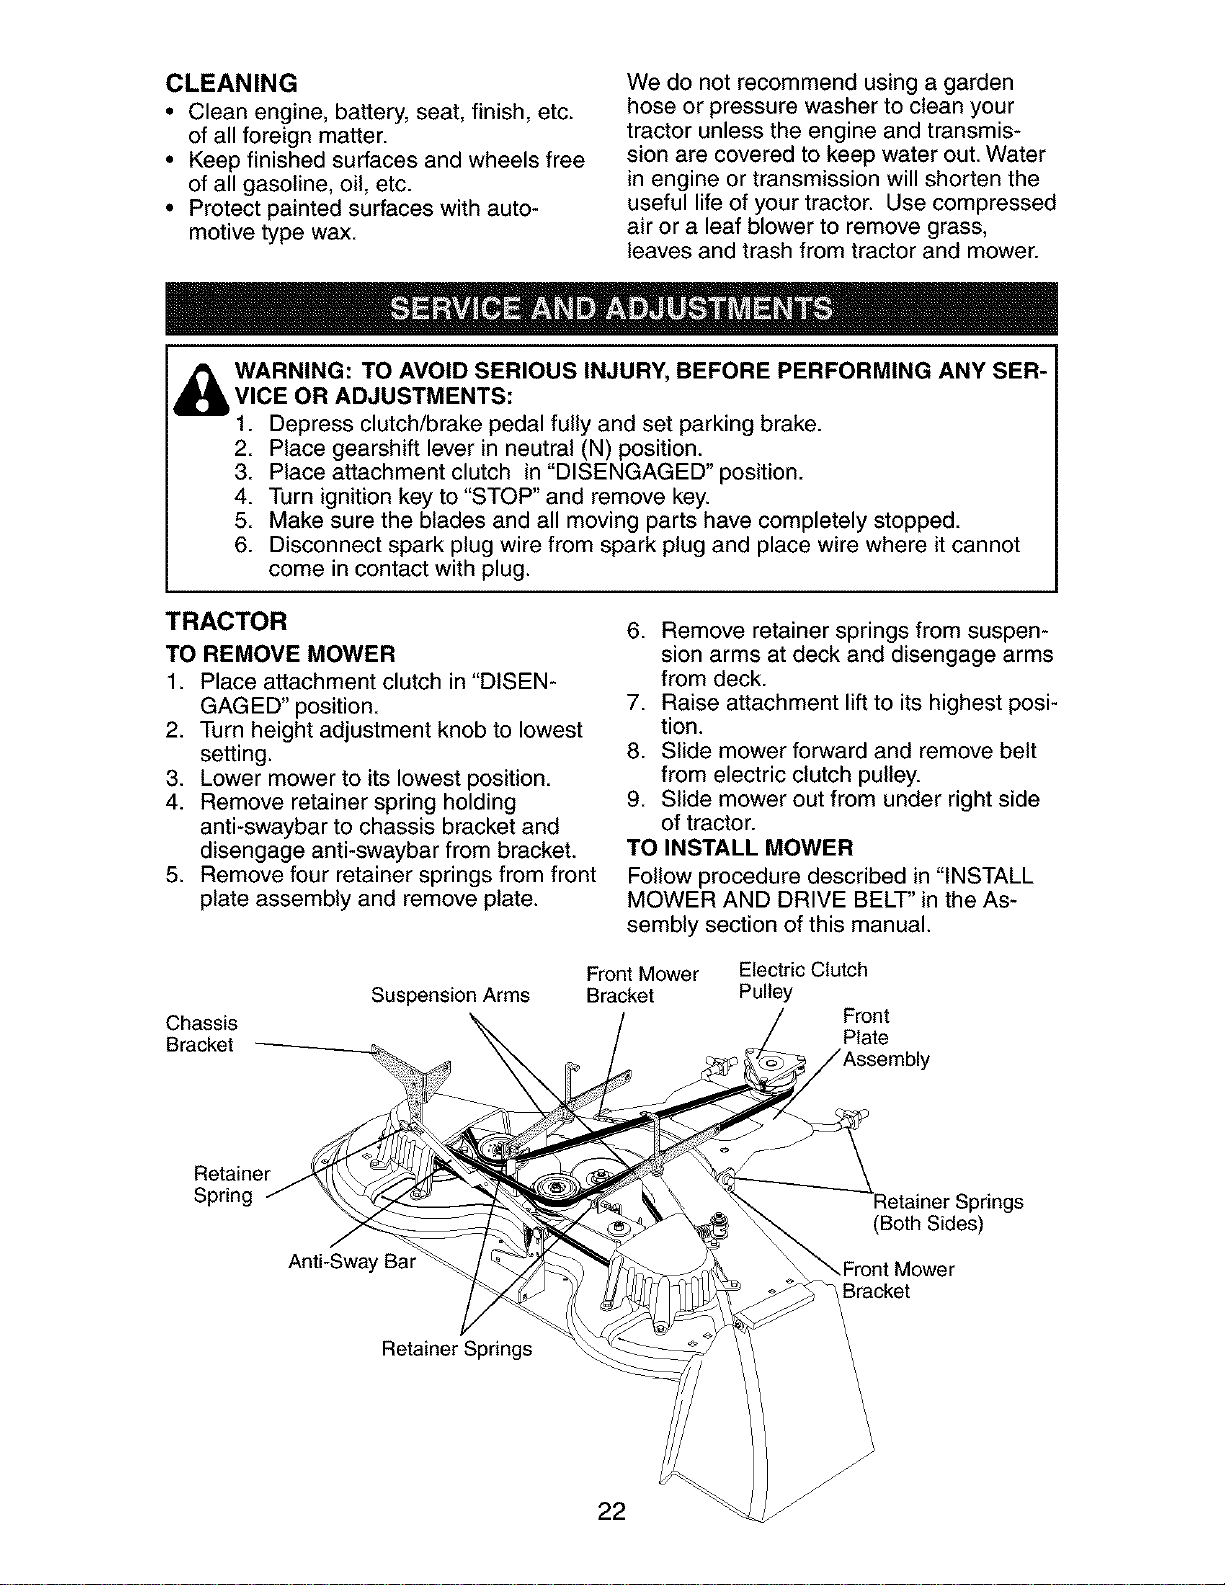
TRACTOR
TO REMOVE MOWER
1. Place attachment clutch in "DISEN-
GAGED" position.
2. Turn height adjustment knob to lowest
setting.
3. Lower mower to its lowest position.
4. Remove retainer spring holding
anti-swaybar to chassis bracket and
disengage anti-swaybar from bracket.
5. Remove four retainer springs from front
plate assembly and remove plate.
6. Remove retainer springs from suspen-
sion arms at deck and disengage arms
from deck.
7. Raise attachment lift to its highest posi-
tion.
8. Slide mower forward and remove belt
from electric clutch pulley.
9. Slide mower out from under right side
of tractor.
TO INSTALL MOWER
Follow procedure described in "INSTALL
MOWER AND DRIVE BELT" in the As-
sembly section of this manual.
Chassis
Bracket
Suspension Arms
Front Mower Electric Clutch
Bracket Pulley
Front
Plate
Retainer
Spring
Anti-Swa_
etainer Springs
(Both Sides)
Bracket
Retainer Springs
22
Loading ...
Loading ...
Loading ...