Loading ...
Loading ...
Loading ...
Ifyourtractorhitchhas8"to 10"groundclearance,
usethe instructionsbelowto assemblethesweeper
hitchbrackets.Ifyourtractorhitchhasmorethan10"
groundclearance,referback topage5fortheassem-
blyofthesweeperhitchbrackets.
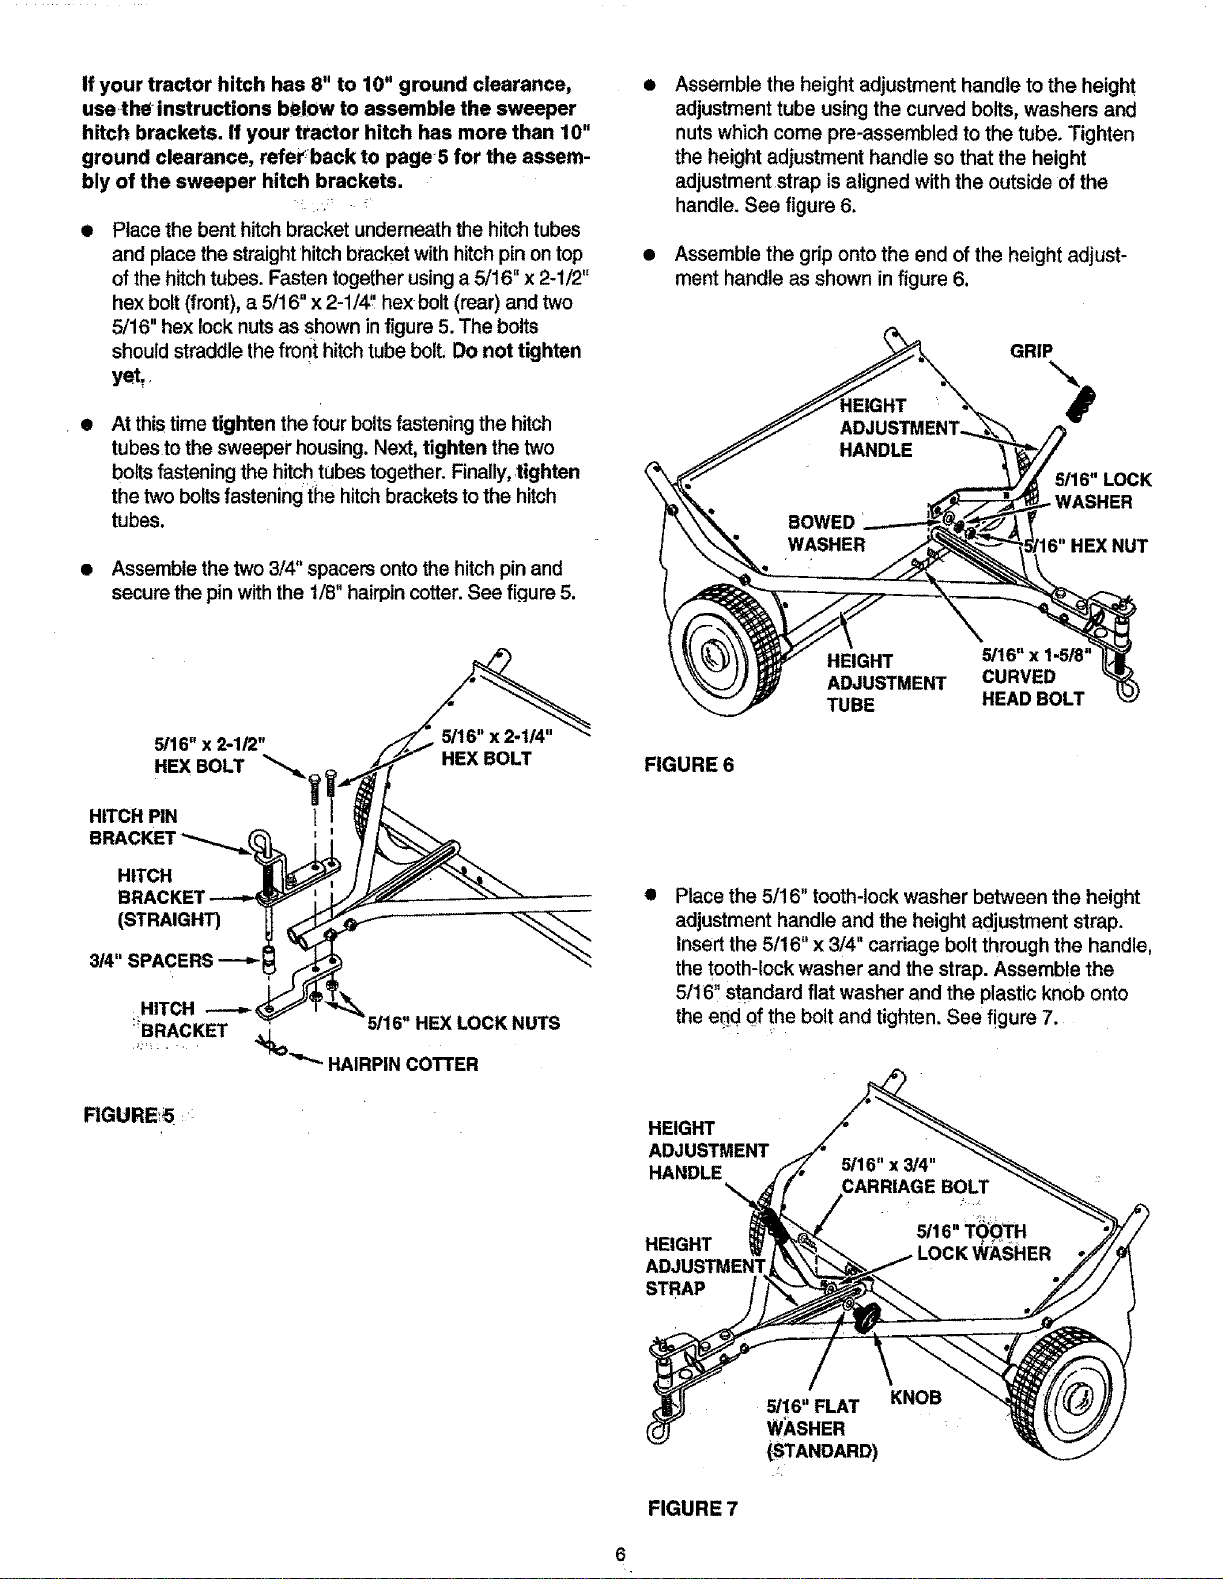
• Place the bent hitch bracket underneaththe hitch tubes
and place the straight •hitch bracket with hitch pin on top
of the hitch tubes. Fasten together using a 5/16" x 2-1/2"
hex bolt (front), a 5/16" x 2-1/4!!hex bolt (rear) and two
5/16" hex lock nuts as shown in figure 5. The bolts
should straddle the front hitch tube bolt, Do not tighten
yet.
• •
At this time tighten the four bolts fastening the hitch
tubes tothe sweeper housing.Next, tighten the two
boltsfastening the hitchtubes together. Finally,tighten
the twobolts fastening the hitchbracketsto the hitch
tubes.
• Assemble the two 3/4" spacers onto the hitch pin and
secure the pin with the 1/8" hairpin cotter. See fiqure 5.
e
Assemble the height adjustment handle to the height
adjustment tube using the curved bolts, washers and
nuts which come pre-assembled to the tube. Tighten
the height adjustment handle so that the height
adjustment strap is aligned with the outside of the
handle. See figure 6.
Assemble the grip onto the end of the height adjust-
ment handle as shown in figure 6.
GRIP
5/16" LOCK
'16" HEX NUT
5/16" x 2-112" x 2-1/4"
HEX BOLT _ HEX BOLT
HITCH PIN
FIGURE 6
HEIGHT _16"xl-5/8"
ADJUSTMENT CURVED
TUBE HEAD BOLT
HITCH
(STRAIGHT)
314"SPACERS
HITCH ---_
:_BRACKET
FIGURE_5 _
HEX LOCK NUTS
_°_ HAIRPINCOTTER
e
Place the 5/16" tooth-lock washer between the height
adjustment handle and the height adjustment strap.
Insert the 5/16" x 3/4" carriage bolt through the handle,
the tooth-lock washer and the strap. Assemble the
5/16', sta.ndard flat washer and the plastic knob onto
the e.ndof !he bolt and tighten. See figure 7.
HEIGHT
ADJUSTMENT
HANDLE
HEIGHT
ADJUSTMENT
STRAP
FIGURE 7
5116" FLAT
WASHER
(STANDARD)
Loading ...
Loading ...
Loading ...