Loading ...
Loading ...
Loading ...
Air Evacuation
Air Evacuation
Preparations and Precautions
Air and foreign matter in the refrigerant circuit
can cause abnormal rises in pressure, which
can damage the air conditioner, reduce its
efficiency, and cause injury. Use a vacuum pump
and manifold gauge to evacuate the refrigerant
circuit, removing any non-condensable gas and
moisture from the system.
Evacuation should be performed upon initial
installation and when unit is relocated.
BEFORE PERFORMING EVACUATION
Check to make sure that both high-
pressure and low-pressure pipes between
the indoor and outdoor units are
connected properly in accordance with the
Refrigerant Piping Connection section of
this manual.
Check to make sure all wiring is connected
properly.
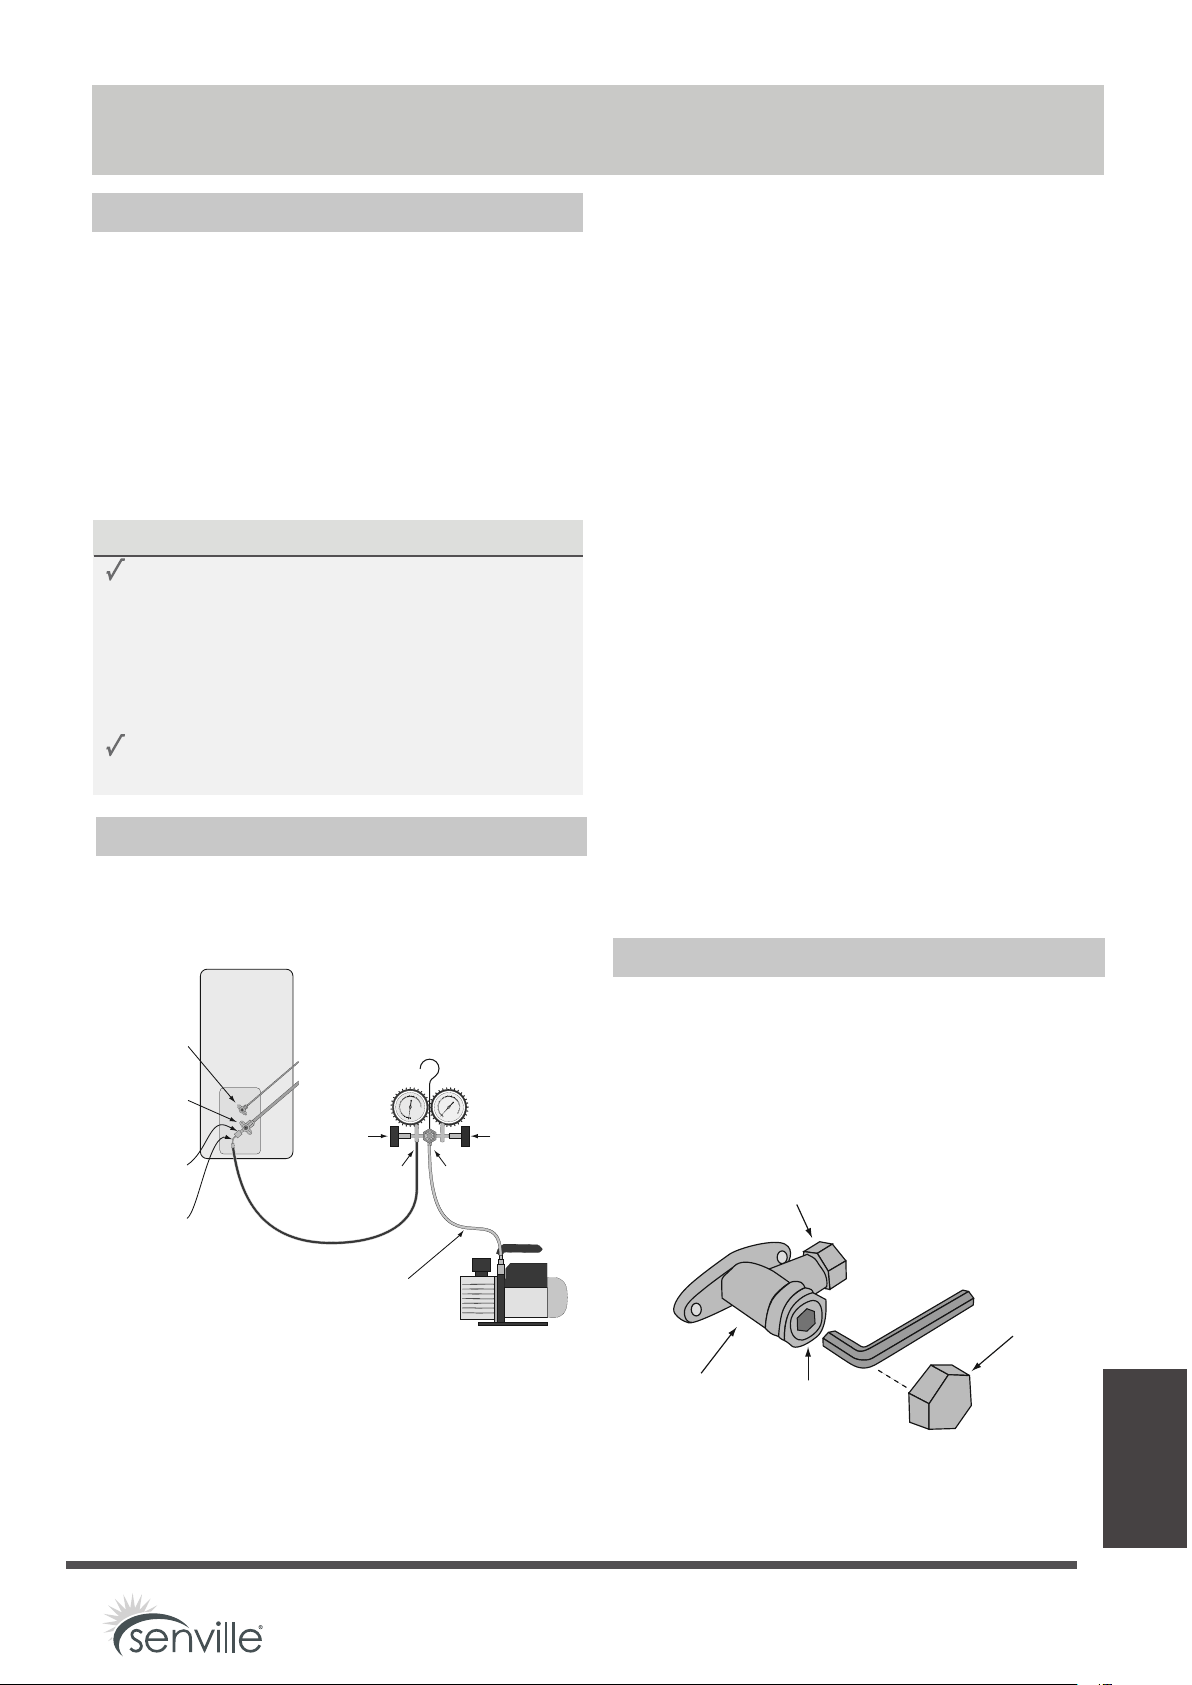
Evacuation Instructions
Before using the manifold gauge and vacuum
pump, read their operation manuals to familiarize
yourself with how to use them properly.
1.
Connect the blue charge hose of the
manifold gauge to the service port on the
outdoor unit’s low pressure valve.
Manifold Gauge
Outdoor
Unit
Vacuum Pump
Manifold
Low
Pressure
Valve
Left
Manifold
Gauge Port
Blue Charge Hose
Yellow
Charge Hose
Middle
Manifold
Gauge Port
Larger Low
Pressure
Valve
Service
Port
1/4” to 5/16”
Adaptor for
R134A
Coolant
Smaller
High
Pressure
Valve
Manifold
High
Pressure
Valve
0
0
-3
50
100
150
200
250
300
350
0
100
200
300
400
500
5
0
0
600
Fig. 6.1 Air Evacuation
4.
5.
6.
Evacuation is now complete. Close the
left (blue) manifold low pressure valve and
switch off the vacuum pump.
7.
Wait at least 30 minutes and then check
the left (blue) manifold gauge to verify
that ther has been no change in system
pressure. If there is a change in pressure,
refer to the Gas Leak Check section for
how to check for leaks.
Note that the service port has a
Schrader valve similar to a tire valve that
will open and close when attaching and
removing the hose.
2. Connect the yellow charge hose from t
manifold gauge to the vacuum pump.
3.
Close the right (red) manifold high
pressure valve.
Open the left (blue) manifold low pressure
valve. The left gauge should read zero
pressure.
Switch on the vacuum pump and run it for
at least 15 minutes until the left gauge
move slightly counter-clockwise to show a
negative pressure of about -30 inHg.
Refrigerant Release Instructions
1.
The unit comes pre-charged with
refrigerant. After checking that there has
been no change in the system pressure,
unscrew the cap on the outdoor unit's high
pressure valve (the smaller upper valve).
Fig. 6.2
Flare nut
Valve stem
Valve body
Cap
Page 35
Loading ...
Loading ...
Loading ...