Loading ...
Loading ...
Loading ...
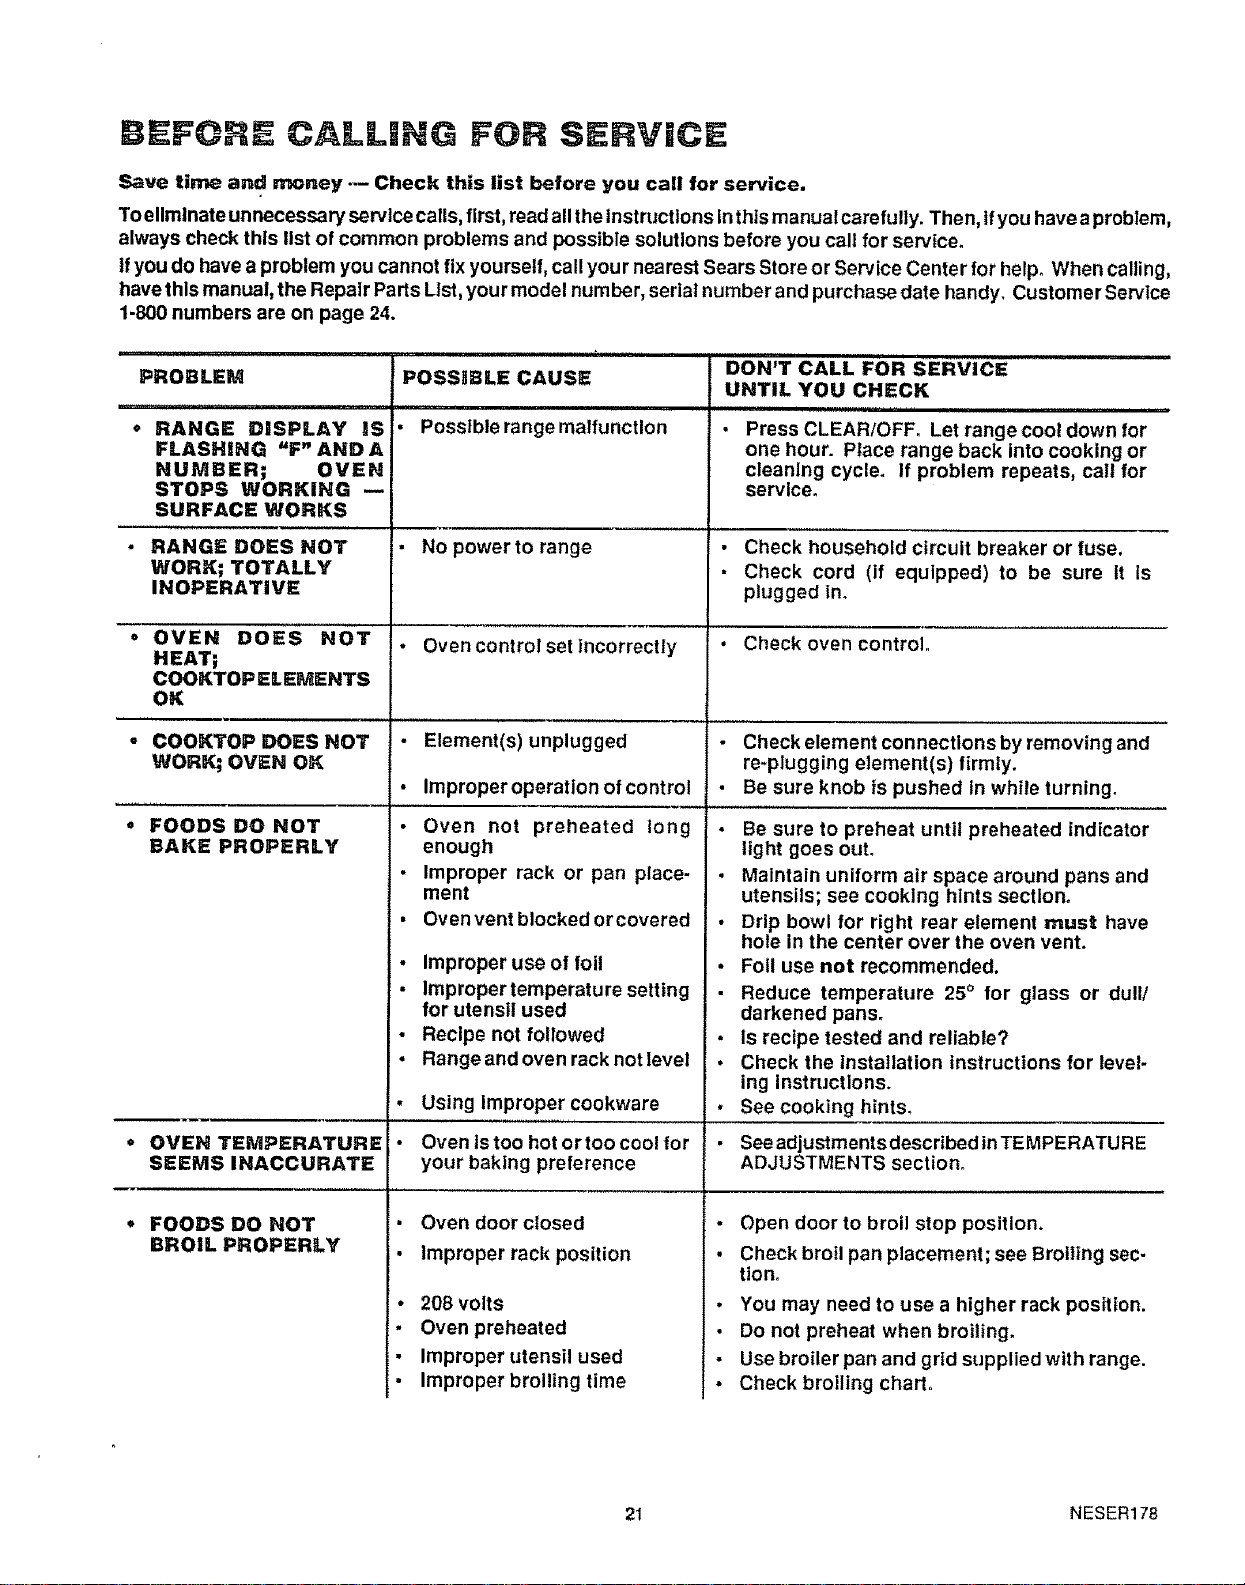
BEFORE CALLING FOR SERVICE
Save time and money --- Check this llst before you call for service.
To eliminate unnecessary service calls, first, read all theInstructions inthis manual carefully. Then, ifyou have a problem,
always check this list of common problems and possible solutions before you call for service.
Ifyou do have a problem you cannot fixyourself, call your nearest Sears Store or SePJiceCenter for help. When calling,
have this manual, the Repair Parts List,your model number, serial number and purchase date handy. Customer Service
1-800 numbers are on page 24.
PROBLEM
• RANGE DISPLAY NS
FLASHING "F" AND A
NUMBER; OVEN
STOPS WORKING
SURFACE WORKS
RANGE DOES NOT
WORK; TOTALLY
INOPERATIVE
OVEN DOES NOT
HEAT;
COOKTOP ELEMENTS
OK
COOKTOP DOES NOT
WORK; OVEN OK
FOODS DO NOT
BAKE PROPERLY
* OVEN TEMPERATURE
SEEMS INACCURATE
• FOODS DO NOT
BROIL PROPERLY
_l,_.,ll.ll,,iii1,1,,i ii
POSSIBLE CAUSE
iiilllll,lll, i , i
• Posstble range malfunction
• No power to range
- Oven control set incorrectly
• Element(s) unplugged
• Improperoperation of control
q*
!
s
m
m
i.
il
Oven not preheated long
enough
Improper rack or pan place-
ment
Oven vent blocked oreovered
Improper use of foil
Improper temperatu re setting
for utensil used
Recipe not followed
Range and oven rack not level
Using improper cookware
Oven ts too hot ortoo cool for
your baking preference
Oven door closed
Improper rack position
208 volts
Oven preheated
Improper utensil used
Improper broiling time
DON'T CALL FOR SERVICE
UNTIL YOU CHECK
• Press CLEAR/OFF_ Let range coot down for
one hour. Place range back into cooking or
cleaning cycle. If problem repeats, call for
service.
• Check household circuit breaker or fuse.
• Check cord (if equipped) to be sure it Is
plugged in_
• Check oven control°
• Check element connections by removing and
re-plugging element(s) firmly.
• Be sure knob is pushed in while turning.
• Be sure to preheat until preheated indicator
light goes out.
• Maintain uniform air space around pans and
utensils; see cooking hints sectlono
• Drip bowl for right rear element must have
hole in the center over the oven vent.
• Foil use not recommended.
• Reduce temperature 25° for glass or dull/
darkened pans.
• Is recipe tested and reliable?
• Check the installation instructions for level-
ing Instructions.
• Seecooking hints.
• Seeadjustments described tnTEMPERATURE
ADJUSTMENTS section°
- Open door to broil stop position.
• Check broil pan placement; see Broiling sec-
tion.
• You may need to use a higher rack position.
• Do not preheat when broiling.
• Use broiler pan and grid supplied with range.
• Check broiling chart,
21 NESER178
Loading ...
Loading ...
Loading ...