Loading ...
Loading ...
Loading ...
C3
C3
Prevent the power cord from becoming caught.
Tie a piece of string to the middle of the power cord
and feed forwards under the appliance. When
pushing in the appliance, pull the cable forwards.
or
Using adhesive tape, stick the power cord to the
floor centrally behind the appliance approx. 15"
(380 mm) away from the rear panel of the cavity.
Carefully push the appliance into the cavity until
the height-adjustable wheel interlock with the
anti tip brackets.
C3 Remove edge protection.
10. Installing and aligning the
appliance
6/4 38 mm
C3
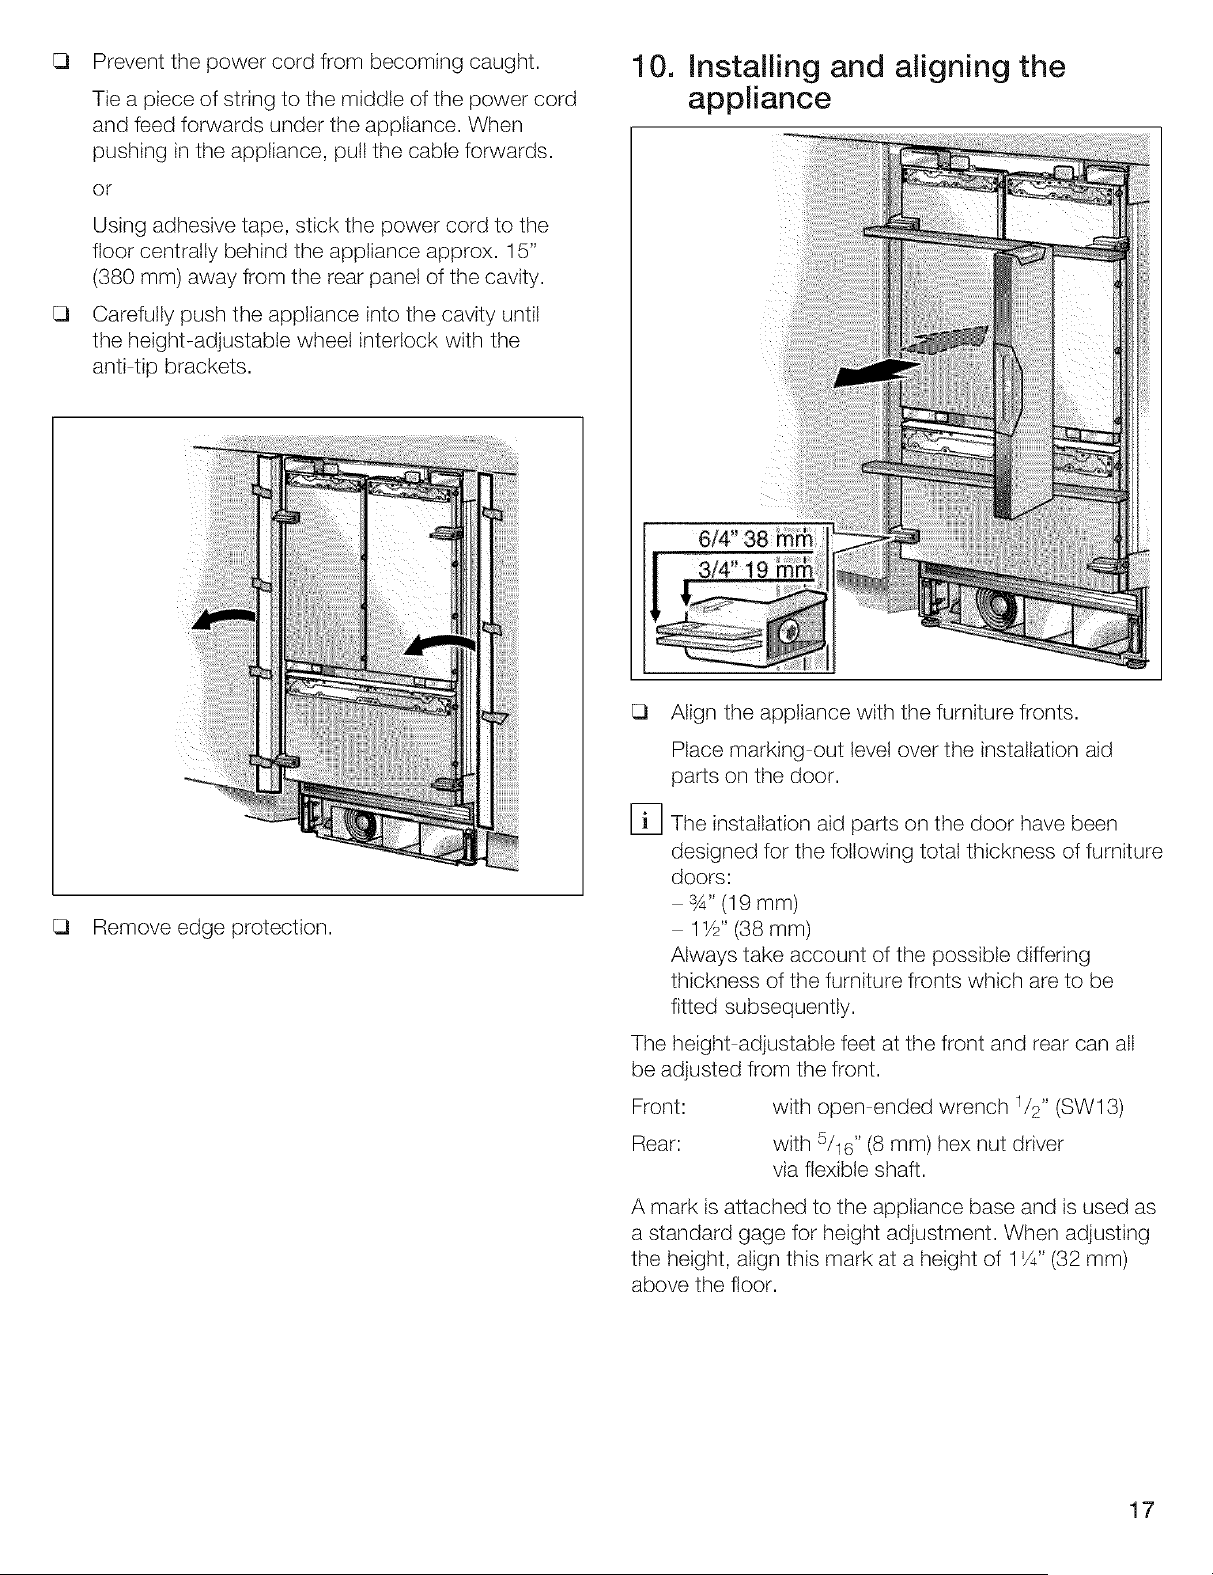
Align the appliance with the furniture fronts.
Place marking out level over the installation aid
parts on the door.
The installation aid parts on the door have been
designed for the following total thickness of furniture
doors:
:_" (19 mm)
11/2" (38 mm)
Always take account of the possible differing
thickness of the furniture fronts which are to be
fitted subsequently.
The height adjustable feet at the front and rear can all
be adjusted from the front.
Front: with open ended wrench 1/2" (SW13)
Rear: with 5/16" (8 mm) hex nut driver
via flexible shaft.
A mark is attached to the appliance base and is used as
a standard gage for height adjustment. When adjusting
the height, align this mark at a height of 1 '/4" (32 mm)
above the floor.
17
Loading ...
Loading ...
Loading ...