Loading ...
Loading ...
Loading ...
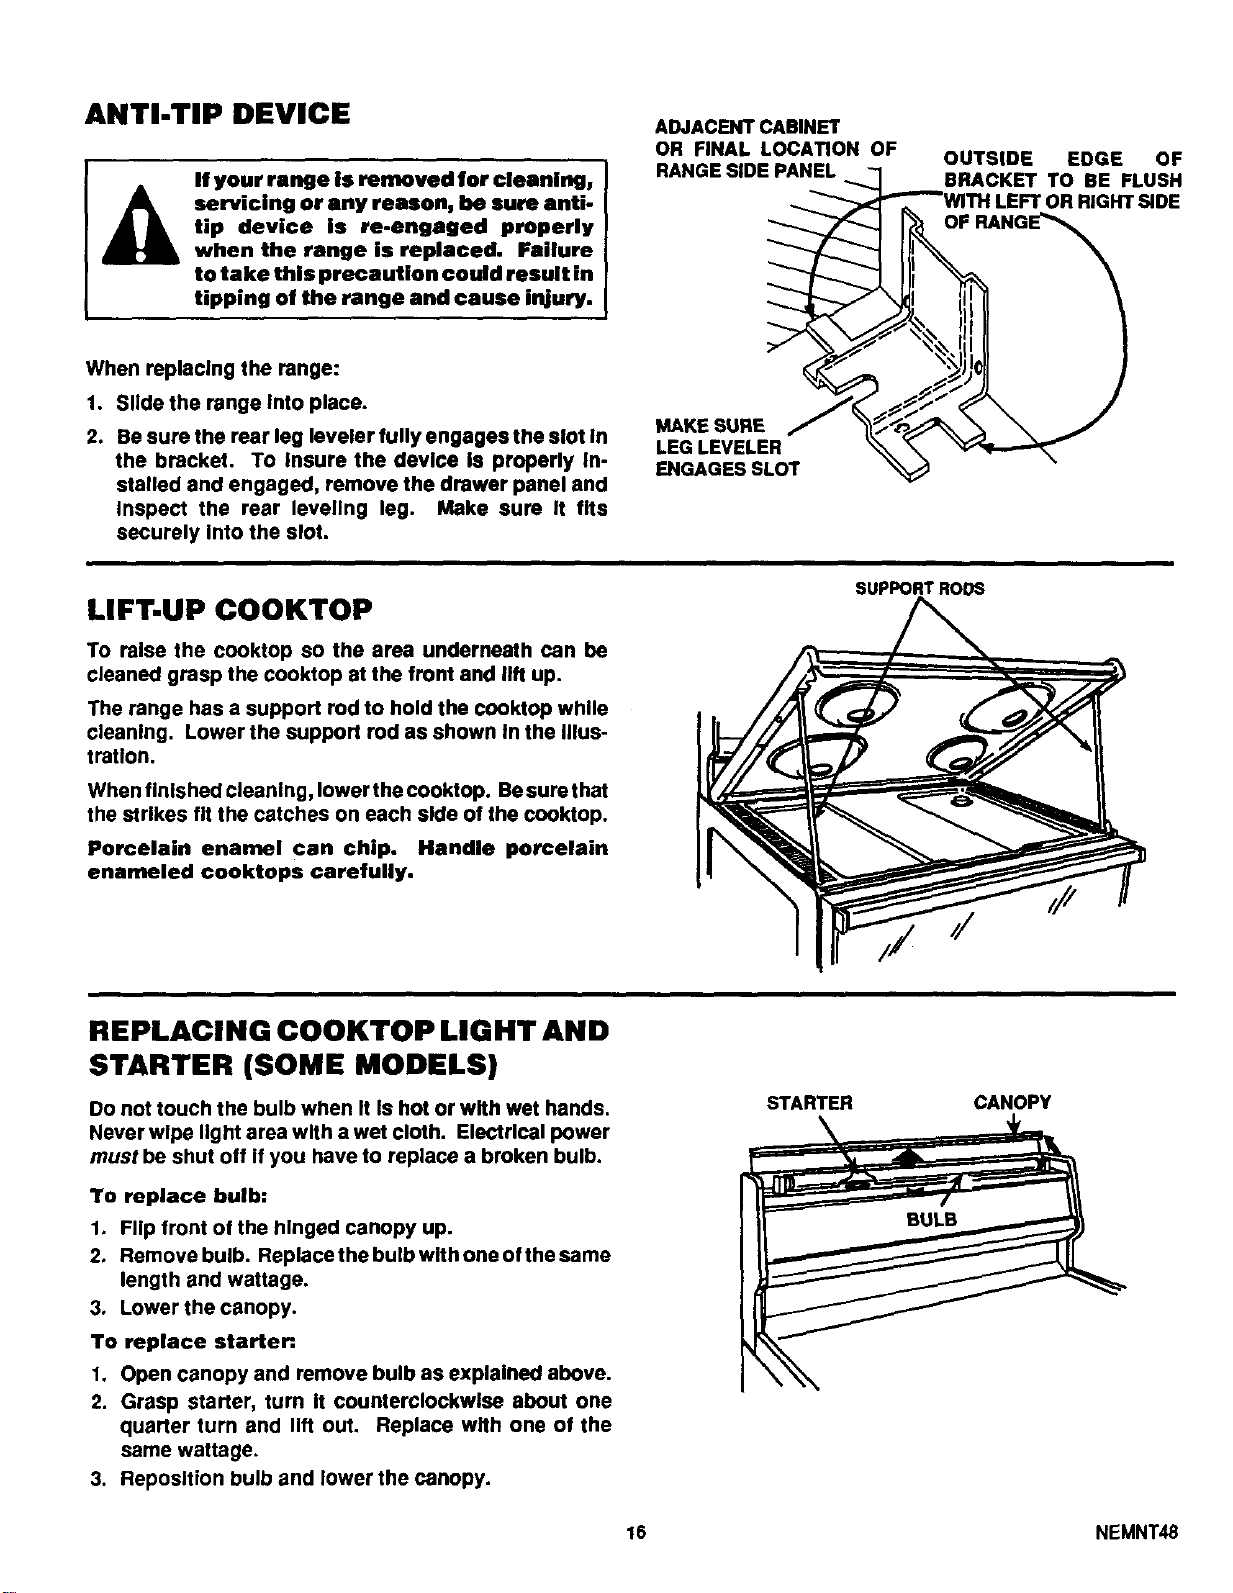
ANTI-TIP DEVICE
If your range is removed for cleaning,
servicing or any reason, be sure anti.
tip device is re-engaged properly
when the range is replaced. Failure
to take this precaution could result in
tipping of the range and cause injury.
ADJACENT CABINET
OR FINAL LOCATION OF
RANGE SIDE PANEL
OUTSIDE EOGE OF
BRACKET TO BE FLUSH
DR RIGHT SIDE
When replacing the range:
1. Slide the range Into place.
2. Be sure the rear leg leveler fully engages the slot In
the bracket. To insure the device Is properly in-
stalled and engaged, remove the drawer panel and
inspect the rear leveling leg. Make sure It fits
securely Into the slot.
MAKE SURE
LEG LEVELER
ENGAGES SLOT
LIFT-UP COOKTOP
To raise the cooktop so the area underneath can be
cleaned grasp the cooktop at the front and lift up.
The range has a support rod to hold the cooktop while
cleaning. Lower the support rod as shown In the Illus-
tration.
When finished cleaning, lower the cooktop. Besurethat
the strikes fit the catches on each side of the cooktop.
Porcelain enamel can chip. Handle porcelain
enameled cooktops carefully.
SUPPORT RODS
REPLACING COOKTOP LIGHT AND
STARTER (SOME MODELS)
Do not touch the bulb when It is hot or with wet hands.
Never wipe light area with a wet cloth. Electrical power
must be shut off If you have to replace a broken bulb.
To replace bulb:
1. Flip front of the hinged canopy up.
2. Remove bulb. Replace the bulb with one of the same
length and wattage.
3. Lower the canopy.
To replace starter:.
1. Open canopy and remove bulb as explained above.
2. Grasp starter, turn It counterclockwise about one
quarter turn and lift out. Replace with one of the
same wattage.
3. Reposltion bulb and lower the canopy.
STARTER CANOPY
16 NEMNT_
Loading ...
Loading ...
Loading ...