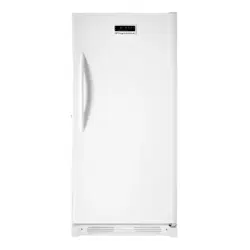
Frigidaire FFUH17F2NWA freezer
Product's Documents
Below are documents related to this product, you can read online or download:
- Owner's manual - (English) Read Online | Download pdf
User Manual Frigidaire FFUH17F2NWA freezer
This Owner's Guide provides specific operating instructions for your model. Use the freezer only as instructed in this Owner's Guide. Before starting the freezer, follow these important first steps
Choose a place that is near a grounded electrical outlet. Do Not use an extension cord or an adapter plug.
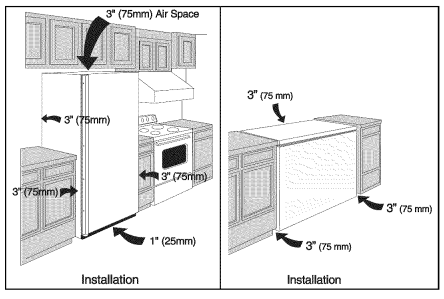
NOTE: The exterior walls of the freezer may become quite warm as the compressor works to transfer heat from the inside. Temperatures as much as 30° F warmer than room temperature can be expected. For this reason it is particularly important in hotter climates to allow enough space for air circulation around your freezer.
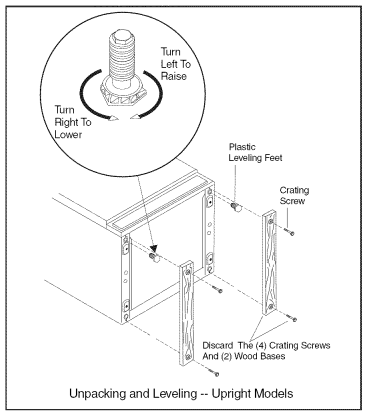
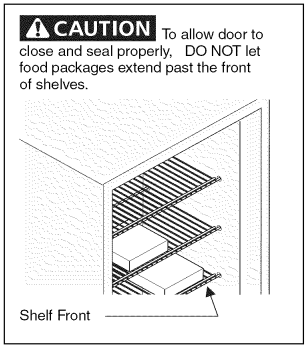
The freezer must have all bottom corners resting firmly on a solid floor. The floor must be strong enough to support a fully loaded freezer. NOTE: It is VERY IMPORTANT for your freezer to be level in order to function properly. If the freezer is not leveled during installation, the door may be misaligned and not close or seal properly, causing cooling, frost, or moisture problems.
To Level Upright Models:
After discarding crating screws and wood base, use a carpenter's level to level the freezer from front-to-back. Adjust the plastic leveling feet in front, Y2bubble higher, so that the door closes easily when left halfway open.
To Level Chest Models:
If needed, add metal or wood shims between foot pads and floor.
Wash any removable parts, the freezer interior, and exterior with mild detergent and warm water. Wipe dry. Do not use harsh cleaners on these surfaces.
If door must be removed:
If door must be removed:
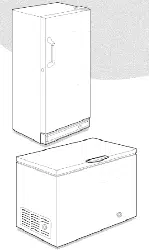
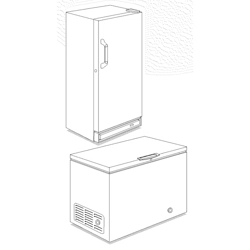
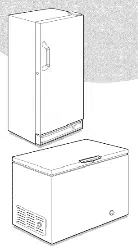
Electromechanical Temperature Control (Chest and Some Upright Models)
The electromechanical temperature control is located inside the freezer on upright models, and on the left exterior wall on chest models (see figure 1). The temperature is factory preset to provide satisfactory food storage temperatures. However, the temperature control is adjustable to provide a range of temperatures for your personal satisfaction. To adjust the temperature setting, turn the temperature control knob clockwise or counter clockwise. Allow several hours for the temperature to stabilize between adjustments.
Standard Electronic Temperature Control (Some Up= right Frost Free Models)
The standard electronic temperature control is located outside the freezer (see Figure 1). Temperature is factory preset to provide satisfactory food storage temperatures. To adjust the temperature setting, move the UP symbol for colder temperatures and DOWN symbol for warmer temperatures on the control panel. Allow several hours for the temperature to stabilize between adjustments.
To turn off freezer, press DOWN (v) symbol until display shows "1". Press three more times until display shows "0" To activate freezer, press UP three times until display shows "1" then press to desired setting.
To keep the temperature setting from being accidentally changed, the control may be locked. This is done by pressing "Alarm Reset" for 3 seconds. '1" will then appear on display. To unlock the control, press "Alarm Reset" for 3 seconds. For the first second, "U" will appear, and then the current temperature will appear
Should an "E" appear on display, contact your authorized service technician for repair. Until changes are made, freezer will continue to run.
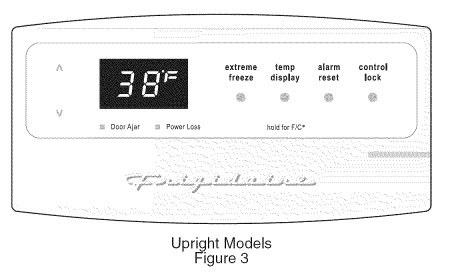
Deluxe Electronic Temperature Control (Some Upright Frost Free Models)
Refer to the Electronics Control Guide supplied when you purchase a deluxe electronic upright model. See Figure 3 for deluxe electronics control panel.
SECURITY LOCK WITH POP-OUT KEY
This security lock fastens the door snugly, ensuring stored food is secure. To lock or unlock the freezer, push the key into the lock and turn. The key pops out of the lock after it has been turned.
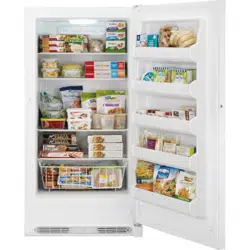
SLIDE-OUT BASKET (SOME UPRIGHT MODELS)
A Slide-Out Basket (some models), located at the bottom of the freezer, provides separate storage space for items that are difficult to store on freezer shelves. To remove the basket, pull out and lift up.
INTERIOR LIGHT
The light comes on automatically when the door is opened. To replace the light bulb, turn the temperature control to OFF and unplug the electrical cord. Replace the old bulb with a bulb of the same wattage.
ADJUSTABLE SHELF (SOME UPRIGHT MODELS)
This shelf can be moved to one or two positions. Lift the shelf up and out to move to the desired location.
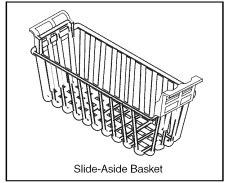
SLIDE-ASIDE BASKET (SOME CHEST MODELS)
This basket helps organize odd-shaped items. To reach other packages in the freezer, slide the basket aside, or lift out.
FAST FREEZING SHELVES (MANUAL DEFROST UPRIGHT MODELS)
These shelves contain cooling coils to freeze foods quickly and allow cold air to constantly circulate throughout the freezer. Do not use sharp metal objects such as ice picks or scrapers to clean the shelves. This could damage the shelves and reduce their cooling ability. These shelves are not adjustable.
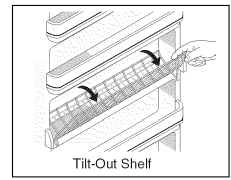
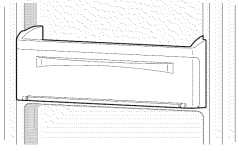
TILT-OUT SHELF (SOME UPRIGHT MODELS)
This shelf is located inside on the freezer door and provides additional storage space. To access an item, tilt the top of the "basket" shelf down.
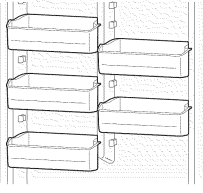
ADJUSTABLE DOOR BiNS (SOME UPRIGHT MODELS)
Adjustable door bins are located inside on the freezer door and provide flexible storage space. The number of bins provided varies by model.
SOFT FREEZE ZONE (SOME UPRIGHT MODELS)
Soft Freeze Zone is specifically designed to maintain a higher temperature than the rest of the freezer to store products such as ice cream.
PIZZA SHELF (SOME UPRIGHT MODELS)
Here is the place to store up to four extra-large boxes of frozen pizza without ever having to dig them out from beneath a pile of other stored goods.
The pizza shelf can be retracted to provide space for larger items on the shelf below and still store up to two more pizzas.
BASKET DIVIDER (SOME UPRIGHT MODELS)
Use these handy dividers to keep the various items stored in your baskets more organized. To change the location of the divider simply slide your basket out, grab the divider from the center and rotate in a counter-clockwise direction until it is disengaged. To assemble, simply align as shown in the figure below and rotate in a clockwise direction until it spans into place.

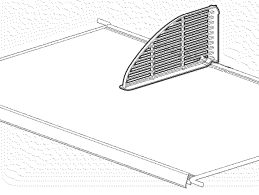
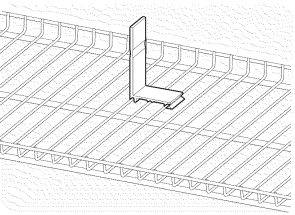
SHELF BOOKEND (SOME UPRIGHT MODELS)
Glass Shelf Bookend
Use these handy bookends to keep the various boxed items stored neatly in your freezer. To adjust location, simply slide where desired.

Wire Shelf Bookend
Use these handy bookends to keep the various boxed items stored neatly in your freezer. To adjust location,simply unsnap the bookend from the wire shelf and snap into the next desired location.
CHEST DIVIDER (SOME CHEST MODELS)
Use these clever dividers to custom=arrange a variety of different-sized storage bins inthe bottom of your chest freezer. Use the peel-n-stick labels found in your literature packet to help remind you which items are stored where. If you have an item that isn't already covered by one of the pre-printed labels then use one of the blank labels and a permanent marking pen to make your own custom label. Labels can be peeled off when no longer needed and replaced by new and different ones.
BETWEEN DEFROSTINGS
To avoid frequent defrosting, occasionally use a plastic scraper to remove frost. Scrape with a pulling motion. Never use a metal instrument to remove frost.
DEFROSTING
It is important to defrost and clean the freezer when 1/4 to 1/2 inch of frost has accumulated. Frost may tend to accumulate faster on the upper part of the freezer due to warm, moist air entering the freezer when the door is opened. Remove food and leave the door open when defrosting the freezer.
To Defrost Upright Models with Defrost Drain:
To Defrost Chest Models with Defrost Drain:
To Defrost Models without Defrost Drain:
After defrosting, wash inside surfaces of the freezer with a solution of two tablespoons of baking soda in one quart (1.1 litres) warm water. Rinse and dry. Wring excess water out of the sponge or cloth when cleaning in the area of the controls, or any electrical parts.
Wash the removable parts and door basket with the baking soda solution mentioned above, or mild detergent and warm water. Rinse and dry. Never use metallic scouring pads, brushes, abrasive cleaners, or alkaline solutions on any surface. Do not wash removable parts in a dishwasher.
Wash the cabinet with warm water and mild liquid detergent. Rinse well and wipe dry with a clean soft cloth. Replace parts and food.
Do not use razor blades or other sharp instruments, which can scratch the freezer surface when removing adhesive labels. Any glue left from the tape can be removed with a mixture of warm water and mild detergent, or touch the residue with the sticky side of the tape already removed.
DO NOT REMOVE THE SERIAL PLATE.
Short Vacations:
Long Vacations:
If the freezer will not be used for several months:
Moving: When moving the freezer, follow these guidelines to prevent damage:
If a power failure occurs, frozen foods will stay frozen for at least 24 hours if the freezer is kept closed. If the power failure continues, pack seven or eight pounds of dry ice into the freezer every 24 hours. Look in the Yellow Pages under Dry Ice, Dairies, or Ice Cream Manufacturers for local dry ice suppliers. Always wear gloves and use caution when handling dry ice.
If the freezer has stopped operating, see Freezer Does Not Run in the Troubleshooting Guide. If you cannot solve the problem, call an authorized servicer immediately. If the freezer remains off for several hours, follow the directions above for the use of dry ice during a power failure. If necessary, take the food to a local locker plant until the freezer is ready to operate. Look in the Yellow Pages under Frozen Food Locker Plants.