Loading ...
Loading ...
Loading ...
PREPARATION
MAINTENANCE FREE BATTERY 3
4.
IMPORTANT: Before you attach the battery cables to the
battery, check the battery date. The battery date tells if the
battery must be charged.
1. Raise the seat support and secure in the UP position with the
seat support rod.
2. Check the top and the side of the battery for the location of the
battery date (Figure 1).
3. If the battery is put into service before the battery date, the
battery cables can be attached without charging the battery.
See "How To Install The Battery Cables".
4. If the battery is put into service after the battery date, the
battery must be charged. See "How To Charge The
Maintenance Free Battery".
HOW TO CHARGE
THE MAINTENANCE FREE BATTERY
,_ WARNING: When you charge the battery, do not
smoke. Keep the battery away from any sparks. The
fumes from the battery acid can cause an explosion.
1. To disconnect the battery retainer from the battery tray, push
in on the lower end of the battery retainer,
2. Remove the battery from the right side of the unit.
Remove the protective cap from the battery terminal.
Use a 12 volt battery charger to charge the battery. Charge at
a rate of 6 amperes for one hour. If you do not have a battery
charger, have a Sears or other qualified service center charge
the battery.
install the battery and secure with the battery retainer. Make
sure the positive (+) terminal is on the right side.
HOW TO INSTALL THE BATTERY CABLES
,_ WARNING: To prevent sparks, fasten the red cable to
the positive (+) terminal before you connect the black
cable.
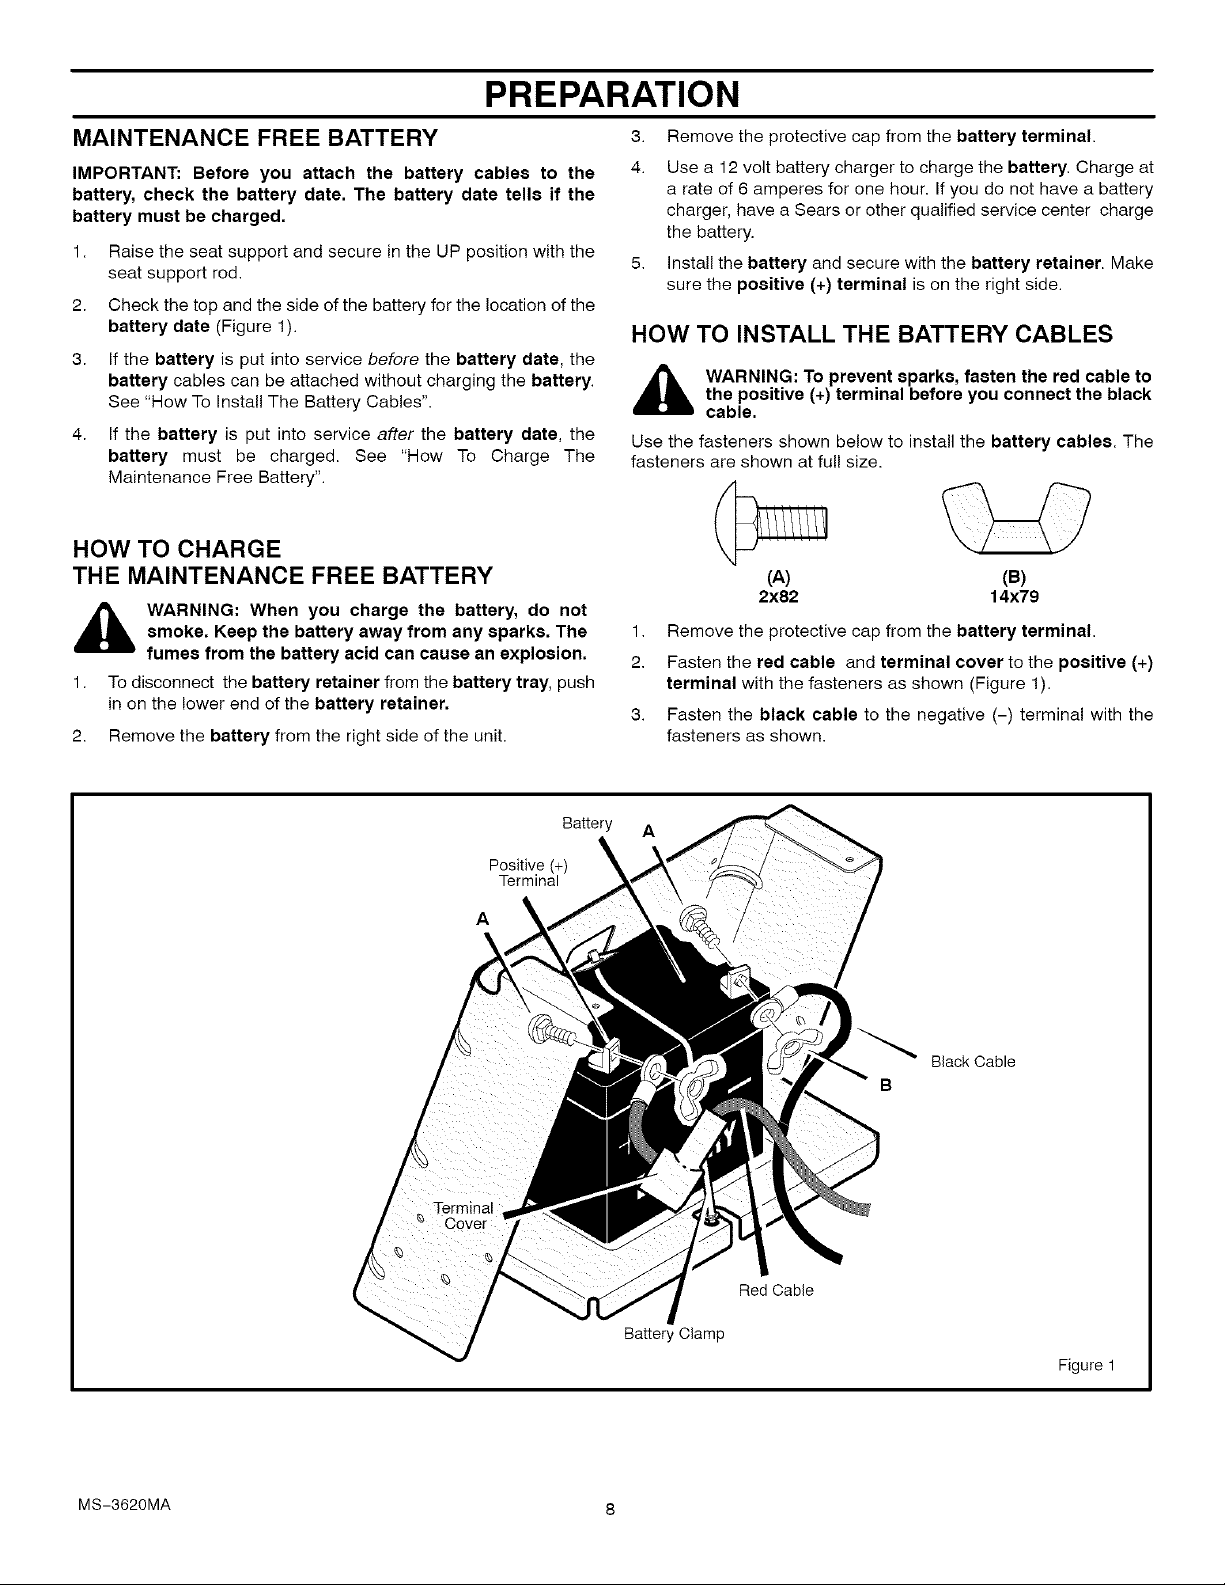
Use the fasteners shown below to install the battery cables. The
fasteners are shown at full size.
(A) (B)
2x82 14x79
1. Remove the protective cap from the battery terminal.
2. Fasten the red cable and terminal cover to the positive (+)
terminal with the fasteners as shown (Figure 1).
3. Fasten the black cable to the negative (-) terminal with the
fasteners as shown.
Battery A
Positive (+)
Terminal
A .....
Black Cable
B
Battery Clamp
Red Cable
Figure 1
MS-3620MA 8
Loading ...
Loading ...
Loading ...