ge.com
>,
C'q
Safety
Instructions ..... 2-7, 22, 23, 24
Operating Instructions
Oxen .................. ]0-16
Surface Burners ............ 8, 9
Care and Cleaning
Broiler Compartment ........ 19
Broiler Pan and Grid ........ 20
Burners ................... 18
Control Panel and I_obs ..... 18
Grates .................... 17
Lift-Up Cooktop ............ 17
Lift-Off Oven Door .......... 20
Metal Parts ................. 18
Oven Interior .............. 21
Painted Surfaces ............ 21
Removable Oven Bottom ..... 19
Shelves ................... 18
Th ermosta t Adj ustm ent ....... ] 4
Installation Instructions.. 22-33
12 ....................... 33
Troubleshooting Tips ....... 34
Consumer Support
Consumer Support . . . Back Coxer
X4'arranty .................. 35
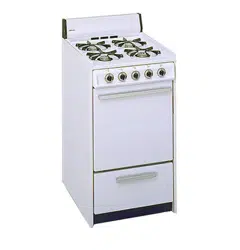
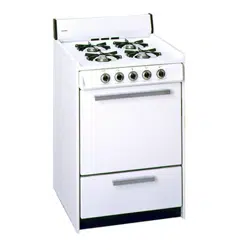
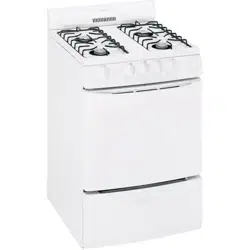
HOTPOINT
RGA ,,20
RGA 724
Write the model and serial numbers
here:
Model #
Serial #
You can find them on a label under the
cooktop. See the i,itt-Up Cooktop section
in this malmal for instluctions on how to
lift the cooktop.
183D9542PO02 49-85104 12-05JR
IMPORTANTSAFETYINFORMATION.
READALLINSTRUCTIONSBEFOREUSING.
WARNING!
For your safety, the information in this manual must be followed to minimize the risk of fire or explosion, electric
shock, or toprevent property damage, personal injury, or loss of life.
WARNING!
ANTI-TIPDEVICE
_!_ALL RANGES CAN TIP
_: INJURY TOPERSONS
COULD RESULT
_: INSTALL AN_ TIP
DEVICES PACKED WITH
RANGE
_: SEE INSTALLAtiON
INSTRUCtiONS
WARNING:if theinformation
in this manual is not followed exactly,
a fire or explosion may result causing
property damage, personal injury
or death.
-- Do not store or use gasoline or other
flammable vapors and liquids in the
vicinity of this or any other appliance.
- WHATTODOIFYOU
SMELLGAS
iJ_::i:Do not try to light any appliance.
i?_:iDo not touch any electrical switch;
do not use any phone in your
building.
!:_i:Immediately call your gas supplier
from a neighbor's phone. Follow the
gas supplier's instructions.
!_i:If you cannot reach your gas supplier,
call the fire department.
-- Installation and service must be
performed by a qualified installer,
service agency or the gas supplier.
2
ANTI-TIPDEVICE
All rangescan tip and injury could result.
Toprevent accidental tipping of the range, attach it to the wall by installing the Anti--tip device
supplied.
If the Anti--tip device supplied with the range does not fit this application, use the universal Anti--17p
device WB2X7909.
Tocheck if the device is instafled and engaged properly, carefully tip the range forward. TheAnti--tip
device should engage and prevent the range from tipping over.
If you pull the range out flom the wall for any reason, make sure die device is properly
engaged when you push the range back against the wall. If it is not, there is a possible risk of
the rang_ tipping oxer and causing injui T if you or a child stand, sit or lean on an open door
Please refer to the Anti-Tip device infollnation in this manual. Failure to take this precaution
could result in tipping of the rang_ and ilijury.

ge.com
WARNING!
IMPORTANTSAFETYNOtiCE
The Cafifomia Safe Drinking Water and Toxic Enforcement Act requires the Governor of Cafifomia
to publish a list of substances known to the state to cause birth defects or other reproductive harm,
and requires businesses to warn customers of potential exposure to such substances.
Gas appliances can cause minor exposure to four of these substances, namely benzene, carbon
monoxide, formaldehyde and soot, caused primarily by the incomplete combustion of natural gas
or
LP fuels. Properly adjusted burners, indicated by a bluish rather than a yellow flame, will minimize
incomplete combustion. Exposure to these substances can be minimized by venting with an open
window or using a ventilation fan or hood.
SAFETYPRECAUtiONS
Have the installer show you the location of the range gas shut-off valve and how to shut it off if
necessary.
_::Hax> your rang_ installed and properly
grounded by a qualified insmllet; in
accordance with the Installation
Instructions. Any adjusunent and
service should be perfot_ned only by
qualified gv_srang> installers or service
mchnicians.
;f?:':Do not attempt to repair or replace any
part of your rang_ unless it is
specifically recommended in this
manual. All other service should be
refen-ed to a qualified mchnician.
_: Plug your rang_ into a 120_\olt
grounded outlet only. Do not remove
the round grounding prong flom the
plug. If in doubt about file grounding
of fl)e home electrical system, it is your
personal responsibility and obligation
to have an ungrounded outlet replaced
with a properly grounded, three-prong
outlet in accordance with fl)e National
Elecuical Code. Do not use an
exmnsion cord with this appliance.
WARNING:NEVERusethis
appliance as a space heater to heat or
wam] the room. Doing so m W result
in carbon monoxide poisoning and
ox_flleating of rite oxen.
3
IMPORTANTSAFETYINFORMATION.
READALLINSTRUCTIONSBEFOREUSING.
4
SAFETYPRECAUTIONS
_; Locate tire rang.e out of kitchen traffc _;
paflt arm out of drafty' locations to prm.ent
pilot outag.e (on standing pilot models) ;_;
arm poor air circulation.
_i:,:Be sure all packaging materials are t.emoxed
fiom tire mng.e befot.e operating it m
prexent fire or smoke damag.e should the
packaging material ignite.
_::Be sure your rang.e is cort.ectly adjusted by
a qualified setMce mchnician or installer
for the wpe of gas (nautral or IP) that is
m be used. Your rang.e can be corrxermd
for use with either type of gas. See the
Installation of the range section.
WARNING: tesea >stmentsmnst
be made by a qualified service technician
in accordance with rite manuthcut_er's
irrsmtctions arm all codes arm t.equit.ements
of the authority havingjm_isdicfion. Failure
to follow fltese insmtcfions could t.esult in
serious it_juU or proper)' damag.e. Tire
qualified ag.ency perforating this work
assumes t.esponsibili_' tbr tire corrx.ersion.
;_i:,:Be careflfl when you clean the cooktop
because the at.ea oxer the pilot (on
standing pilot models) will be hot.
_:;After prolong.ed nse of a range, hiOr floor
mmperaun.es m W t.esuh and many floor
cox.ering:s will not wiflrsmnd this kind of
use. Nex.er install fire rang.e oxer vinyl tile
or linoleum that cannot withstand such
type of use. Nexer irrsmll it directly ox.er
inmrior kitchen carpeting.
_{;:Do not leme children alone or unatmnded
where a rang.e is hot or in operation. They
could be seriously burned.
_f):':Do not allow arryone m climb, stand or
hang on the ox.en dent; broiler door or ;_i:,:
cooktop. They could damag.e the rang.e
and exen tip it ox.el, causing sex.ere
personal irljm%
CAUTION: temsofir.erest.
children should not be stored in cabinets
aboxe a range or on tire backsplash of a
rang.e---rhild_.en climbing on tire rang.e
m reach items could be seriously injured. ;_i:,:
Clean only parts listed ira this Owner's
Manual.
Nexer wear loose fating or hanging
garments while using the appliance. Be
cat.eflfl when reaching for imms stot.ed in
cabinets ox.er tim rang.e. Flammable
material could be ig_rited if brougir t in
contact wiflr flame or hot oxen surfi_ces
arm m W cause sex.et.e battTlS.
_?:':Do not store flammable materials in an
ox.en, a rang.e broiler or near a cooktop.
_?:':Do not store or use combustible materials,
gasoline or oflter flammable vapors and
liquids ira rite vicinity of this or arty oflter
appliance.
_i;:Do not let cooking gxease or other
flammable materials accumulam in or
near the rang.e.
;_):':Do not rise water on grease fires. Nexer
pick up a flaming pan. Turn tire controls
off. Smother a flaming pan on a surfi_ce
burner by coxering fire pan completely
with a well-fitting lid, cookie sheet or fiat
na> Use a multi-puq)ose d_T chemical or
foam-wpe fire extinguisher
Flaming gt.ease outside a pan can be put
out by covering it with baMng soda at;
if available, by using a mnlfi-pnrpose diT
chemical or foam-wl)e rit.e exfinguishen
Flame in the ox.en can be smothered
completely by closing the ox.en door arm
utrning fire cormel to off or by using a
nmlfi-pm])ose d U chemical or foam-type
fit.e extinguisher
;_;i,et fire burner grams and odter surfaces
cool betbre touching them or leaving
them where child_.en can t.each flrem.
Never block the xents (air openings) of
the rang.e. They provide the air irrlet arm
outlet that are necessa U for the rang.e to
operate properly with correct combustion.
Air opening:s are located at tire rear of
rite cooktop, at the top arm bottom of tim
oxen dent; and at fine bottom of the rang.e
under the broiler door
Large scratches or impacts to glass doors
can lead to broken or shattered glass.
_e.com
COOKMEATANDPOULTRYTHOROUGHLY...
Cook meat and poultry thoroughly--meat to at least an INTERNAL temperature of 160°Fand poultry
to at least an INTERNAL temperature of 180°ECooking to these temperatures usually protects
against foodbome illness.
OVEN
Stand away from the range when opening the door of a hot oven. Thehot air and steam that escape
can cause bums to hands, face and eyes.
_{_:Do not use the oven for a storage area.
Imms stored in file oxen can ignim.
_i_Kee I) tile oxen free from grease buildup.
_::Place the oxen shelxes in the desired
position while tile oxen is cool.
;f?:,iPulling out the shelf m the smi>lock is a
convenience in lifting heaxy' foods. It is
also a precaution against bums flom
ranching hot sniP, tces of tile door or
oxen walls.
Do not heat unopened food containers.
Pressure could build tl I) and die container
could burst, causing an ii)jui>
WARNING:NEVERcover
any slots, holes or passages in dae oxen
bottom or cover an entire rack wifll
mamrials such as alunfinum foil. Doing
so blocks air flow through the oxen and
may cause carbon monoxide poisoning.
'Aluminum foil lining_ m W also uap
heat, causing a fire hazaM.
_]{::Do not use your oxen to dry newspapers.
If oveflleamd, they can catch fire.
_]{::Use only glass cookware that is
recommended for use in gas oxens.
_i:,iAlwws remove the broiler pan flom range
as soon as you finish broiling. Grease left
in the pan can catch fire if oxen is used
without removing tile grease flom the
broiler pan.
_!{,:When broiling, if meat is too close to flae
flame, the fat may ignite. Trim excess fat to
prexent excessive flare-ups.
_i:,iMake sure the broiler pan is in place
coixectly to reduce the possibility of
giease files.
_]{::If you should haxe a grease fire in the
broiler pan, turn off file oven control, and
kee I) the broiler door and oxen door
closed to contain fire until it bums ont.
_i:,:For safeff and proper cooking perfomlance,
always bake and broil with tile oxen and
broiler doors closed.
_i:,:When using cooking or roasdng bags in
tile oxen, follow the manufi_cturer's
directions.
_::Nexer leaxejars of £_t drippings on or near
your range.
5
IMPORTANTSAFETYINFORMATION.
READALLINSTRUCTIONSBEFOREUSING.
WARNING!
SURFACEBURNERS
Use proper pan size--a void pans that are unstable or easily tipped. Select cookware having flat
bottoms large enough to cover bumer grates. Toavoid spillovers, make sure cookware is large
enough to contain the food properly. This will both save cleaning time and prevent hazardous
accumulations of food, since heavy spattering or spiflovers left on range can ignite. Use pans with
handles that can be easily grasped and remain cool
_::Always use die Life position (on elecuic _t{::
ignition models) or d_e Hlposidon (on
standing pilot models) when igniting fl_e
top burners and make sure the burners
hme ig_ited. ;_i:,:
_:;Nexer leme the surfi_ce burners
unattended at high flame settings.
Boilo_rs cause smoking and greasy _i:,:
q)illox>rs that may catch on fire.
_i:,:Adjust the top burner flame size so it
does not exmnd beyond the edge of fl_e
cookwme. Excessive flame is hazardous.
;_;Use only &Y pot holders--moist or damp
pot holders on hot surfiaces may result in
bmxls flom smam. Do not let pot holders
come near open flames when lifting
cookware. Do not use a towel or other
bulky cloth in place of a pot holder
;_i:,:When using glass cookware, make sure it
is designed for rap-of-range cooking.
N To minimize the possibility of bums,
ignition of flammable mamtJals and
spillage, um_ cookware handles toward the
side or back of the range without
exmnding ox_r adjacent burners.
_:;Cateflflly wamh tbods being tided at a hiOt
flame setting.
_:;Alwws heat fiat slowly, and watch as it heats.
;_i:,:Do not leme any imms on fl_e cookmp.
The hot air flom the x_nt m W ignite.
flammable imms and will increase pressure
in closed containers, which m W cause
fltem to burst.
;_i:,:ff a combination of oils or fiatswill be used
in flying, stir together before heating or as
tats meh slowly.
;_?:';Use a deep fiat fl_ermometer whenever
possible to prevent ox>rheafing flit beyond
the smoking point.
Use the least possible amount of fiat tbr
effecdve shallow or deei>fiat fiTing. Filling
the pan too flfll of fiat can cause spillox>rs
when tbod is added.
Do not flame foods on fl_e cooktop, ffyou
do flame foods under fire hood, um_ fire
[_tIl Oil.
Do not use a wok on tim cooking surfiace
if the wok has a round metal ring that is
placed ox>r rite burner g_am to support
the wok. This ring acts as a heat uap,
which m W damag_ the burner gram and
burner head. Also, it m W cause rite burner
m work improperly. This may cause a
carbon monoxide lexel aboxe that
allowed by cn_Tent standards, resnlung
in a health hazard.
_fi:,:Foods for fl?'ing should be as dry as
possible. Frost on frozen foods or moisture
on flesh foods can cause hot fiat to bubble
up and over the sides of the pan.
_:;Nex_r ttT to mo\'e a pan of hot fat,
especially a deep fiat flTen _4'ait until the fiat
is cool.
Do not leaxe plastic imms on the
cooktoi>--fltey may melt if left too close to
the \_nt.
Kee I) all plastics away from dte surfl_ce
b/ll31el's.
To moid the possibility of a bum, always be
certain fltat rite conuols for all burners are
at the OFFposition and all grams axe cool
befbre atmmpfing to temoxe them.
It range is locamd near a windox% do not
hang long curtains fl_at could blow ox>r rite
smfi_ce burners and create a fire hazard.
Always tm_ the surface burner controls off
before removing cookware.
ge.com
SURFACEBURNERS(cont.)
_:; V_]len a pilot goes out (on standing pilot _:;Do not place or store items fllat can melt
or catch fire on the grates, ex_n when the
cooktop is not being used,
;_i:':Kee I) range clean and flee of
accumulations of grease or spillox_rs,
which may ignite.
models), you will demct a faint odor of gas
as your signal to religt_t fl_e pilot. When
relighting the pilot, make sure burner
controls are in the off position, and tbllow
instructions in this book m religtlt.
If you smell gas, and you hax> aheady
made sure pilots are lit (on standing pilot
models), mm off the gas to the rang_ and
call a quafified service technician. Ne_>r
use an open flame to locate a leak.
FLOORINGUNDERTHERANGE
Do not locate the range where it may be subject to strong drafts. Any open&gs & the floor or wall
behind the range should be sealed. Make sure the openings around the base of the range that supply
fresh air for combustion and ventilation are not obstructed by carpeting or woodwork.
_bur range, like many odmr household imms,
is hea_y and can setde into soft floor coverings
such as cushioned _iW1 or carpeting. Use
care when moving the range on this t).])e of
flooring. It is recommended that the following
simple and inexpensive instructions be
followed m promct your floor:
The mnge should be installed on a sheet of
pl)._vood (or similar material). "_lmn the floor
covering ends at dm fiont of the range, the
area flint the range will rest on should be built
up with pl}_vood m the same level or higher
than the floor co_ering.
This will allow the range to be moved for
cleaning or servicing. Also, make sure your
floor covering will withstand 180°E (See the
Installation Safety Instructions section).
Make snre the wall coverings aronnd },onr
mnge can withstand the heat genemmd (up m
200°F) by the range. (See the Installation
Safety Instructions section).
%
LEVELINGTHERANGE
I_.xeling legs are locamd on each comer of
fl3e base of fl_e range. Your range must be
lex_l in order to produce proper cooking and
baking resuhs. Alter it is in its final location,
place a lex_l horizontally on any oxen shelf
and check the lexelness front to back and
side to side. Lexel the range by adjusting the
lexeling legs or by placing shims under the
comers as needed.
READANDFOLLOWTHISSAFETYINFORMATIONCAREFULLY.
SAVETHESEINSTRUCTIONS
Usingthegas surfaceburners.
Throughout this manual, features and appearance may vary from your model
Surface Lighting Instructions for Electric Ignition Models
Thesurfaceburnerson somemodelsare fit by
electrici)?nition,eflYnlnatlngtheneed for standing
pilot lights with constant/)/burnlbgflames.
In case ofa powerfailure, you can light
the surfi_ce 1)urnex_ on your range with
a match. Hold a lit match to the burner,
then mrn the knob to the LITE position.
Use extreme caution when lighting burners
this way.
The electrode (ff the spark igniter is
exposed. _._l_en one burner is turned
to LITE,all the burnex_ spark. Do not
attempt to disassemble or clean
around any burner while another
burner is on. An electric shock may
result, which could cause you to
knock over hot cookware.
St/i'tilce btli'nei3 in t/se when an
electrical power fifilm'e occm's will
contintle to opei'ate noFi//allv.
Pilotport >:_=<_v
\
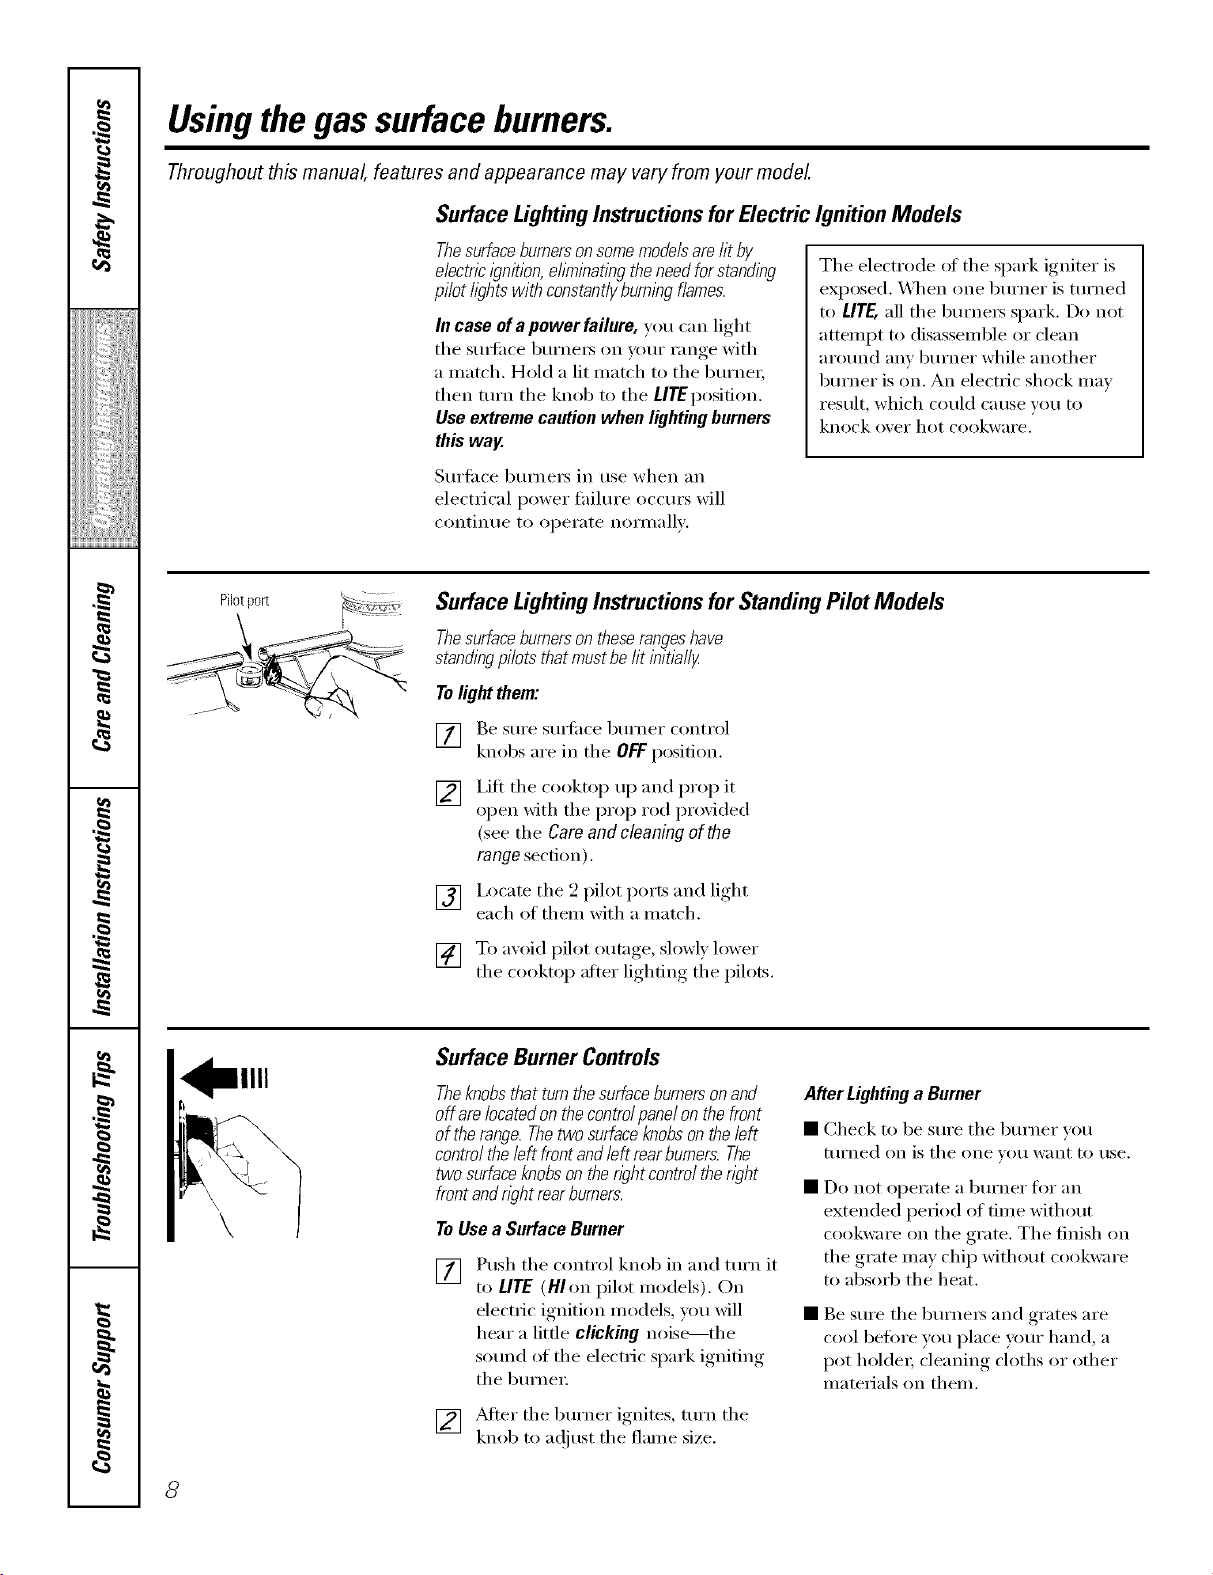
Surface Lighting Instructions for Standing Pilot Models
The surface burners on these ranges have
standingpilotsthat must be fit initMly
To light them:
] Be st/I'e st/FIilce bt/FneI" control
knobs are in the OFF position.
[]
lift the cooktop up and prop it
open with the prop rod provided
(see the Care and cleaning of the
range section).
[] I,ocate the 2 pilot ports and light
each of them with a match.
[] To aw)id pilot outage, slowl) lower
the cooktop after lighting the pilots.
\
\
Surface Burner Controls
Theknobsthatturnthesurfaceburnersonand
offarelocatedonthecontrolpanelonthefront
oftherange.Thetwosurfaceknobsontheleft
controltheleft frontandleftrearburners.The
twosurfaceknobsonthewht contro/thewht
frontandwht rearburners.
ToUsea Surface Burner
[]
Push the control knob in and tm'n it
to LITE(HIon pilot models). On
electric ignition models, you will
hear a little clicking noise---the
sotmd of the electric spark igniting
the burne_;
] _Mter the burner ignites, tm'n the
knob to a(!iust the flame size.
AfterLightinga Burner
• Check to be sure the burner you
ttlrned on is the one _Otl IV}lilt to rise.
• Do not opel'ate a btlrner _k)I"}lIl
extended period of time without
cookware on the grate. The finish on
the grate may chip without cookware
to absorb the heat.
• Be sure the burners and grates are
cool heft)re you place your hand, a
pot holder; cleaning cloths or other
materials on them.
8
ge.com
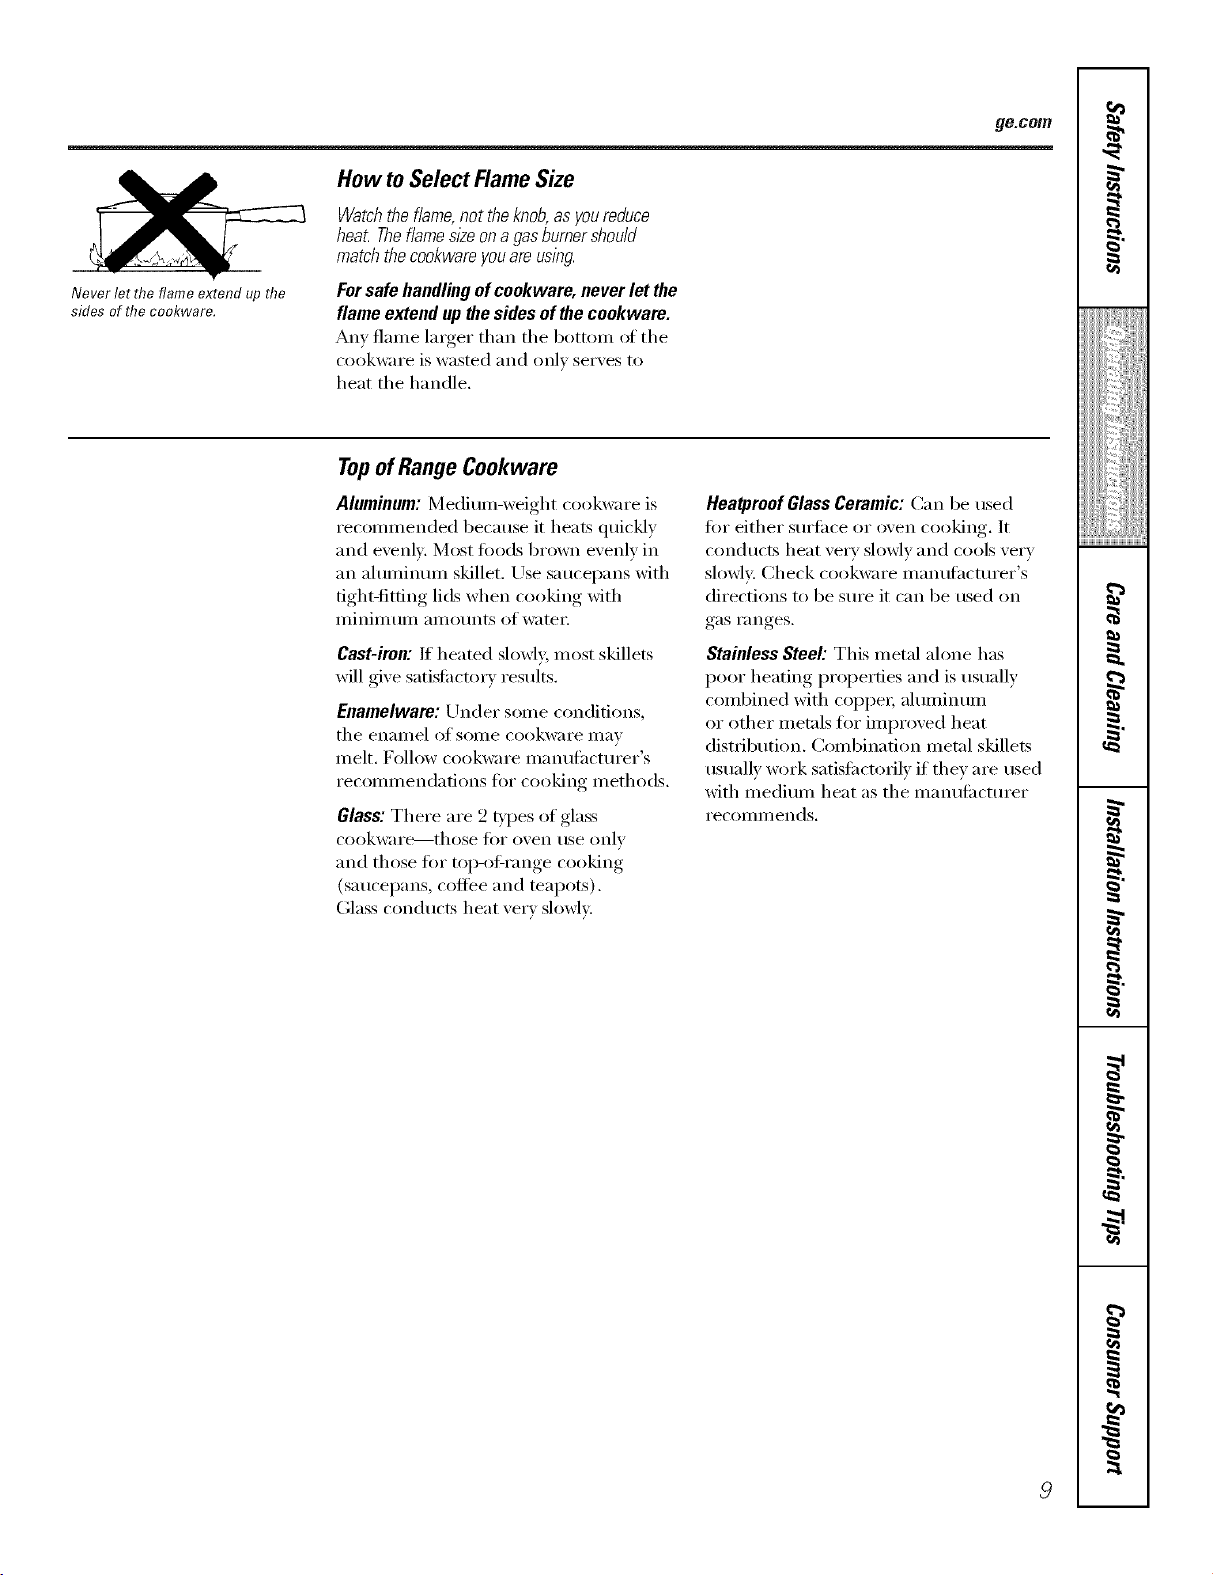
How to Select Flame Size
Never let the flame extend up the
sides of the cookware.
Watchthe flame,not theknob,as youreduce
heat Theflamesloeona gasburnershou/d
match thecookware youare using.
Forsafe handling of cookware, never let the
flame extend upthe sides of the ceekware.
Any flame larger than the botton_ of the
cookwai'e is wasted add oIllV serves to
heat tile handle.
Topof RangeCookware
Aluminum: IMedimn-weight cookware is
recommended because it heats quickly
and evenly. Most fi_o(ls brown evenly in
an ahmfinmn skillet. Use saucepans with
fight-titling lids when cooking with
I/liIliIlltlIll [lIllO/lIltS of water,
Cast-iron: If heated slowly, most skillets
will give satisfi_ctorv results.
Enamelware: Under some conditions,
tile eilai//el of SOille cookware i/l}l_
melt. Follow cookware mantdactm'er's
recommendations for cooking methods.
Glass: There are 2 types of glass
cookware,---those for oven use only
and those fin" top-ol_range cooking
(saucepans, coffee and teapots).
Glass conducts heat very slowly.
Hea_mof Glass Ceramic: Can be used
fin" either surfilce or oven cooking. It
conducts heat ve_T slowly and cools very
slowly: Check cookware manufilcturer's
directions to be sure it can be used on
gas ranges.
Stainless Steel: This metal alone has
poor heating properties and is usually
combined with coppe_; ahmfinum
or other metals for improved heat
distribution. Combination metal skillets
usually work satisti_ctorilv if thev are used
with medium heat as the manufi_cmrer
I'eCOIllI//eIlds.
9
Usingtheoven.
Throughout this manual, features and appearance may vary from your model
OVEN • TEMP
OvenControl
Youroven/s controlledbyan OVENTEMPknob.
/t can takeup to 90secondsbefore the flame
comes OR.
_dter tile oven reaches tile selected
temperature, tile oven burner maintains
tile selected temperature.
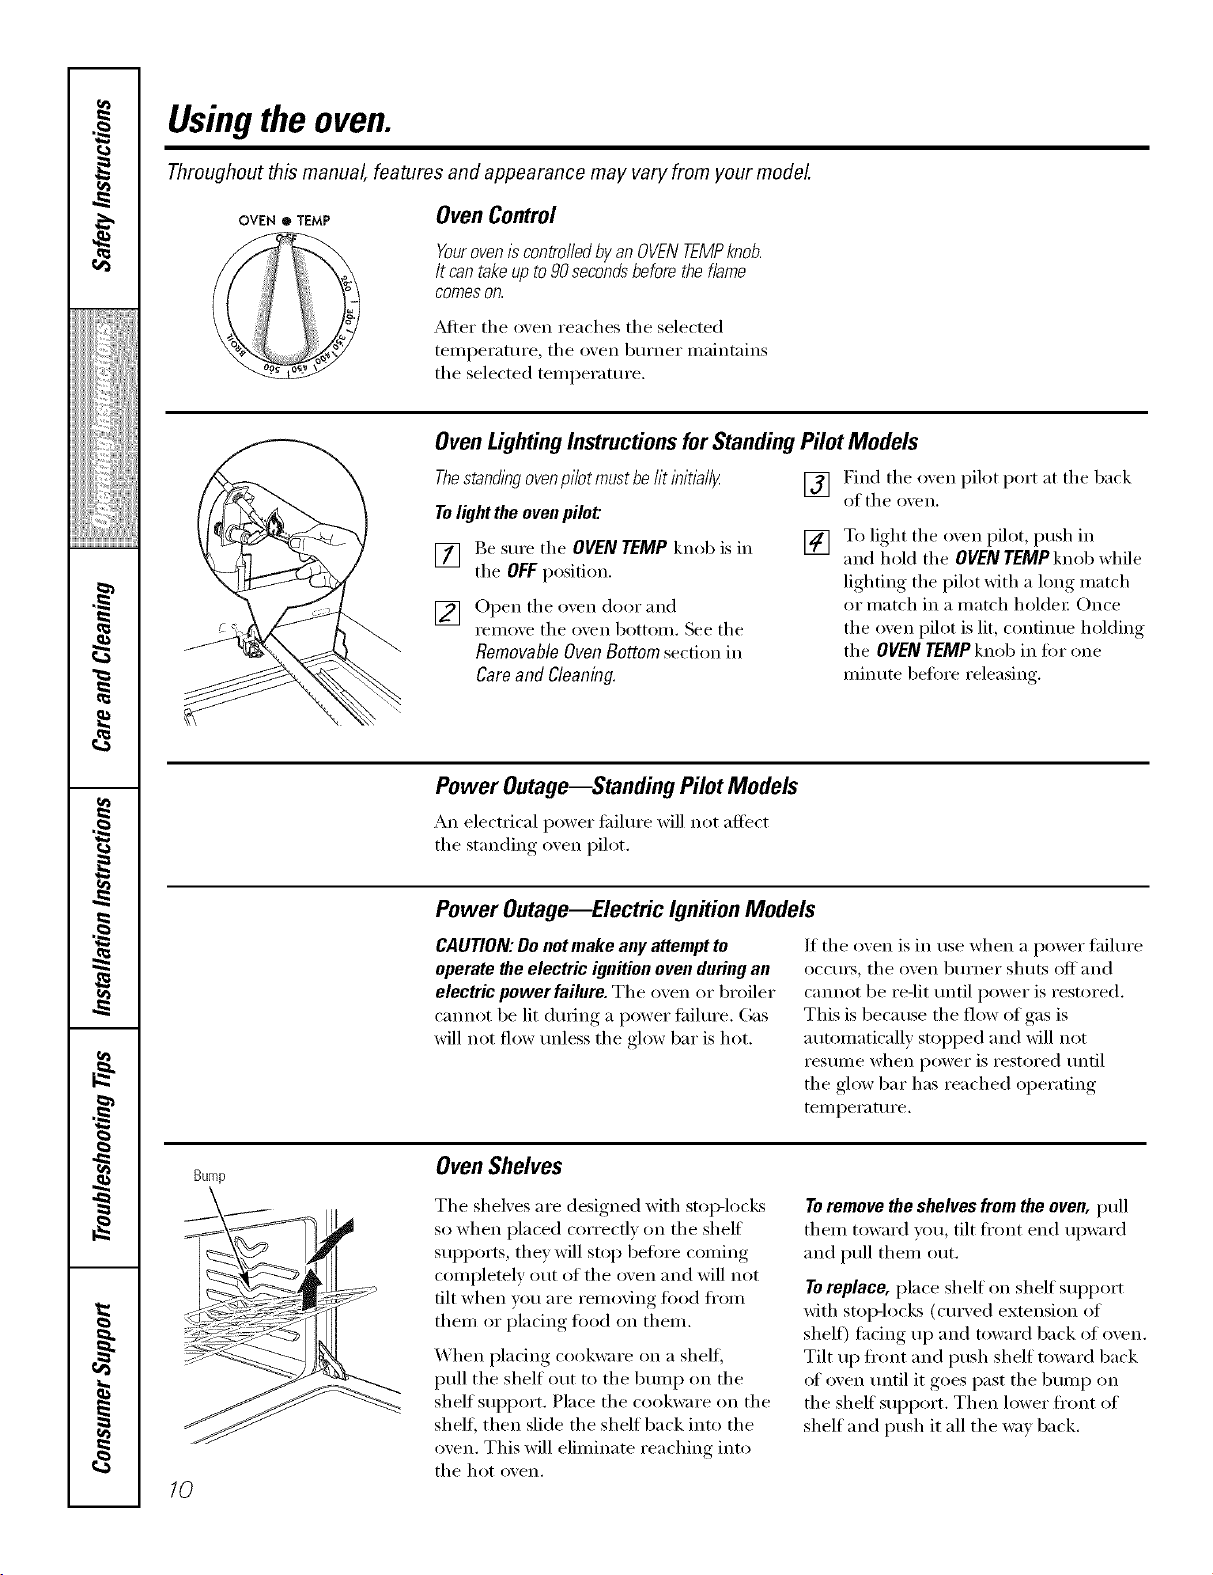
Oven Lighting Instructions for Standing Pilot Models
Thestandingovenpl/ot mustbelit/nit/a//_
Tolight the ovenpilot:
[] Be sm'e the OVEN TEMP knob is in
the OFF position.
[] Open tile oven door and
remove the oven bottom. See the
Removable Oven Bottom section in
Careand Cleaning,
[]
[]
Find tile oxen pilot port at tile back
of tile oxen.
To light tile o'_en pilot, push in
and hold tile OVENTEMP knob xdfile
lighting the pilot with a long match
or match in a match holdeE Once
the oven pilot is lit, contiime holding
tile OVENTEMP knob in fin" one
minute betore releasing.
Power Outage--Standing Pilot Models
An electrical power fifilure will not affect
tile standing o_en pilot,
CAUTION:Do not make any attempt to
operate _e electric ignition oven duringan
electric powerfailure. Tile oven or broiler
cmmot be lit during a power fifilure. Gas
will not flow tlnless tile glow bar is hot.
Power Outage--Electric Ignition Models
If tile oven is in use when a power fifilure
occm_, tile oven burner shuts off and
cmmot be re-lit tmtil power is restored.
This is because the flow of gas is
automatically stopped and will not
resume when power is restored until
tile glow bar has reached operating
temperature.
Bump
10
OvenShelves
Tile shelves are designed with stop-locl<s
so when placed correctly on the shelf
supports, they will stop before coming
complemly otlt of tile oven and will not
flit when you are removing food fl'om
them or placing fi)od on them.
When placing cookware on a shell
pull the shelf out to the bump on the
shelf support. Place the cookware on the
shelE then slide the shelf back into the
oven. This will eliminate reaching into
tile hot oven.
Toremove the shelvesfrom the oven, pull
them toward you, tilt fl'ont end upward
and pull them out.
Toreplace, place shelf on shelf support
with stop-locks (curved extension of
shell) tacing up and toward back of oven.
Tilt up ti'ont and push shelf toward back
of oven until it goes past tile bump on
tile shelf support. Then lower fl'ont of
shelf and push it all the way back.
ge.com
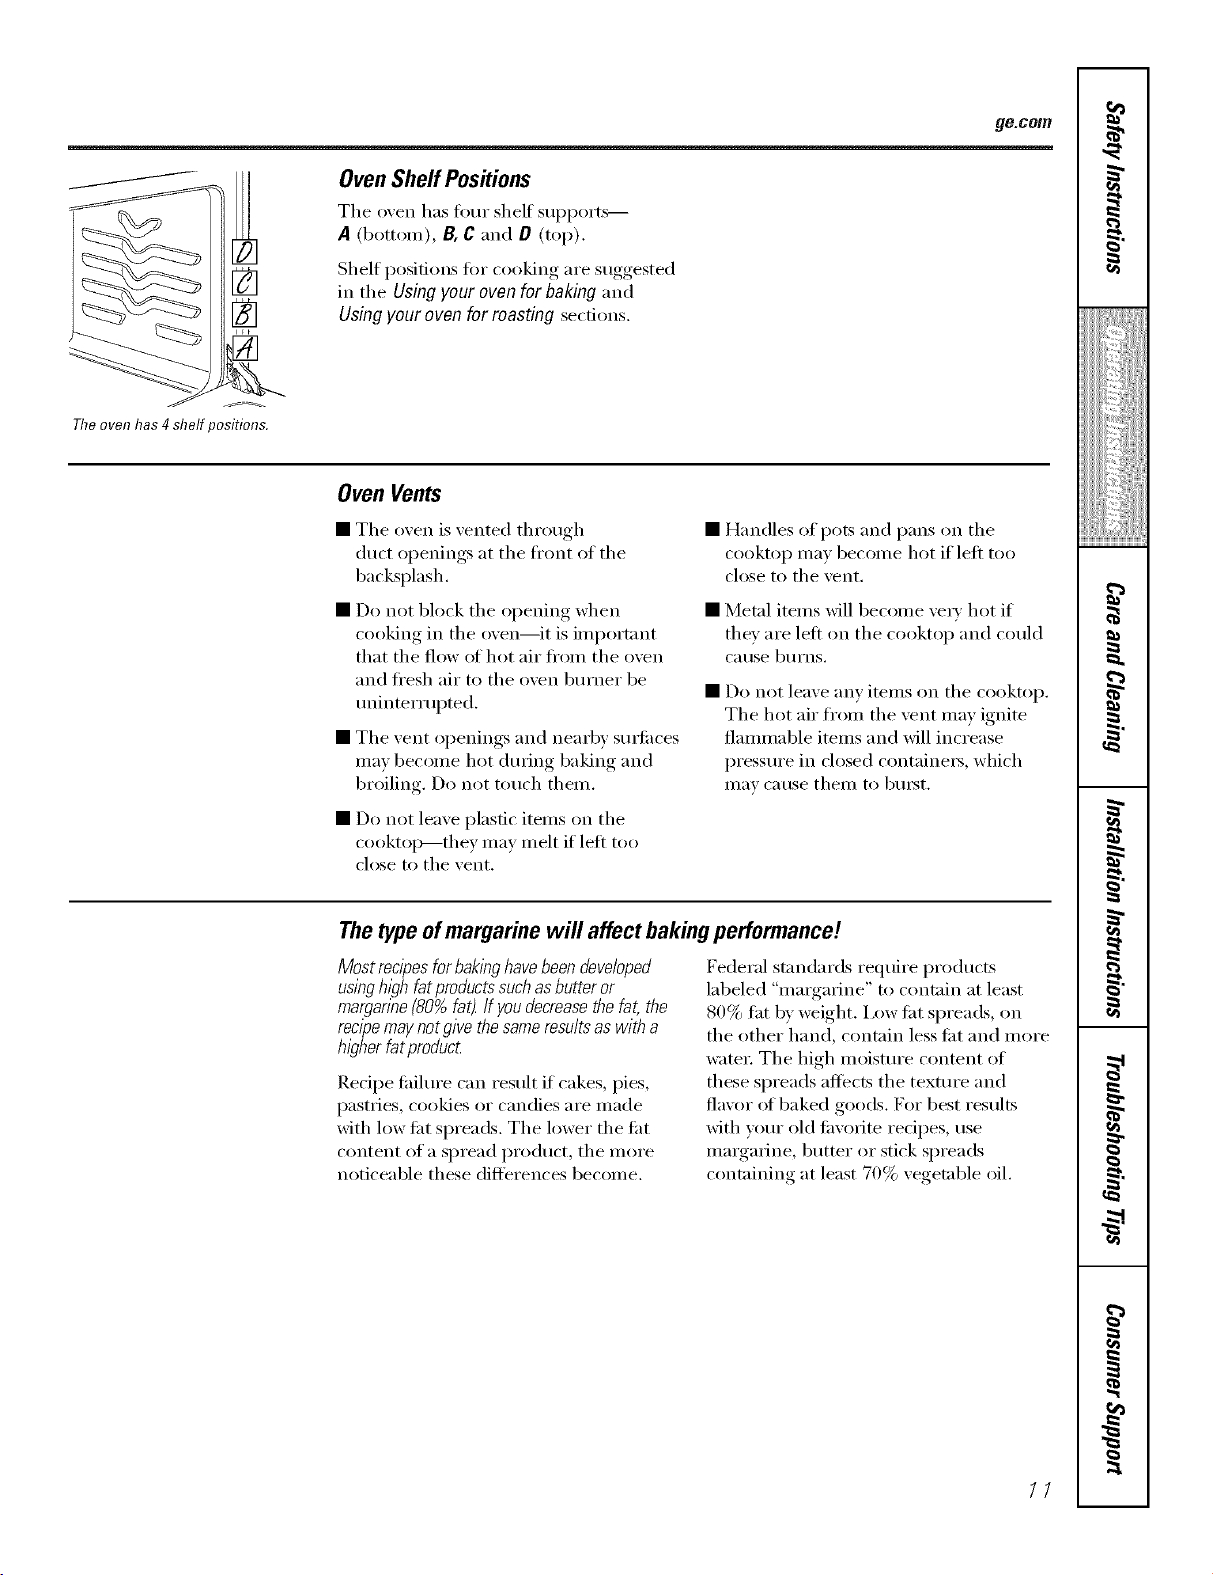
Theovenhas4shelfpositions.
Oven Shelf Positions
The oven has tour shelf supports--
A (bottom), B, C and O (top).
Shelf positions fin" cooking are suggested
in the Using your oven for baking and
Using your oven for roasting sections.
Oven Vents
• Tile oven is vented through •
duct openings at tile fl'ont of tile
backsplash.
• Do not block tile opening when •
cooking in tile oven--it is important
that the flow of hot air fl'om the oven
and fl'esh air to tile oven burner be
tminterrul)ted.
• The vent openings and nearby SUlqfilces
may become hot during baking and
broiling. Do not touch them.
• Do not leave plastic items on the
cooktoi_--they may melt if left too
close to the vent.
Handles of pots and pans on the
cooktop may becom e hot if left too
close to tile vent.
Metal items will become \'eta' hot if
tile}' are left on tile cooktop and could
C_l rise b/IYnS.
Do not leave }lIIV itelllS on tile cooktop.
Tile hot air from tile vent may ignite
flammable items and will increase
pressure in closed containers, which
Ill,IV (;itlse theI// to btli'St.
Thetype ofmargarine will affect bakingperformance!
Mostrecipesforbakinghavebeendeveloped
usinghighfatproductssuchasbutteror
margarine(80%fat).If youdecreasethefat,the
recipemaynotgivethesameresu/tsaswitha
higherfatproduc_
Redpe tililure can result if cakes, pies,
pastries, cookies or candies are made
with low lilt spreads, The lower the lilt
content of a spread product, tile more
noticeable these differences become.
Federal standards require products
labeled "margarine" to contain at least
80% tilt by weight. I,ow lilt spreads, on
the other hand, contain less lilt and more
water: The high moisture content of
these spreads affects tile texture and
flavor of baked goods. For best results
with vour old tm'orite redpes, rise
margarine, glitter or stick spreads
containing at least 70% vegetable oil.
1/

Usingtheovenforbaking.
To avoid possible bums, place the shelves in the desired position before you turn the oven on.
How toSet the OvenForBaking
[_] Close tile o_en door Then turn tile
OVEN TEMP knob to tile desired
tempel';fftlre.
V_] Check tile fi)od fi)r doneness at
tile minimmn time on tile recipe.
Cook longer if necessary. Turn
tile OVENTEMP knob to OFF and
I'eI//o\ e tile fi)o(L
Placemostfoodsin themiddleof
the oveR,
Oven Shelves
Arrange tile oven shelf or shelves in tile
desired locations while the oven is cool.
Tile correct shelf position depends on
tile kind at fi)o(l and tile browning
desired,
_&sa general rule, place most tbods in
tile middle of tile oven, on either tile
shelf position B or 12.See tile chart
tot suggested shelf positions.
Typeof Food
Angelfoodcake
Biscuits,muffinsorcupcakes
Cookies
Brownies
Layercakes
Bundtor poundcakes
Piesorpieshells
Frozenpies(oncookiesheet)
Casseroles
Shelf Position
A
Bore
CorD
BorC
BorC
B
BorC
BorC
BorC
Topreheat,set the
ovenat the correct
temperature--
selectbg a higher
temperaturedoes
not shorten the
preheat time.
Preheating
Preheat tile oven fi)r 10 minutes if'
tile recipe calls fi)r it. Preheat means
bringing tile oven up to tile specified
temperature before putting tile food
in the oven.
Preheating is necessm T fi)r good results
when baking cakes, cookies, pastry and
breads. For IllOSt casseroles [lll(l roasts,
preheating is not necessm_:
Baking Pans
Use theproperbaklbgpan. Thetypeof finish on
the pandeterminesthe amountof brownlbg that
will occur
• Glass baking dishes also absorb heat.
\._l/en baking in glass baking dishes,
lower tile temperature by 25°F and rise
tile recommended cooking time in tile
recipe. This is not necessary when
baking pies or casseroles.
• Dark, rough or dull pans absorb heat
resulting in a browne_; crisper crust.
Use this type for pies.
• Shin> b_ight and smooth pans reflect
heat, resulting in a lighte_; more
delicam browning. Cakes and cookies
require this t)pe of pan.
12
Pan Placement
For e\'en cooking and proper browning,
there nlust be enough room for air
ci_vulation in the oven. Baking results will
be better if baking pans are centered as
much as possible rather than being
placed to the fl'ont or to the back ot
tile oven.
Pans should not touch each other or tile
wails of the ()veil. Mlow 1 to 1½ inch
space between pans as well as fl'om tile
back of the oven, the door and the sides.
Ifyouneed to usetwo shelves,staggerthe
pansso one is not directlyabovethe other
ge.com
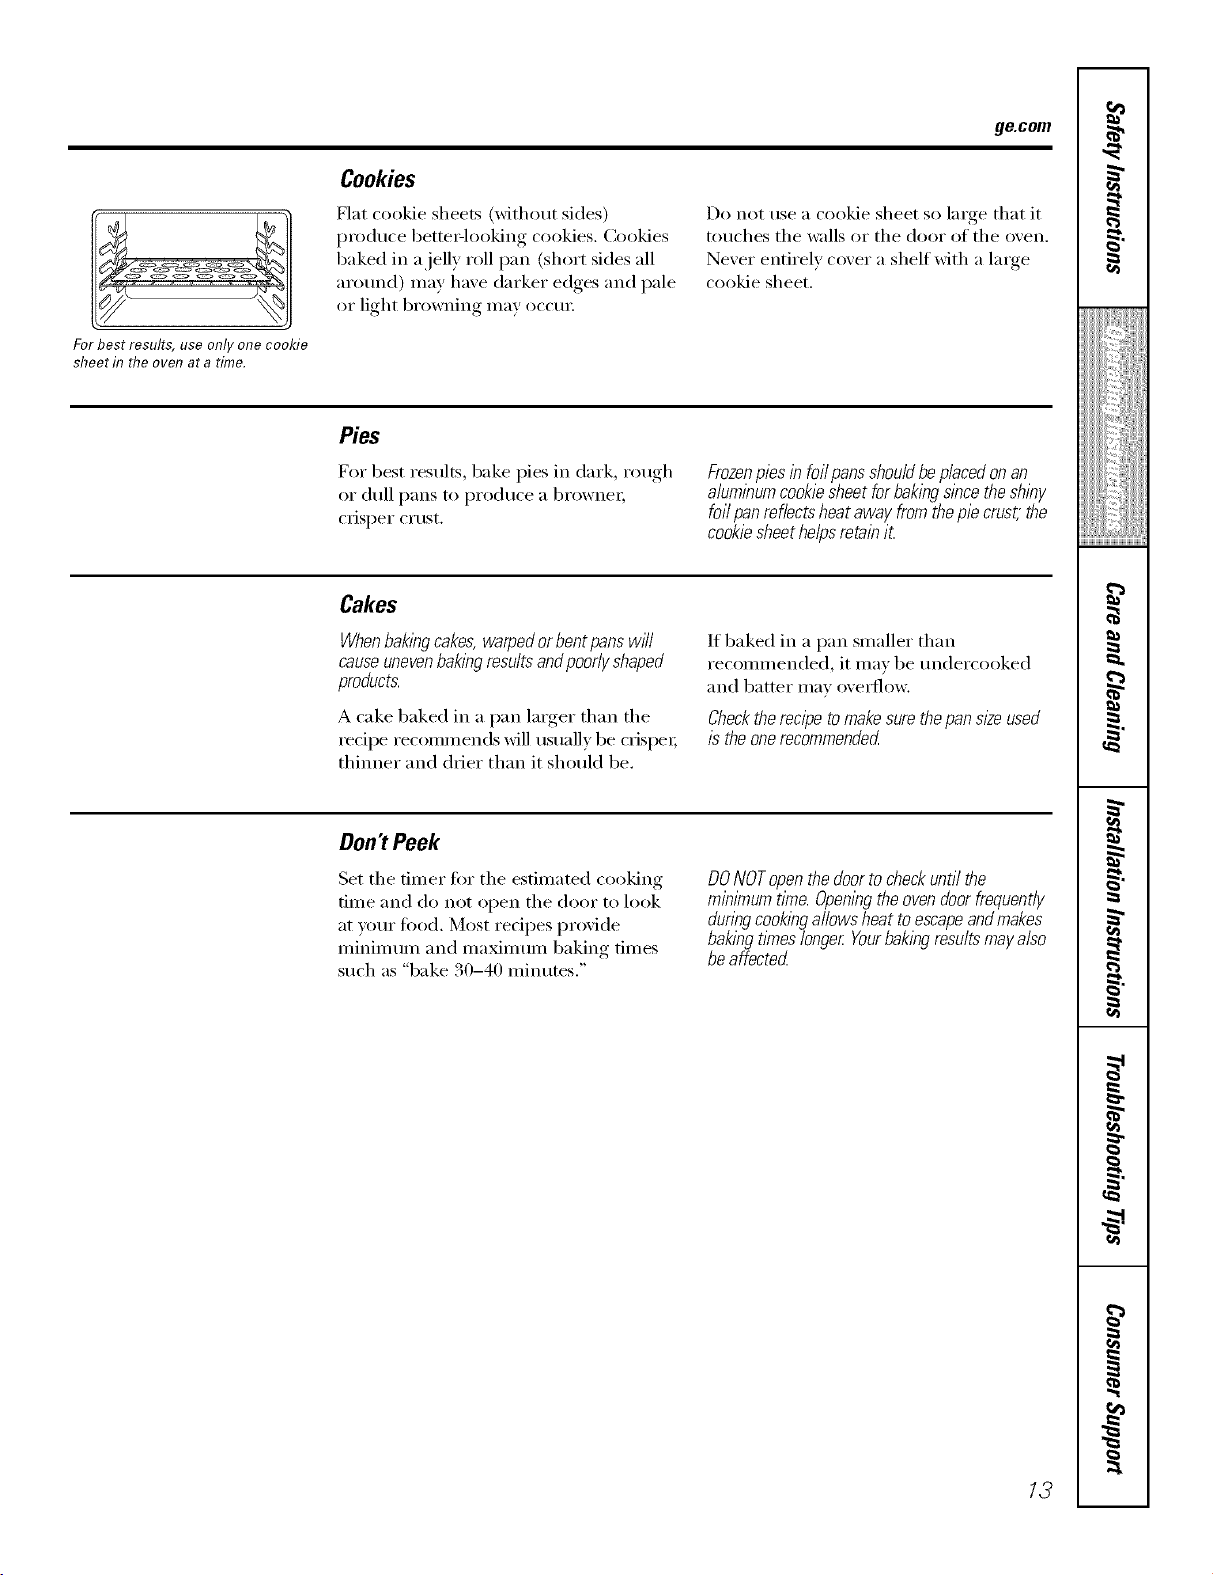
Forbestresults,useonlyonecookie
sheetin theovenatatime.
Cookies
Flat cookie sheets (without sides)
produce bette_qoo]dng cookies. ())()]des
baked in a jelly roll pan (short sides all
arom_(l) may have darker edges and pale
or light browning may occm:
Do not use a cookie sheet so lmge that it
touches the walls or the door of the oven.
Never entirely cover a shelf with a lmge
cookie sheet.
Pies
For best results, bake pies in dark, rough
or dull pans to produce a browne_;
crisper crust.
Frozenpies in foil pansshouldbeplacedon an
aluminumcookiesheet for bakingsincethe shiny
foil panreflects heataway fromthe pie crust,the
cookiesheet helpsretain it
Cakes
Whenbaklbgcakes, warpedor bentpans wiTl
causeunevenbaklbgresults andpoor/y shaped
products.
A cake baked in a pan linger than tile
recipe recommends will usually be cfispe_;
thim_er and drier than it should be.
If baked in a pan smaller than
recommended, it may be tmdercooked
[In(1 batter Ill[Iv (weYJlow.
Checkthe recipe tomakesurethe pansize used
is the onerecommended
Don'tPeek
Set tile timer fi)r tile estimated cooking
time and do not open tile door to look
at )'ore" fi)od. Most redpes provide
minim um and maximum baking times
such as "bake 30-40 minutes."
DONOTopenthedoor tocheckuntil the
minimum time. Openlbgthe ovendoorfrequently
dur/bgcook/bgallows heat to escapeandmakes
baking t/Yneslonge_Yourbakingresultsmay also
be affected
13
Usingtheovenformasting.
Roasting is cooking by dry heat. Tender meat or poultry can be roasted uncovered in your oven. Roasting
temperatures, which should be low and steady, keep spattering to a minimum.
Roasting is really a baking procedure used for meats. Roasting is easy;just follow these directions:
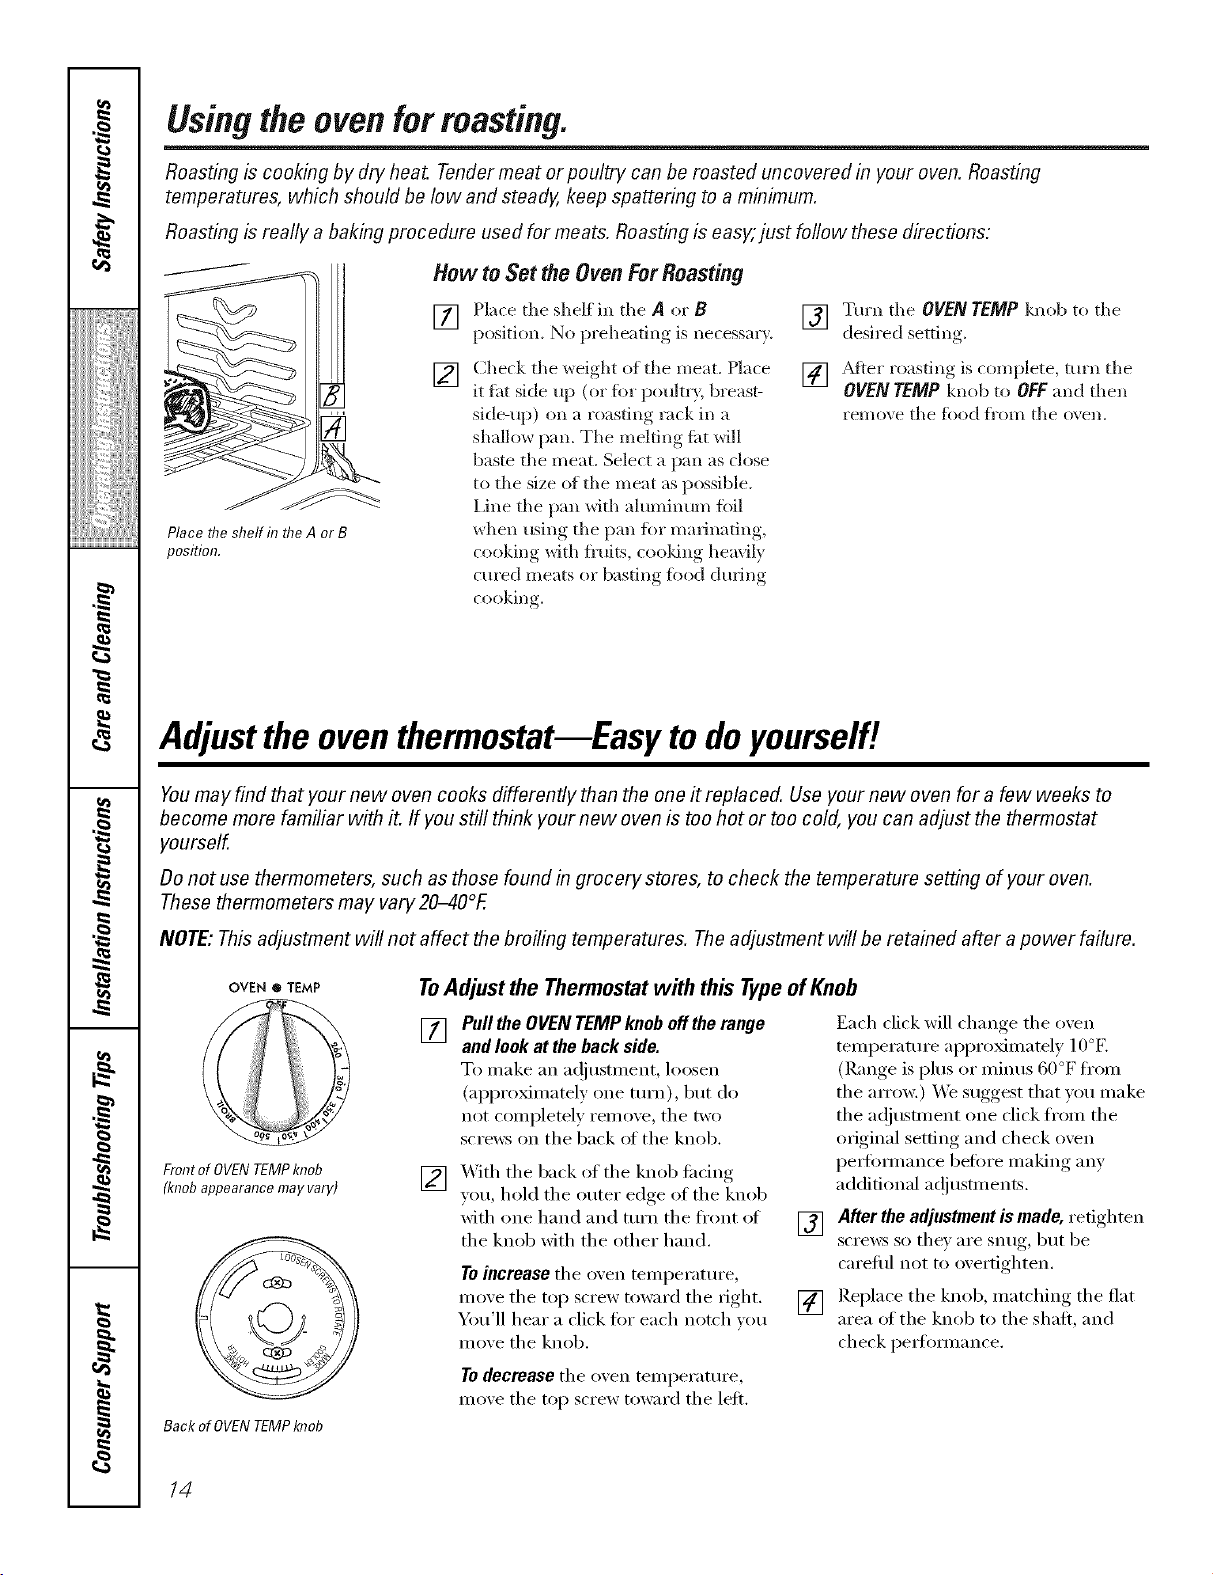
Place flTeshelf in flTeA or B
position.
How toSet theOvenForRoasting
[] Place the shelf in tile A or B
position_ No l_reheating, is necessm'_
Check tile weight of the meat. Place
[] it tht side up (or fiw p(mltry, breast-
side-tip) (sn a roasting rack in a
shallow pan. Tile melting ti_t will
baste the meat. Select a pan as close
to the size of tile meat as possible.
I,ine tile pan _dth ahmfinum toil
when using tile pan fist marinating,
cooking with fruits, cooldng heavily
cured meats or basting fisod during
cooking.
F_] Turn tile OVENTEMP knob to tile
desired settin ,
] _Mter roasting is complete, tm'n tile
OVEN TEMP knob to OFF and then
rei//(sve tile food ii'om tile ()*,'ell.
Adjustthe oven thermostat--Easy todoyourself!
Youmay find that your new oven cooks differently than the one # replaced. Use your new oven for a few weeks to
become more familiar with it. If you still think your new oven is too hot or too cold, you can adjust the thermostat
yourself.
Donot use thermometers, such as those found in grocery stores, to check the temperature setting of your oven.
These thermometers may vary 20_40°F.
NOTE: This adjustment will not affect the broiling temperatures. Theadjustment will be retained after a power failure.
OVEN • TEMP
ToAdjustthe Thermostatwith this Typeof Knob
[]
Front of OVENTEMPknob
FS]
(knob appearancemay vary) I_1
Back of OVENTEMPknob
Pull the OVEN TEMP knob off the range
and look at the back side.
To make an a(!iustment, loosen
(appro_mately one turn), but (1(5
not completely remove, tile two
scre_:s on tile back (5t tile knob.
With tile back of tile knob ti_cing
you, hold tile outer edge of tile knob
with one hand and mrn tile fl'ont (5t
the knob with the other hand.
To increase tile oven temperature,
move tile top screw reward tile right.
You'll hear a click tot each notch vou
move the knob.
[]
[]
Each click will change tile oven
temperature approximately 10°E
(Range is plus or n/inus 60°F fl'om
tile art'(m:) We suggest that vou make
tile a@,snnent one click fl'om tile
original setting and check oven
perlimnance before making any
additional a(!jtlstments.
After the adjustment is made, retighten
scrmvs so they are snug, but be
careful not to overtighten.
Replace the knob, matching the flat
area of tile knob to tile shaft, and
check pe_l'imnance.
To decrease tile oven temperature,
mole tile top screw toward tile left.
14

Usingthe ovenforbroiling, gecom
Broiling is cooking food by direct heat from above the food. Most fish and tender cuts of meat can be broiled. Follow
these steps to keep spattering and smoking to a minimum.
Yourrange has a compartment below the oven for broiling. A specially designed broiler pan allows dripping fat to
drain away from the food.
Both the oven door and broiler compartment drawer should be closed during broiling.
S
>>
How to Set Your Oven for Broiling
[] You can change tile distance oI tile []
t0od fl'oln tile heat source by
positioning tile broiler rack in
tile broiler compartment: []
-A (bottom of broiler []
compartment).
-B (center of broiler compartment).
-C (top of broiler compartment).
Most broiling should be done in
position A. []
Preheat the broiler tot best results.
[]
[]
If tile meat has tat or gristle
around tile edge, cut xertical slashes
through it about 2 inches apart,
but don't cut into tile meat. _,\'e
recomlnend that vou tlJm tile tilt to
i)revent excessive slnoking, leaving a
laver about l/8 inch thick.
Close tile oxen door and broiler
COIl/I)_lI'tII/ent drawei:
Turn tile OVENTEMPknob to BROIL.
Ttlrn IllOSt loo(ls once (h/IJng
cooking Tilne foods tor about one-
half tile total cooking tilne, turn
tood, then continue to cook to
preterred doneness.
Turn tile OVEN TEMP knob to OFF.
]_.elnox e tile broiler pan fl'oln tile
broiler rack and serve tile food
ilnnmdiatelv. I,eave tile pan
outside tile range to cool.
Broiler Compartment
Tile broiler pan is held in place in tile
broiler rack.
Toremovethebreilerpan:
[] Gently pull forward on tile drop
down broiler dooI:
[] Pull tile broiler rack x6th pan
torward lmtil the rack stops. Grasp
tile broiler pan and relno'_e it fl'onl
tile broiler rack.
Toreplacethebreilerpan:
[]
[]
Slide tile broiler pan onto tile rack
and push both tile broiler pan and
the rack all the way into the broiler
COillpa i'tli/ent.
Close tile broiler dooI:
UseofAluminumFoil
Never cover the oven bottom with
aluminum foil.
Yinl can use ahuninunl foil to line your
broiler pan and broiler grid. Howevei;
um Inust rooM tile toil tightly to tile pan
and cut slits in the foil to open all slots
in tile grid.
_Mmninum fifil may also be used to catch
a spillove_: To do so, place a small sheet
of toil on a lower shelf several inches
below tile tood.
Never endrely cover a shelf with
ahmliimln t0il. This will disturb tile heat
drculation and result ill poor baking.
15

Usingtheovenforbroiling.
Broiling Guide
[] The o_en door and broiler compariment
dmv, er must be closed during broiling.
[] Alv, a_s use the broiler pan that comes
xdth _,om" nmge
[]/f desired, marinate meats or chicken
betbre broiling. (h; brash xdth
barbecue sauce the last 5 to 10 minutes.
[] _hen arrangdng_ _ fi)od on })an, do not
let thtt_ edges hano over the sides. The
fiat drippings will soil the broiler
COl/IpallI/l ent.
[] Use tongs to turn the meat. Pierced
meat loses juices.
Food
Bacon
GroundBeef
Beef Steaks
Medium
Chicken
Fish
Amountor Shelf
Thickness Position
1/2 lb. B
(about8thinslices)
1 lb.(4 patties) B
1/2to 3/4" thick
1to 11/zIbs. Bor C
1whole
2to 2VzIbs.,
split lengthwise
1 lb.fillets
1/4to 1/2" thick
Time In Minutes
First Side Second Side
31/Lrain. 3 rain.
11 12min. 6 7rain.
12mira 5 6min.
30_5 min. 25 30mira
5 min. 5 min.
Comments
Arrangein single layer
Spaceevenly.
Steakslesstban 1"
thickcookthrougb
beforebrowning.Pan
fryingisrecommended.
Reducetime about5
to 10minutesperside
forcut-up chicken.
Brusheachsidewitb
meltedbutter.Broil
skin-side-downfirst.
Handleandturnvery
carefully.Brushwitb
lemonbutterbefore
andduringcooking,
if desired.Preheat
broilerto increase
browning.
16

Careand cleaningoftherange, gecom
Be sure electrical power is off and aft surfaces are cool before cleaning any part of the range.
Proper care and cleaning are important so your range will give you efficient and satisfactory service. Follow these
directions carefully in caring for your range to assure safe and proper maintenance.
If your range is removed for cleaning, servicing or any reason, be sure the anti-tip
device is re-engaged properly when the range is replaced. Failure to take this
precaution could result in tipping of the range and cause injury.
How to Removethe Rangefor Cleaningand Servicing
Follow these steps to remove the range
tor servicing or cleaning hard to reach
StlI'J[iIces.
[] Shut off the gas supply to the range.
[] Disconnect the electrical suppl} to
the mnge.
[] Disconnect tile gas supply robing to
the range.
[]
Reverse these steps to re-install the
range. If the gas line has been
disconnected, check tor gas leaks
al[er re-connection. See tile
Installation Instructions tor tile gas
lead test method.
NOTE:A trainedtechm?lanshou/flmakethegas
1?Tsta//ation,disconnectionandre-connectionofthe
gassupplytotheapphance.
[]
Slide the range tb_avard to fl'ee tile
range ti)ot fl'om the Anti-Tip bracket.
See the Installation Instructions tor
the location of the bracket.
Lift-Up Cooktop
Cleanthe areaunderthe cooktopoften. Built-up
soil, especiallygrease,may catchon fire.
To make cleaning easier; the (ooktop
may be lifted up and propped open.
Be sure all burnei_ are turned offbefore
raising the cooktop. Then remove the
grates.
Grasp the two fl'ont bm'ner wells and lift
the cooktop up and prop it open with
the prop rod provided. Be carefld of the
pilots when the cooktop is up.
_Mter cleaning tmderneath the cooktop
with hot, soapy water and a clean cloth,
hold the cooktop up, return the prop
rod to its storage position and lower the
cooktop tmfil it snaps into position. Be
careflfl not to pinch yore" finge_s.
Burner Grates
Gratesshouldbe washedregularlyandafter
spil/overe Washthem/n hot, soapywaterand
nnsewith clean water
_Mter cleaning, &T thoroughly by putting
thelll in a /vailll o\ ell ik)r a Jew Illintltes.
Don't put the grates back on the range
while they are wet. \\]_en repladng the
grates, be sm'e they're positioned securely
(wer the bm'nel_.
To get rid of bm'ne&on fi)od, })lace the
grates in a covered container (or plastic
bag) with 1/4 cup ammonia to loosen
the soil. Then scrub with a soap-filled
scorning pad if necessary.
_Mthough they're din'able, the grates will
gradually lose their shine, regardless ot
the best care you can give them. This is
due to their continual exposm'e to high
temperatures.
Do not operate a burner fi)r an extended
period (d time without cook,s'are on the
grate. The finish on the grate may chip
without cookware to absorb the heat.
17
Camand cleaningoftherange.
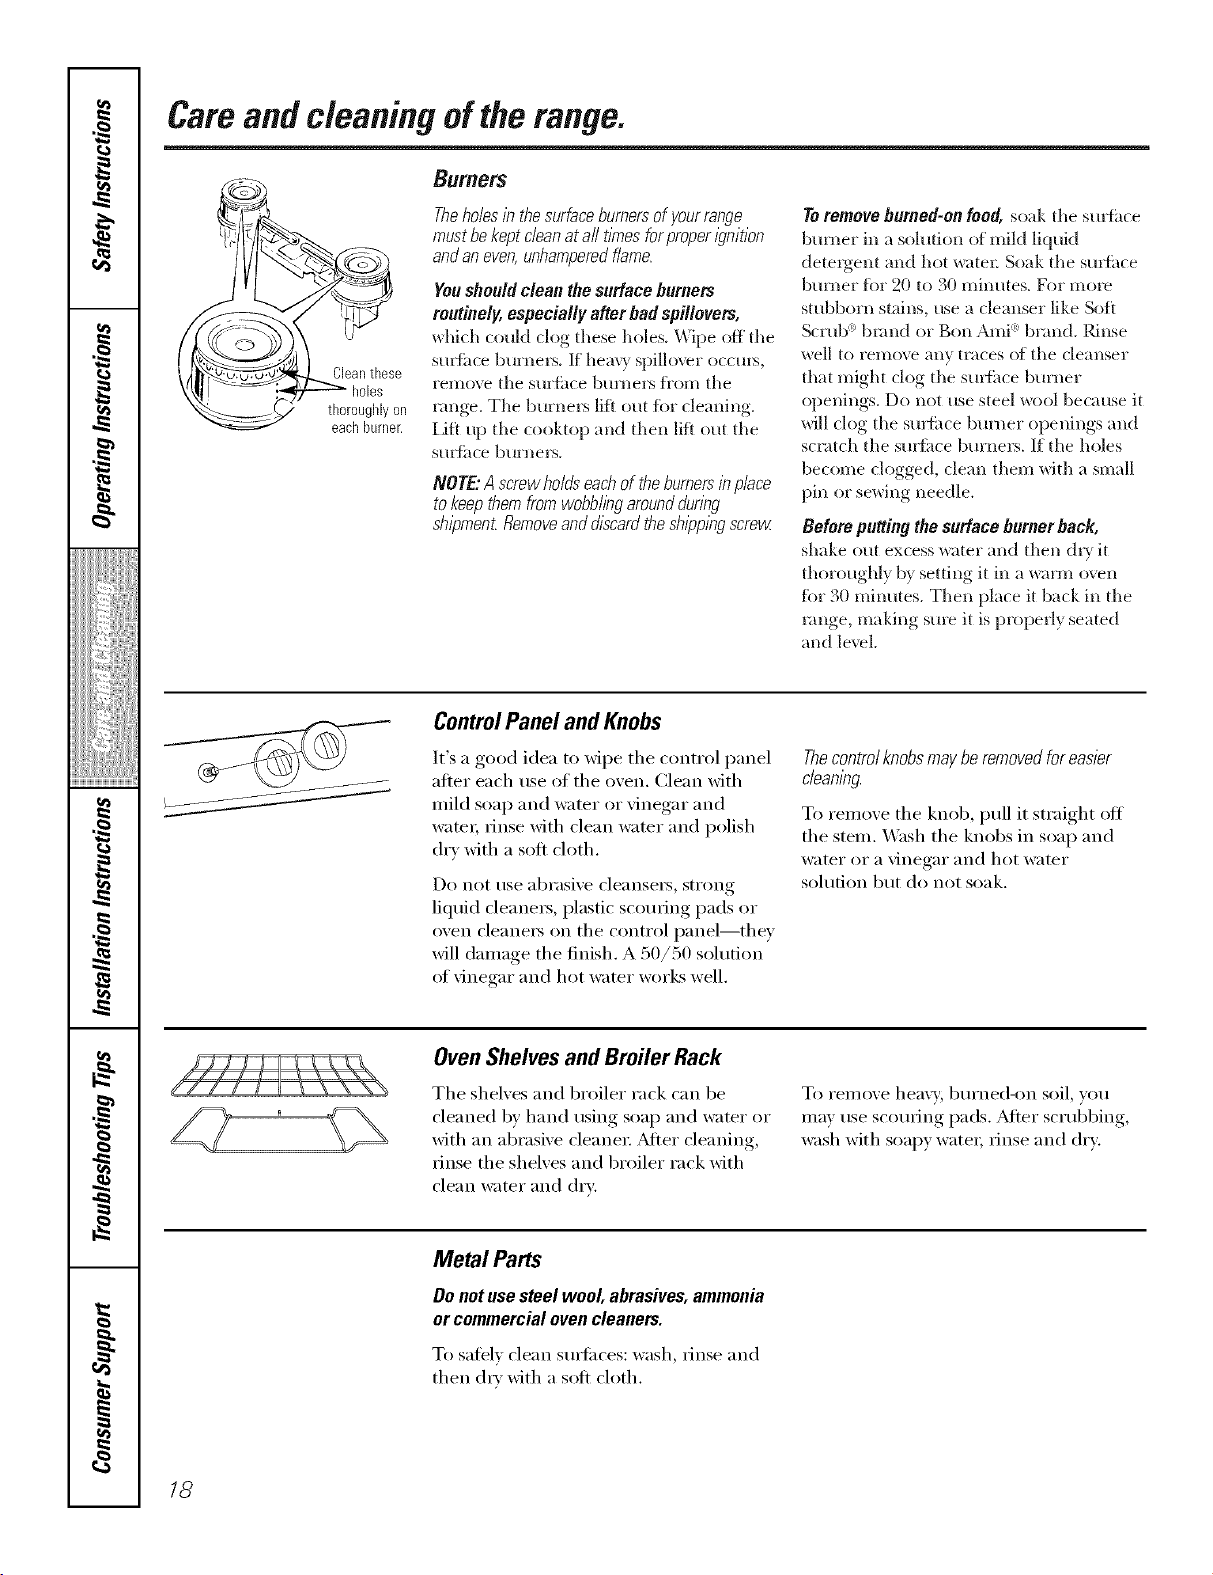
! Cleantl_ese
holes
thorougifly on
each bul'lleE
Burners
Theholes inthe surfaceburnersof yourrange
mustbekeptcleanatall t/?nesforproper /iTnition
andan even,unhamperedflame.
Youshould clean the surface burners
routinely,especially after bad spillovers,
which (-o/lid clog these holes. Wipe off the
sm_hce burners. If heil\ry spillo_r occms,
remove tile surfhce bunlers fl'(n'a tile
hinge. The burners lilt out for cleaning.
iJfl up the cooktop and then lift out tile
surthce burners.
NOTE:A screwholds eachof theburners177place
to keepthem fromwobblingaroundduring
shipment Removeanddiscardthe shippingscrew
Toremove burned-on food, soak tile sm{hce
burner ill a solution of mild liquid
detergent and hot watei: Soak tile sm_hce
burner fbr 20 to 30 minutes. For morn
stubborn stains, use a cleanser like Soft
Scrub <_brand or gon Ami <:brand. Rinse
well to remove ally tiaces of the cleanser
that might clog tile sm_thce burner
openings. Do not use steel wool because it
will clog the sm_hce burner openings and
sci:Jtch tile sm_ti_ce burners. If tlle holes
become clogged, dean them with a small
pin or sewing needle.
Beforeputting thesurface burner back,
shake out excess _lter and then dry it
thoroughly by setting it in a _m_n oven
for 30 minutes. Then place it back in the
range, making sure it is properly seated
and le_l.
ControlPanel and Knobs
It's a good idea to Mpe tile control panel
after each rise of tile oven. Clean with
mild soap and water or vinegar and
wateI; rinse with clean water and polish
dry with a soft cloth.
Do not use abrasive cleanse_, smmg
liquid cleane_, plastic scouting pads or
oven cleane_ on tile control panel--they
will damage tl/e finish. A 50/50 solution
of vinegar and hot water works well.
Thecontrolknobsmayberemovedforeasier
cleaning
To remove tile knob, pull it straight off
tile stem. X4'ash tile knobs in soap and
water or a vinegar and hot water
sohltion gilt do IXO[ soak.
OvenShelves and BroilerRack
Tile shelves and broiler rack can be
cleaned by hand using soap and water or
with an abrasive cleane_: _Mter cleaning,
rinse the shelves and broiler rack with
clean water and dry:
To remove heavy, burned-on soil, you
nlav use scouting pads. _Mtei" scrubbing,
wash with soapy water; rinse and (h>
Metal Parts
Do not use steel wool, abrasives, ammonia
or commercial ovencleaners.
To safely clean smti_ces: wash, rinse and
then (hw with a soft cloth.
18

ge.com
÷
Knurledscrew
(011SOftie
models)
RemovableOvenBottom
First renlove the shelves fl'onl the oven.
The oven bottom lifts fl'oIn the front.
Toremove:
[] On models so equipped, i'eino_.e
the knurled screw in the fl'ont of the
oxen bottoi/l.
[] (;rasp each side of the oxen bottonl
and push it back.
[] iJfi tile front up and pull it ()/It of
tile oxen.
Toreplace:
[] (;rasp each side of tile oxen bottoin
and guide its rear tabs into the slots
in tile back of tile oxen.
[] I.ower tile oxen bottonl and pull it
fin'ward until it is secure under tile
Jl"(IIlt o_,en floor edge.
[] On nlodels so equipped, replace tile
knurled screw in tile fl'ont of tile
oxen bottoil/.
NOTE,"If theovenbottom/sreplaced/#correctly,it
maywarpandcauseundeskab/ebakingresults.
CleaningtheOvenBottom
Theovenbottom hasaporcelainenamel fi#ish.
To niake cleaning easiei; protect tile oven
bottoin fl'oin excessive spillovei_ by
placing a cookie sheet on the shelf below
the shelf you are cooking on. This is
particularly inlportant when baking a
fl'uit pie or other fi)ods with high add
content. Hot fruit fillings or fi)ods that
aI'e acidic in content, such as toi/latoes
or sauerkraut, and sauces with vinegar
or leinonjuice, niay cause pitting and
danlage to tile porcelain enanlel SUltilce
and should be wiped up ininlediately:
Toprotecttheovenbottomsurface,place
a piece ot ahuninuin fi)il slighdy laiger
than tile baking dish on tile shelf below
to catch any boiloveI_. It should not
completely cover tile shelf as this
would cause uneven heat in tile oven.
/_dtli/lintllll foil should not be placed
on tile ()veil bottolli.
If a spillover does occur on tile ()veil
bottonl, allow tile oven to cool fiI_t. You
can clean tile bottoin with soap and
wateI; a nIild abrasive cleansei; soap-filled
scouiing pads or an oven cleaner
folh)wing package directions.
Broiler Compartment
Tile broiler pan is held in place in tile
broiler rack.
Toremove the breiler pan:
[] Gently pull fitrwaM on tile drop
down broiler dooI:
[] Pull tile broiler rack with pan
fi)rward until tile rack stops. (;rasp
tile broiler pan and i'einoxe it fl'onl
the broiler rack.
Toreplace the breiler pan:
[]
[]
Slide tile broiler pan onto tile rack
and push both tile broiler pan and
tile rack all tile way into tile broiler
coiilpa i'tlii ent,
Close tile broiler dooi:
If a spillover occuis in tile broiler
conlpartnlent, allow tile conlpartnlent to
cool fiIst. You can clean tile conlpartnlent
with soap and wateI; a nlild al)i'asive
cleansei; soap-filled scouiing pads or an
oven cleaner following package
diIecfions.
19
Careand cleaningofthe range.
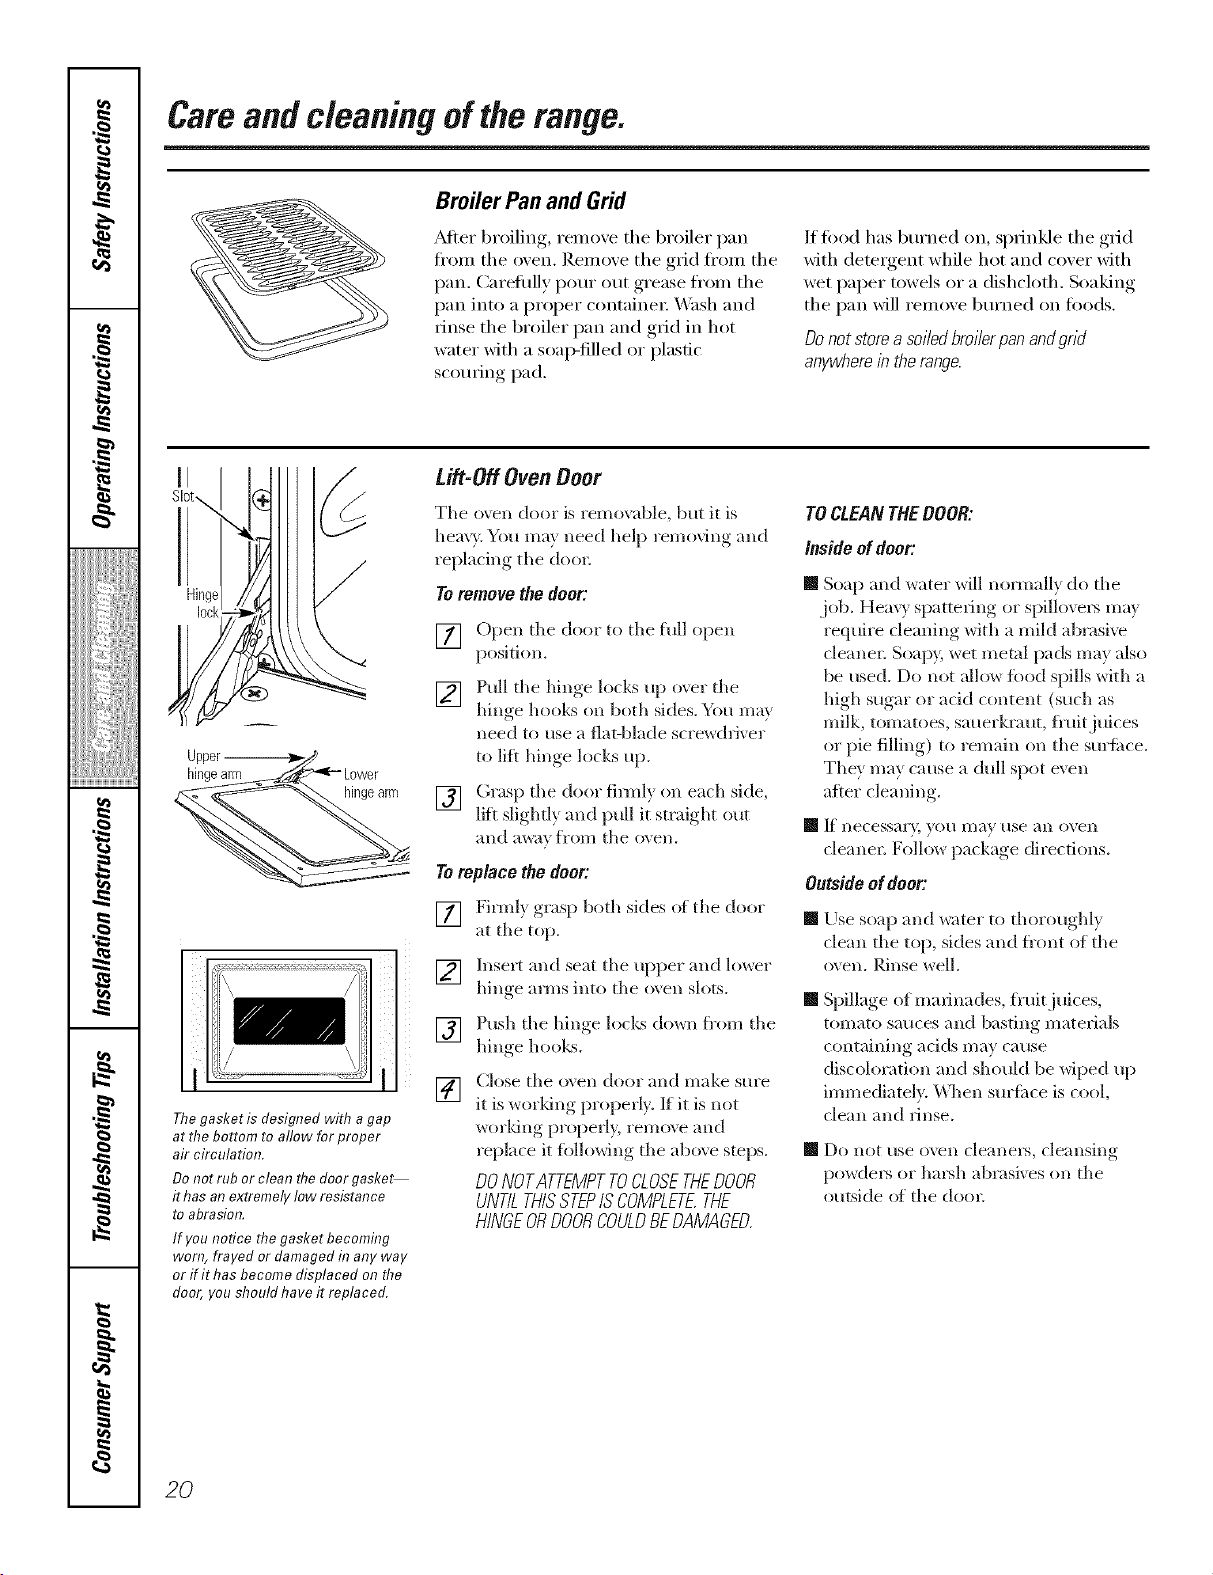
Broiler Pan and Grid
_dter broiling, remove tile broiler pan
fl'on/ tile oven. Remove tile grid fl'om tile
pan. Carefiflly pour out grease fl'om tile
pan into a proper containe_: X,Vashand
rinse the broiler pan and grid in hot
water with a soap-filled or plastic
scouring pad.
If food has bm'ned on, sprinkle tile grid
with detergent while hot and cover with
wet paper towels or a dishcloth. Soaking
tile pan will remove bm'ned on foods.
Donotstorea soiledbroilerpanandgnd
anywhereintherange.
hingearm
hingearm
i) I
i,/ , iii!
The gasket is designed with a gap
at the bottom to allow for proper
air circulation.
Do not rub or clean the door gaske_
it has an extremely low resistance
to abrasion.
If you notice the gasket becoming
worn, frayed or damaged in any way
or if it has become displaced on the
door, you should have it replaced.
Lift-OffOvenDoor
Tile o\en door is remo_d)le, but it is
heavy. You may need help removing and
replacing the doo_:
Toremove the door:
[] (-)pen the door to tile full open
position.
[] Pull tile hinge locks up oxer tile
hinge hooks on both sides. Y)u max
need to use a flat-blade screwdriver
to lift hinge locks up.
[] (;rasp tile door fimfl) on each side,
lift slighfl) and pull it straight out
and away fl'oI// tile ()\'ell.
Toreplace the door:
[] Fimfl? grasp both sides of tile door
at tile top.
[] Insert and seat tile upper and lower
hinge arms into tile oxen slots.
[] Push tile hinge locks (lo*_n fl'om tile
hinge hooks.
[] Close tile oxen door and make sure
it is _orldng properly. If it is not
worldng propefl> remove and
replace it following tile abo\e steps.
DONOTATTEMPTTOCLOSETHEDOOR
UNTILTHISSTEPISCOMPLETETHE
HINGEORDOORCOULDBEDAMAGED.
TOCLEANTHEBOOR:
Insideofdoor:
[] Soap and water will nommllv do tile
job. Hea\)' spattering or spillovel_ may
require cleaning with a mikl abmsi\v
cleanel: Soapy, wet metal pads may also
be used. Do not allow food spills with a
high sugar or add content (such as
milk, tomatoes, sauerkraut, fl'uit juices
or pie filling) to remain on tile surfi_ce.
Tile)' may cause a dull spot even
after cleaning.
[] If Ilecessary, yell Illay rise all ()veil
cleanel: Follow package directions.
Outside ofdoor:
[] Use soap and water to thoroughl}
clean the top, sides and fl'ont of tile
oxen. Rinse well.
[] Spillage of marinades, fl uitjuices,
tomato sauces and basting materials
containing adds may cause
discoloration and should be wiped up
immediately, _v\]len surfime is cool,
clean and rinse.
[] Do 11o1 rise oven cleallers, c]eallsillo
powders or hmMl abrasives on tile
outside of tile do(n=
2O
ge.com
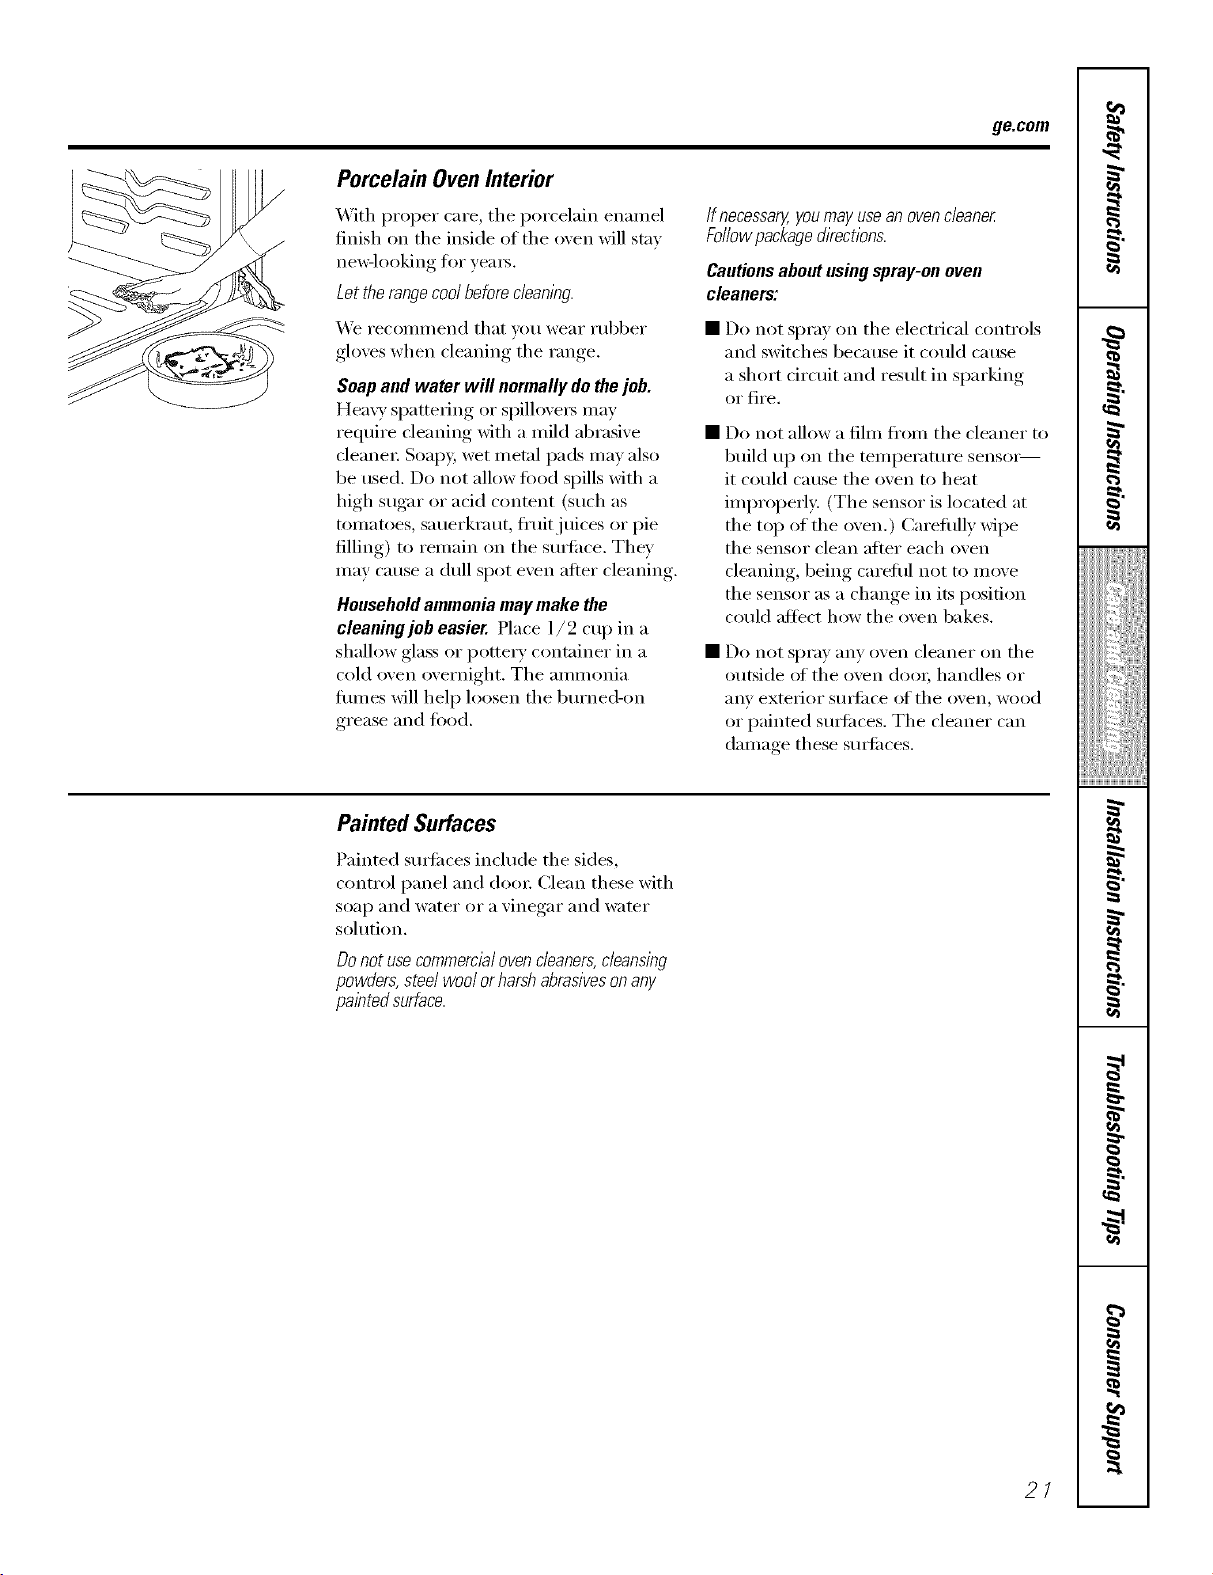
Porcelain Oven Interior
With proper care, the porcelain enamel
finish on the inside of the oven will stay
ne_qooking tor yeats.
Let the rangecool beforecleaning.
We reconmtend that you wear rubber •
gloves when cleaning the range.
Soap and water will normally do thejob.
Hea\ T spattering or spillovet_ may
require cleaning with a mild abrasive
cleaner: Soap> wet metal pads may also
be used. Do not allow food spills with a
high sugar or acid content (such as
tomatoes, sauerkraut, fl'uitjuices or pie
filling) to remain on the s/tt_li_ce. They
Inav cause a dull spot even after cleaning.
Household ammonia may make the
cleaning job easier. Place l/2 cup in a
shallow glass or pottery container in a •
cold oven overnight. The amntonia
dunes will hel I) loosen the bm'ned-on
grease and food.
Ifnecessa_ youmay usean ovencleaner
Followpackagedirections.
Cautionsabout using spray-on oven
cleaners:
Do not spray on the electrical controls
and switches because it could cause
a short circuit and result in sparking
or fire.
• Do not allow a film from the cleaner to
build up on the teml)erature sensot_
it could cause the oven to heat
imi)roperl > (The sensor is located at
the top of tile oven.) Carefltlly wipe
tile sensor clean after each oven
cleaning, being careful not to move
the sensor as a change in its position
could affect how the ()veil bakes.
Do not spray any oven cleaner on the
outside of the oven door; handles or
any exterior sut_fi_ce of the oven, wood
or painted sm_fi_ces. The cleaner can
damage these surli_ces.
PaintedSurfaces
Painted sm_i_ces include the sides,
control panel and (loot: Clean these with
soap atld wateI" oi" a vitlegaI" atld wateI"
sohttion.
Do notusecommercialovenc/eanera,cleansing
powders,steel wool orharsh abrasiveson any
pa/nted sufface.
21
Installation
Instructions
Range
IN THE COMMONWEALTH OF
MASSACHUSETTS
• This product must be installed by
a licensed plumber or gas fitter,
• When using ball-type gas shut-off valves,
they shall be the T-handle type.
• A flexible gas connector, when used,
must not exceed 3 feet.
BEFORE YOU BEGIN
Read these instructions completely and
carefully.
Installation of this range must conform with
local codes, or in the absence of local codes,
with the National Fuel Gas Code, ANSI
Z223.1/NFPA.54, latest edition. In Canada,
installation must conform with the current
Natural Gas Installation Code, CAN/CGA-
B149.1 or the current Propane Installation
Code, CAN/CGA-B149.2, and with local
codes where applicable. This range has
been design-certified by CSA International
according to ANSI Z21.1, latest edition
and Canadian Gas Association according
to CAN/CGA-I.1 latest edition.
As with any appliance using gas and generating
heat, there are certain safety precautions you
should follow. You will find these precautions in
the Important Safety Information section in
the front of this manual. Read them carefully.
• IMPORTANT - Savethese
instructions for local inspector's use.
• IMPORTANT - Observeall
governing codes and ordinances.
• Note to Installer - Be sure to leave these
instructions with the Consumer.
• Note to Consumer - Keep these
instructions for future reference.
• Note - This appliance must be properly
grounded.
• Servicer - The electrical diagram is in an
envelope attached to the back of the range.
• Skill Level - Installation of this appliance
requires basic mechanical skills.
• Proper installation is the responsibility of
the installer.
• Product failure due to improper installation
is not covered under the Warranty.
22
Installation instructions
FOR YOUR SAFETY
Do not store or use combustible materials,
gasoline or other flammable vapors and
liquids in the vicinity of this or any other
appliance, if you smell gas:
[] Open windows.
[] Don't touch electrical switches.
[] Extinguish any open flame.
[] Immediately call your gas supplier.
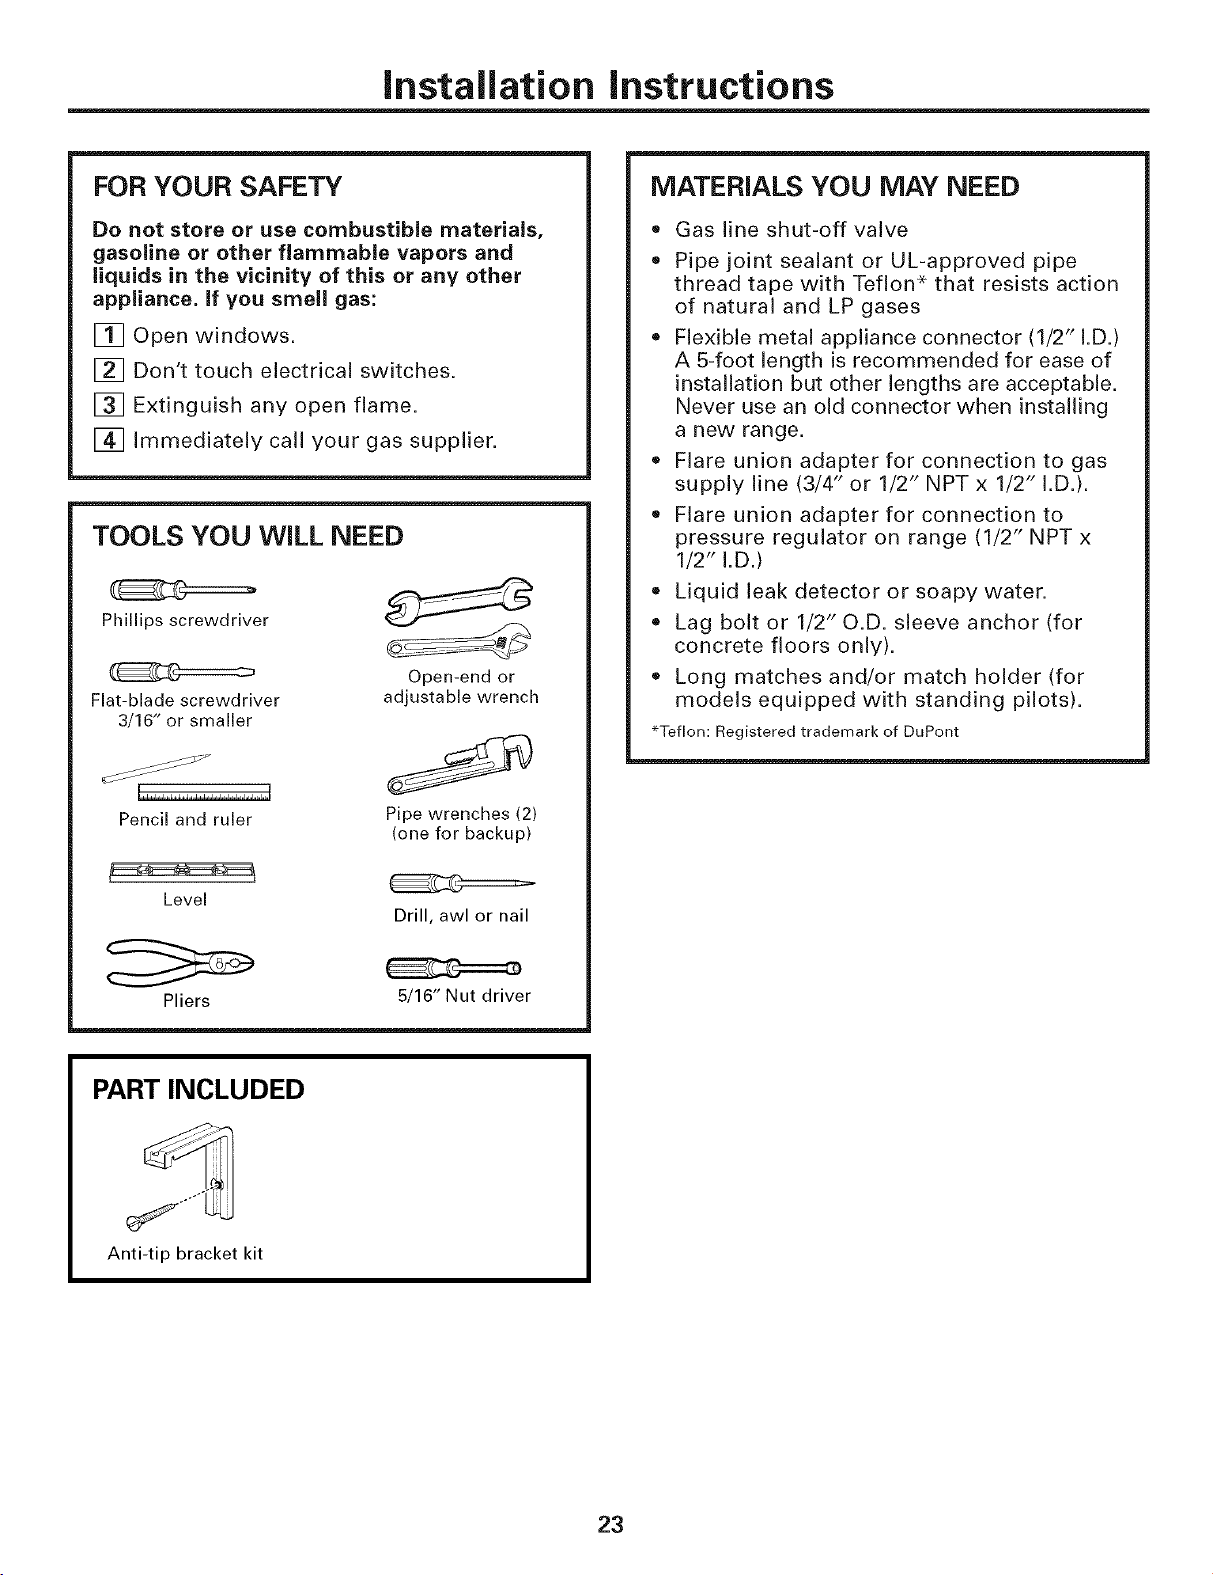
TOOLS YOU WILL NEED
Phillips screwdriver
Flat-blade screwdriver
3/16" or smaller
_ jSy
Pencil and ruler
Open-end or
adjustable wrench
Pipe wrenches (2)
(one for backup)
Level
Drill, awl or nail
Pliers 5/16" Nut driver
MATERIALS YOU MAY NEED
• Gas line shut-off valve
• Pipe joint sealant or UL-approved pipe
thread tape with Teflon* that resists action
of natural and LP gases
• Flexible metal appliance connector (1/2" I.D.)
A 5-foot length is recommended for ease of
installation but other lengths are acceptable.
Never use an old connector when installing
a new range.
• Flare union adapter for connection to gas
supply line (3/4" or 1/2" NPT x 1/2" I.D.).
• Flare union adapter for connection to
pressure regulator on range (1/2" NPT x
1/2" I.D.)
Liquid leak detector or soapy water.
Lag bolt or 1/2" O.D. sleeve anchor (for
concrete floors only).
Long matches and/or match holder (for
models equipped with standing pilots).
*Teflon: Registered trademark of DuPont
PART INCLUDED
Anti-tip bracket kit
23

Installation instructions
-AWARNING!
iNSTALLATiON SAFETY
iNSTRUCTiONS
Read these instructions completely and
carefully.
Improper installation, adjustment, alteration,
service or maintenance can cause injury or
property damage. Refer to this manual.
For assistance or additional information,
consult a qualified installer, service agency,
manufacturer (dealer) or the gas supplier.
Never reuse old flexible connectors. The use
of old flexible connectors can cause gas leaks
and personal injury. Always use NEW flexible
connectors when installing a gas appliance.
IMPORTANT- Removeallpacking
material and literature from oven before
connecting gas and electrical supply to range.
CAUTION - Donotattempt to operate
the oven of this range during a power failure
(Electric ignition models only).
• Have your range installed by a qualified
installer.
* Your range must be electrically grounded
in accordance with local codes or, in the
absence of local codes, in accordance with
the National Electrical Code (ANSI/NFPA 70,
latest edition). In Canada, electrical
grounding must be in accordance with the
current CSA C22.1 Canadian Electrical Code
Part 1 and/or local codes. See Electrical
Connections in this section.
* Before installing your range on linoleum or
any other synthetic floor covering, make
sure the floor covering can withstand 180°F
without shrinking, warping or discoloring.
Do not install the range over carpeting
unless a sheet of 1/4" thick plywood or
similar insulator is placed between the
range and carpeting.
* Make sure the wall coverings around the
range can withstand heat generated by
the range up to 200°F.
Avoid placing cabinets above the range.
To reduce the hazard caused by reaching
over the open flames of operating burners,
install a ventilation hood over the range
that projects forward at least 5" beyond
the front of the cabinets.
The ventilating hood must be constructed
of sheet metal not less than 0.0122" thick.
Install above the cooktop with a clearance
of not less than 1/4" between the hood and
the underside of the combustible material
or metal cabinet. The hood must be at least
as wide as the appliance and centered
over the appliance. Clearance between the
cooking surface and the ventilation hood
surface MUST NEVER BE LESS THAN
24 INCHES.
EXCEPTION: Installation of a listed microwave
oven or cooking appliance over the cooktop
shall conform to the installation instructions
packed with that appliance.
• If cabinets are placed above the range,
allow a minimum clearance of 30" between
the cooking surface and the bottom of
unprotected cabinets.
• If a 30" clearance between cooking surface
and overhead combustible material or metal
cabinets cannot be maintained, protect the
underside of the cabinets above the cooktop
with not less than 1/4" insulating millboard
covered with sheet metal not less than
0.0122" thick. Clearance between the
cooking surface and protected cabinets
MUST NEVER BE LESS THAN 24 INCHES.
The vertical distance from the plane of the
cooking surface to the bottom of adjacent
overhead cabinets extending closer than
1" to the plane of the range sides must not
be less than 18". (See the Dimensions and
Clearances illustration in this section.)
• CAUTION -Items of interest to
children should not be stored in cabinets
above a range or on the backsplash of a
rangeichildren climbing on the range to
reach items could be seriously injured.
24
Installation Instructions
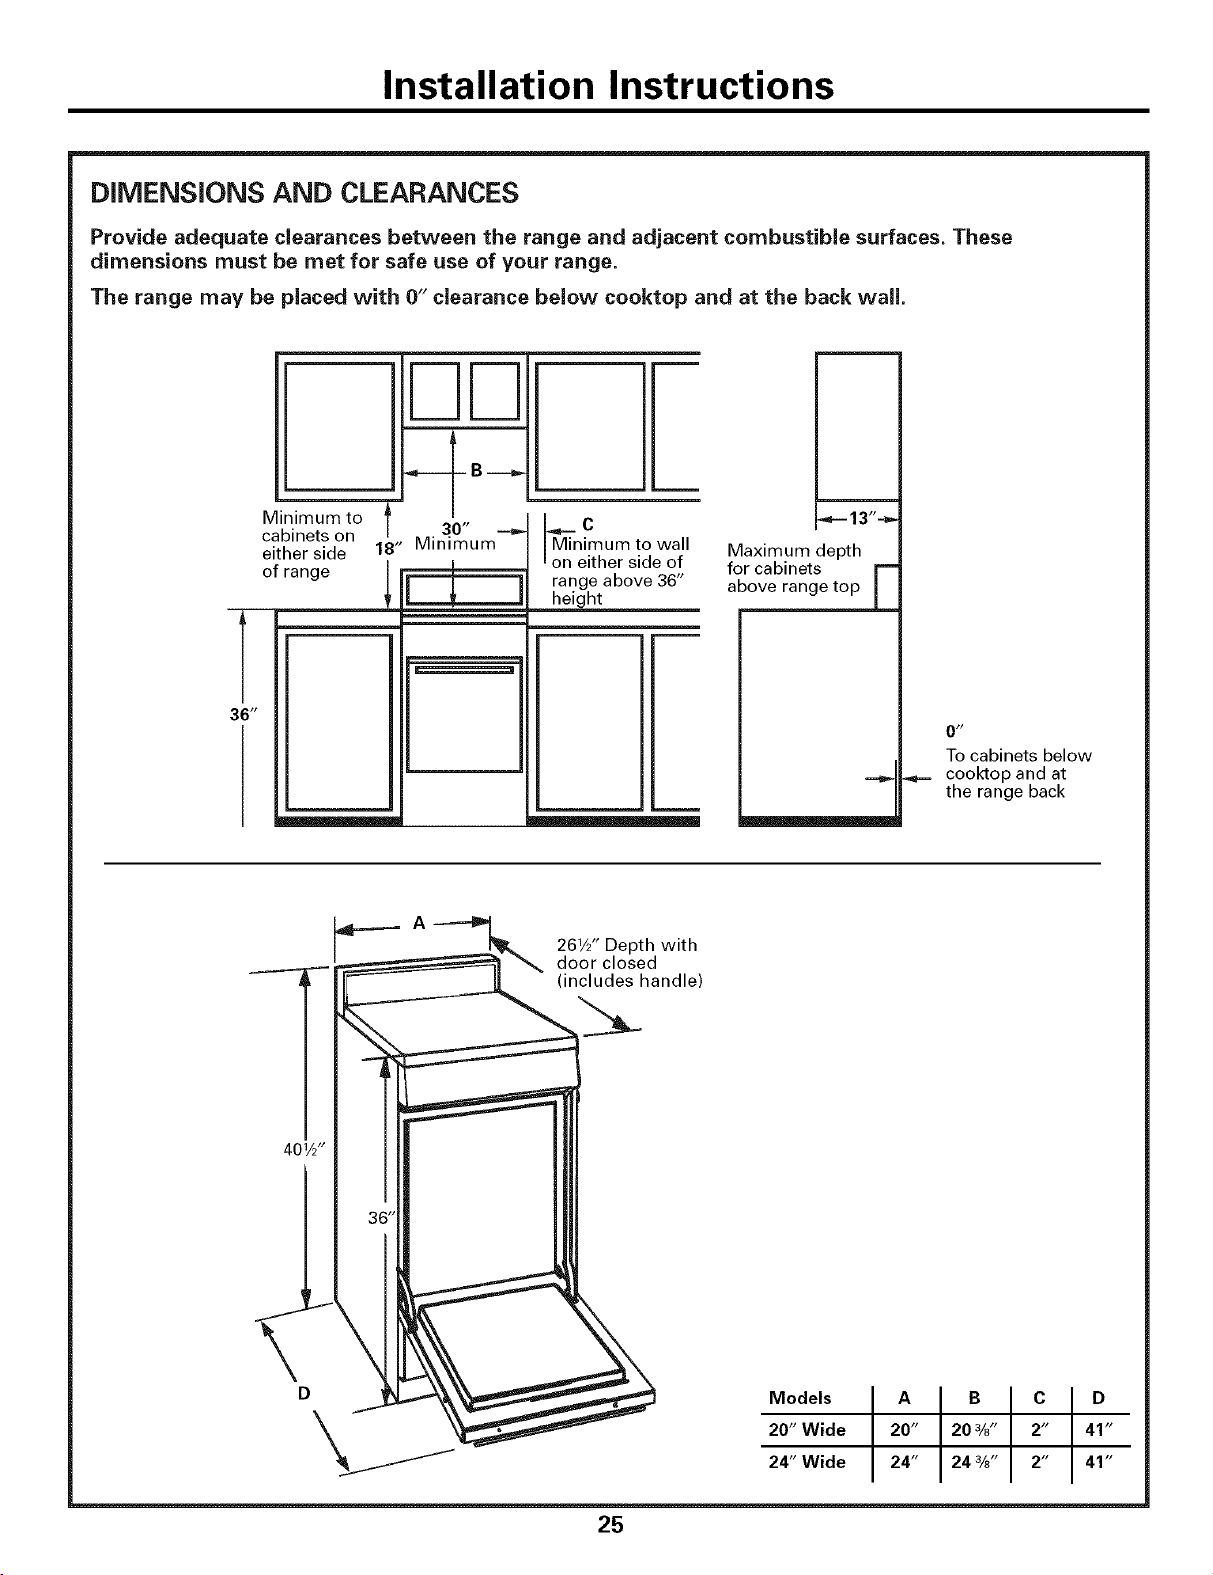
DiMENSiONS AND CLEARANCES
Provide adequate clearances between the range and adjacent combustible surfaces. These
dimensions must be met for safe use of your range.
The range may be placed with 0" clearance below cooktop and at the back wall.
l
Minimum to
cabinets on
either side
of range
_,__C
Minimum to wall
on either side of
range above 36"
height
I_-- 13"-_
Maximum depth
for cabinets E
above range top
=...p_
0 _
To cabinets below
cooktop and at
the range back
401/2"
261½"Depth with
door closed
includes handle)
Models
20" Wide
24" Wide
A B C D
20" 20¾" I 2" I 41"
24" 24 ¾" 2" 41"
25
Installation instructions
-AWARNING!
ANTI-TIP DEVICE
®
All ranges can tip and injury could
result.
To prevent accidental tipping of the
range, install the Anti-Tip device
packed with this range. (See Install
the Anti-Tip Device in this section.}
To check if the device is installed
and engaged properly, carefully
tip the range forward. The Anti-Tip
device should engage and prevent
the range from tipping over.
if you pull the range out from the
wall for any reason, make sure the
Anti-Tip device is engaged when
you push the range back against
the wall.
• For your safety, never use your range for
warming or heating the room. Your oven
and cooktop are not designed to heat
your kitchen. Top burners should not be
operated without cookware on the grate.
Such abuse could result in fire and damage
to your range and will void your warranty.
• Do not store or use combustible materials,
gasoline or other flammable vapors and
liquids in the vicinity of this or any other
appliance. Explosions or fires could result.
Do not use oven for a storage area. Items
stored in the oven can ignite.
Do not let cooking grease or other
flammable materials accumulate in or
near the range.
LOCATION
Do not locate the range where it may be
subject to strong drafts. Any openings in
the floor or wall behind the range should
be sealed. Make sure the openings around
the base of the range that supply fresh air
for combustion and ventilation are not
obstructed by carpeting or woodwork.
Your range, like many other household
items, is heavy and can settle into soft
floor coverings such as cushioned vinyl or
carpeting. Use care when moving the range
on this type of flooring. It is recommended
that the following simple and inexpensive
instructions be followed to protect your floor.
The range should be installed on a sheet of
plywood (or similar material). When the floor
covering ends at the front of the range, the
area that the range will rest on should be
built up with plywood to the same level or
higher than the floor covering.
This will allow the range to be moved for
cleaning or servicing. Also, make sure your
floor covering will withstand 180°F. (See the
Installation Safety Instructions section.)
Make sure the wall coverings around your
range can withstand the heat generated (up
to 200°F) by the range. (See the Installation
Safety Instructions section.)
MODELAND SERIALNUMBERLOCATION
You can find them on a label under the
cooktop. See the Lift-Up Cooktop section in
this manual or instructions on how to lift the
cooktop.
IMPORTANT!
Remove all tape and packaging. Make sure
the burners are properly seated and level.
Lift up the cooktop and remove any packing
material under it.
Take the accessory pack out of the oven
and/or drawer.
Check to be sure that no range parts have
come loose during shipping.
26
Installation instructions
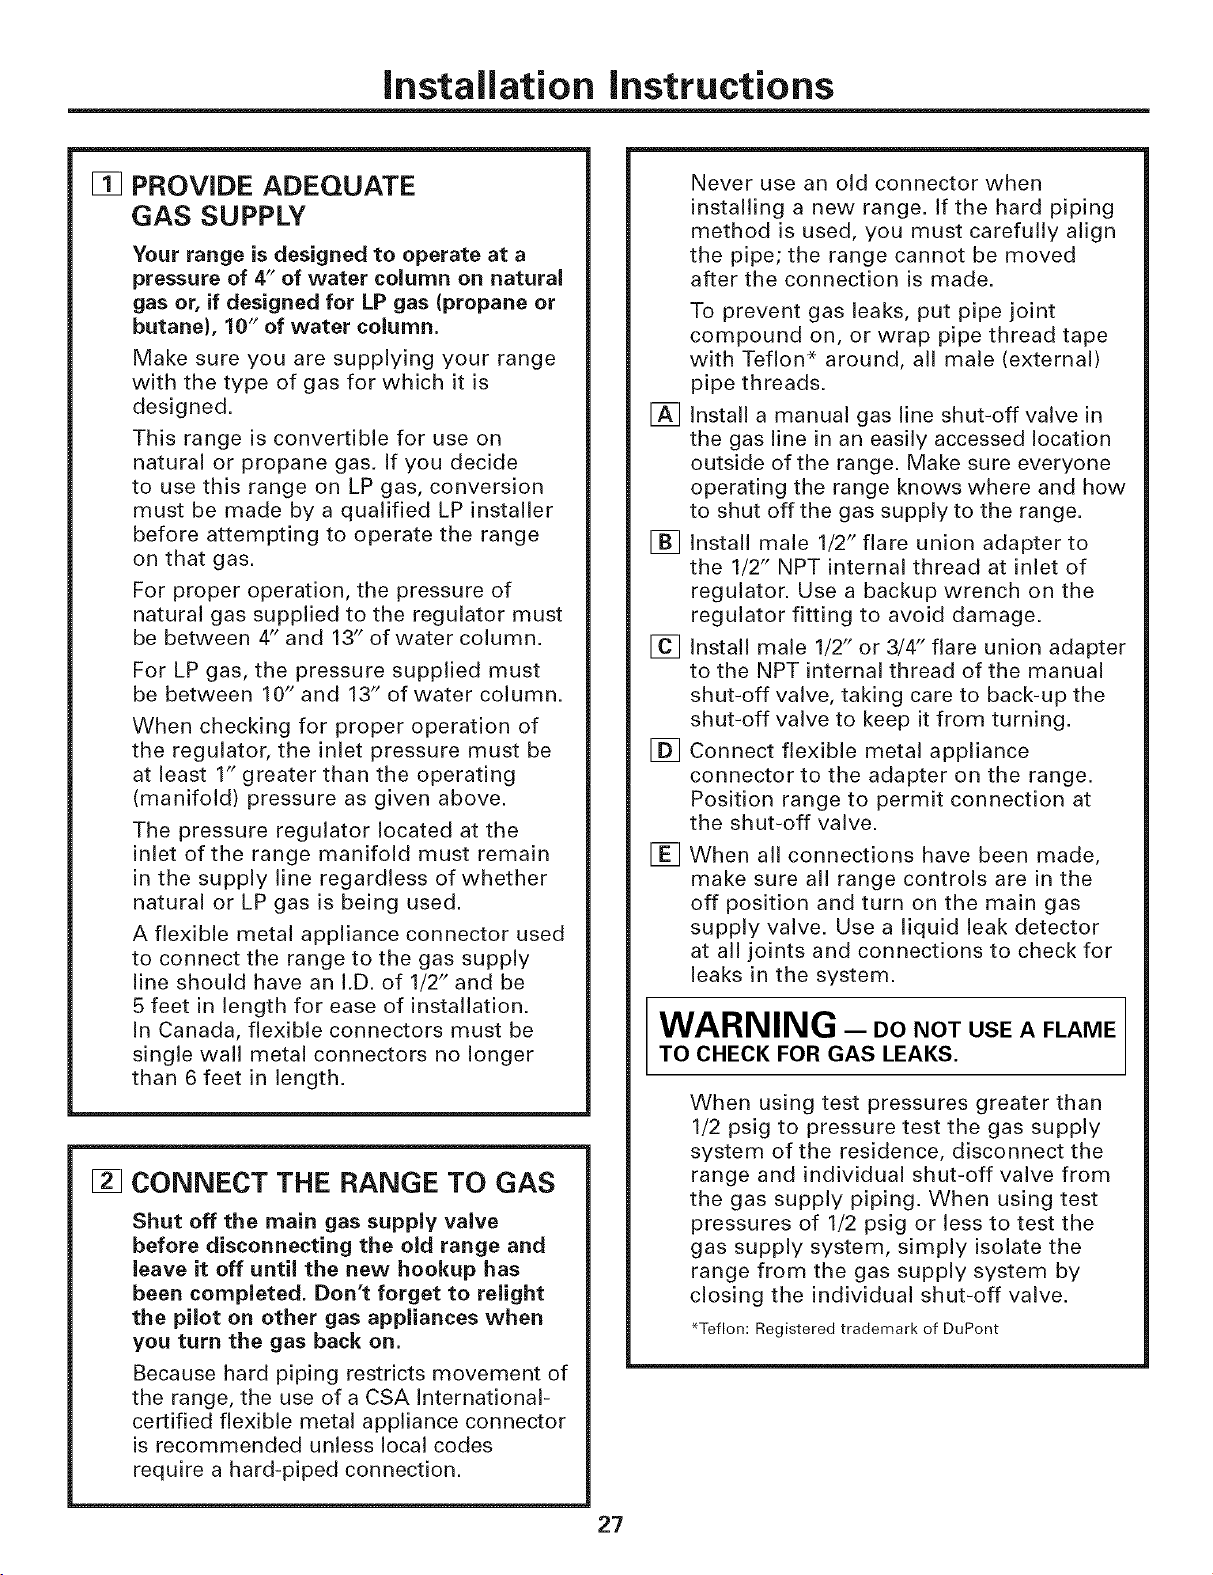
[] PROVIDE ADEQUATE
GAS SUPPLY
Your range is designed to operate at a
pressure of 4" of water column on natural
gas or, if designed for LP gas (propane or
butane), 10" of water column.
Make sure you are supplying your range
with the type of gas for which it is
designed.
This range is convertible for use on
natural or propane gas. If you decide
to use this range on LP gas, conversion
must be made by a qualified LP installer
before attempting to operate the range
on that gas.
For proper operation, the pressure of
natural gas supplied to the regulator must
be between 4" and 13" of water column.
For LP gas, the pressure supplied must
be between 10" and 13" of water column.
When checking for proper operation of
the regulator, the inlet pressure must be
at least 1" greater than the operating
(manifold) pressure as given above.
The pressure regulator located at the
inlet of the range manifold must remain
in the supply line regardless of whether
natural or LP gas is being used.
A flexible metal appliance connector used
to connect the range to the gas supply
line should have an I.D. of 1/2" and be
5 feet in length for ease of installation.
In Canada, flexible connectors must be
single wall metal connectors no longer
than 6 feet in length.
[] CONNECT THE RANGE TO GAS
Shut off the main gas supply valve
before disconnecting the old range and
leave it off until the new hookup has
been completed. Don't forget to relight
the pilot on other gas appliances when
you turn the gas back on,
Because hard piping restricts movement of
the range, the use of a CSA International-
certified flexible metal appliance connector
is recommended unless local codes
require a hard-piped connection.
[]
[]
[]
[]
[]
Never use an old connector when
installing a new range. If the hard piping
method is used, you must carefully align
the pipe; the range cannot be moved
after the connection is made.
To prevent gas leaks, put pipe joint
compound on, or wrap pipe thread tape
with Teflon* around, all male (external
pipe threads.
Install a manual gas line shut-off valve in
the gas line in an easily accessed location
outside of the range. Make sure everyone
operating the range knows where and how
to shut off the gas supply to the range.
Install male 1/2" flare union adapter to
the 1/2" NPT internal thread at inlet of
regulator. Use a backup wrench on the
regulator fitting to avoid damage.
Install male 1/2" or 3/4" flare union adapter
to the NPT internal thread of the manual
shut-off valve, taking care to back-up the
shut-off valve to keep it from turning.
Connect flexible metal appliance
connector to the adapter on the range.
Position range to permit connection at
the shut-off valve.
When all connections have been made,
make sure all range controls are in the
off position and turn on the main gas
supply valve. Use a liquid leak detector
at all joints and connections to check for
leaks in the system.
WARNING - DoNoTUSEAFLAME
TO CHECK FOR GAS LEAKS.
When using test pressures greater than
1/2 psig to pressure test the gas supply
system of the residence, disconnect the
range and individual shut-off valve from
the gas supply piping. When using test
pressures of 1/2 psig or less to test the
gas supply system, simply isolate the
range from the gas supply system by
closing the individual shut-off valve.
*Teflon: Registered trademark of DuPont
27

Installation instructions
RECOMMENDED GAS AND ELECTRIC SUPPLY LOCATION
NOTE: Recommended gas
hook-up locations behind
range. Gas fittings and shut-off
cock should NOT protrude
more than 2" from the wall to
allow the range to fit against
the wall.
30 tt
;feCr"e'°,?4c;des=
connections.
A-
\
"- Gas
"-. Hookup
\ Area
FLEXIBLE CONNECTOR
HOOKUP (Example)
Pressure _ L1_r _
regulator_ _ @]
Adapter _ _ ]_1
L&_
xt:_ Flexconnector
(4Vzft. max.)
@_1_ Adapter
_] _1--- Gasshut-offvalve
1/2" or 3/4" Gaspipe_
l nstaller: Inform the
consumer of the location
of the gas shut-off valve.
RIGID PIPE HOOKUP (Example)
Pressure __
Nipple(maynot _
beneeded) @ _--- Union
_--- Nipple
_L_ .,__ Gasshut-off
1/2" or 3/4" Gaspipe_ _ valve
Installer: Inform the consumer of the
location of the gas shut-off valve.
28

Installation instructions
[] ELECTRICAL CONNECTIONS
(on electric ignition models)
Electrical Requirements
120-volt, 60 Hertz, properly grounded
dedicated circuit protected by a 15-amp or
20-amp circuit breaker or time delay fuse.
Extension Cord Cautions
Because of potential safety hazards
associated with certain conditions, we
strongly recommend against the use of an
extension cord. However, if you still elect
to use an extension cord, it is absolutely
necessary that it be a UL-listed, 3-wire
grounding-type appliance extension cord
and that the current carrying rating of the
cord in amperes be equivalent to, or
greater than, the branch circuit rating.
Grounding
IMPORTANT--(Please read carefully)
FOR PERSONAL SAFETY, THIS
APPLIANCE MUST BE PROPERLY
GROUNDED.
Preferred Method
Ensure proper ground
exists before use
The power cord of this appliance is
equipped with a 3-prong (grounding) plug
which mates with a standard 3-prong
grounding wall receptacle to minimize the
possibility of electric shock hazard from
this appliance.
The customer should have the wall
receptacle and circuit checked by a
qualified electrician to make sure the
receptacle is properly grounded.
Where a standard 2-prong wall receptacle
is encountered, it is the personal
responsibility and obligation of the
customer to have it replaced with a
properly grounded 3-prong wall receptacle.
DO NOT, UNDER ANY CIRCUMSTANCES,
CUT OR REMOVE THE THIRD (GROUND)
PRONG FROM THE POWER CORD.
[] SEAL THE OPENINGS
Seal any openings in the wall behind the
range and in the floor under the range
when hookups are completed.
[] LIGHT THE PILOTS
(For models equipped with standing
pilots. If the range is an electric ignition
model, the burners are ignited by electric
ignition which eliminates the need for
standing pilot lights.)
The range should be installed in its
permanent position before any pilots
are lit or adjusted.
CAUTION - Make sure the surface
burner control knobs are in the OFF position
before attempting to light the pilots.
[] Light the Surface Burner Pilots
1. Lift the cooktop up and prop it open
with the prop rod provided (see the
Care and cleaning of the range
section).
2. Locate the 2 pilot ports and light each
of them with a match.
Pilot port _._
3. To avoid pilot outage, use caution when
closing cooktop after lighting pilots.
NOTE: Do not leave standing pilot lit in
a newly constructed or remodeled home
or apartment that will be unoccupied for
more than a month.
Each pilot flame was adjusted at the
factory to be approximately 5/16" tall.
A tinge of yellow appearing at the upper
tip is normal. If you find pilot adjustment
is necessary, follow instructions in Step B.
29

Installation Instructions
[] LIGHT THE PILOTS (cont.)
[] Adjust the Surface Burner Pilots if
Necessary
1. Raise the cooktop,
2. Use a small flat-bladed screwdriver
to turn the adjusting screw (accessed
through a hole in the front right side of
the burner box).
_ Pilot __
adjustment _
o \4_ o
CAUTION - Make sure the surface
burner control knobs are in the OFF position
before attempting to adjust the pilots.
3. Observe lit burners. Compare the
flames to pictures in the Before you
call for service section. If any flame is
unsatisfactory, call for service,
4. To avoid pilot outage, slowly lower the
cooktop after lighting the pilots,
[]
[]
[] LIGHT THE OVEN PILOT
(on standing pilot models)
[] Be sure the OVEN TEMP knob is in the
OFF position.
[] Open the oven door and remove the
oven bottom. See the Removable Oven
Bottom section in Care and Cleaning.
Find the oven pilot port at the back of
the oven.
To light the oven pilot, push in
and hold the OVEN TEMP knob while
lighting the pilot with a long match or
match in a match holder. Once the oven
pilot is lit, continue holding the OVEN
TEMP knob in for one minute before
releasing.
[] IF THE RANGE HAS ELECTRIC
IGNITION
There are separate ignition devices for
the left and right hand surface burners.
Both of these ignitors are ON when any
knob is turned to the UTE setting. The
ignitors will spark as long as any of the
top burner knobs are at the UTE setting.
In the event of an electrical power
failure, the top burners can still be used.
To light a burner, hold a lit kitchen match
adjacent to the top burner to be used and
turn valve knob to UTE. USE EXTREME
CAUTION.
[] ADJUST THE OVEN BURNER AIR
SHUTTER IF NECESSARY
Blue flames __
Natural gas _I
Inner cone _
of flame--._ 1_ i
L.R gas _ _
Bake/broil
burner
For Natural Gas:
The oven burner flame should be a
clean, blue flame with distinct inner
cones approximately 1/2 inch long.
A soft, lazy flame with indistinct cones
means too much gas or not enough air.
A noisy lifting flame means too much air.
30

Installation instructions
[] ADJUST THE OVEN BURNER AIR
SHUTTER IF NECESSARY (CONT.)
For LP Gas:
The flame should have approximately
1-inch blue cones. After 30 seconds of
burner operation, check for flames lifting
off the burner ports. If lifting is observed,
gradually reduce the air shutter opening
until flames are stabilized. Some yellow
tipping may be normal for LP gas.
If Adjustment is Necessary:
[] Loosen the lock screw located at the
top of the air shutter, then rotate the
air shutter to the correct setting and
retighten screw.
Loosen
lock
shutter
[] Oven burner flame can be checked
as follows (without burner baffle in
place):
• To correct a yellow flameilncrease
size of air shutter opening.
• To correct a lifting, but distinct,
blue flameiDecrease size of air
shutter opening.
[] The air shutter should be set
approximately 2/3 open for natural
gas, and approximately full open for
LP gas.
[] The oven burner air shutter
adjustment is the same on ranges
with a gas pilot or electric ignition.
[] QUALITY OF FLAMES
The combustion quality of burner flames
needs to be determined visually.
(A) Yellow flames:
Further adjustment
required
(B) Yellow tips on outer
cones:
Normal for LP gas
(C) Soft blue flames:
Normal for natural
gas
If burner flames look like (A), further
adjustment is required. Normal burner
flames should look like (B) or (C), depending
on the type of gas you use.
With LP gas, some yellow tipping on outer
cones is normal
[] REPLACEOVEN PARTS
After all adjustments are made, replace
the oven bottom, shelves and oven door.
31
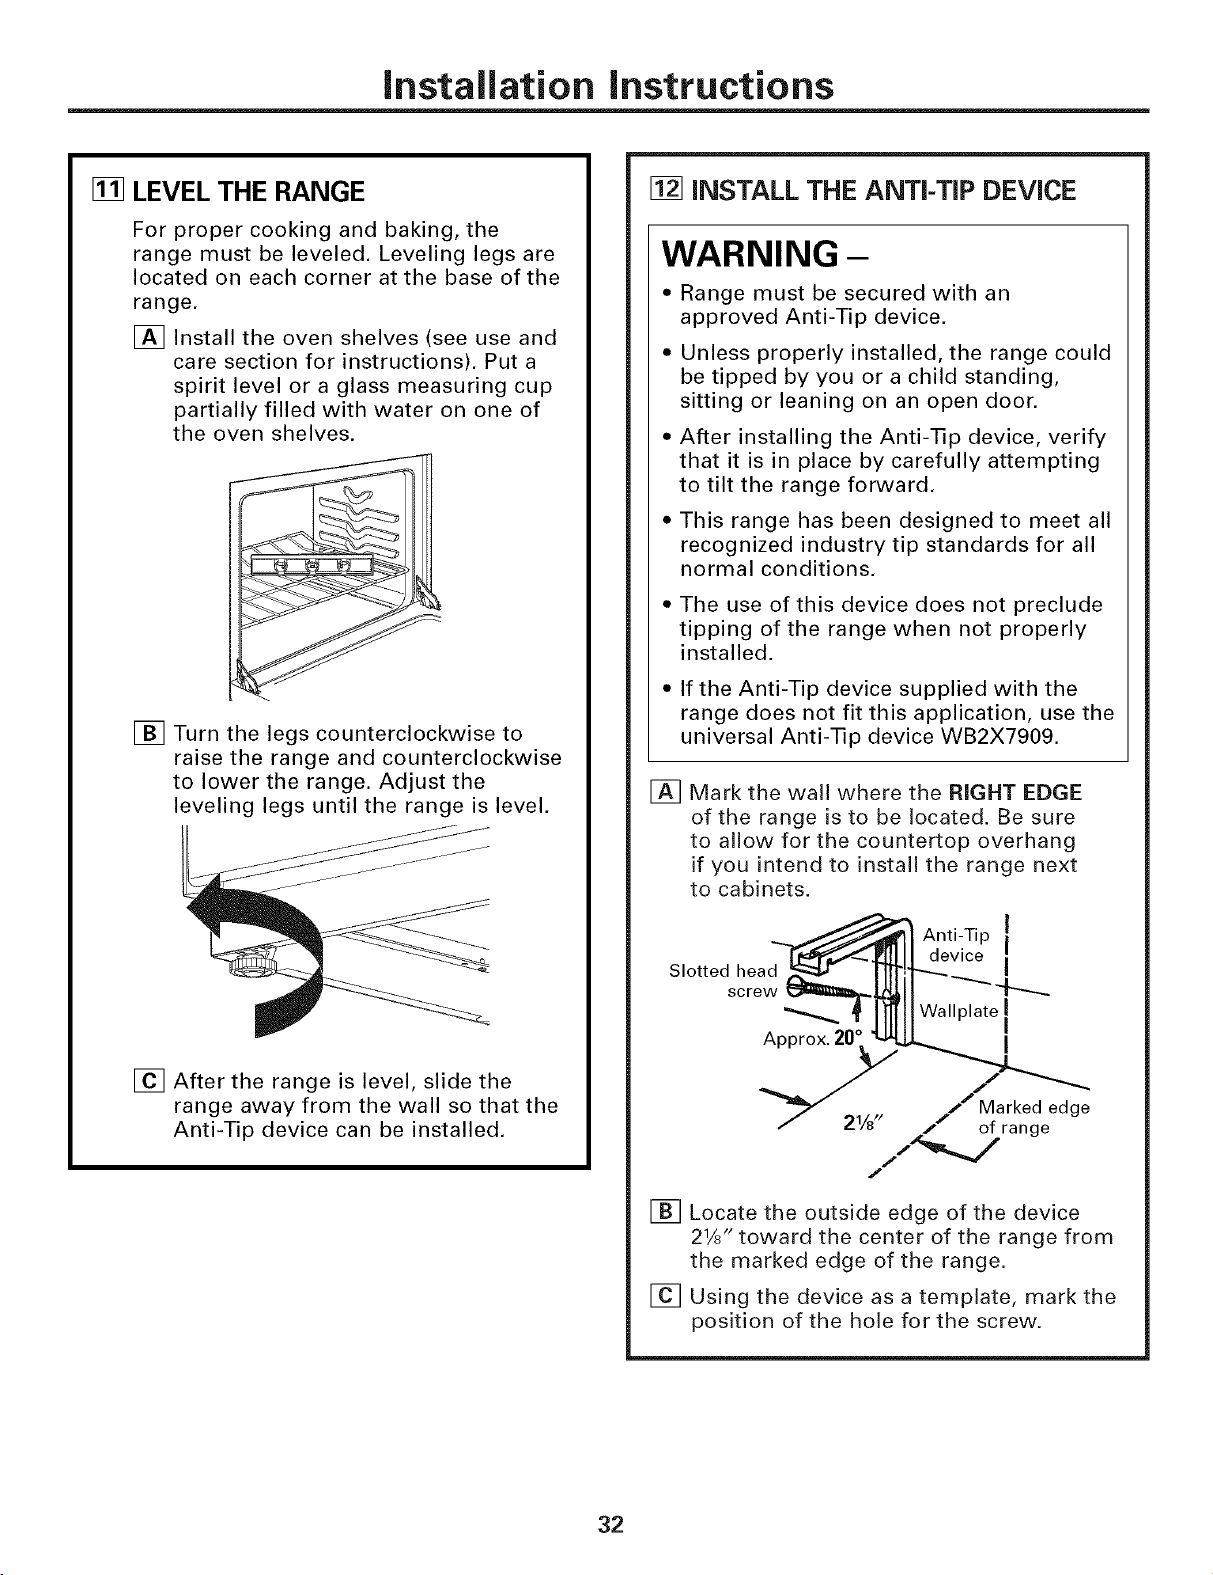
Installation instructions
[] LEVEL THE RANGE
For proper cooking and baking, the
range must be leveled. Leveling legs are
located on each corner at the base of the
range,
[] Install the oven shelves (see use and
care section for instructions). Put a
spirit level or a glass measuring cup
partially filled with water on one of
the oven shelves.
[] Turn the legs counterclockwise to
raise the range and counterclockwise
to lower the range. Adjust the
leveling legs until the range is level.
[] After the range is level, slide the
range away from the wall so that the
Anti-Tip device can be installed.
[] iNSTALL THE ANTI-TIP DEVICE
WARNING -
• Range must be secured with an
approved Anti-Tip device.
Unless properly installed, the range could
be tipped by you or a child standing,
sitting or leaning on an open door.
After installing the Anti-Tip device, verify
that it is in place by carefully attempting
to tilt the range forward.
This range has been designed to meet all
recognized industry tip standards for all
normal conditions.
• The use of this device does not preclude
tipping of the range when not properly
installed.
• If the Anti-Tip device supplied with the
range does not fit this application, use the
universal Anti-Tip device WB2X7909.
[]
Mark the wall where the RIGHT EDGE
of the range is to be located. Be sure
to allow for the countertop overhang
if you intend to install the range next
to cabinets.
Slotted head
screw
Approx. 20°
Anti-Tip I
device
Wallplate I
I
Marked edge
21/8" / of range
J
[] Locate the outside edge of the device
21/J toward the center of the range from
the marked edge of the range.
[] Using the device as a template, mark the
position of the hole for the screw.
32
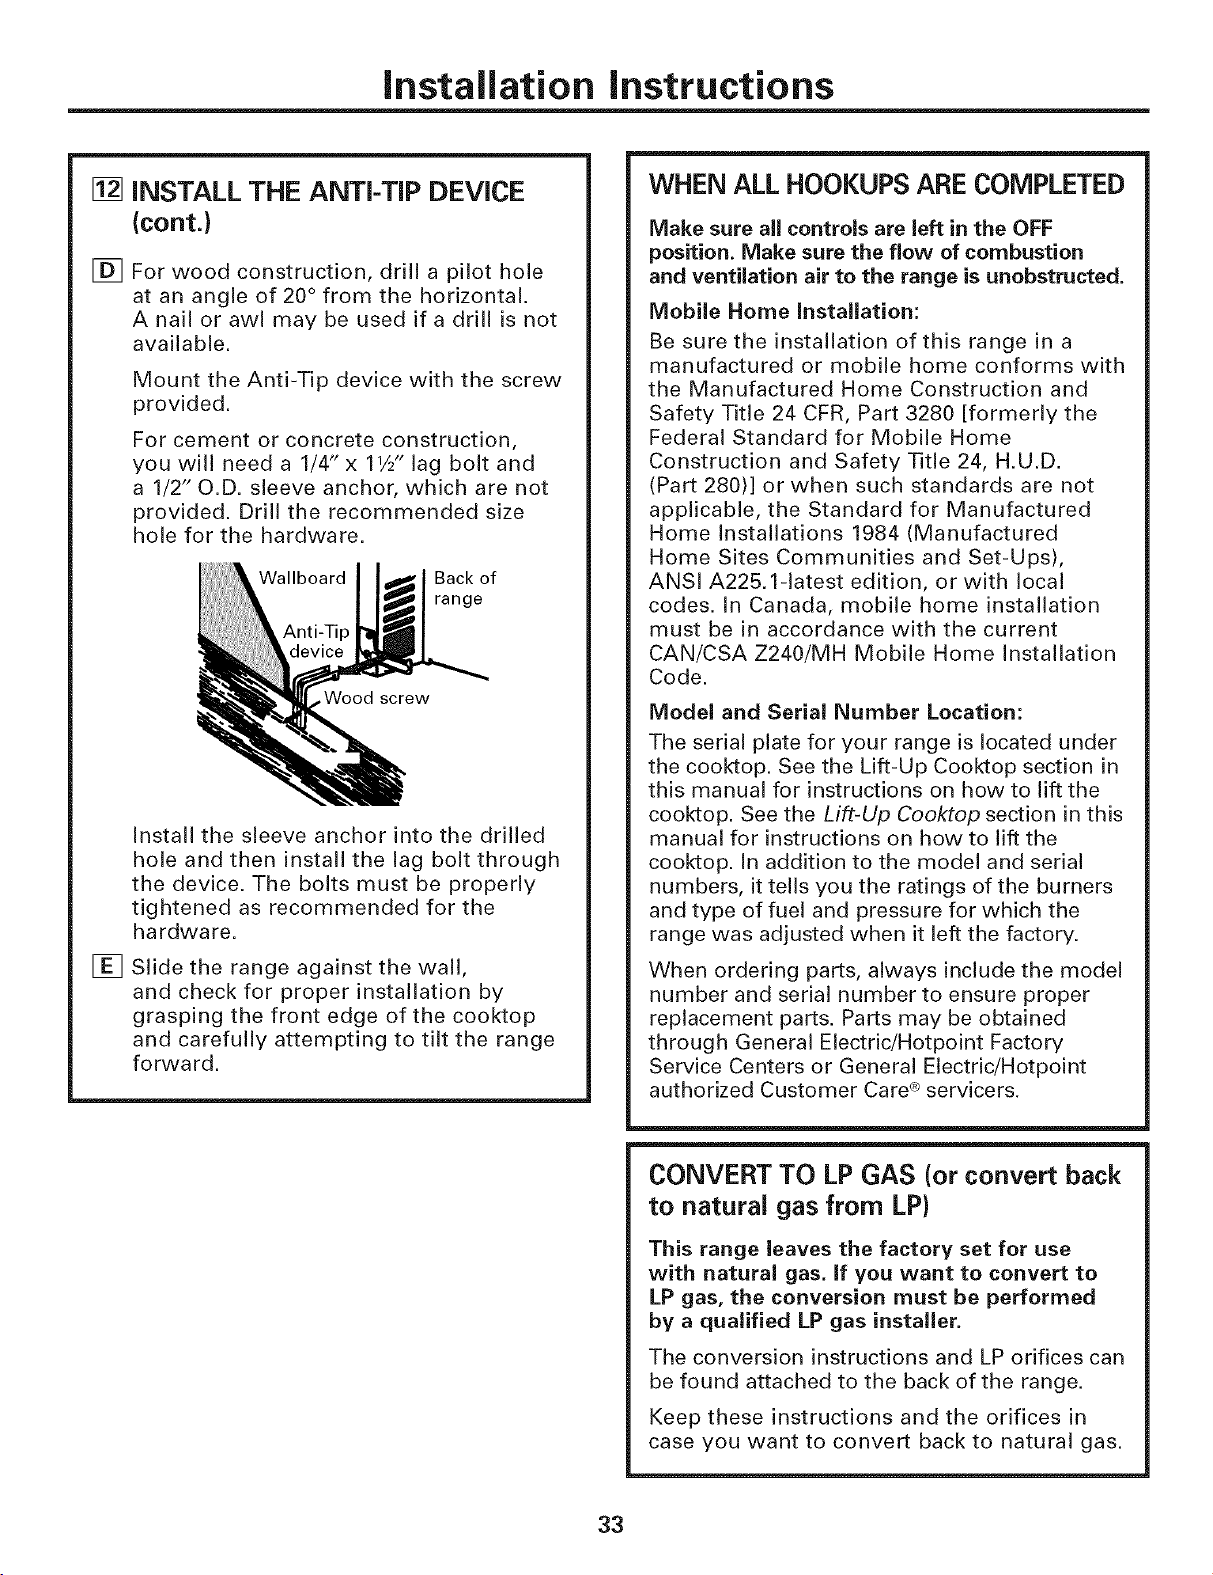
Installation instructions
[]
[]
iNSTALL THE ANTI-TIP DEVICE
(cont.)
For wood construction, drill a pilot hole
at an angle of 20 ° from the horizontal.
A nail or awl may be used if a drill is not
available.
Mount the Anti-Tip device with the screw
provided.
For cement or concrete construction,
you will need a 1/4" x 11/2" lag bolt and
a 1/2" O.D. sleeve anchor, which are not
provided. Drill the recommended size
hole for the hardware.
Wallboard Back of
range
screw
[]
Install the sleeve anchor into the drilled
hole and then install the lag bolt through
the device. The bolts must be properly
tightened as recommended for the
hardware.
Slide the range against the wall,
and check for proper installation by
grasping the front edge of the cooktop
and carefully attempting to tilt the range
forward.
WHEN ALL HOOKUPS ARE COMPLETED
Make sure all controls are left in the OFF
position. Make sure the flow of combustion
and ventilation air to the range is unobstructed.
Mobile Home installation:
Be sure the installation of this range in a
manufactured or mobile home conforms with
the Manufactured Home Construction and
Safety Title 24 CFR, Part 3280 [formerly the
Federal Standard for Mobile Home
Construction and Safety Title 24, H.U.D.
(Part 280)] or when such standards are not
applicable, the Standard for Manufactured
Home Installations 1984 (Manufactured
Home Sites Communities and Set-Ups),
ANSI A225.1-1atest edition, or with local
codes. In Canada, mobile home installation
must be in accordance with the current
CAN/CSA Z240/MH Mobile Home Installation
Code.
Model and Serial Number Location:
The serial plate for your range is located under
the cooktop. See the Lift-Up Cooktop section in
this manual for instructions on how to lift the
cooktop. See the Lift-Up Cooktop section in this
manual for instructions on how to lift the
cooktop. In addition to the model and serial
numbers, it tells you the ratings of the burners
and type of fuel and pressure for which the
range was adjusted when it left the factory.
When ordering parts, always include the model
number and serial number to ensure proper
replacement parts. Parts may be obtained
through General Electric/Hotpoint Factory
Service Centers or General Electdc/Hotpoint
authorized Customer Care ® servicers.
CONVERT TO LP GAS (or convert back
to natural gas from LP}
This range leaves the factory set for use
with natural gas. if you want to convert to
LP gas, the conversion must be performed
by a qualified LP gas installer.
The conversion instructions and LP orifices can
be found attached to the back of the range.
Keep these instructions and the orifices in
case you want to convert back to natural gas.
33
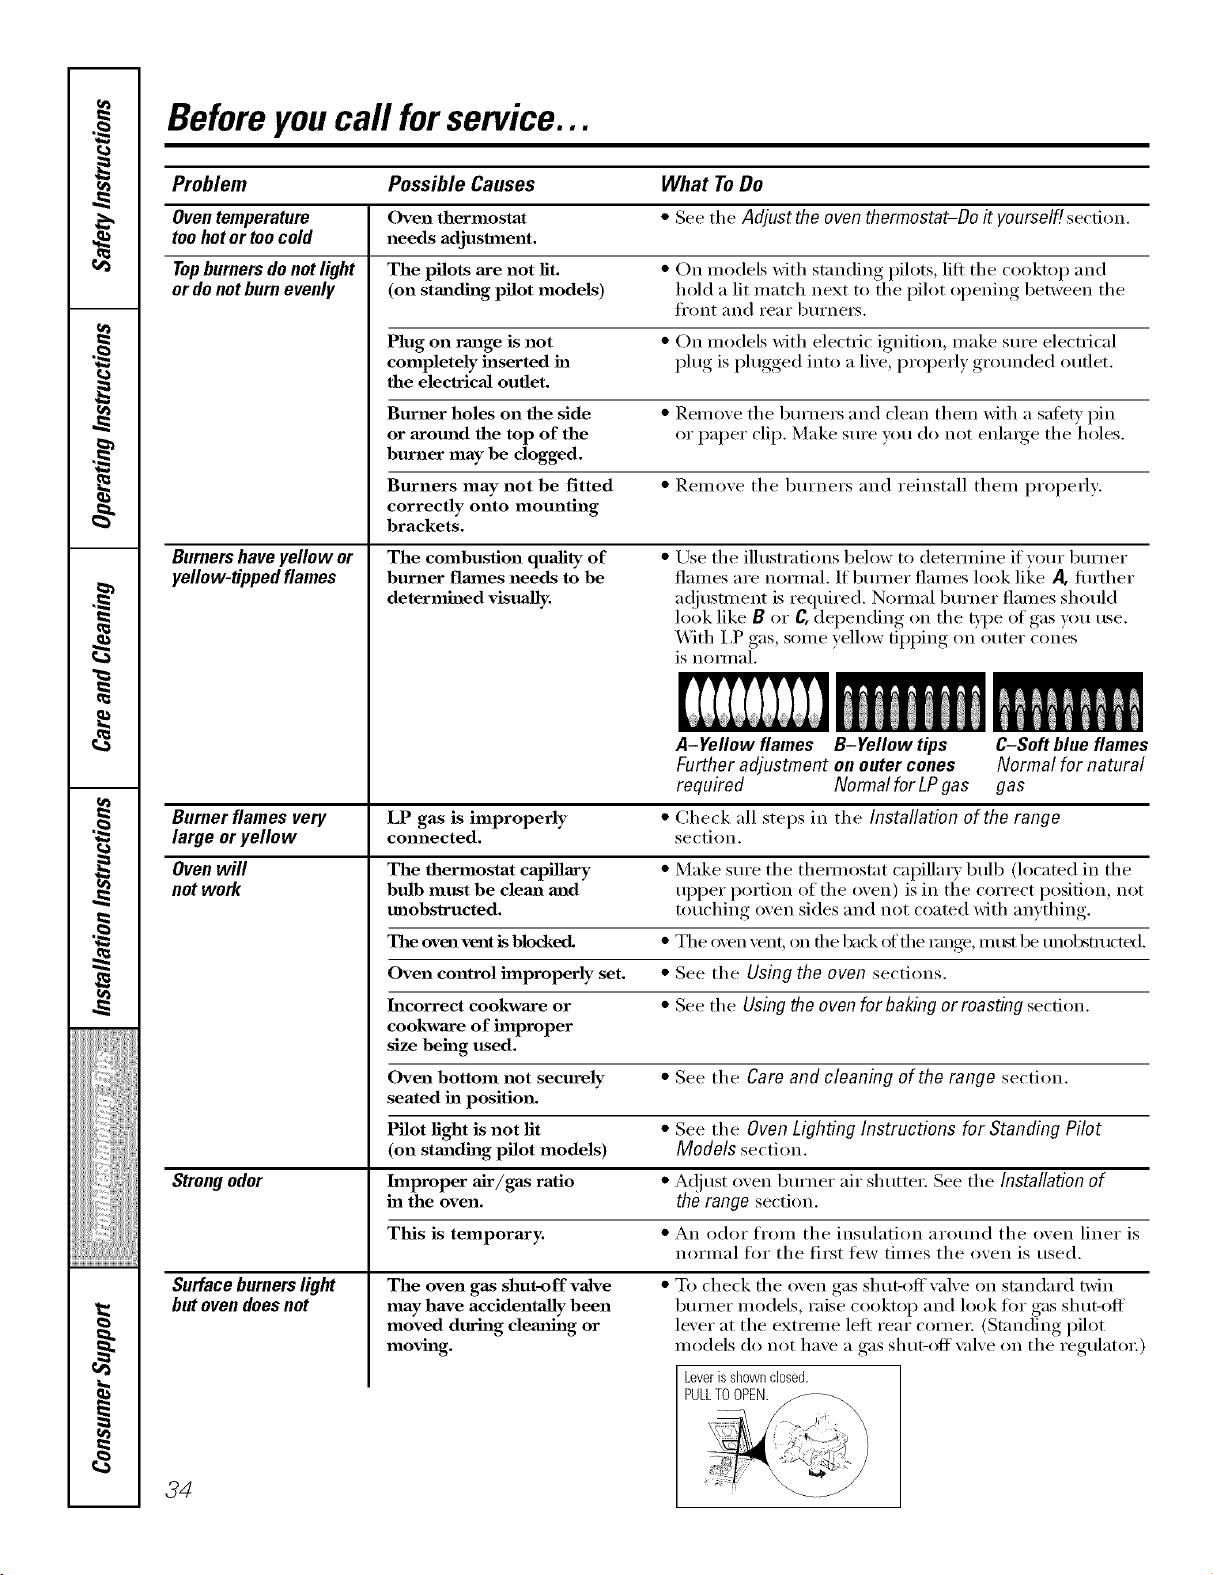
Beforeyoucall forservice...
34
Problem Possible Causes What ToDo
Oven temperature Oven thermostat • See tile Adjust the oven thermostat-Do it yourself! section.
too hot or too cold needs adjustment.
Topburners do not light The pilots axe not fit. * Oil n/odels with standing pilots, lilt tile cooktop and
ordo nothurn evenly (on standing pilot models) hold a lit Inatch next to the pilot ol)ening between the
ti'ont and I'e}lI" btli'ners.
Plug on rmage is not * On models with electric ignition, niake Stli'e electrical
completely inserted ha phig is phigged into a live, [)i'o[)erly grounded outlet.
the electrical outlet.
Burner holes on the side * Remove tile burnei_ and clean thein with a safe D' pin
or around the top of the or paper clip. Make sure you do not enlaige tile holes.
burner may be clogged.
Burners may not be fitted * Reinove the burners and reinstall theni i)roi)erly:
correctly onto mounting
brackets.
Burnershaveyellowor
yellow-tippedflames
The combustion quality of
bmamr flmnes needs to be
determhaed visually.
• Use tile illustrations beh)w to detei_nine ifvour 1)urner
flaines are noimal. If burner flaines look like _ fllrther
a(!justn/ent is required. Noimal burner flaines should
look like B or C, del)ending on the type of gas you use,
With I,P gas, soIne yellow ill)ping on outer cones
is noimal.
B-Yellow tips
A-Yeflow flames C-Soft blueflames
Further adjustment onoutercones Normal for natural
required Normalfor LPgas gas
Burner flames very LP gas is improperly • Check all steps in tile Installation of the range
largeor yellow connected, section.
Oven will The thermostat capillary • Make sure the themlostat capillai T bulb (located in the
not work bulb must be clema mad upper portion of tile oven) is in tile correct position, not
tmobslructed, touching oven sides and not coated with anything.
The oven vent is blocked. • The oven vent, on file back of file rouge, inttst be unohsmi(_e*l.
Oven control improperly set. • See tile Using the oven sections.
Incorrect cookwaxe or • See tile Using the oven forbaking orroasting section.
cookware of improper
size being used.
Oven bottom not securely • See tile Care and cleaning of the range section.
seated in position.
Pilot fight is not fit • See tile OvenLighting Instructions for Standing Pilot
(on stmading pilot models) Models section.
Strong odor Improper air/gas ratio • A(!]ust ()veil burner air shuttei: See tile Installation of
ha the oven. therange section.
This is temporary. • An odor froin tile insulation around tile oven liner is
norinal tor tile first ti_w tiInes tile oven is used.
Surface burners light
but oven doesnot
The oven gas shut-off valve
may have accidentally been
moved during clemthag or
moving.
• To check tile oven gas shut-offvalve on standard twin
1)urner Inodels, raise ci)oktop and h)ok fin" gas shut-off
lever at tile extreine left rear cornei: (Standing pilot
nIodels do not have a gas shut-off \_dve on tile regulatoi:)
Leverissl_ownclosed.
PULLTOOPEN.
GasRange Warranty.
Aft warranty service provided by our Factory Service Centers,
or an authorized Customer Care®technician. Toschedule service,
on-line, 24 hours a day, visit us at ge.com, or carl 800.GE.CARES
(800.432.2737).Please have serial number and model number
available when calling for service.
Staple your receipt here.
Proofof the original purchase
date is needed to obtain service
under the warranty.
For ThePeriod Of." We Will Replace:
OneYear
Fromthedate ofthe
originalpurchase
Anypart of the range which fifils due to a defect in materials or workananship.
During this limRed one-year warranty,we will also provide, free of charge, all labor
and in-home service to replace tile defective part.
What is Not Covered:
• Service trips to VOtli" hoille to fetich Veil how to
use tile product.
• hnproper installation, deli\'e_ w or maintenance.
• Failm'e ot the product if it is abused, misused, or
used tot other than the intended puq_ose or used
commercialE:
• Damage caused after delivery:
• Replacement _ff house fllses or resetting _ff circuit
breake_.
• Damage to tile product caused by accident, fire,
floods or acts of God.
• Incidental or consequential damage caused by possible
defects with this appliance.
• Product not accessible to provide required se_Mce.
I
I EXCLDSIONOFIMPLIED WARRANTIES--Your sole and exclusive remedy isproduct repair asprovided hi this Limited I I
I
Warranty. Any implied warranties, including the implied warranties ofmerchantability or fitnessfor aparticular purpose,
I
I
are limited to one year or the shortestperiod allowed by law.
This warranty is extended to the original purchaser and any succeeding owner for products purchased for
home use within the USA. If the product is located in an area where service by a GEAuthorized Servicer is
not available, you may be responsible for a trip charge or you may be required to bring the product to an
Authorized GE Service location for service. In Alaska, the warranty excludes the cost of shipping or service
calls to your home.
Some states do not aflow the exclusion or limitation of incidental or consequential damages. This warranty
gives you specific legal rights, and you may also have other rights which vary from state to state. Toknow
what your legal rights are, consult your local or state consumer affairs office or your state's Attorney General
Warranter: General Electric Company.Louisville, KY40225
35

ConsumerSupport.
GEAppliancesWebsite ge.com
Have a question or need assist;race with your appliance? Try the (;E Al)pliances Website 24 hom_ a (la);
any day of the vear'. For greater convenience and faster se_Mce, you can now download Owner's Manuals,
order parts, catalogs, or even schedule service onqine. You can also "_sk Our Team of Experts ......
}'OILY questions, and so I/lllch I/loI'e...
ScheduleService
Expert (;E repair se_Mce is (mix one step away fl'om xour doo_: Get on-line and schedule your service at
,_our comenience 24 hotu_ any (lm of the year! Or call 800.(;E.(_ARES (800.432.2737) during n{mnal
business hom_.
ge.com
RealLifeDesignStudio ge.com
GE suI_ports the ILrni\'e_al Design concept--products, services and enviromnents that can be used b)'
people of all ages, sizes and capabilities. We recognize the need to design fi)r a wide range of i)hysical and
ment;d abilities and impaim_ents. For details of GE's ILrnive_al Design applications, including kitchen
design ideas for people with disabilities, check ()tit our _.Vebsite today. For the hearing impaired, please call
800.TDD.GEAC (800.833.4322).
ExtendedWarranties
ge.com
Pro'chase a GE extended warrant_ and learn about special discounts that are available while xour warrant_
is still in effect. You can purchase it on-line anytime, or call 800.626.2224 during nomml business hou_.
(;E (_onsumer Home Serxices will still be there after )our warrant} expires.
PartsandAccessories
ge.com
Individuals qualified to se_Mce their own appliances can have parts or accessories sent direcflv to their
homes (VISA, MasterCard and Discover cards are accepted). Order on-line today, 24 hom_ eve_' day or
by phone at 800.626.2002 dm_ing nomml business horus.
Instructions contained in this manual coverprocedures tobe performed by any user. Other servicing generally
should be referred to qualified service personnel. Cautionmust be exercised, since improper servicing may cause
unsafe operation.
ContactUs
ge.com
If you are not satistied with the service you receive fl'om GE, contact us on our _.Vebsite with all the details
including yore" phone ntlI/lbeI; or wlJte to: General Manage_; Custolner Relations
GE Appliances, Appliance Park
I,ouisville, KY 40225
RegisterYourAppliance
Register your new applim_ce on-lhle----at your convenience! Timely product registration will allow for
enhanced communication and prompt service under the temps of_our warrant); should the need arise.
You may also mail in the pre-p_inted registration card included in the I)ackiw"_ material.
ge.com
Printed in Mexico