Loading ...
Loading ...
Loading ...
8
installation manual
M
N
P
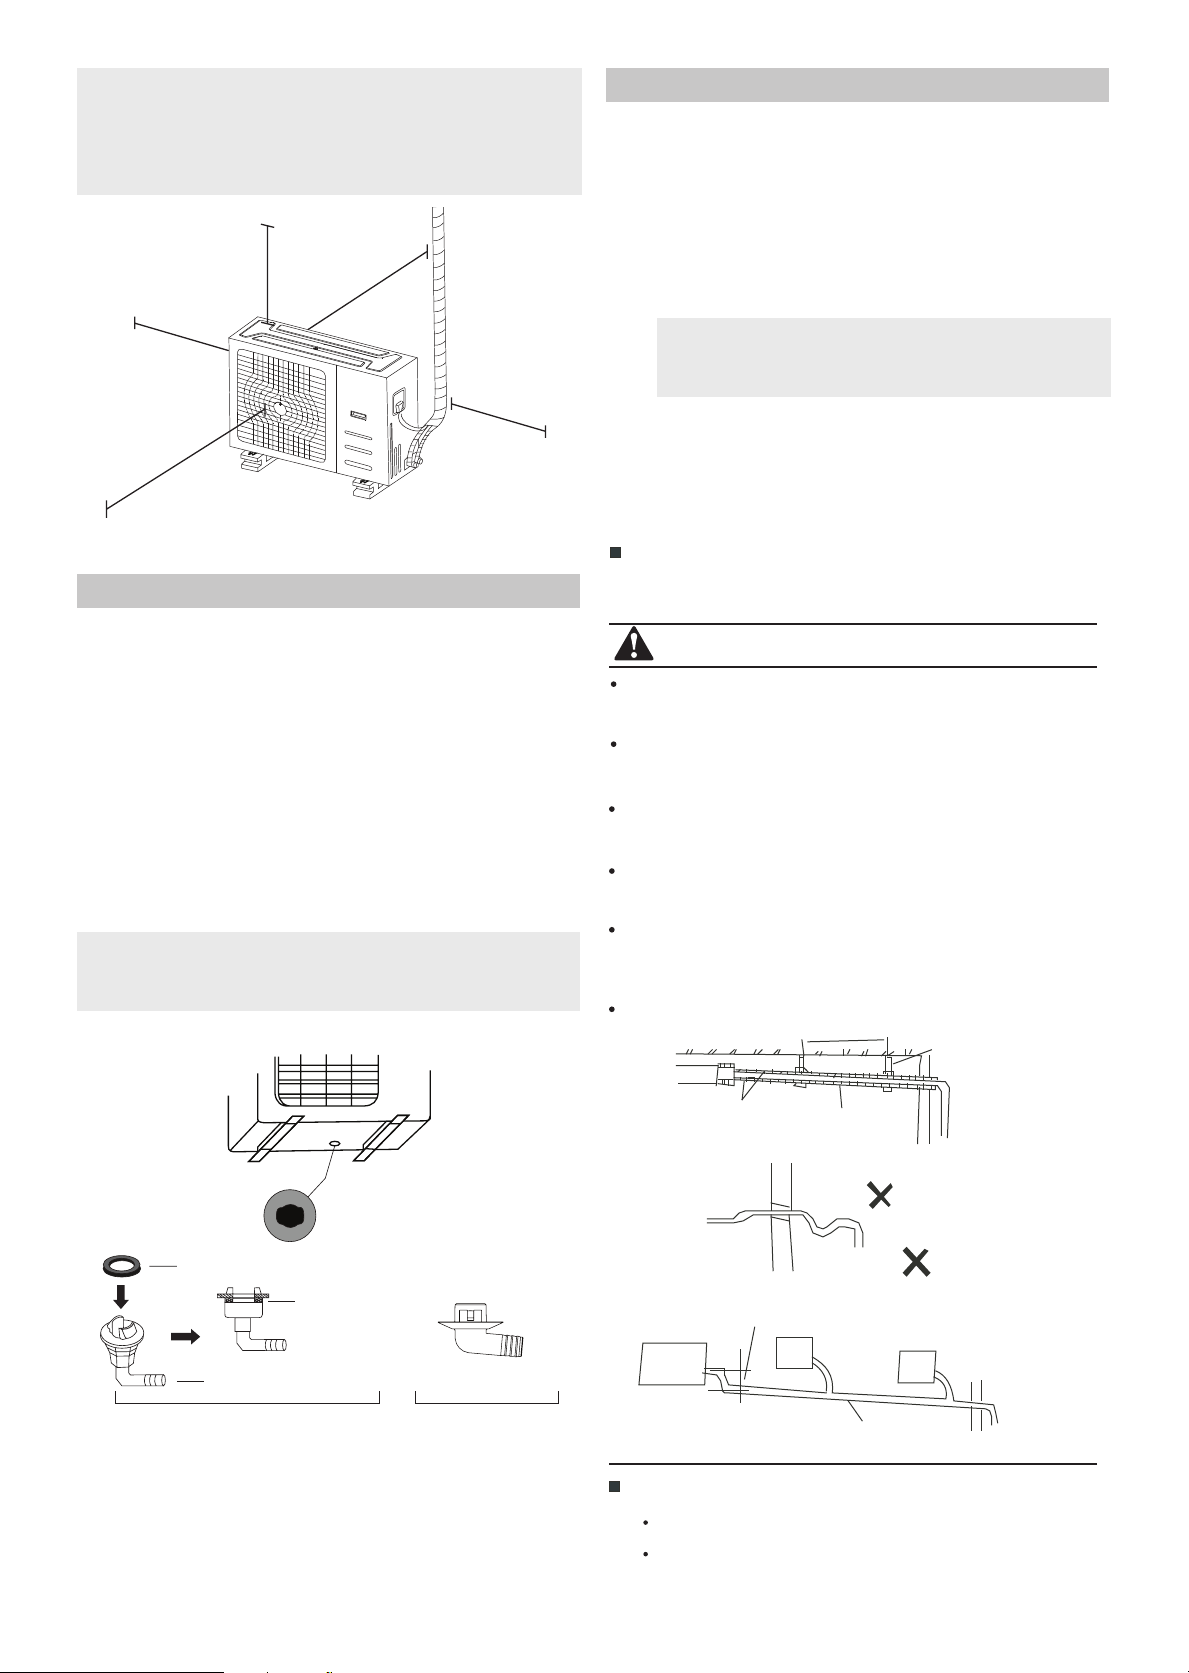
3 0 c m / 1 1 . 8 ” f r o
m b a c k w a
l l
6 0 c m / 2 3 .6 ” o n r i g h t
6 0 c m / 2 3 . 6 ” a b o v e
3 0 c m / 1 1 .
8 ” o n l e f t
2 0 0 c m / 7 8 ” ni f r o n t
Fig. 6.10
Drain Joint Installation
Before bolting the outdoor unit in place, you must install
the drain joint at the bottom of the unit. (See Fig. 6.11)
1. Fit the rubber seal on the end of the drain joint that
will connect to the outdoor unit.
2. Insert the drain joint into the hole in the base pan of
the unit.
3. Rotate the drain joint 90° until it clicks in place
facing the f ront of the unit.
4. Connect a drain hose extension (not included) to
the drain joint to redirect water f rom the unit during
heating mode.
NOTE: Make su re the water drains to a safe location
where it will not cause water damage or a slipping
hazard.
Seal
Drain joint
(A) (B)
Base pan hole of
outdoor unit
Seal
Fig. 6.11
Notes On Drilling Hole In W all
You must drill a hole in the wall for the refrigerant piping,
and the signal cable that will connect the indoor and
outdoor units.
1. Determine the location of the wall hole based on the
location of the outdoor unit.
2. Using a 65-mm (2.5”) co re drill, drill a hole in the
wall.
NOTE: When drilling the wall hole, make su re
to avoid wi res, plumbing, and other sensitive
components.
3. Place the protective wall cu ff in the hole. This
protects the edges of the hole and will help seal it
when you nish the installation p rocess.
NOTE: The minimum distance between the outdoor
unit and walls described in the installation guide does
not apply to airtight rooms. Be su e to keep the unit
unobstructed in at least two of the three directions (M,
N, P) (See Fig. 6.10)
CAUTION
7. CONNECT THE DRAIN PI
Install the drainpipe of the indoor unit
The outlet has PTI screw bread, Please use sealing materials
and pipe sheath(fitting) when connecting PVC pipes.
Drainage test
Check whether the drainpipe is unhindered.
New built house should have this test done before
paving the ceiling.
The drain pipe of indoor unit must be heat insulated, or it will
condense dew, as well as the connections of the indoor unit.
Hard PVC binder must be used for pipe connection, and make
sure there is no leakage.
With the connection part to the indoor unit, please be noted not
to impose pressure on the side of indoor unit pipes.
When the declivity of the drain pipe downwards is over 1/100,
there should not be any winding.
The total length of the drain pipe when pulled out traversely
shall not exceed 20m, when the pipe is over long, a prop stand
must be installed to prevent winding.
Refer to the Fig.7-1 for the installation of the pipes.
1.5m~2m
Insulating
material
Downward declivity
lower than 1/100
Bend
S shape
VP30
Downw ard declivity
lower t han 1/100
Put as deep as possible
(about 10cm)
Fig. 7-1
Loading ...
Loading ...
Loading ...