Version 1.0.0
More choice
for your growing business
Mobile Data Terminal
IPDA086 User Manual

1.0. Product intro
1.1. Intro
1.2. Precaution before using battery
1.3. Charger
1.4. Notes
1
1
3
3
……………………………………………………
15
16
17
18
19
20
21
21
3
6
5
5
5
8
11
13
12
12
15
2.0. Installation instructions
2.1. Appearance
2.2. Install Micro SD and SIM cards
2.3. Battery charge
2.4. Buttons and function area display
3.0. Keyboard emulator
3.1.
Function setup and keycode
3.2. Process mode
3.3. Additional information
3.4. Continuous scan setup
3.5. Enable scanner
Content
4.0. Barcode reader-write
5.0. RFID reader
5.1. NFC
7.0. FAQ
6.0. Other functions
6.1. PING Tool
6.2. Bluetooth
6.3. GPS
6.4. Volume setup
6.5. Sensor
6.6. Keyboard
6.7. Network

1.1. Intro
- 1 - - 2 -
IPDA086 is an industrial-grade smart handheld
terminal.It is based on Android 11, which runs fast
and has long battery life. To meet the needs of
multi-industry applications like logistics express,
warehouse inventory, manufacturing, retail, etc.
It can help customers to quickly access
information and improve the efficiency of
outbound storage inventory.
The user manual download link:
https://munbyn.biz/086um
The SDK download link:
https://munbyn.biz/086sdk
1.2. Precaution before using battery
1.0. Product intro
Do not leave the battery unused for a long
time, no matter it is in the device or
inventory. If the battery has been used for
6 months already, it should be checked for
charging function or it should be disposed
of correctly.
The lifespan of a Li-ion battery is around 2
to 3 years, it can be circularly charged 300
to 500 times. (One full battery charge
period means completely charged and
completely discharged.)
When a Li-ion battery is not in use, it will
continue to discharge slowly. Therefore,
battery charging status should be checked
frequently and take reference related
battery charging information in the
manuals.
Observe and record the information of a
new unused and non-fully charged battery.
On the basis of the operating time of the
new battery and compare with a battery
that has been used for a long time.
According to the product configuration
and application program, the operating
time of the battery would be different.
Check battery charging status at regular
intervals.
When battery operating time drops below
about 80%, charging time will be increased
remarkably.
If a battery is stored or otherwise unused
for an extended period, be sure to follow the
storage instructions in this document.
If you do not follow the instructions, and the
battery has no charge remaining when you
check it, consider it to be damaged. Do not
attempt to recharge it or to use it. Replace it
with a new battery.

Store the battery at temperatures between
5 °C and 20 °C (41 °F and 68 °F).
Button Description
2.0. Installation instructions
1.3. Charger
The charger output voltage/current is 9V DC/2A.
The plug considered as disconnect device of
adapter.
1.4. Notes
1. Using the incorrect type of battery has the
danger of explosion. Please dispose of the used
battery according to instructions.
2. Due to the used enclosure material, the product
shall only be connected to a USB Interface of
version 2.0 or higher. The connection to the
so-called power USB is prohibited.
3. The adapter shall be installed near the equipment
and shall be easily accessible.
4. The suitable temperature for the product and
accessories is -10℃ to 50℃.
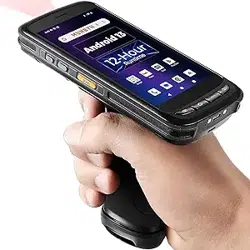
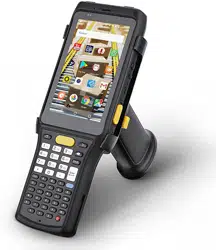
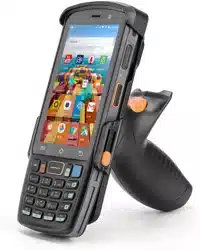
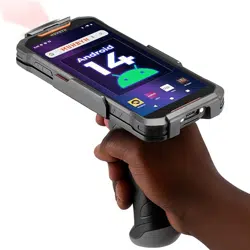
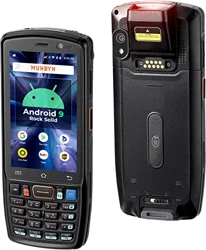
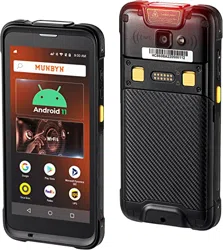
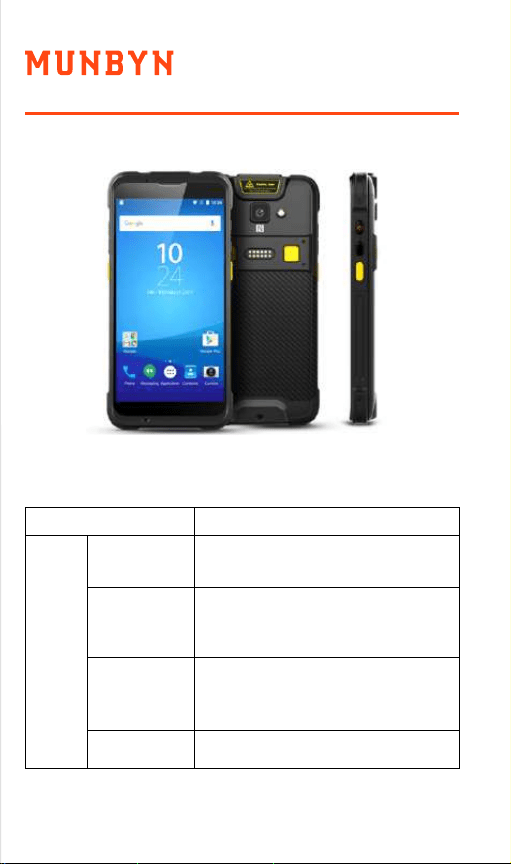
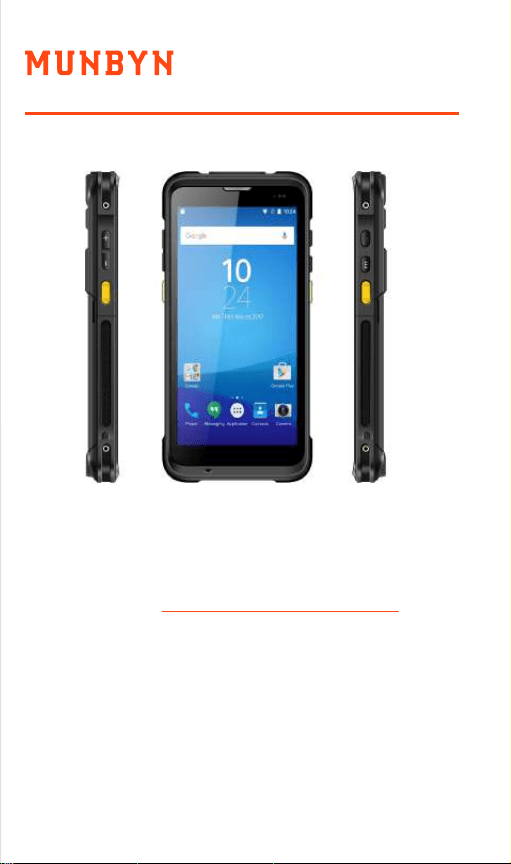
2.1. Appearance
IPDA086 back and front appearances are showing
as follows:
Side
button
1. Power
Locate on the right side, press to
ON/OFF device
Volume up and down
Locate on the right side, its
function can be defined by
software
Scanning button located on
both sides. There are two
scanning buttons
2. PTT key
3. SCAN
4. Volume +/-
Buttons instruction
- 3 - - 4 -
Store the battery at temperatures between
5 °C and 20 °C (41 °F and 68 °F).
Button Description
2.0. Installation instructions
1.3. Charger
The charger output voltage/current is 9V DC/2A.
The plug considered as disconnect device of
adapter.
1.4. Notes
1. Using the incorrect type of battery has the
danger of explosion. Please dispose of the used
battery according to instructions.
2. Due to the used enclosure material, the product
shall only be connected to a USB Interface of
version 2.0 or higher. The connection to the
so-called power USB is prohibited.
3. The adapter shall be installed near the equipment
and shall be easily accessible.
4. The suitable temperature for the product and
accessories is -10℃ to 50℃.
2.1. Appearance
IPDA086 back and front appearances are showing
as follows:
Side
button
1. Power
Locate on the right side, press to
ON/OFF device
Volume up and down
Locate on the right side, its
function can be defined by
software
Scanning button located on
both sides. There are two
scanning buttons
2. PTT key
3. SCAN
4. Volume +/-
Buttons instruction
- 3 - - 4 -
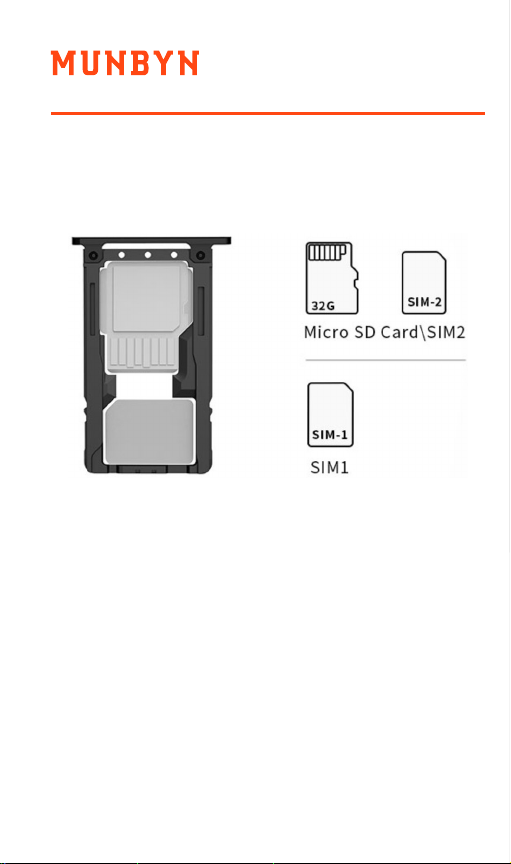
2.2. Install Micro SD and SIM cards
The cards sockets are showing as follows:
2.3. Battery charge
By using USB Type-C contact, the original adapter
should be used for charging the device. Make sure
not to use other adapters to charge the device.
3.0. Keyboard emulator
Keyboard emulator detailed operation manual
download link:https://munbyn.biz/083kem
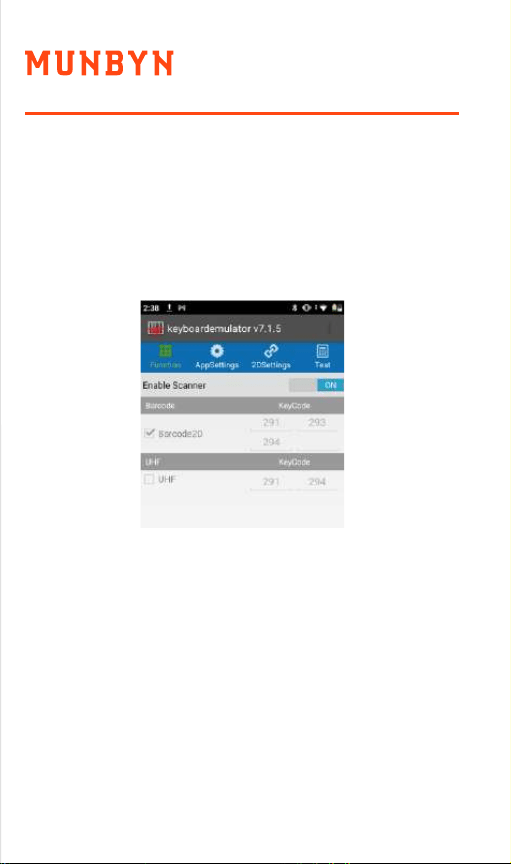
3.1. Function setup and keycode
In the function list, the user can select the supported
function that can be realized by keyboard emulator.
For example, if the device has equipped with 2D
2.4. Buttons and function area display
IPDA086 has 6 side buttons, 2D scanning module
locates on the top. HD camera and flashlight locate
at the rear. NFC identification surrounds the camera.
- 5 - - 6 -
2.2. Install Micro SD and SIM cards
The cards sockets are showing as follows:
2.3. Battery charge
By using USB Type-C contact, the original adapter
should be used for charging the device. Make sure
not to use other adapters to charge the device.
3.0. Keyboard emulator
Keyboard emulator detailed operation manual
download link:https://munbyn.biz/083kem
3.1. Function setup and keycode
In the function list, the user can select the supported
function that can be realized by keyboard emulator.
For example, if the device has equipped with 2D
2.4. Buttons and function area display
IPDA086 has 6 side buttons, 2D scanning module
locates on the top. HD camera and flashlight locate
at the rear. NFC identification surrounds the camera.
- 5 - - 6 -
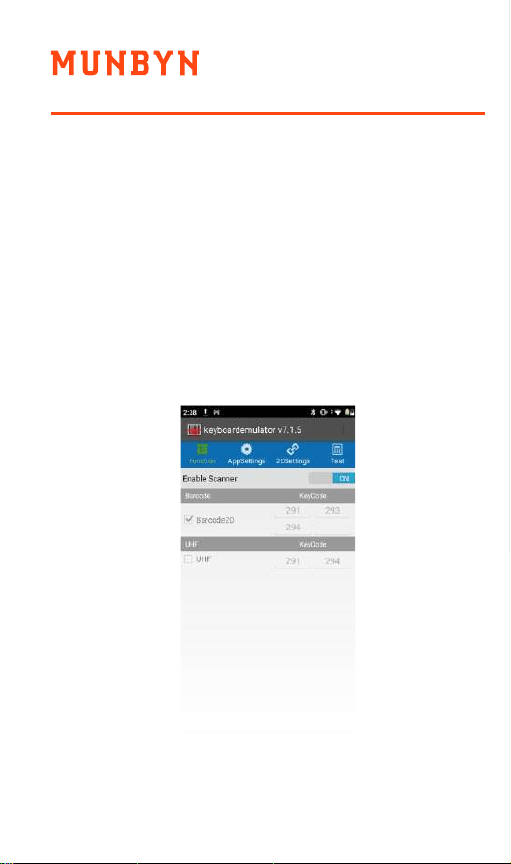
barcode scanning module, option “Barcode2D”
should be selected for scanning 1D/2D barcode.
Click “Keycode” to acquire focus point, press the
button “SCAN”, then related key code will be
entered on the line automatically.
Left scan key : 291
Right scan key : 293
Handle key : 294
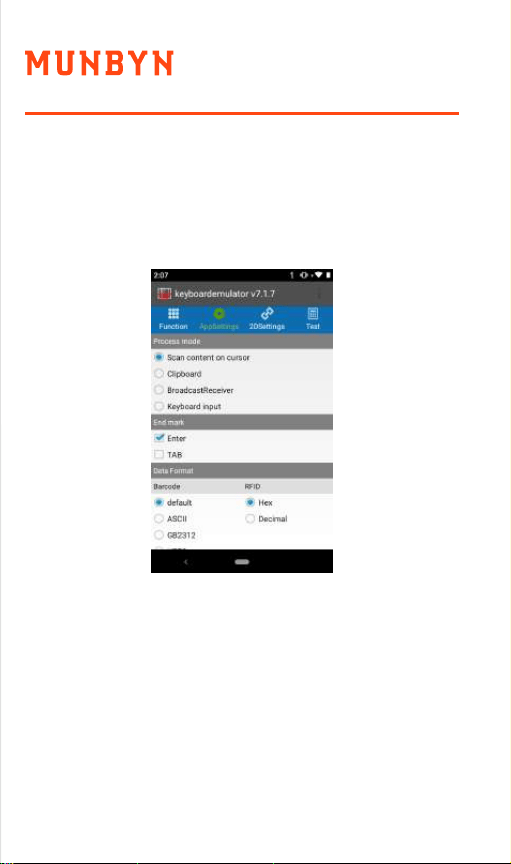
3.2. Process mode
Process mode means how the data will be processed
after barcode data has been read out.
Enter read-out data in cursor position.
After the function has been bound with button,
related function can be activated by pressing button.
The keycode:
Scan content on cursor :
Enter read-out data in cursor position, it is same as
input data on analog keyboard.
Keyboard Input:
- 7 - - 8 -
barcode scanning module, option “Barcode2D”
should be selected for scanning 1D/2D barcode.
Click “Keycode” to acquire focus point, press the
button “SCAN”, then related key code will be
entered on the line automatically.
Left scan key : 291
Right scan key : 293
Handle key : 294
3.2. Process mode
Process mode means how the data will be processed
after barcode data has been read out.
Enter read-out data in cursor position.
After the function has been bound with button,
related function can be activated by pressing button.
The keycode:
Scan content on cursor :
Enter read-out data in cursor position, it is same as
input data on analog keyboard.
Keyboard Input:
- 7 - - 8 -

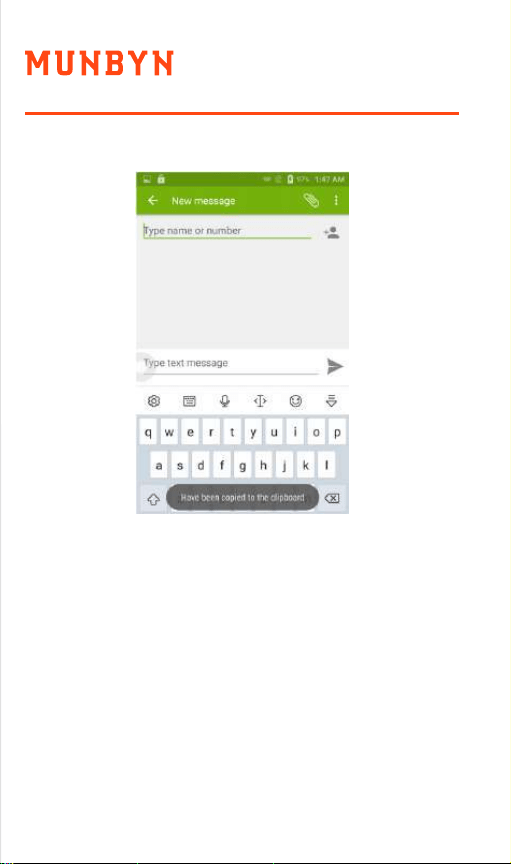
Copy the read-out data on the clipboard, paste data
on the place that the user needs.
Clipboard:
It is the method that uses the broadcast
mechanism of Android to transfer read-out bar code
data to customer’s program. In this way, the codes of
API in SDK do not need to be written into customer
software codes, read-out data can be acquired by
registering broadcast and customer can operate
read-out data according to logic requirements.
After selecting “Broadcast Receiver”, “Broadcast
name” and “Key” need to be adjusted.
Broadcast Receiver:
- 9 - - 10 -
Broadcast name: it is the broadcast name of
acquired data in customer software.
Key: acquire the corresponding key designation of
the broadcast.
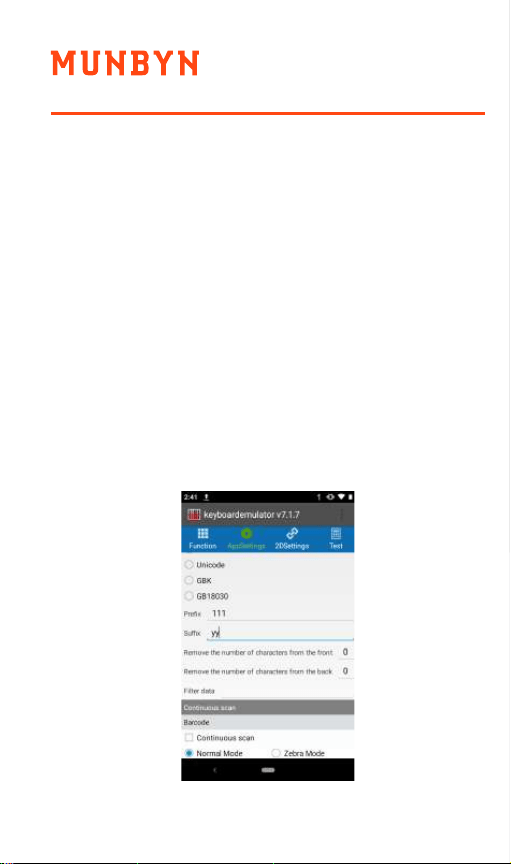
3.3. Additional information
The additional information means adding extra data
at front or rear on scanned barcode data.
“Prefix”: add data at the front of read-out data.
“Suffix”: add data at the rear of read-out data.
For example, if the original read-out data is
“12345678”, prefix will be modified as “111” and
suffix will be modified as “yy”, the final data will
display “11112345678yy”.
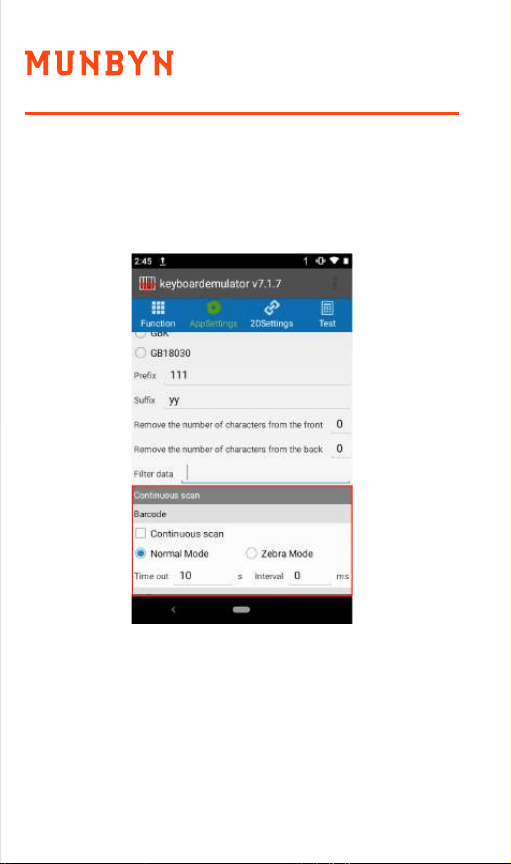
3.4. Continuous scan setup
Select continuous scan, user can adjust the “interval”
and “time Out”.
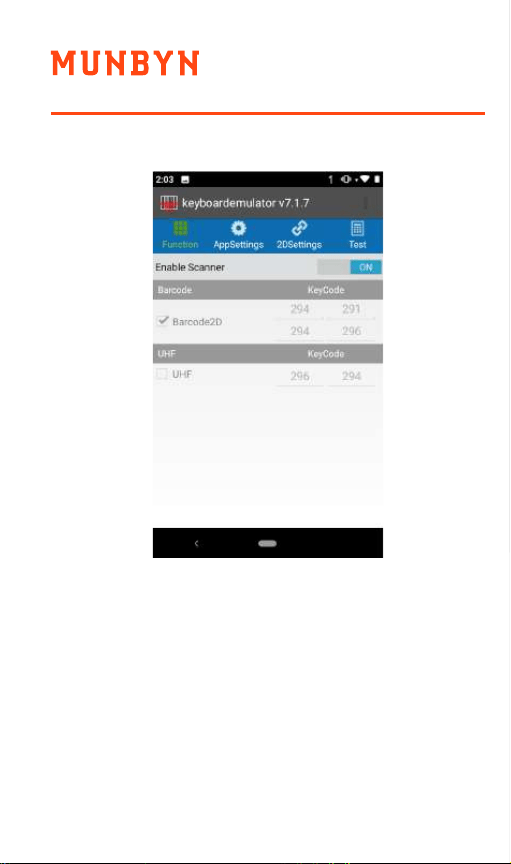
3.5. Enable scanner
After all previous functions have been adjusted, click
“Enable scanner” to switch on scanner, now user can
use all the functions of keyboard emulator.
- 11 - - 12 -
Broadcast name: it is the broadcast name of
acquired data in customer software.
Key: acquire the corresponding key designation of
the broadcast.
3.3. Additional information
The additional information means adding extra data
at front or rear on scanned barcode data.
“Prefix”: add data at the front of read-out data.
“Suffix”: add data at the rear of read-out data.
For example, if the original read-out data is
“12345678”, prefix will be modified as “111” and
suffix will be modified as “yy”, the final data will
display “11112345678yy”.
3.4. Continuous scan setup
Select continuous scan, user can adjust the “interval”
and “time Out”.
3.5. Enable scanner
After all previous functions have been adjusted, click
“Enable scanner” to switch on scanner, now user can
use all the functions of keyboard emulator.
- 11 - - 12 -
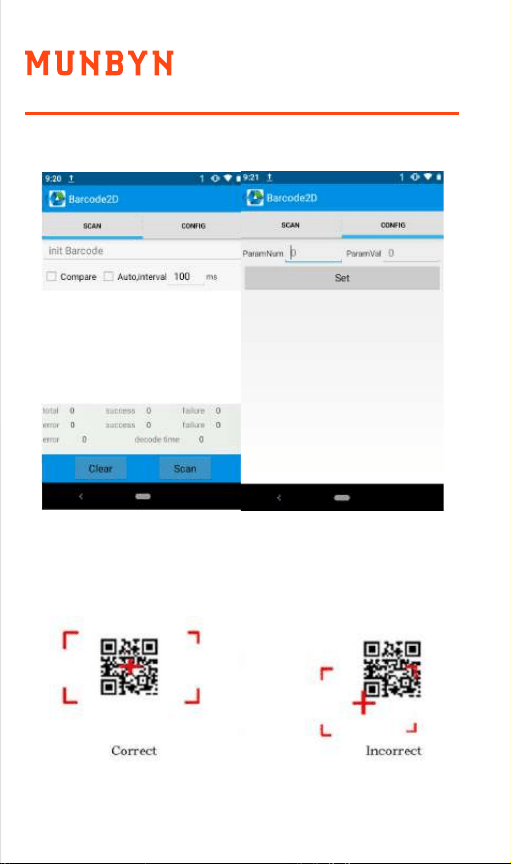
4.0. Barcode reader-writer
1. In App Center, to open 2D barcode scan test.
2. Press “SCAN” button or click scan key to start
scanning, the parameter “Auto interval” can be
adjusted.
Caution: Please scan codes in the correct way
otherwise the scanning will be failed.
2D code:
- 13 - - 14 -
4.0. Barcode reader-writer
1. In App Center, to open 2D barcode scan test.
2. Press “SCAN” button or click scan key to start
scanning, the parameter “Auto interval” can be
adjusted.
Caution: Please scan codes in the correct way
otherwise the scanning will be failed.
2D code:
- 13 - - 14 -

5.0. RFID reader
5.1. NFC
Click App Center, open “NFC” to read and write tag
information.
6.0. Other functions
6.1. PING Tool
1. Open “PING” in App Center.
2. Setup PING parameter and select external/internal
address.
- 15 - - 16 -

5.0. RFID reader
5.1. NFC
Click App Center, open “NFC” to read and write tag
information.
6.0. Other functions
6.1. PING Tool
1. Open “PING” in App Center.
2. Setup PING parameter and select external/internal
address.
- 15 - - 16 -
6.3. GPS
1. Click “GPS” in App Center to open GPS test.
2. Setup GPS parameters to access GPS information.
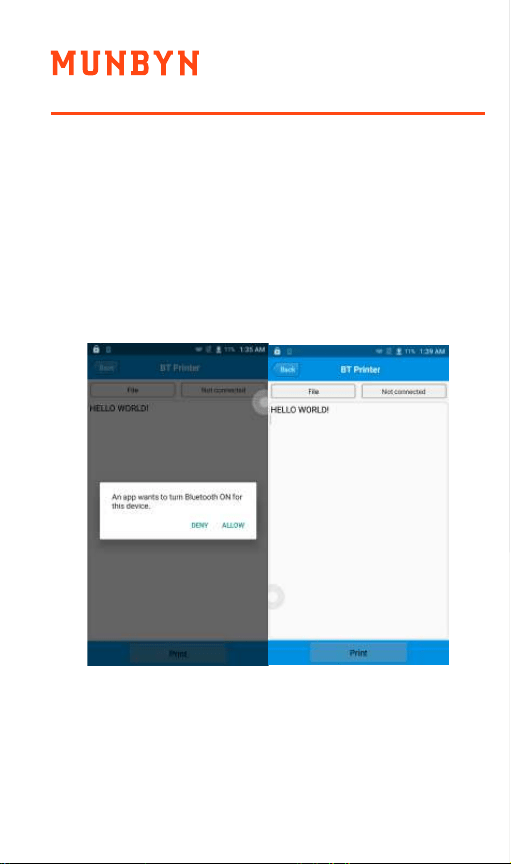
6.2. Bluetooth
1. Open “BT Printer” in App Center.
2. In the list of detected devices, click the device
that you want to pair.
3. Select printer and click “Print” to start printing
contents.
- 17 - - 18 -

6.3. GPS
1. Click “GPS” in App Center to open GPS test.
2. Setup GPS parameters to access GPS information.
6.2. Bluetooth
1. Open “BT Printer” in App Center.
2. In the list of detected devices, click the device
that you want to pair.
3. Select printer and click “Print” to start printing
contents.
- 17 - - 18 -
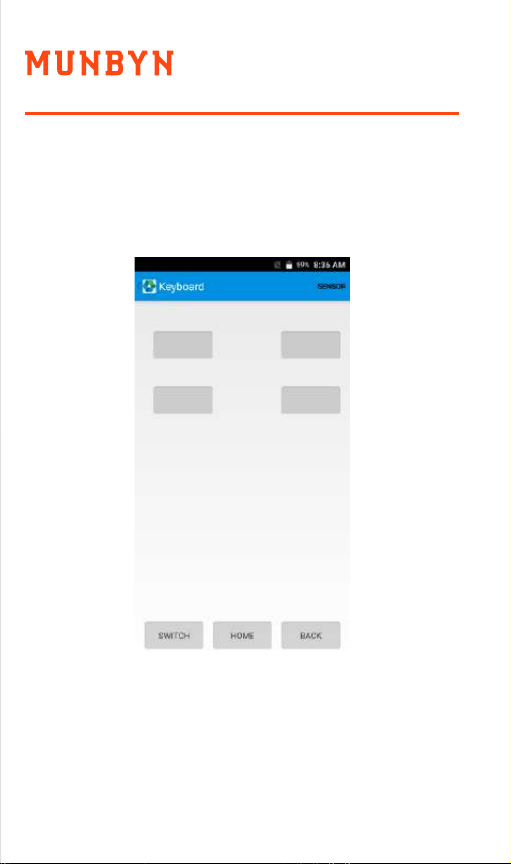
6.6. Keyboard
1. Click “Keyboard” in App Center.
2. Setup and test the main value of the device.
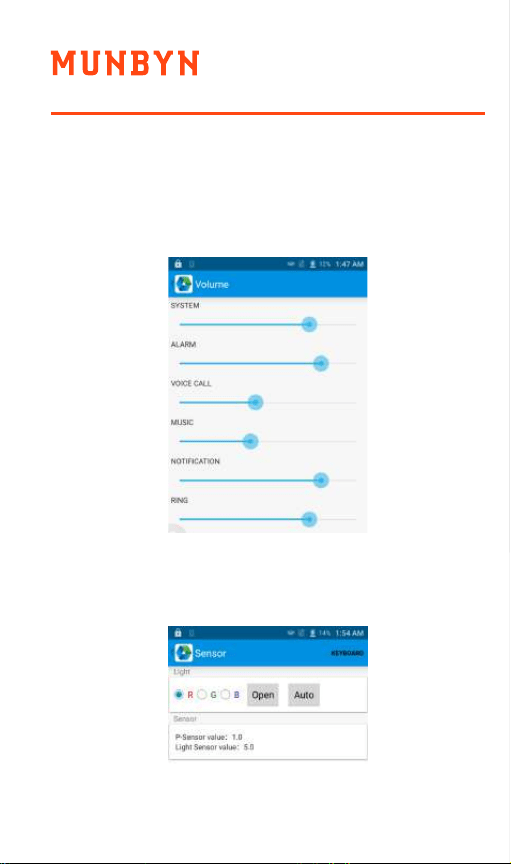
6.5. Sensor
1. Click “Sensor” in App Center.
2. Setup the sensor by requirements.
6.4. Volume setup
1. Click “Volume” in App Center.
2. Setup volume by requirements.
- 19 - - 20 -
6.6. Keyboard
1. Click “Keyboard” in App Center.
2. Setup and test the main value of the device.
6.5. Sensor
1. Click “Sensor” in App Center.
2. Setup the sensor by requirements.
6.4. Volume setup
1. Click “Volume” in App Center.
2. Setup volume by requirements.
- 19 - - 20 -

Q2:Why can’t the device scan after I restore
the factory settings?
A2: When you reset the device to factory
settings, you should check the
Barcode2D, as the following picture.
Q3:Why can't my newly purchased device
be turned on, even after charging for
more than half an hour?
A3: It must be that the insulation sticker of
the battery has not been torn off, please
tear off the insulation sticker of the
battery before turning on the machine.
7.0. FAQ
Q1: Why is there no light when scanning?
A1: First make sure that "Enable Scanner"
is turned on and the keycode entered
is correct.
Left scan key: 291
Right scan key: 293
Handle key: 294
6.7. Network
1. Click “Network” in App Center.
2. Test WIFI/Mobile signal by requirements.
- 21 - - 22 -

www.munbyn.com (how-to videos, warranty details)
MUNBYN provides 18 months warranty and
lifetime free service.
If you encounter any issues with the product,
please contact the MUNBYN team to promptly
receive troubleshooting tips or a replacement.
support@munbyn.com (24-7 online support)
- 23 - - 24 -
Q4: How to use the battery correctly?
A4: The battery is a Li-ion battery, if no
power, please immediately charge it,
don't keep the battery with full power
or no power for long time, the best
way is to keep 50% power of the
battery to store it. And if you don't use
the PDA for long time, it is better to
pull out the battery from PDA.
Q5: The device cannot be charged.
(1) Check the device adapter and charging
port are good.
(2) If the device is not used for a long time,
please keep it charged for 30 minutes.
Then check the device lights on or not.
(3) Replace the battery of the device that
can be turned on normally, check the
problem on battery or device.
Q6: How to install the hand strap?
Tutorial video:
https://munbyn.biz/086hsiv

www.munbyn.com (how-to videos, warranty details)
MUNBYN provides 18 months warranty and
lifetime free service.
If you encounter any issues with the product,
please contact the MUNBYN team to promptly
receive troubleshooting tips or a replacement.
[email protected] (24-7 online support)
- 23 - - 24 -
Q4: How to use the battery correctly?
A4: The battery is a Li-ion battery, if no
power, please immediately charge it,
don't keep the battery with full power
or no power for long time, the best
way is to keep 50% power of the
battery to store it. And if you don't use
the PDA for long time, it is better to
pull out the battery from PDA.
Q5: The device cannot be charged.
(1) Check the device adapter and charging
port are good.
(2) If the device is not used for a long time,
please keep it charged for 30 minutes.
Then check the device lights on or not.
(3) Replace the battery of the device that
can be turned on normally, check the
problem on battery or device.
Q6: How to install the hand strap?
Tutorial video:
https://munbyn.biz/086hsiv

Version 1.0.0
More choice
for your growing business
Mobile Data Terminal
IPDA086 User Manual