Loading ...
Loading ...
Loading ...
USER GUIDE
Anti-Tip Bracket 1
u-line.com
SAFETY • INSTALLATION & INTEGRATION • OPERATING INSTRUCTIONS • MAINTENANCE • SERVICE
Anti-Tip Bracket
CAUTION
!
The anti-tip bracket must be installed to prevent
the unit from tipping when doors are fully
opened or excess weight is placed on the front of
the unit.
The anti-tip brackets have multiple mounting options.
Mounting will depend on your particular cabinet
configuration. Locate 6 #8x5/8" screws included with your
unit.
TOP MOUNT
For ease of installation the anti-tip brackets are
pre-installed in the top mount position.
1. Completely slide the unit into its position in the
opening. Be certain unit height is properly adjusted.
(See GENERAL INSTALLATION).
2. Open both doors completely. Make certain doors clear
surrounding cabinetry.
3. Using a 3/32" (2.50 mm) drill bit, drill 6 pilot holes
(3 for each bracket) 5/8" (16 mm) deep into bottom of
countertop. Use the anti-tip brackets as a template.
4. Install 6 #8x5/8" screws into the plate using a #2
Phillips head screwdriver.
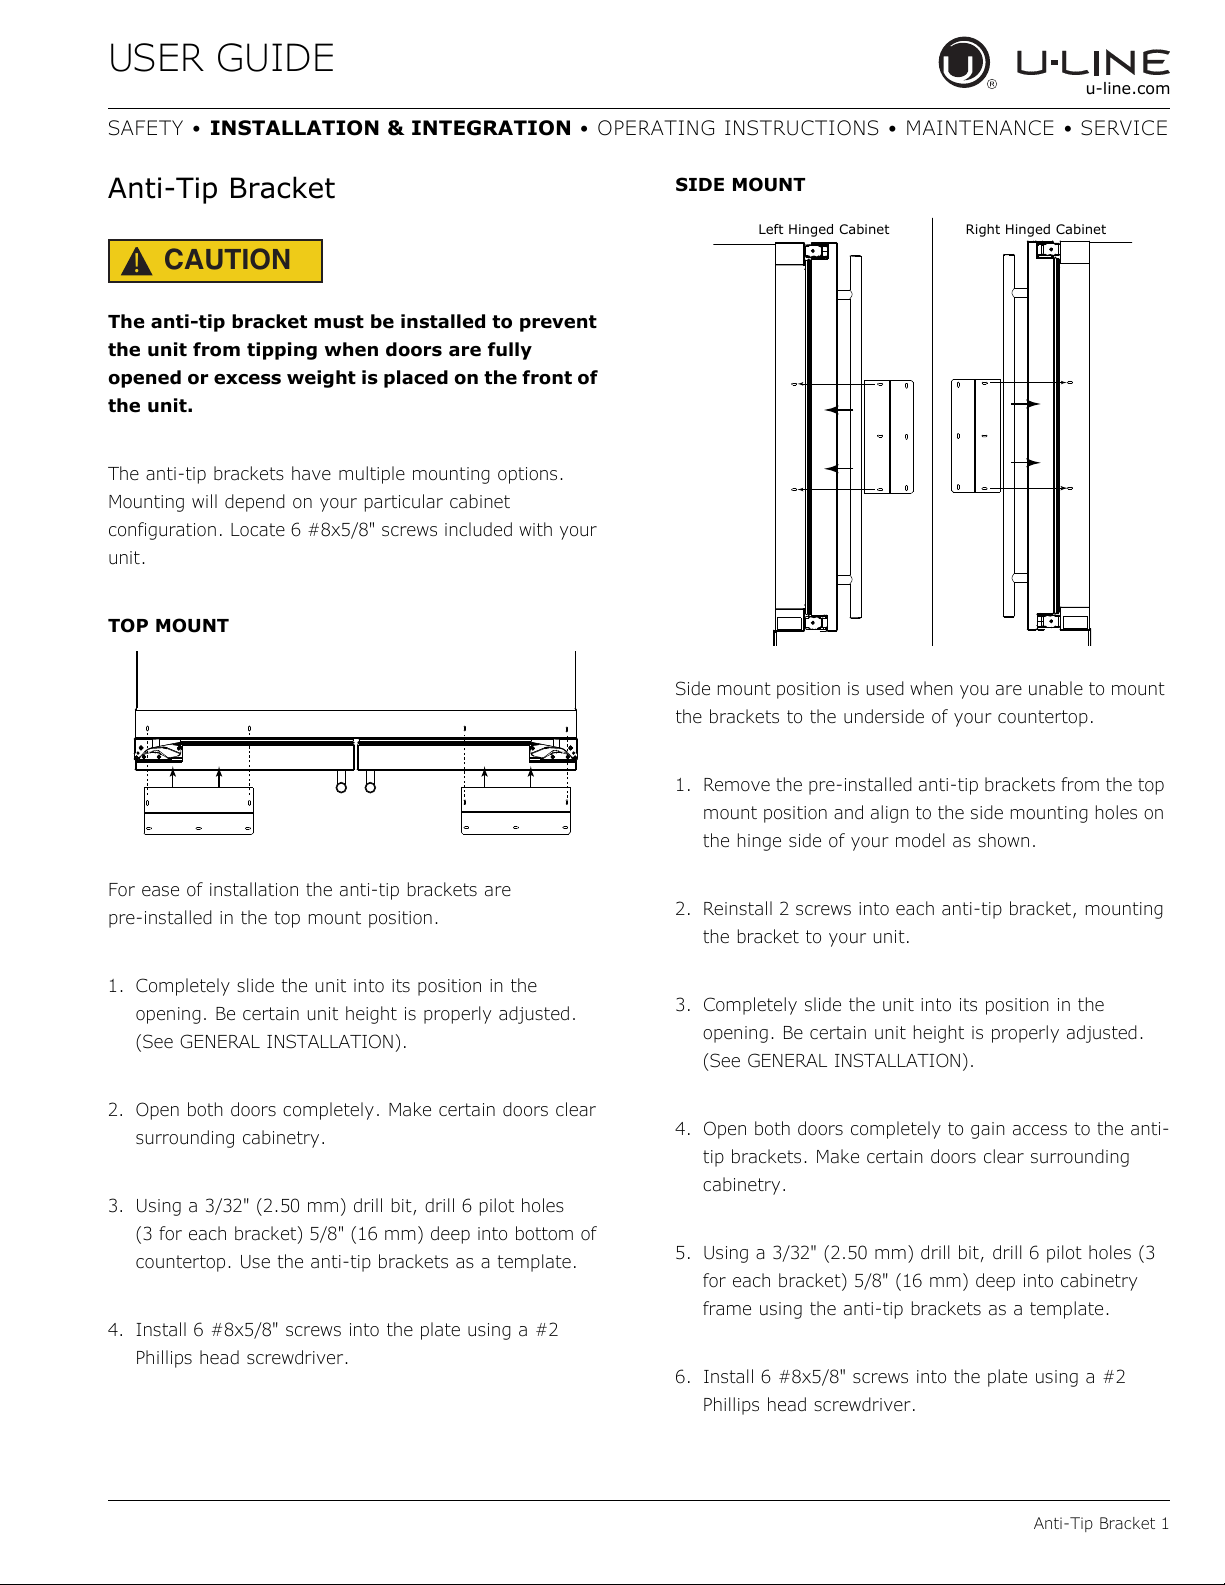
SIDE MOUNT
Side mount position is used when you are unable to mount
the brackets to the underside of your countertop.
1. Remove the pre-installed anti-tip brackets from the top
mount position and align to the side mounting holes on
the hinge side of your model as shown.
2. Reinstall 2 screws into each anti-tip bracket, mounting
the bracket to your unit.
3. Completely slide the unit into its position in the
opening. Be certain unit height is properly adjusted.
(See GENERAL INSTALLATION).
4. Open both doors completely to gain access to the anti-
tip brackets. Make certain doors clear surrounding
cabinetry.
5. Using a 3/32" (2.50 mm) drill bit, drill 6 pilot holes (3
for each bracket) 5/8" (16 mm) deep into cabinetry
frame using the anti-tip brackets as a template.
6. Install 6 #8x5/8" screws into the plate using a #2
Phillips head screwdriver.
Left Hinged Cabinet
Right Hinged Cabinet
11
Loading ...
Loading ...
Loading ...