Loading ...
Loading ...
Loading ...

17
Introduction
Nothing Comes Close to a Cobra
®
16
English
Introduction
Included in this Package
Included in this Package
•
You should find all of the following items in the package with
your Cobra VHF/GMRS radio:
MEM
SAME
ATIS
VOX
HI
ROG
VHF
T
R
A
B
GMRS
X
CI
U
Radio Drop-In Battery Charger
DC Charger
For connection to 12-volt power
sources.
LiON Battery Pack
Operating Instruction Manual Spring-Loaded Belt Clip
MEMSAMELOMEDH I
ROG
VHF
T
R
A
B
X
CIU
16/9
TW
SCAN
WX
HML
ESC
MEM
ENT SETUP
CALL
MARINE HH500
SUBMERSIBLE
A2
English
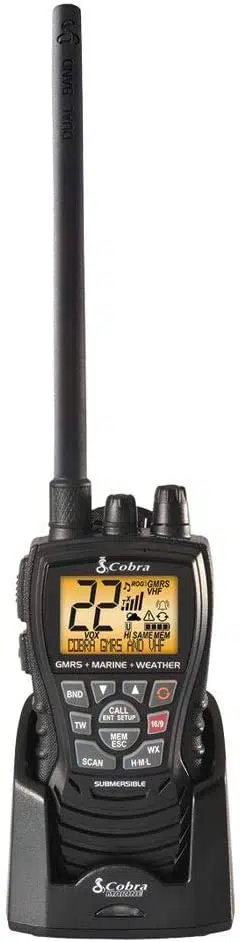
Radio Controls
and Indicators
Introduction
Instant
Channel
16/9 Button
Channel
Up Button
ON/OFF/
Volume Control
Speaker/
Microphone
External Cover
Antenna
Backlit
LCD
Screen
Tri-Watch
Button
Battery
Backlight/
Key Lock
Button
Memory/Escape
Button
Push to
Talk
Button
Channel
Down
Button
Speaker
Belt Clip
Battery
Door
Screw
Power
Level/Weather
Button
SCAN Button
Call/Enter
Button
VHF Microphone
Rewind-Say-Again
®
Button
Bluetooth
Microphone
Bluetooth
Button
MR HH450 DUAL
Printed in China Part No. 480-907-P Version A
Owner’s Manual
NothingComes Close to a Cobra
®
English
Antenna
AC Charger
For connection to 120-volt power
source.
Wrist Strap
Alkaline Battery Tray
Install/Remove Antenna
Install/Remove Antenna
•
1. To install the antenna turn the antenna into the radio
clockwise to tighten. Do not overtighten.
2. To remove the antenna turn the antenna counterclockwise.
This radio transmitter IC: 906A-MRHH450 has been
approved by Industry Canada to operate with the supplied
antenna. Other antennas are strictly prohibited for use with
this device.
Cet émetteur radio IC: 906A-MRHH450 a été approuvé par
Industrie Canada pour fonctionner avec l'antenne fournie.
D'autres antennes sont strictement interdits pour une
utilisation avec cet appareil.
Batteries and Charger
•
The radio is shipped with a sealed lithium-ion (LiON) battery
pack (P/N CM 110-026) that is rechargeable.
WARNING
The charger provided for this radio is only to be used
to charge the battery pack provided. Do not charge
any other type of batteries in the charger as fire,
explosion or battery damage will occur. Avoiding
extreme room temperatures will also help prolong
the life of the battery pack for the radio.
When your rechargeable batteries begin to discharge too
quickly, it is time to install a new battery pack. Your radio
will also operate with five (5) high-quality AA alkaline
batteries, using the included alkaline battery tray.
Installing the Battery Pack
1. Position the battery pack over the back of the radio.
2. Engage the battery pack into the radio by sliding to the top
until battery pack is fully seated against radio housing.
3. Tighten the screw using the end of the belt clip to secure
the battery pack to the radio. Do not overtighten. Only use
the end of the belt clip to tighten the screw.
Antenna
Install Battery Pack
LiON Battery Pack
Tighten Screw
Loading ...
Loading ...
Loading ...