Loading ...
Loading ...
TROUBLESHOOTING
If you experience problems with your telephone, try the following suggestions:
NO DIAL TONE
1. Make sure that all plugs are connected properly. Check the connections at the wall jack, the telephone
body and the handset.
2. Try another modular jack within your home which you know to be working properly.
CALLS CANNOT BE DIALED OR DIALED SLOWLY
Check to make sure that the DIAL MODE switch is in the correct position for the type of service available
in your area.
TELEPHONE DOES NOT RING
Check that RINGER CONTROL switch is not set to OFF.
If there are several telephones connected to the same line, try disconnecting some of the other telephones.
Having too many telephones connected to the same line can cause low ringer volume or poor sound quality
during calls.
CARE AND MAINTENANCE
Avoid rough treatment to your telephone. Do not drop the handset and always replace it gently onto the
cradle.Clean only with a cloth slightly dampened with water only. Do not use detergents, waxes, solvents,
sprays, alcohols or excessive water.
PARTS INCLUDED
Your new telephone includes the following items:
1 - Telephone handset
1 - Handset coil cord
1 - Telephone body
1 - 7 Foot line cord
1 - 15 Inch line cord
2 - Screws with wall archors
4 - Rubber spacer pads.
2 - Tapping screw
1 - Template (See above picture and instructions)
4
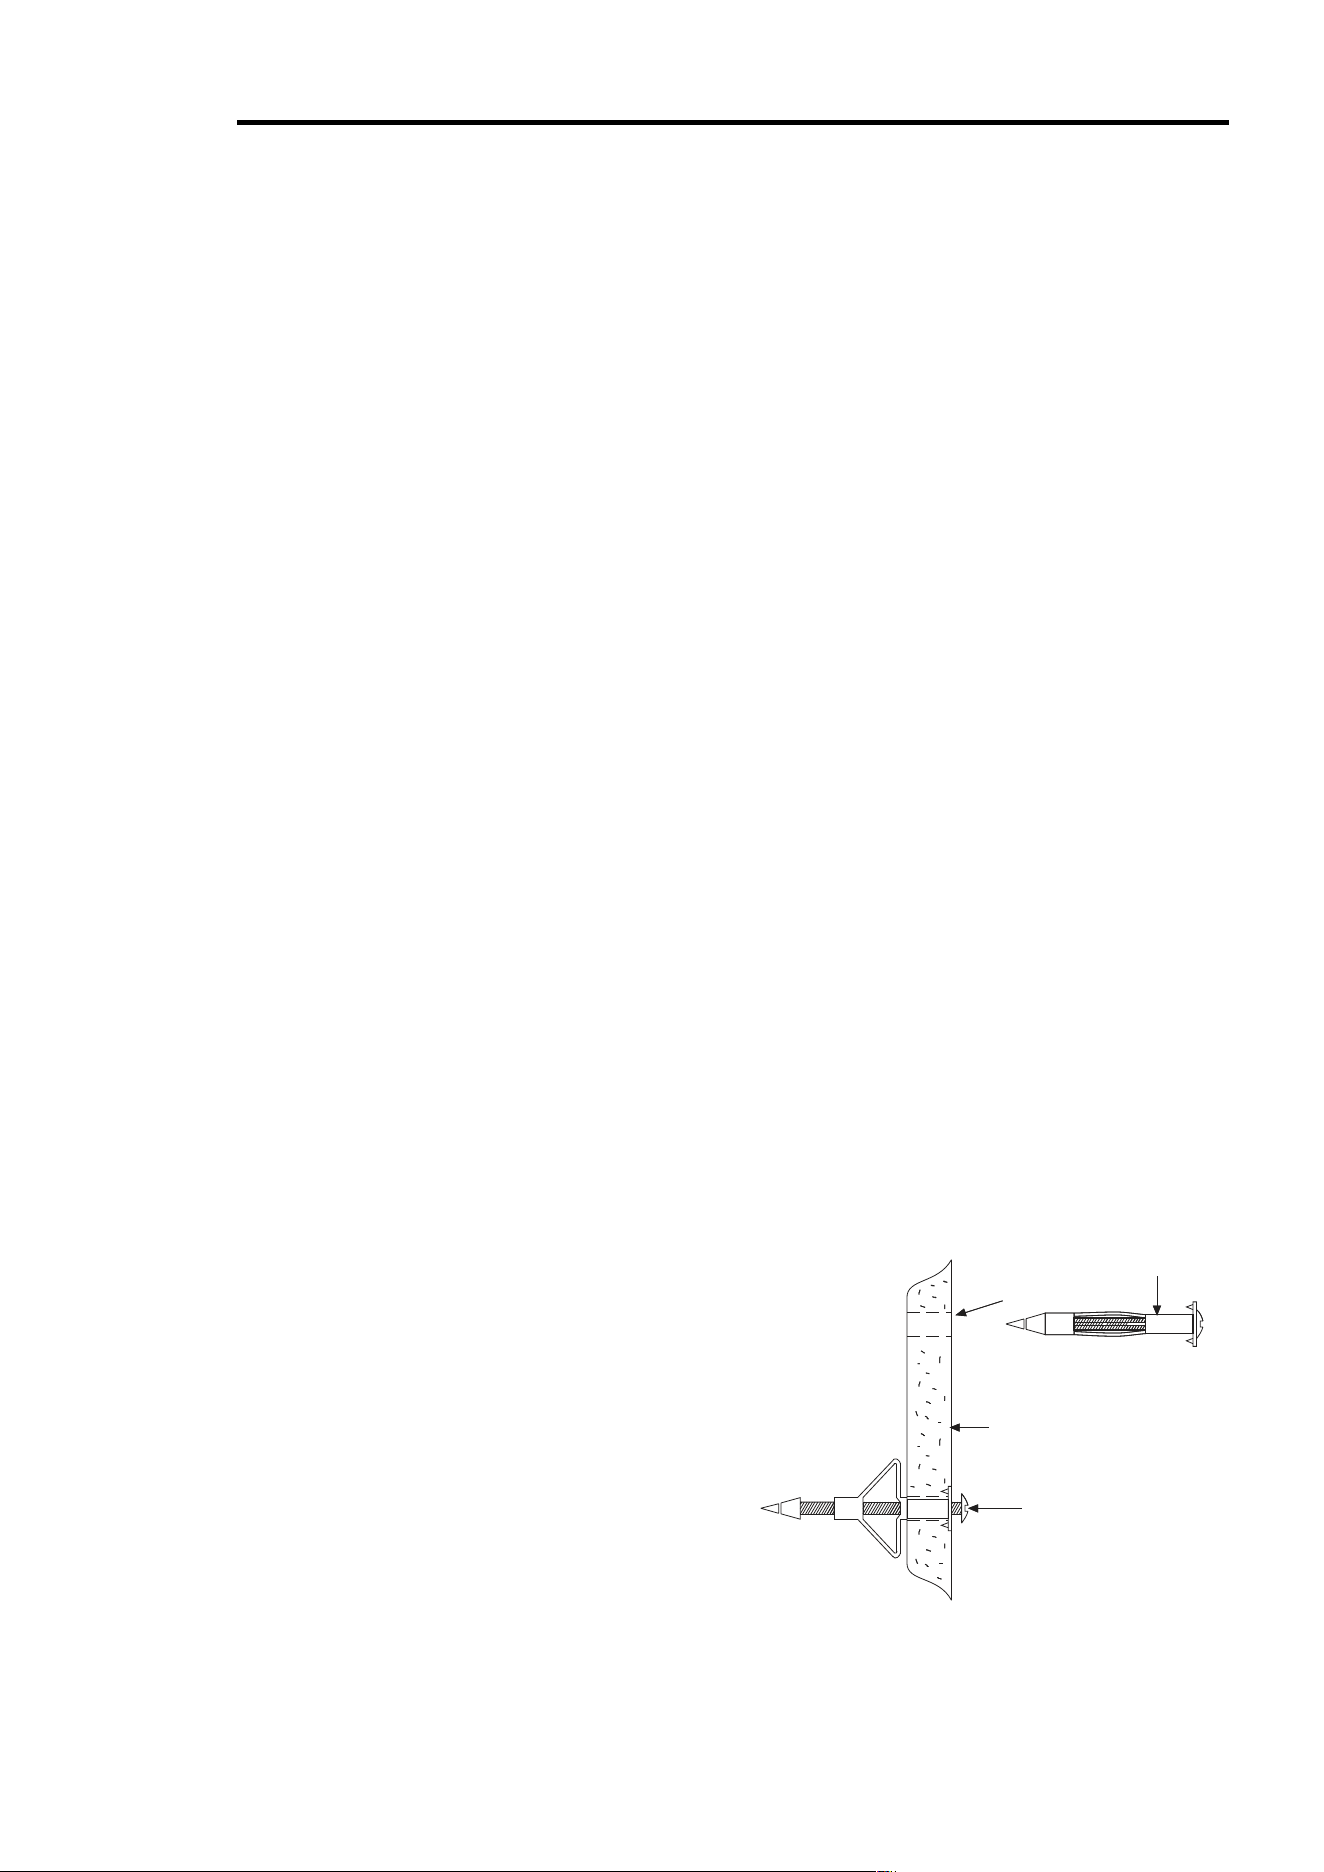
TO INSTALL WALL ANCHORS
If the location you have chosen to mount your telephone
is a hollow wall without any beams you will have to use the
included wall anchors.
To install, place the template against the wall where you
wish to place your telephone. Mark the wall at the location
of the two + on the template by pushing a pen or pencil
through the template. Drill a 1/4" hole at each mark.
With a Phillips screwdriver, begin tightening the screw by
turning it clockwise. Stop turning when you feel firm
resistance.
Turn the screw counter clockwise until the screw head is
about 1/4" out of the wall.
Install the 7 foot line cord at back of the telephone . Adjust
the switches to your preference. Position the line cord
through the slot on the bottom of the cabinet. Line up the
holes with the two screws. Place the telephone onto these
two screws and gently pull down.
This may require a little fine tuning until the phone is seated
securely.
ENGLISH
WALL
1/4" HOLE
WALL ANCHOR
PRIOR TO INSTALLION
AFTER INSTALLION
Loading ...
Loading ...
Loading ...