0
GEApp/iances.com
0
&
Safety Instructions ........ 2-4
Operating Instructions
Clock and Timer ............. 9
Control i,ockout ............ 19
Controls .................. 5, 6
Convection ............. 11-13
Oven .................... 7, 8
Sabbath Feature ......... 20, 21
Self'Cleaning Oven ....... 15, 16
Special Features ......... 17-19
Thermostat ................ 14
Timed Baking and Roasting . .10
Care and Cleaning
Broiler Pan and (;rid ........ 23
Control Panel .............. 22
(;lass Surfaces .............. 25
Knob ..................... 22
Lift-Off Oven Door ....... 22, 23
Light Bulb ................. 24
Oven Interior .............. 25
Packaging Tape ............. 22
Painted Surfhces ............ 25
Racks ..................... 23
Stainless Steel Surfaces ....... 25
Troubleshooting Tips .... 26-28
Accessories ................ 29
Consumer Support
Consumer Support .......... 32
Warranty .................. 31
,]KP30-2 7" Single _dl Oven
,f1_30-30" Single _d[ Oven
,]KP70-2 7" SinKle Convection Wall Oven
fl'P70-30" Single Convection Wall Oven
,]KP35-2 7" Doubk Wall Oven
,f1_35=30" Doubk Wall Oven
,]KP55-2 7" Doubk Wall Oven
fl'P55=30" Doubk Wail Oven
,]KP75-2 7" Doubk Convection Wall Oven
fl'P75=30" Doubk Convection Wall Oven
Write the model andserial
numbershere:
Model #
Serial #
You can find them on a label
on the side trim or on the flont
of the (lower) oven behind the
oven doo_:
Printedon
RecycledPaper
P_i,t_di_th_UnitedSt_t_s 49-80598 08-09 Jfl
IMPORTANTSAFETYINFORMATION.
READALL INSTRUCTIONSBEFOREUSING.
m
For your safety, the information in this manual must be foflowed to minimize the risk of fire or
explosion, electric shock, or to prevent property damage, personal injury, or loss of life.
IMPORTANTSAFETYNOtiCE
The California Safe Drinking Water and Toxic Enforcement Act requires the Governor of California to
publish a list of substances known to the state to cause cancer, birth defects or other reproductive
harm, and requires businesses to warn customers of potential exposure to such substances.
The fiberglass insulation in self-clean ovens gives off a very smafl amount of carbon monoxide during
the cleaning cycle. Exposure can be minimized by venting with an open window or using a ventilation
fan or hood.
SAFETYPRECAUtiONS
When using electrical appliances, basic safety precautions should be followed, including the following:
iii}i}i
iii}i}}li_
iii}i}}li_
iii}i}}li_
iii}i}}li_
iii}i}}li_
Use this appliance only fbr its intended
purpose as described in this Owner's
Manual.
}} Do not allow anyone to climb, stand or
hang on the door. They could damage the
oven, or cause severe personal in,ju U.
Be sure your appliance is properly
installed and grounded by a qualified
technician in accordance with the
prox,ided installation instructions.
iii}i}i
Be sure the oven is securely installed in a
cabinet that is firmly attached to the house
structure. Never allow anyone u) climb, sit,
stand or hang on the oven door.
Do not attempt to repair or replace any }}
part of your oven unless it is specifically
recommended in this manual. All other
}}
ser_,icing should be referred to a qualified
technician.
Have the installer show you the location
of the circuit breaker or rise. Mark it for
easy reference.
Betbre pertbrming any ser_,ice, disconnect
the oven power supply at the household
distribution panel by remox,ing the fuse or
s_dtching off the circuit breaker.
Do not leave children alone--children
should not be left alone or unattended in
an area where an appliance is in use. They
should never be allowed to sit or stand on
any part of the appliance.
iii}i}i
iii}i}}li_
iii}i}}li_
iii}i}}li_
Never leave the oven door open when you
are not watching the oven.
Always keep combustible wall coverings,
curtains or drapes a s_e distance from
your oven.
Always keep dish towels, dish cloths, pot
holders and other linens a s_e distance
flom your oven.
Always keep wooden and plastic utensils
and canned fbod a s_e distance away Dom
your oven.
Teach children not to play with the
controls or any other part of the oven.
Large scratches or impacts to glass doors
can lead to broken or shattered glass.
2
GEPpp/iances.com
SAFETYPRECAUTIONS
_:_Do not store flammable mamrials in
an oven.
children should not be stored in cabinets
above an oven; children climbing on the
oven u) reach imms could be seriously
injured.
_:_Never wear loose4itting or han_ng
garments while using the appliance. Be
careful when reaching for imms stored
in cabinets over the oven. Flammable
mamrial could be ignited if brought in
contact with hot surfaces or heating
elements and may cruise severe burns.
_:_Use only dry pot holders--moist or damp
pot holders on hot surfaces may result in
burns flom smam. Do not let pot holders
touch hot heating elements. Do not use a
towel or other bulky cloth.
::;For your safety, never use your appliance
for wamfing or heating the room.
_:_Do not let cooking grease or other
flammable mate, rials accumulate in
or near the oven.
_:_Do not use wamr on grease fires. Never
pick tip a flaming pan. Turn the controls
off{,
Flame in the oven can be smothered
completely by closing the oven door and
turning the oven off or by using a multi-
purpose dry chemical or foam-type tire
extinguisher.
::_Never leave jars or cans of tat drippings in
or near your ()ven.
_:_Do not store or use combustible materials,
gasoline or other flammable vapors and
liquids in the x_icinityof this or any other
appliance.
Stand away from the oven when opening
the oven door. Hot air or smam which
escapes can cruise burns m hands, face
and/or eyes.
Do not heat unopened food containers.
Pressure could build tip and the container
could burst, causing an injury.
Keep the oven vent unobstructed.
Keep the oven free from grease buildup.
Place the oven rack in the desired position
while the oven is cool. If racks must be
handled when hot, do not let pot holder
contact the heating elements.
When using cooking or roasting bags
in the oven, fi)llow the manufacturer's
directions.
Do not touch the heating elements or the
interior surface of the oven. These surfaces
may be hot enough to burn even though
they are dark in color. During and after
use, do not touch, or let clothing or other
flammable materials contact any inmrior
area of the oven; allow sufticient time fbr
cooling first.
Potentially hot surfaces include oven vent
openings, surfaces near the openings,
crex,ices around the oven door, the edges
of the window and metal trim parts above
the door.
REMEMBER:The inside surface of the oven
may be hot when the door is opened.
3
IMPORTANTSAFETYINFORMATION.
READALLINSTRUCTIONSBEFOREUSING.
m
SAFETYPRECAUTIONS
iiiil}i
iii}i}}li_
iii}i}}li_
iii}i}}li_
Pulling out the rack to the stop-lock is a
convenience in lifting heax,y foods. It is
also a precaution against burns flom
touching hot surfhces of the door or
oven walls.
Do not use the oven to dry newspapers.
K overheated, they can catch on fire.
Do not use the oven for a storage area.
Items stored in an oven can ignite.
Do not leave paper products, cooking
utensils or fk)od in the oven when not
in use.
}}Mter broiling, always take the broiler pan
out of the oven and clean it. i,eflover
g,ease in the broiler pan can catch fire
next time you use the pan.
}} Clean only parts listed in this Owner's
Manual.
iii}i}iDo not use aluminum fk)ilto line oven
bottoms, except as suggested in this
manual. Improper installation of
aluminum foil may result in a risk
of electric shock or fire.
COOKMEATANDPOULTRYTHOROUGHLY...
Cookmeatandpoultry thoroughly--meat to at leastan INTERNALtemperatureof 160°Fandpoultry
to at least an INTERNALtemperatureof 180°ECookingto thesetemperaturesusuall}/protects against
foodborneillness.
SELF-CLEANINGOVEN
iii}i}i
iii}i}}li_
Do not clean the door gasket. The door _:_
gasket is essential fk)r a good seal. Care
should be taken not m rob, damage or
move the gasket.
Do not use oven cleaners. No commercial
oven cleaner or oven liner protective
coating of any kind should be used in or
around any part of the oven. Resi&le flom
oven cleaners will damage the inside of the
oven when the self-clean cycle is used.
iii}i}i
Befk)re selfXcleaning the oven, remove the
broiler pan, grid and other cookware.
Be sure to wipe up excess spillage befk)re
starting the self:cleaning operation.
R the self:cleaning mode malfimctions,
turn the oven off and disconnect the
power supply. Hmre it ser_,iced by a
qualified technician.
READANDFOLLOWTHISSAFETYINFORMATIONCAREFULLY.
SAVETHESEINSTRUCTIONS
4
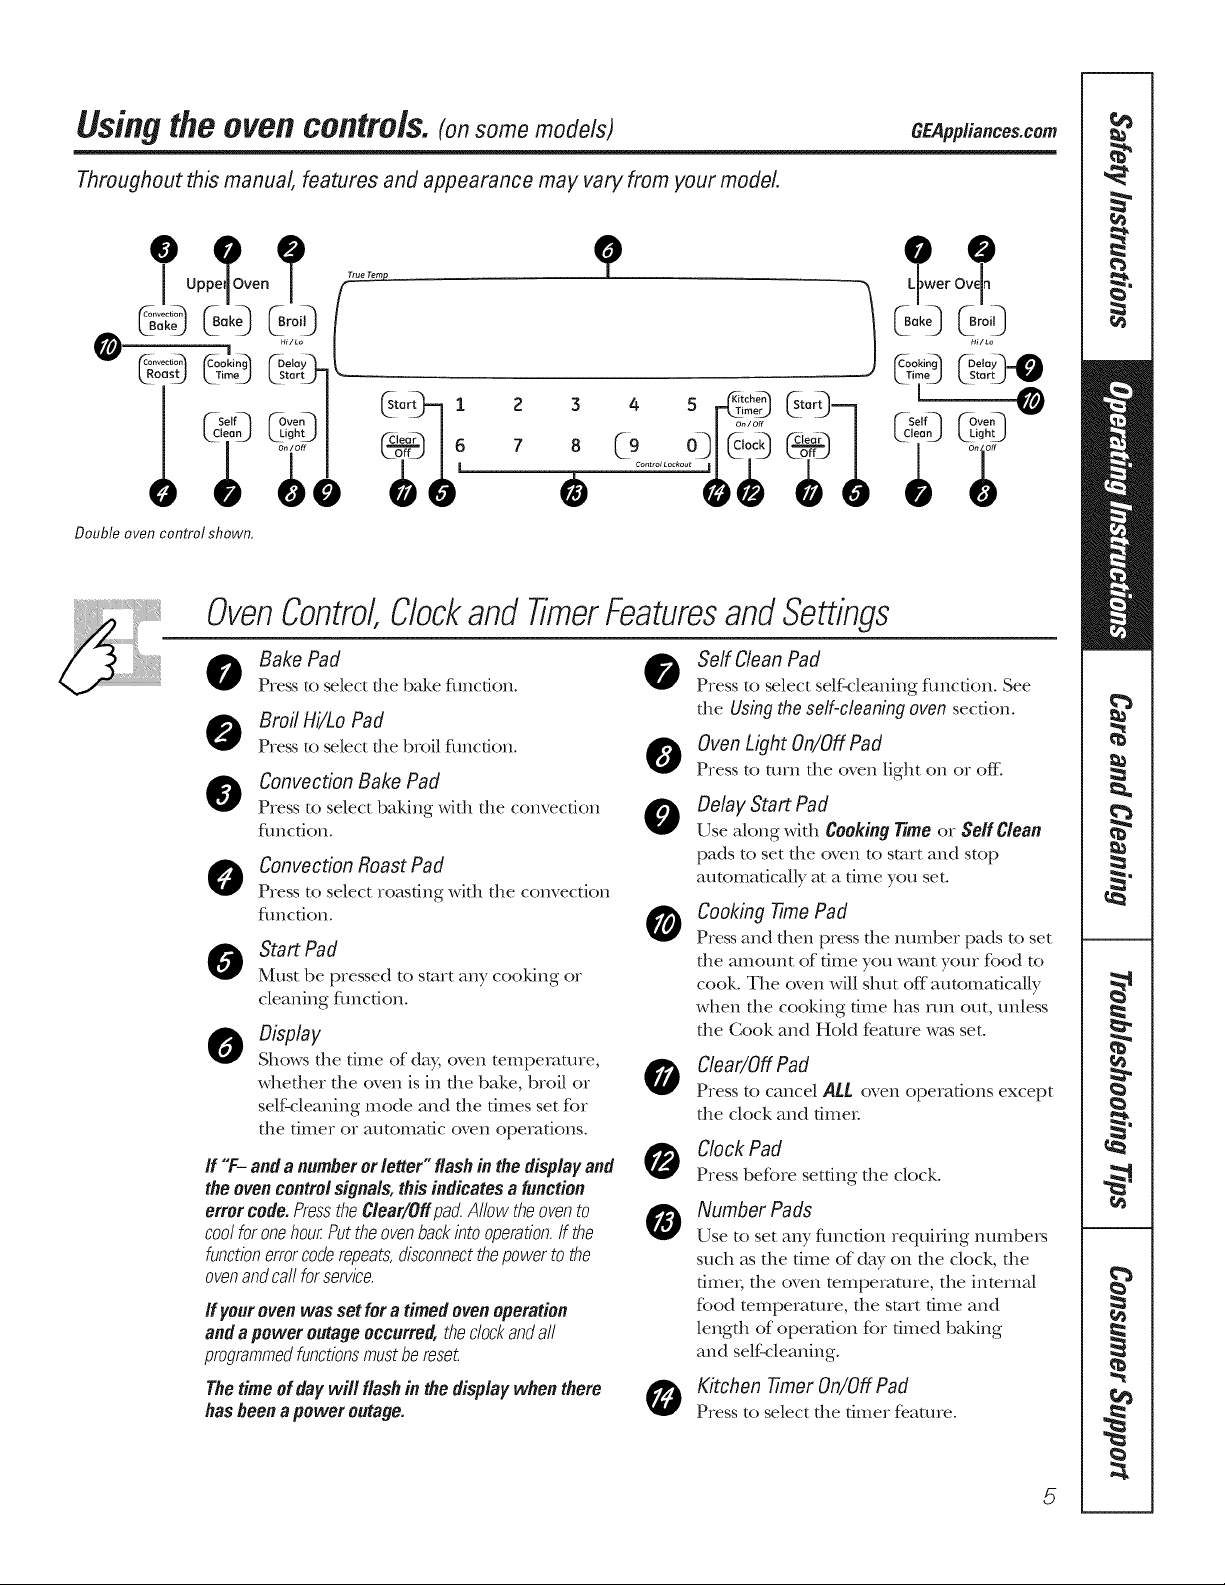
Using the oven controls. (on some models)
Throughout this manual, features and appearance may vary from your model
GEPpp/iances.com
.
Double oven control shown,
2
7
OvenControl,Clockand TimerFeaturesand Settings
Bake Pad
Press to select die bake flmcdon.
BroilHi/LoPad
Press to select file broil flmcdon. 0
Convection Bake Pad
Press to select baking with the convection 0
flmcfion.
Convection Roast Pad
Press to select roasdng with the convection
flmcdon.
Start Pad
Must be pressed to start any cooldng or
cleaning flmcfion.
0 Display
Shows file time of day, oven temperature,
whether the oven is in file bake, broil or
self:cleaning mode and the times set for
the timer or automatic oven operations.
SelfCleanPad
Press to select selfk-.leaning flmcfion. See
the Using the self-cleaning oven section.
@
Oven Light On/Off Pad
Press to turn the oven light on or off-.
Delay Start Pad
Use along with Cookingtime or Self Clean
pads to set the oven to start and stop
automatically a a time you set.
Cooking time Pad
Press and then press the number pads to set
the amount of time you want your food to
cook. The oven will shut off automatically
when the cooking time has run out, unless
the Cook and Hold fe.amre w_Lsset.
Clear/OffPad
Press to cancel ALL oven operations except
the clock and timer
if "F- anda numberorletter" flashin the displayand
the ovencontrolsignals, thisindicates a function
error code.PresstheClear/Offpad.Allow theovento
coolforonehourPuttheovenbackintooperation./fthe
functionerrorcoderepeats,disconnectthepowerto the
ovenandcall forservice.
if yourovenwas set fora timed ovenoperation
andapower outageoccurred,theclockandall
programmedfunctionsmustbe reset
Thetimeofday will flashin the displaywhen there
hasbeena power outage.
Clock Pad
Press before setting the clock.
Number Pads
Use to set any flmcfion requiting nmn|)e_
such as the time of d W on the clock, the
fime_; the (wen mmpemmre, the inmrnal
food mmperamre, the start time and
length of operation for timed baking
and self:cleaning.
Kitchen77merOn/OffPad
Press to select the fin:mr fe.ature.
5
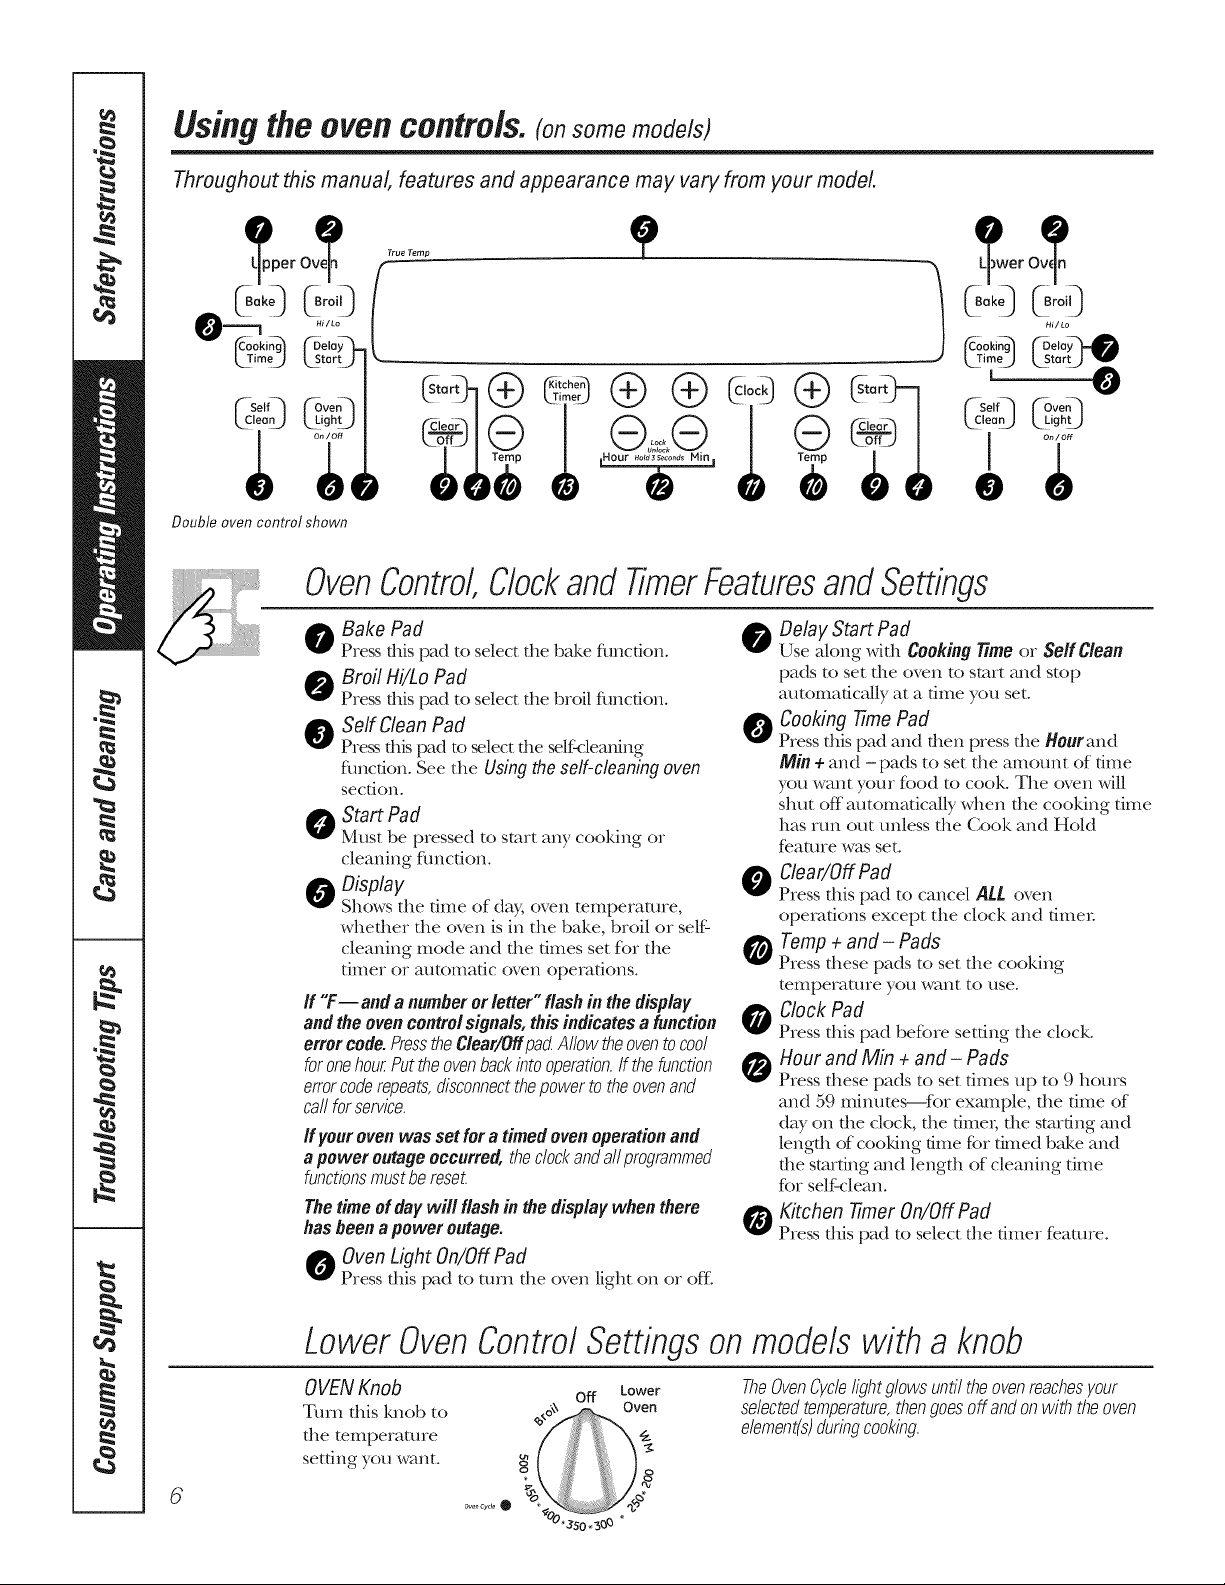
Using the oven controls. (on some models)
Throughout this manual, features and appearance may vary from your model
L_pper Ove_
L TimeA L stm j
l_0_ Lughtj
True Temp
(
0
® ....® ® ® ( t0r%
[_)wer O_
HI/LO
_oo_,__Do,<__
ime] L startJ "_
L O
lean_ LUghL)
I
@
Double oven control shown
OvenControl,Clockand TimerFeaturesand Settings
Bake Pad
Press dds pad to select the bake flmcdon.
Broil Hi/Lo Pad
Press dds pad to select the broil flmcfion.
Self Clean Pad
Pre_ dds pad to select die self<:leaning
flmcfion. See the Using the self-cleaning oven
section°
_ Start Pad
Must be pressed to start any cooking or
cleaning flmcfiono
Display
Shows the time of da?; oven temperature,
whether the oven is in the bake, broil or self:
cleaning mode and the times set for the
tiIIler or a/ltOIllatic oven operations.
ff "F--and a numberor letter"flashin the display
andtheoven controlsignals, thisindicatesa function
errorcode.PresstheClear/Offpa_Allowtheoventocool
foronehourPuttheovenbackintooperation.If thefunction
errorcoderepeats,disconnectthepowerto theovenand
call forservice.
ff your oven was set for a timed oven operation and
a power outage occurred, the clockand allprogrammed
functions must be reset
Thetimeof daywill flashin thedisplaywhen there
hasbeenapower outage.
_ Oven Light On/Off Pad
Press this pad to mrn the oven light on or off.
Delay Start Pad
Use along with Cooking time or Self Clean
pads to set the oven to start and stop
automatically at a dine you set.
Cooking time Pad
Press this pad and then press the HOurand
Min + and -pads to set the amount of time
you want your food to cook° Tile oven will
slmt off automaticNly when the cooldng dine
has mn out unless the Cook and Hold
feature was set.
0 Clear/OffPad
Press this pad to cancel ALL oven
operations except the clock and fime_:
Tamp + and - Pads
Press these pads to set tile cooking
telIIperat/lre you _.vHIItto use.
Clock Pad
Press this pad before setting the clock.
Hour and Min ÷ and - Pads
Press these pads to set fimes up to 9 hours
and 59 mfimms--fbr exmnple, the fillle of
day on the clock, the fime_; the starting and
length of cooldng time for timed bake and
the starting and length of cleaning time
for self:clean.
Kitchen timer On/Off Pad
Press this pad to select the timer fe.ature.
Lower OvenControl Settings on models with a knob
OVEN Knob
Tmn this knob to
the mmperamre
setting you want.
TheOvenCyclelightglowsuntiltheovenreachesyour
selectedtemperature,thengoesoff and onwith theoven
element(s)duringcooking.
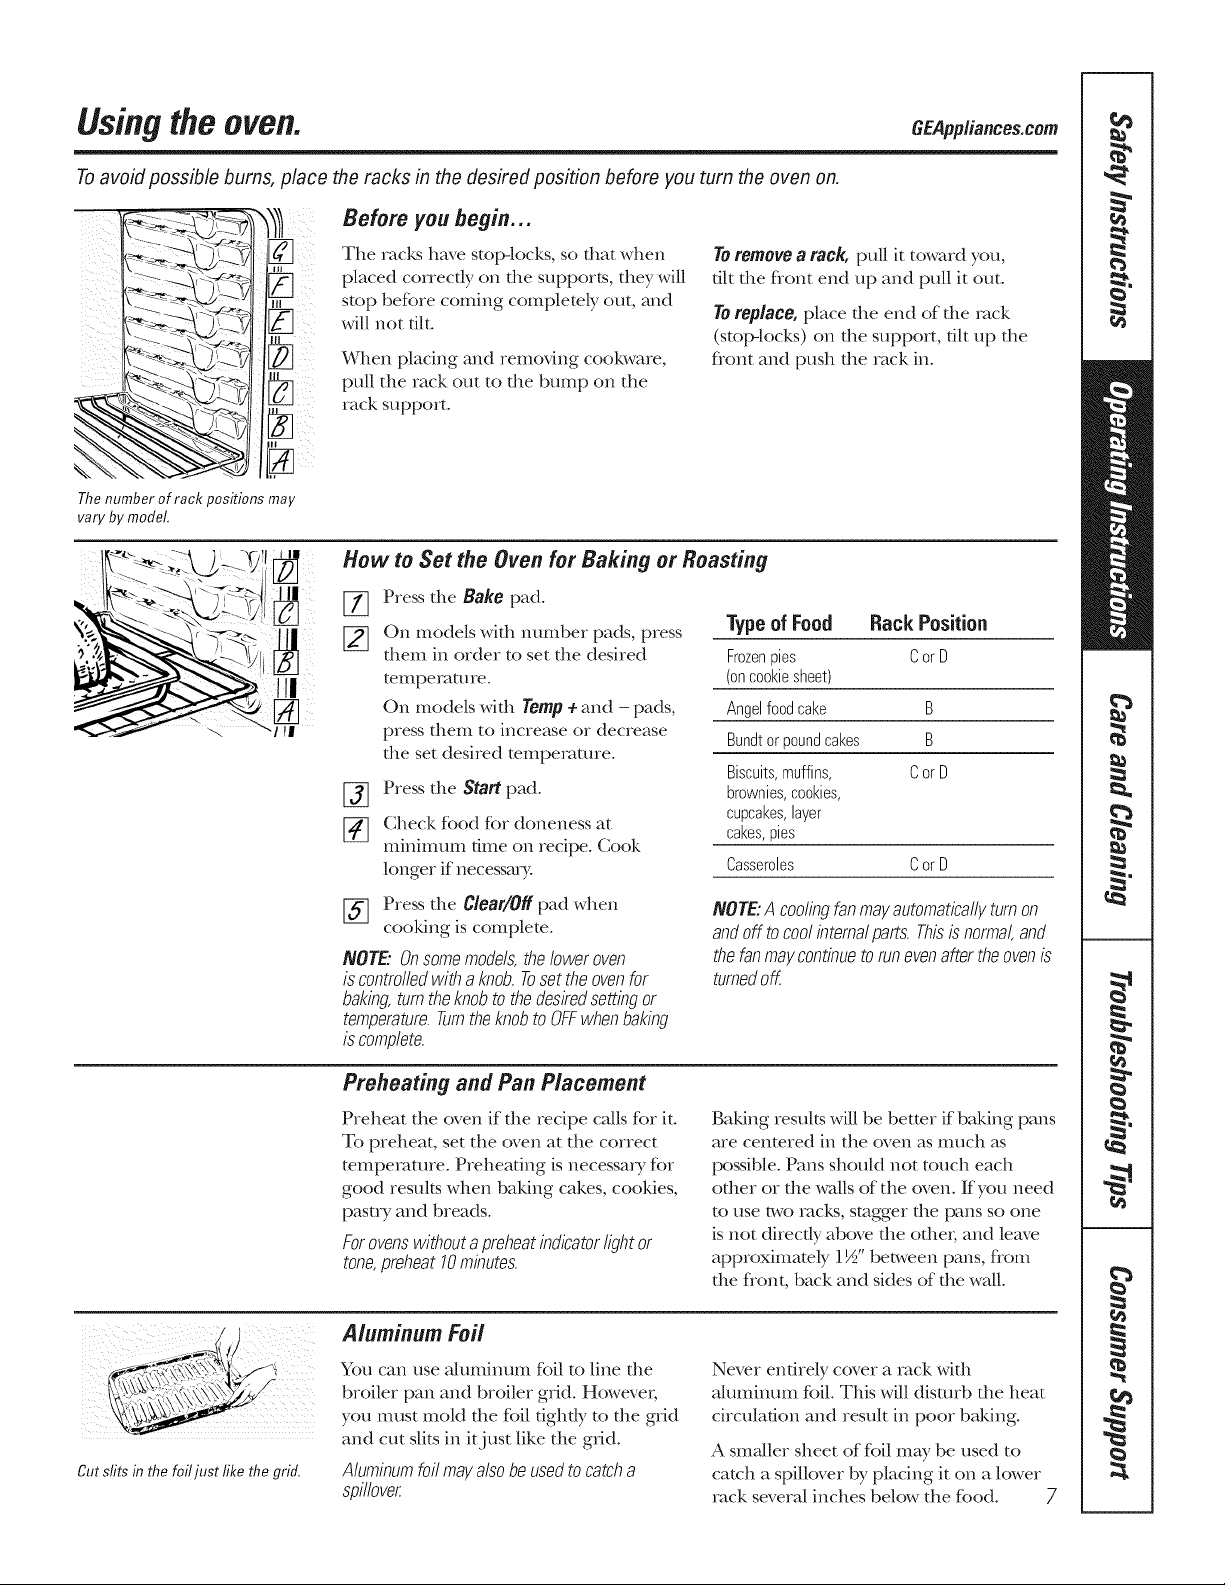
USi[Ig the OveN, GEApp/iances.com
Toavoid possible bums, place the racks in the desired position before you turn the oven on.
I' 11
The number of rack positions may
vary by model,
Before you begin...
The racks have stop-locks, so flint when
placed correctly on file supports, they will
stop beKne coming completely out, and
will not flit.
When placing and removing cookware,
pull the rack out to the bump on the
rack support.
To remove a rack, pull it toward you,
flit the flont end up and pull it out.
Toreplace,place the end of the rack
(stop-locks) on the support, flit up the
flont and push the rack in.
How to Set the Oven for Baking or Roasting
[_ Press the Bake pad.
_] On models with nmnber pads, press
them in order to set the desired
temperature.
On models with Yemp+ and - pads,
press them to increase or decrease
the set desired temperature.
[_ Press the Start pad.
[_ Check food for doneness at
minimum flme on recipe. Cook
longer if necessary.
Type of Food Rack Position
Frozenpies CorD
(oncookiesheet)
Angelfoodcake B
Bundtorpoundcakes B
Biscuits,muffins, CorU
brownies,cookies,
cupcakes,layer
cakes,pies
Casseroles CorD
[_] Press the Clear/Offpad when
cooking is complete.
NOTE" Onsomemodels,theloweroven
is controlledwith a knob.Toset theovenfor
baking,turntheknobto thedesiredsettingor
temperature.Turntheknobto OFFwhenbaking
is complete.
NOTE:A coolingfanmayautomaticallyturnon
andoff tocoolinternalparts.Thisisnormal,and
thefanmaycontinuetorunevenaftertheovenis
turnedoff
Preheating and Pan Placement
Preheat the oven if file recipe calls for it.
To preheat, set the oven at the correct
temperature. Preheating is necessa_ T for
good results when baking cakes, cookies,
pasu T and breads.
Forovenswithoutapreheatindicatorlightor
tone,preheat10minutes.
Baking results will be better if baking pans
are centered in the oven as much as
possible. Pans should not touch each
other or the walls of the oven. If you need
to use two racks, stagger the pans so one
is not directly above the othe,; and leave
approximately 1½" between pans, flom
the f}ont, back and sides of the walL
Cut slits in the foil just like the grid,
Aluminum Foil
You can use almninmn foil to line the
broiler pan and broiler grid. Howevet;
you must room the foil flghtly to the grid
and cut slits in itjust like the grid.
Aluminumfoilmay alsobeusedto catcha
spillover
Never enflrely cover a rack with
aluminum fbil. This will disturb the heat
circulaflon and result in poor baking.
A smaller sheet of foil may be used to
catch a spillover by placing it on a lower
rack several inches below the food. 7
Usingtheoven.
ff yourovenis connectedto 208volts,
ramsteaksmaybebroiledby
preheatingthebroilerandpositioning
theovenrackonepositionhigher
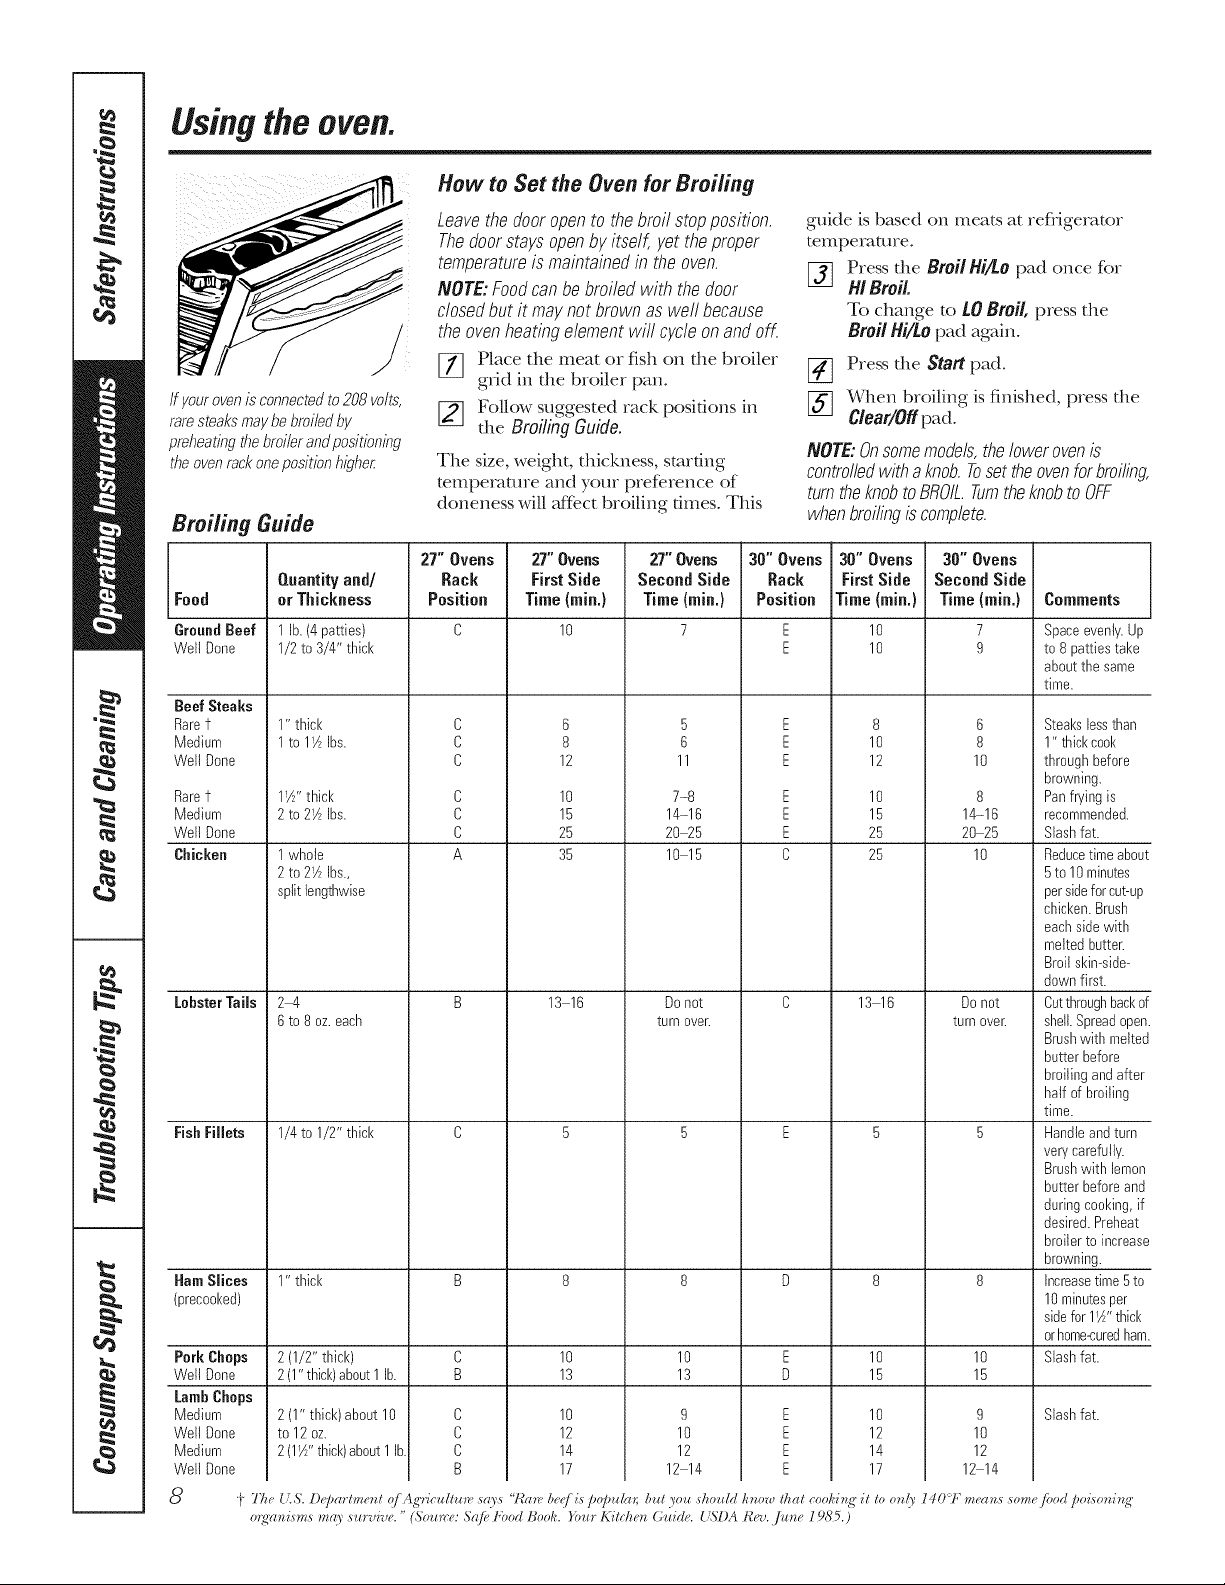
Broiling Guide
How to Set the Oven for Broiling
Leavethe dooropento thebroil stopposition.
Thedoorstaysopenby itself, yet theproper
temperatureis maintainedin the oven.
NOTE:Foodcan bebroiledwith the door
closedbut it maynot brownas well because
the ovenheatingelementwill cycleon and off.
[_ lace the meat or fish on the broiler
grid in the broiler pan.
[_ Follow suggested rack positions in
the Broiling Guide.
The size, weight, thickness, starting
temperature and yore preference of
doneness will affe.ct broiling times. This
guide is based on meats at refligerator
temperature.
[_] Press the Broil Hi/to pad once for
HI Broil.
To change to tO Broil, press the
Broil Hi/to pad again.
[] Press the Start pad.
[_] When broiling is finished, press the
Clear/Offpad.
NOTE:Onsomemodels,thelowerovenis
controlledwith a knob.Tosettheovenforbroiling,
turntheknobtoBROIL.Turntheknobto OFF
whenbroilingis complete.
Food
GroundBeef
Well Done
Beef Steaks
Raref
Medium
Well Done
Raret
Medium
Well Done
Chicken
LobsterTails
FishFillets
Quantityand/
or Thickness
Pork Chops
Well Done
Lamb Chops
Medium
Well Done
Medium
Well Done
8
1 lb. (4patties)
1/2 to 3/4" thick
1" thick
1 to lY2 Ibs.
1W' thick
2 to 2_AIbs.
1 whole
2 to 21AIbs.,
split lengthwise
24
6 to 8 oz.each
1/4 to 1/2" thick
27" Ovens
Rack
Position
C
C
C
C
C
C
A
27" Ovens
FirstSide
Time (rain.)
10
6
8
12
10
15
25
35
13 16
27" Ovens
Second Side
Time {rain.)
5
6
11
7-8
14-16
20_5
10 15
Do not
turn oveL
30" Ovens
Rack
Position
E
E
E
E
E
E
E
E
C
30" Ovens
FirstSide
Time (rain.)
10
10
8
10
12
10
15
25
25
13 16
30" Ovens
Second Side
Tirae(rain.)
7
9
6
8
10
8
14-16
20 25
10
Do not
turn oveL
HamSlices 1" thick B 8 8 D 8 8
(precooked)
2 (1/2" thick) C 10 10 E 10 10
2 (1" thick)about1 lb. B 13 13 D 15 15
Slashfat.10
12
14
17
2 (1" thick)about 10
to 12 oz.
2 (1_" thick)about1 lb.
10
12
14
17
C
C
C
B
9
10
12
12 14
E
E
E
E
9
10
12
12 14
Coraraents
Space evenly. Up
to 8 patties take
about the same
time.
Steaksbessthan
1" thickcool<
through before
browning.
Panfrying is
recommended.
Slashfat.
Reducetime abou
5 to 10 minutes
persidefor cut-up
chicken.Brush
eachside with
melted butter.
Broil skin-side-
down first.
Cutthroughbacko
shell.Spreadoper
Brushwith melte(
butter before
broilingand after
half of broiling
time.
Handleandturn
verycarefully.
Brushwith lemon
butter beforeand
duringcooking, if
desired.Preheat
broilerto increaa
browning.
Increasetime 5 to
10minutesper
sidefor 1W' thick
orhome<uredhair
Slashfat.
i_ The U.S. l)@artment qf Agu@ultar_, says "t{ar_, bee is p@_da_; b_d you sho_dd hno*,, that coohb_g it to on(), 140'1" m_,a_,s some/hod poisonb_A,"
o_gr_nisms mco_ s_trvive." (Source: Sail, I'bod Book. Fmtr Kitchen G_tide. { _I)A Rev. Jane 1985.)
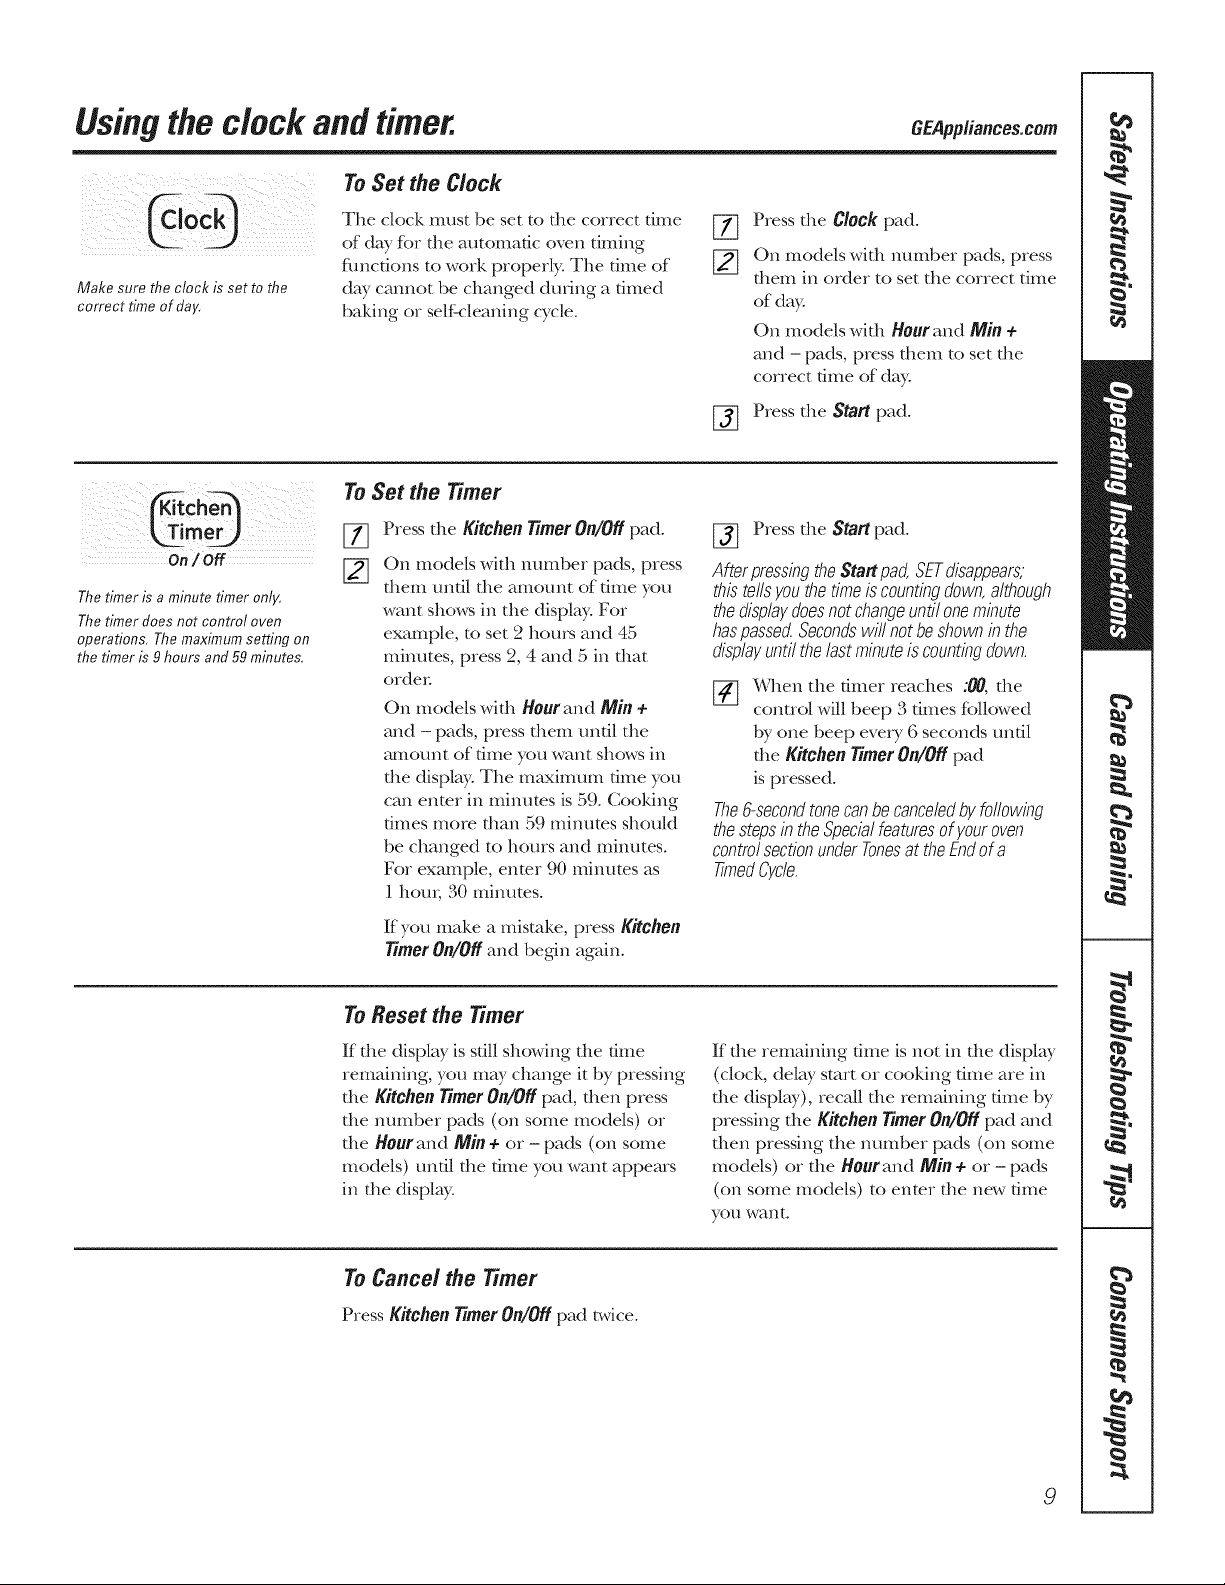
Usingthe clock and timer. C A,,,iance..ccm
Make sure the clock is set to the
correct time of day.
To Set the Clock
The clock must be set to the correct time
of day for the automatic oven timing
flmcfions to work properly: The time of
day cannot be changed during a timed
baldng or self=cleaning cycle.
[]
%
Press die C'cck pad.
On models \,vkh number pads, press
diem in order to set tile correct time
of day.
On models with Hour and Min +
and - pads, press them to set the
correct time of day.
Press the Start pad.
[TiTIm_
On/Off
The timer is a minute timer only.
The timer does not control oven
operations, The maximum setting on
the timer is 9 hours and 59 minutes.
To Set the Timer
[77 Press die Kitchen timer On/Off pad.
[_ On models with number pads, press
them until the amount of time you
want shows in the display° For
example, to set 2 ]lom_ and 45
minutes, press 2, 4 and 5 in that
ordei:
On models with Hcur and Min +
and -pads, press them until the
amount of time you want shows in
the display. The maxinmm dixie yotl
can enmr in minums is 59. Cooldng
times more than 59 minums should
be changed to hours and minutes.
For example, enmr 90 minums as
1 hem; 30 minums.
If you make a mistake, press Kitchen
timer On/Off and begin again.
[_ Press the Start pad.
AfterpressingtheStartpad,SETdisappears,
thistellsgnuthetimeis countingdown,although
thedisplaydoesnotchangeuntiloneminute
haspasse_Secondswill notbe shownin the
displayuntilthelast minuteis countingdown.
[_ When tlle fiIIleI reaches :00, die
control will beep 3 times followed
by one beep every 6 seconds until
the KitchentimerOn/Off pad
is pressed.
The6-secondtonecanbe canceled& following
thestepsin theSpecialfeaturesof youroven
controlsectionunderTonesat theEndof a
timedCycle.
To Reset the Timer
If die display is still showing die time
remaining, you nray change it by pressing
the KitchenTimerOn/Offpad, dlen press
tlle nmnber pads (on some models) or
the Hourand Min + or-pads (on some
models) until the time you want appears
in the display.
If die remaining time is not in die display
(clock, delay start or cooldng time are in
the display), recall the remaining time by
pressing the Kitchen TimerOn/Offpad and
then pressing the number pads (on some
models) or the Hourand Min + or-pads
(on some models) to enmr the new time
TOLl _'V_tIl L
To Cancel the Timer
Press KitchentimerOn/Off pad twice.
9
Usingthe timed baking and masting features, somemode/sJ
Onmodelswithpress pad controlsfor both ovens,you can use timedbakingin oneoven while using self-cleanin the other;
you can alsouse timed bakingin bothovens at the same time.
NOTE:Foodsthatspoil easily--such asmill<,eggs,fish, stuffings,poultry andpork--should not beallowed to sit for more than
I hourbefore or after cooking.Roomtemperaturepromotesthe growth of harmful bacteria.Be sure that the ovenlight is off
becauseheat from the bulbwill speedharmful bacteria growth.
ii( : ;! ; 7¸¸¸¸)
i _ [ i
ii6 ¸¸¸7¸¸¸¸¸¸¸¸8 C9/ _)
Temp
(depend!wOnmodel)
2 3 4- 5
z
or
®
our Nin
(dependingonmodel)
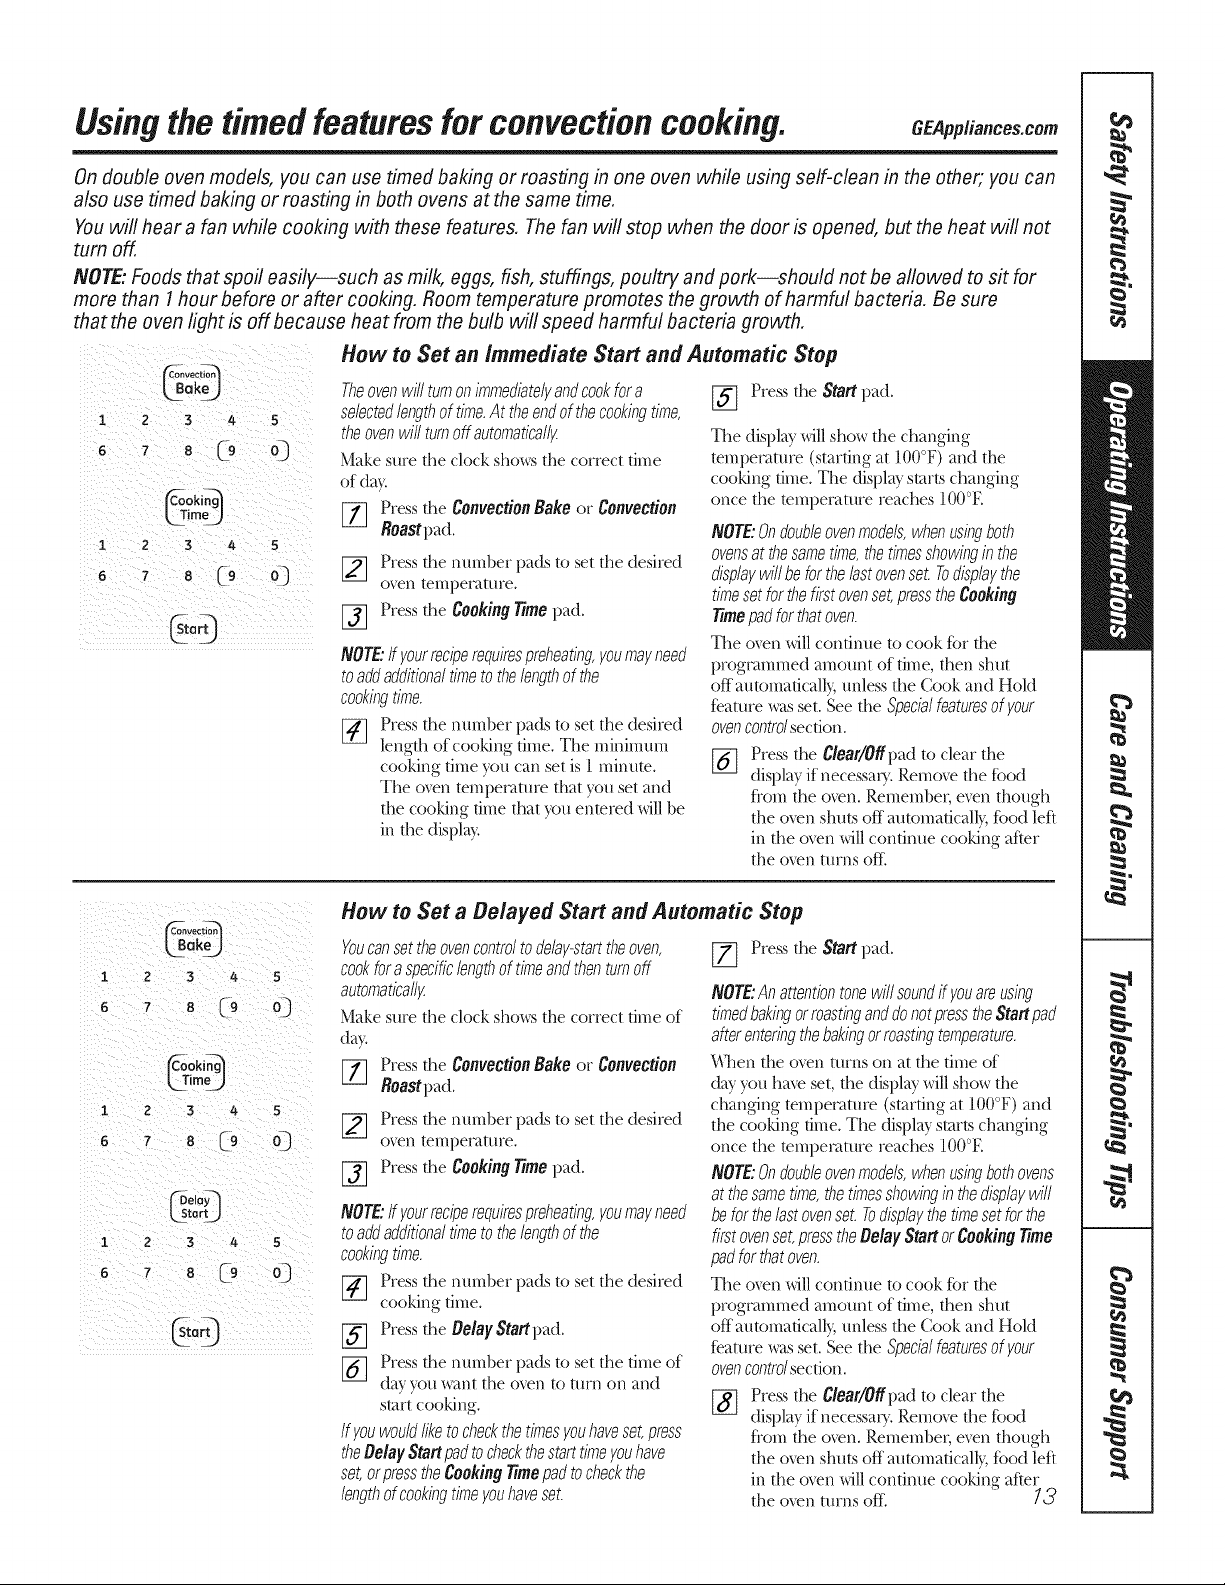
How to Set an Immediate Start and Automatic Stop
Theovenwillturnof?immediatelyandcookfora selected
lengthoftime.Attheendofthecookingtimetheover?will
turnoffautomatically
Make sure the clockshowsthe correct time
of day.
[-_ Pressthe Bake pad.
[] On modelswith number pads, pressthem
in order to setthe desired temperature.
On medalswith Tamp+and - pads, press
them to increase or decrease the set
desiredtemperature.
_] Pressthe CookingTimepad.
NOTE:If yourreciperequirespreheatingyoumayneedto
addadditionaltimetothelengthofthecookingtime.
On models_ith number pads, pressthem
until the amount of time)ou want showsin
the display.For example, to set 2 hours and
45minutes, press 2, 4 and 5 in that ordeL
On modelswith Hourand Min÷and -
pads, pressthem to enter the desired
baking time.The maximum time you
can enter in minutes is 59. Cooking dines
more than 59 minutes should be changed
to hems and ndnutes. For example, enter
90 minutes as I hem; 30 minutes.
The oven temperature and the cooking
time that you entered will be displayed.
[_ Press the Staff pad.
The displ W shows the oven temperature that
you set and the cooking time countdown. The
diN)laystarts changing once the temperature
reaches 100°E
NOTE:Whenusbgbothovensat thesametime,the
timesshowingin thedisplaywillbe forthelastovenset
Todisplaythetimesetforthefirstovenset,pressthe
CookingTimepadforthatoven.
The oven will continue to cook for the
progqammed amount of time, then shut off
m/tomatically, unless the Cook and Hold ligature
wasset. See the Specialfeaturesof youroven
controlsecdon.
Press the Clear/Offpad to clear the display.
i 2 3 /4- 5
or
(9
tdependingonmodel)
i 2 3 4 5
6 z 8 (_9 o]
or
(depending on model)
Delay
i 2 3 /4- 5
or
@(9
.©Q
(depending on model)
10
How to Set a Delayed Start and Automatic Stop
Youcanset theovencontroltodelay-starttheoven,
cookforaspecificlengthoftimeandthenturf?off
automatically
Make sure the clock shows the correct dine
ofday.
[77 Press the Bake pad.
On models with number pads, press them
in order to set the desired temperature.
On models with Temp+ and - pads, press
them to increase or decrease the set
desired temperature.
[_ Press the Cooking Time pad.
NOTE:If yourreciperequirespreheatingyoumayneedto
addadditionaltimeto thelengthof thecookingtime.
On models _ith number pads, press them
until the amount of time )ou want shows in
the display. For example, to set 2 hours and
45 minutes, press 2, 4 and 5 in that ordeL
On models with Hour and Min ÷and -
pads, press them to enter the desired
baking time. The ma_nmm time you can
enter in minutes is 59. Cooking times more
than 59 minutes should be changed to
hom_ and minutes. For example, enter
90 minutes as l hem; 30 minutes.
The oven temperature and the cooking
time that you entered will be displayed.
[_ Press the DelayStaff pad.
[_ Using the number pads (on some models)
or the Hourand Min+or -pads (on some
medals), enter the time of day you want
the oven to turn on and stat_cooking.
[7] Pressthe Startpad.
NOTE:Anattentiontonewillsoundif youareusingtimed
bakinganddonotpresstheStartpadafterenteringthe
bakingtemperature.
If you wouldlike to checkthe timesyou have set,
press the DelayStaffpad to check the start time
you havesetor press the Cooking77mepad to
checkthe length of cookingtime you haveset.
_'_l_enthe oventurns on at the time of day
you haveset,the displaywillshowthe changdng
temperature (stintingat 100°F)and the cooking
time countdown.The displaystartschanging
once the temperature reaches 100°E
NOTE:Whenusingbothovensatthesametime,the
timesshowinginthedisplaywillbeforthelastovenset.
Todisplaythetimesetforthefirstovenset,pressthe
CookingTimepadforthatoven.
The oven willcontinue to cook for the
progqammed amount of time, then shut off
m/tomatically,unless the Cook and Hold ligature
wasset.See the Specialfeaturesofyouroven
controlsecdon.
Pressthe Clear/Offpad to clear the display.
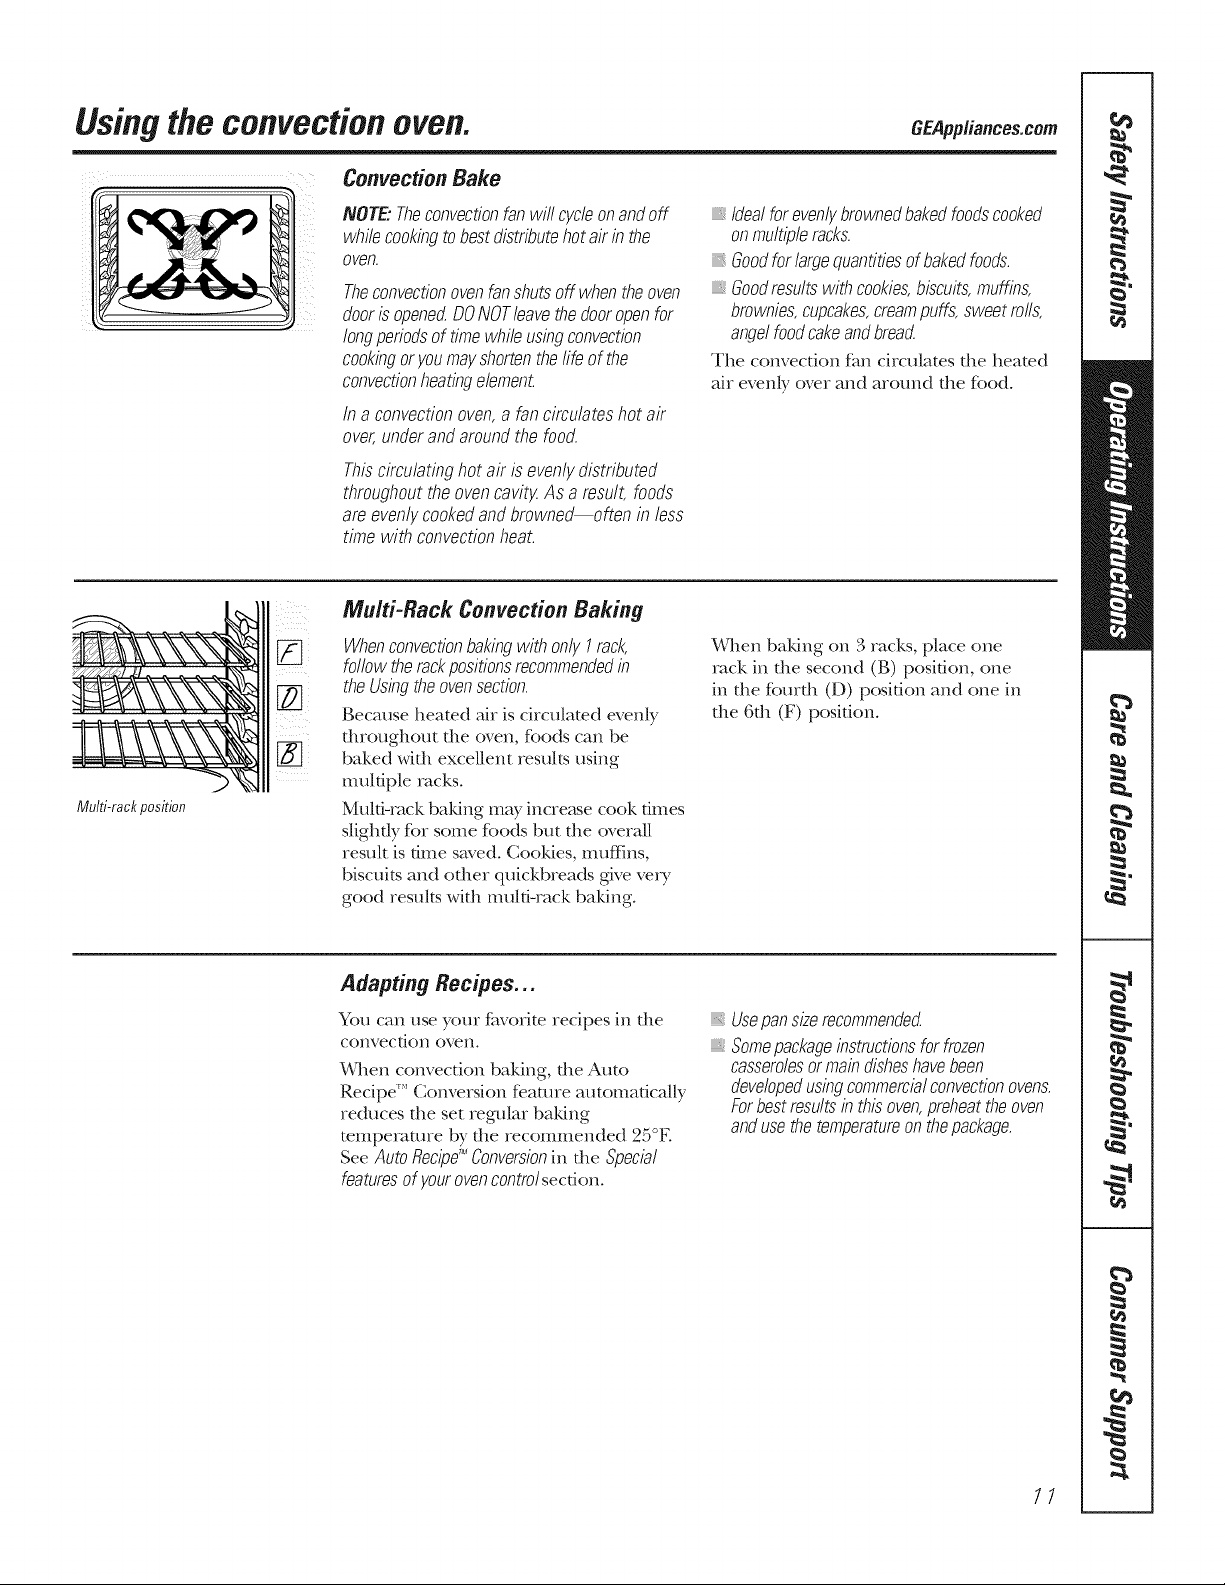
Convection Bake
NOTE"Theconvectionfanwi// cycleonandoff
whilecookingtobestdistributehotairin the
oven.
Theconvectionovenfanshutsoff whentheoven
dooris openec_DONOTleavethedooropenfor
longperiodsof timewhileusingconvection
cookingoryoumayshortenthefife of the
convectionheatingelement
in a convectionoven,a fan circulateshot air
over,underand aroundthe food.
Thiscirculatinghot air is evenlydistributed
throughoutthe ovencavity.As a result,foods
areevenlycookedand browne_often in less
time with convectionheal
Idealforevenlybrownedbakedfoodscooked
onmultipleracks.
Goodfor largequantitiesof bakedfoods.
Goodresultswithcookies,biscuits,muffins,
brownies,cupcakes,creampuffs,sweetmils,
angelfoodcakeandbrea_
Tile convection f_m ci_culates the heated
air evenly over and around tile food.
Multi-rackposition
Multi-Rack Convection Baking
[] Whenconvectionbakingwithonly I rack
followtherackpositionsrecommendedin
[_] theUsingtheovensection.
Because heated ai_ is ciiculated evenly
thloughout tile oven, fk_odscan be
baked with excellent results using
multiple racks.
Multi-rack baking mW incre_Lsecook dines
slightly f_>,some f_>odsbut tile ove,aU
result is time saved. Cookies, muffins,
biscuits and other quickbreads give re, T
good results with muld-_ack baking.
When ba]dng on .1_acks, place one
rack in die second (B) position, one
in the f_uxth (D) position and one in
the 6th (F) position.
Adapting Recipes..,
You can use you_ f_worite recipes in tile
convection oven.
When convection baldng, file Auto
Recipe'" Conversion fbatuxe automatically
reduces the set regular baMng
mmperamre by tile recommended 25°E
See AutoRecipg_Conversionin tile Special
featuresof yourovencontrolsecdon.
Usepansizemcommende_
Somepackageinstructionsfor frozen
casserolesormaindisheshavebeen
developedusingcommercialconvectionovens.
Forbestresultsin this oven,preheattheoven
andusethetemperatureonthepackage.
11
Usingtheconvectionoven.
Grid
Broilerpan
Convection Roast
Goodforlargetendercutsof meat,uncovered.
The convection tim circulates file heated
ah evenly over and around tile food.
Meat and poulu T are browned on N1
sides as if they were cool<ed on a
rotisserie. Heamd air will be circ ulamd
ove_; under and around the food being
roasmd. The heamd air seNs in juices
quicldy for a moist and tender product
while, at the same time, creating a rich
goMen brown extoller
When you are convection roasting it is
important that you use the broiler pan
and grid for best convection roasting
results. The pan is used to catch grease
spills and the grid is used to prevent
grease spatters.
When baking cookies, you will
get the best results ff you use a
flat cookie sheet instead of a
pan with low sides.
Cookware for Convection Cooking
Before using yore convection oven,
check to see if your cool<ware leaves
room for air circulation in the oven.
If you are baking with severn pans, leave
space between them. Also, be sure the
pans do not touch each other or the
walls of the oven.
Paper and Plastic
Heat-resistant paper and plasdc
conmineis dmt are recommended for
use in regular ovens can be used in
convection ovens. Plastic cool<ware that
is heat-resistant to temperatures of
400°F can a/so be used.
Metal and Glass
Any type of cool<ware will work in your
convection oven. However; metal pans
heat the fitsmst and are recommended
for convection baking.
Darkenedor matte-finishedpans will bake
faster than shiny pans.
glass or ceramicpans cook moreslowl;_
For recipes like oven-baked cbicl<en,
use a pan widl low sides. Hot air cannot
circulate well around food in a pan with
high sides.
or
:t 2 3 4 5
6 7 a C9 Q
LTJ
How to Set the Oven for Convection Baking or Roasting
%
%
Press the Convection Bake pad
or the Convection Roast pad.
Press the nmnber pads to set the
desired oven temperature.
Press the Start pad.
To change file oven mmperamre, press
the Convection Bake or Convection Roast
pad and then the nmnber pads
to set the new temperature.
When the oven starts to beat, die
changing temperature, starting at 100°K
will be displayed. _&,qlen the oven reaches
the temperature you set, 3 beeps will
sound.
[_ Press the C/ear/Offpad when
finished.
Youwill heara fanwhilecookingwith
convection.Thefanwill stopwhenthedooris
opened,buttheheatwill not rumoK
Youmayheartheovenclickingduringbaking.
Thisisnormal.
12
Usingthe timed features for convectioncooking. CEApp,iance,com
On double oven models, you can use timed baking or roasting in one oven while using self-clean in the other; you can
also use timed baking or roasting in both ovens at the same time.
Youwill hear a fan while cooking with these features, The fan will stop when the door is opened, but the heat will not
turn off
NOTE:Foods that spoil easily--such as milk, eggs, fish, stuffings, poultry and pork--should not be aflowed to sit for
more than I hour before or after cooking. Room temperature promotes the growth of harmful bacteria. Be sure
that the oven light is off because heat from the bulb will speed harmful bacteria growth.
How to Set an Immediate Start and Automatic Stop
1 2 3 4 5
Theovenwill turnon immediatelyandcookfor a
selectedlengthof time.At the endof thecookingtime,
theovenwi//turnoff automatica//_
Make sure the clock sh(m:s the correct time
of day
[_ Press the ConvectionBake or Convection
Roastpad.
[_ Press the nmnber pads to set the desired
oven telnpet_ttt/re.
[_ Press the Cooking Timepad.
NOTE"ff yourreciperequirespreheating,youmayneed
to addadditionaltimeto thelengthof the
cookingtime.
[_ Press the number pads to set the desired
length of cooking time. The mininmn_
cooking time you can set is 1 minum.
The oxen temi)etature that you set and
the cooking time that you enmred will be
in the display
[_] Press the Startpad.
The display will show the changing
tempex>mue (starting at 100°F) and the
cooking time. The display starts changing
once the mmi)etamre reaches 100°E
NOTE:Ondoubleovenmodels,whenusingboth
ovensat thesametime,thetimesshowingin the
displaywill be forthelastovenset.Todisplaythe
timesetfor thefirst ovenset,pressthe Cooking
Timepadfor thatoven.
The o_n will continue to cook for the
programmed amount of time, then shut
off atttomaticall}, unless the Cook and Hold
Dature ,_vtsset. See the Specialfeaturesof/our
ovencontrolsection.
%
Press the Clear/Of pad to cleat the
display if necessat?. Remove the fbod
tiom the oxen. Remember; ex>n though
the oxen shuts off atmmmticall}, food left
in the ox>n will continue cooking after
the o_n turns off.
1
6
1
6
2 3 4 5
7 8 (9 O)
oking_
mr)
2 3 /4 5
8 0 O]
ela_
tar_tjJ
1 2 3 4 5
6 7 8 0 O]
How to Set a Delayed Start and Automatic Stop
Youcansettheovencontroltode/av-starttheoven,
cookfora specificlengthoftimeandthenturnoff
automaticall_
Make sure the clock sho_vsthe correct time of
da}:
[-_ Press the ConvectionBake or Convection
Roastpad.
[_ Press the number pads to set the desired
oven telnpeDtttHe.
[_ Press the Cooking Timepad.
NOTE:ff yourreciperequirespreheating,youmayneed
to addadditionaltimeto thelengthof the
cookingtime.
[_ Press the number pads to set the desired
cooking time.
Press the Delay Startpad.
%
%
Press the number pads to set the time of
day you want the oven to turn on and
s/art cooking.
If youwouldliketo checkthe timesyouhaveset,press
theDelay Start padto checkthestarttimeyouhave
set,or pressthe Cooking Timepad tocheckthe
lengthof cookingtimeyouhaveset.
[_ Press the Startpad.
NOTE:An attentiontonewill soundff youareusing
timedbakingor mastinganddo notpresstheStartpad
after enteringthe bakingormastingtemperature.
\_]ten the o',_n turns on at the time of
day you haxe set, the display will show the
changing mmpetamre (starting at 100°F) and
the cooking time. The display starts changing
once the mmi)etantre reaches 100°E
NOTE:Ondoubleovenmodels,whenusingbothovens
at the sametime,thetimesshowingin thedisplaywill
be forthe lastovenset.Todisplaythetimeset forthe
first ovenset,presstheDelay Startor CookingTime
padforthatoven.
The o_n will continue to cook for the
programmed amount of time, then shut
off atttomaticall}, unless the Cook and Hold
Dature ,_vtsset. See the Specialfeaturesof your
ovencontrolsection.
Press the Clear/Of pad to cleat the
display if necessat?.'. Remove the food
hom the o_en. Remember; e_n though
the oxen shuts off atttomaticall}, food left
in the ox>n will continue cooking after
the o;_n a/ms off_ _3
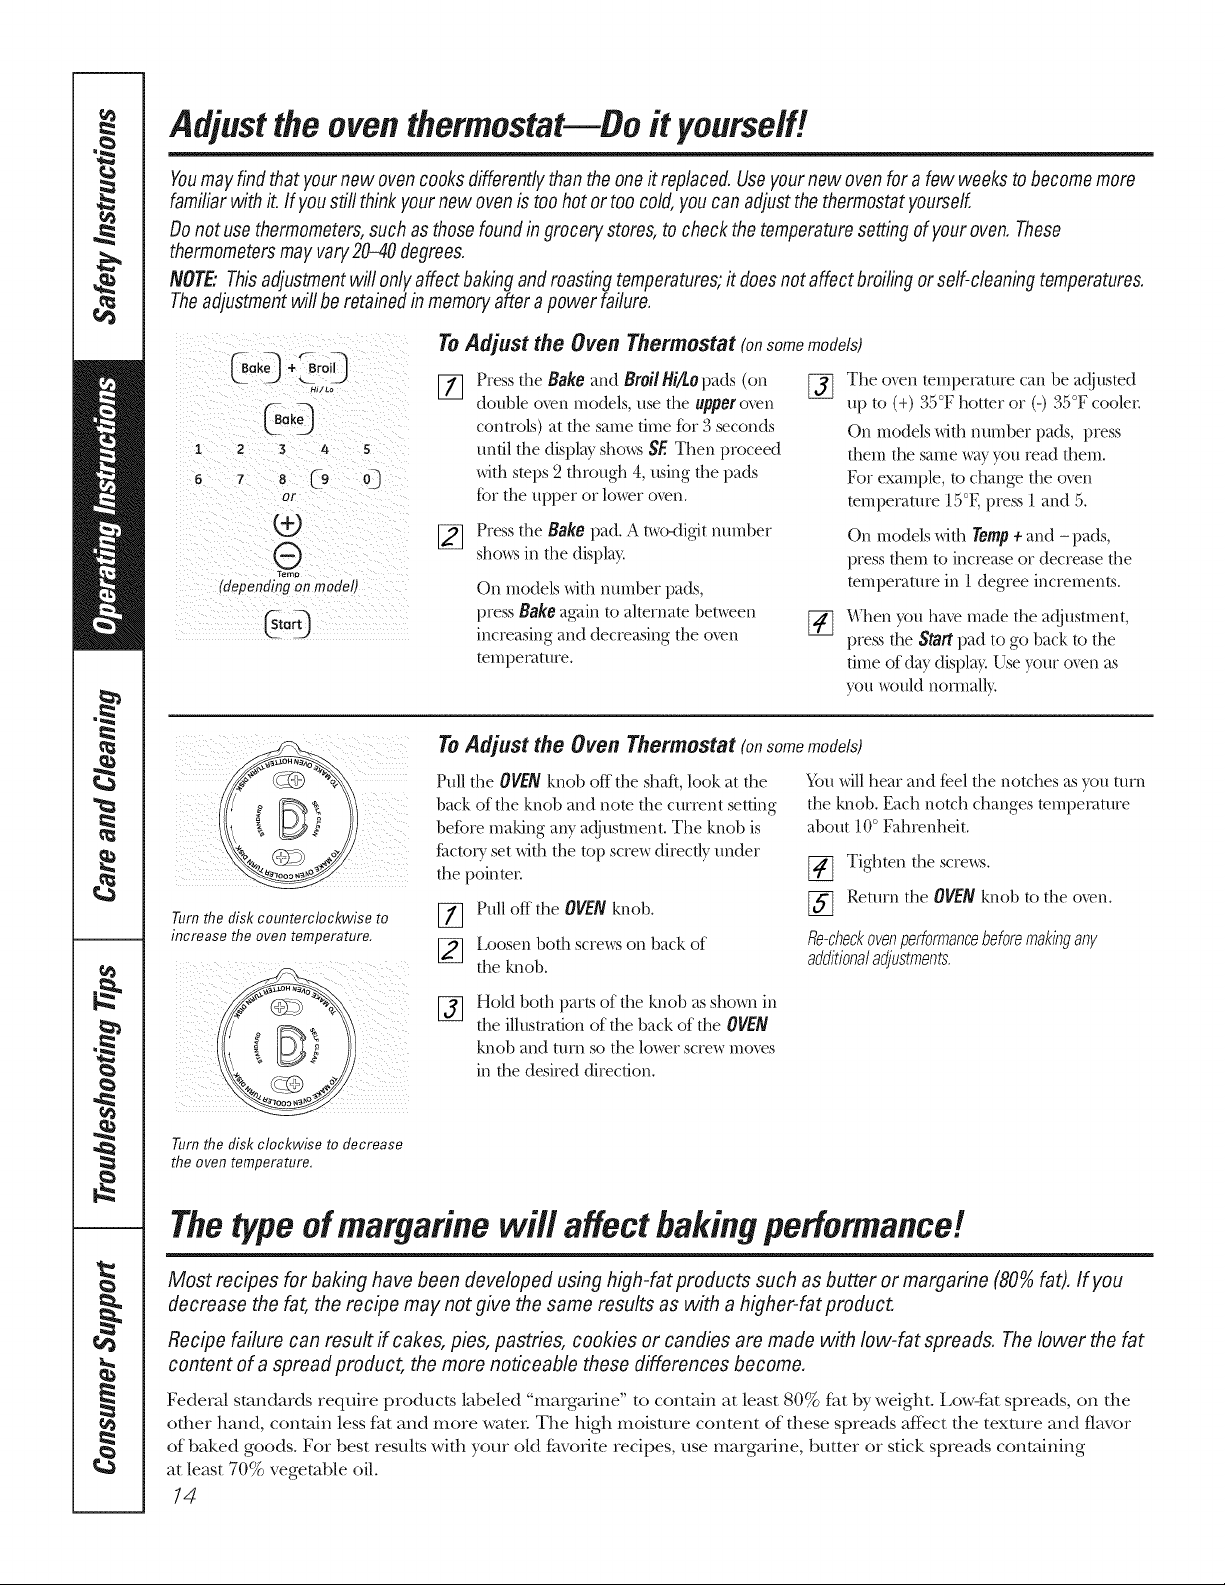
Adjust the oventhermostat--Do it yourself!
Youmay find that your new ovencooks differentlythan the oneit replaced.Useyour new oven for a few weeksto becomemore
familiar with it. If youstill think your new oven is too hot or too cold,you can adjustthe thermostatyourself.
Do not use thermometers,such as those found ingrocery stores, to check the temperaturesetting of your oven. These
thermometersmay vary20-40 degrees.
NOTE"Thisadjustmentwill only affect bakingand roasting temperatures;# does not affect broilingor self-cleaningtemperatures.
Theadjustmentwill beretained in memoryaftera power failure.
O,kO
1 2 3 4 5
_ 8 0 o_
OF
(depending on model)
0°0
To Adjust the Oven Thermostat (onsomemodels)
f_ Press the Bake and BroilHi/Lopads (on []
double oven models, use the upperoven
controls) at the same time f_)r3 seconds
until the displaysho,vs SEThen proceed
with stops 9 through 4, using the pads
%r the upper or lcmer o_en.
[_ Press the Bake pad. A two<tigitnumber
showsin the display<
On models with number pads,
press Bake again to alternate bemeen
increasing and decreasing the o_en
tempemtme.
[]
The oxen/empemmre can be adjusted
up to (+) 35°F hotter or (-) 35°F coole,.
On models with number pads, press
them the same _t>,"you read them.
For example, to change the ox>n
mmpemm,e 15°E p,ess 1 and 5.
On models with Temp+and - pads,
press them to increase or decrease the
temperature in 1 degree increments.
_llen you haxe made the adjustment,
press the Start pad to go back to the
time of day display'.Use your o_n as
you *_v_*/l(tnommlg
Turnthe disk counterclockwise to
increase the oven temperature.
To Adjust the Oven Thermostat (onsomemodels)
Pull the OVEN knob off the shaft, look at the
back of the knob and note the cunent setting
be%re making any adjustment. The knob is
facto U set with the top screw direc/ly' under
the pointe_:
[_ Pull off the OVEN knob.
[_ Loosen both screws on back of
the knob.
_*buwill hear and Del the notches as you turn
the knob. Each notch changes temperature
about l0 ° Fahrenheit.
_-_ Tighten the screws.
_-_ Return the OVENknob to the oven.
Re-checkovenperformancebeforemakingany
additionaladjustments.
%
HoM both parts of the knob as shown in
the illustration of the back of the OVEN
knob and turn so the lower screw moves
in the desired direction.
Turnthe disk clockwise to decrease
the oven temperature,
The type of margarine wil! affect baking performance!
Most recipes for baking have been developed using high-fat products such as butter or marqarine (80% faO. If you
decrease the fat, the recipe may not give the same results as with a higher-fat product
Recipe failure can result if cakes, pies, pastries, cookies or candies are made with low-fat spreads. The lower the fat
content of a spread product, the more noticeable these differences become.
Fede_M standards require products labeled "maEgafine" to contain at least 80% fht by weight. Low-fat spreads, on file
other lmnd, contain less fat and more water The high moisture content of these spreads affect the texture and flavor
of baked goods. For best results with your oM fhvofimrecipes, use margarine, butter or sock spreads containing
at least 70% vegetable oil.
14
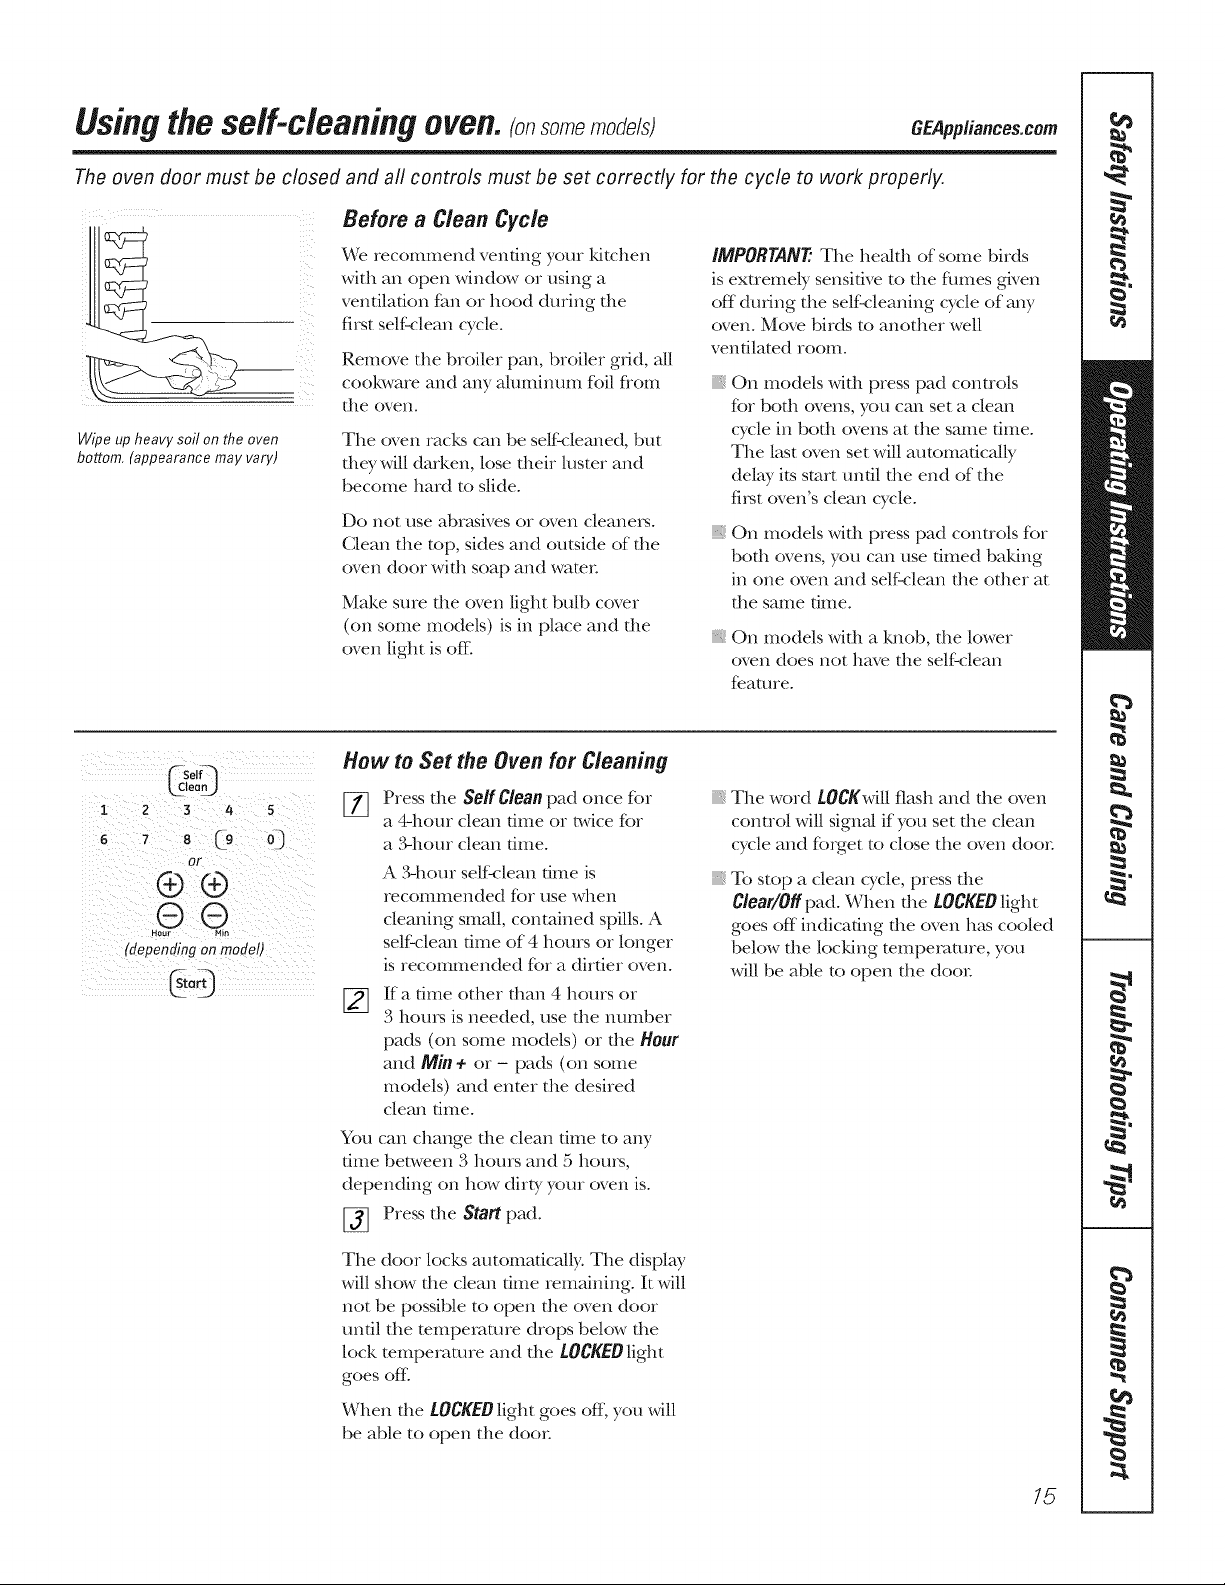
The oven door must be closed and all controls must be set correctly for the cycle to work properly,
the oven.
Before a Clean Cycle
We recommend venting your ldtchen
with an open window or using a
ventilation tim or hood during file
first self clean cycle.
Remove tile broiler pan, broiler grid, all
cool<ware and any aluminum foil flom
Wipe up heavy soil on the oven
bottom, (appearance may vary)
The oven racks can be selfk-.leaned, |)tit
they will darken, lose their luster and
become hard to slide.
Do no[ use abr_ksives or oven cleaneis.
Clean file top, sides and outside of the
oven door with soap and water
Make sure the oven light bulb cover
(on some models) is in place and the
oven light is (fie
IMPORTANE Tile hea/dl of some birds
is extremely sensitive to file flmles given
off during the selfk:leaning cycle of any
oven. Move birds to another well
ventilated room.
iii}iiiiii_
iii}i}}ii_
On models widl press pad controls
for bodl ovens, you can set a clean
cycle in bofll ovens at the same time.
The last oven set will autonladca/ly
delay its start tmfil the end of tile
fi_t oven's clean cycle.
On models wifll press pad conuols for
bofll (wens, you can use dined baking
in one oven and self:clean the other at
the same time.
}i_On models with a l_alob, tile lower
oven does not have tile self:clean
fe.amre.
_cs01/q
tea_
i 2 3 4 5
OF
®®
{depending on model)
How to Set the Oven for Cleaning
77 Press tile $effClean pad once f(n
a 4-hour clean time or twice for
a ,_ghour clean time.
A 341our selfk:lean time is
recommended for use when
cleaning small, contained spills. A
self clean filIle of 4 hours or longer
is recommended for a dirtier oven.
If a time other than 4 hours or
3 hom_ is needed, use the number
pads (on some models) or tile Hour
and Min + or- pads (on sortie
models) and enter the desired
clean time.
You can change the clean time to any
time between 3 hours and 5 hom_,
depending on how dirty your oven is.
[_ Press the Start pad.
Tile door locks automatically: Tile display
will show the clean time remaining. It will
not be possible to open the oven door
until tile mmpemmre drops below tile
lock temperature and the LOCKEDlight
goes ore
When tile LOCKEDlight goes off, you will
be able to open tile door
iii}i}iiii_
iii}i}}ii_
The word tOgKwill flash and tile oven
control will signal if you set tile clean
cycle and fbrget to close tile oven door
To stop a clean cycle, press die
Clear/Offpad. When file LOCKEDlight
goes off indicating tlle oven h_s cooled
below tlle locking mmpemmre, you
will be able to open tile door
15
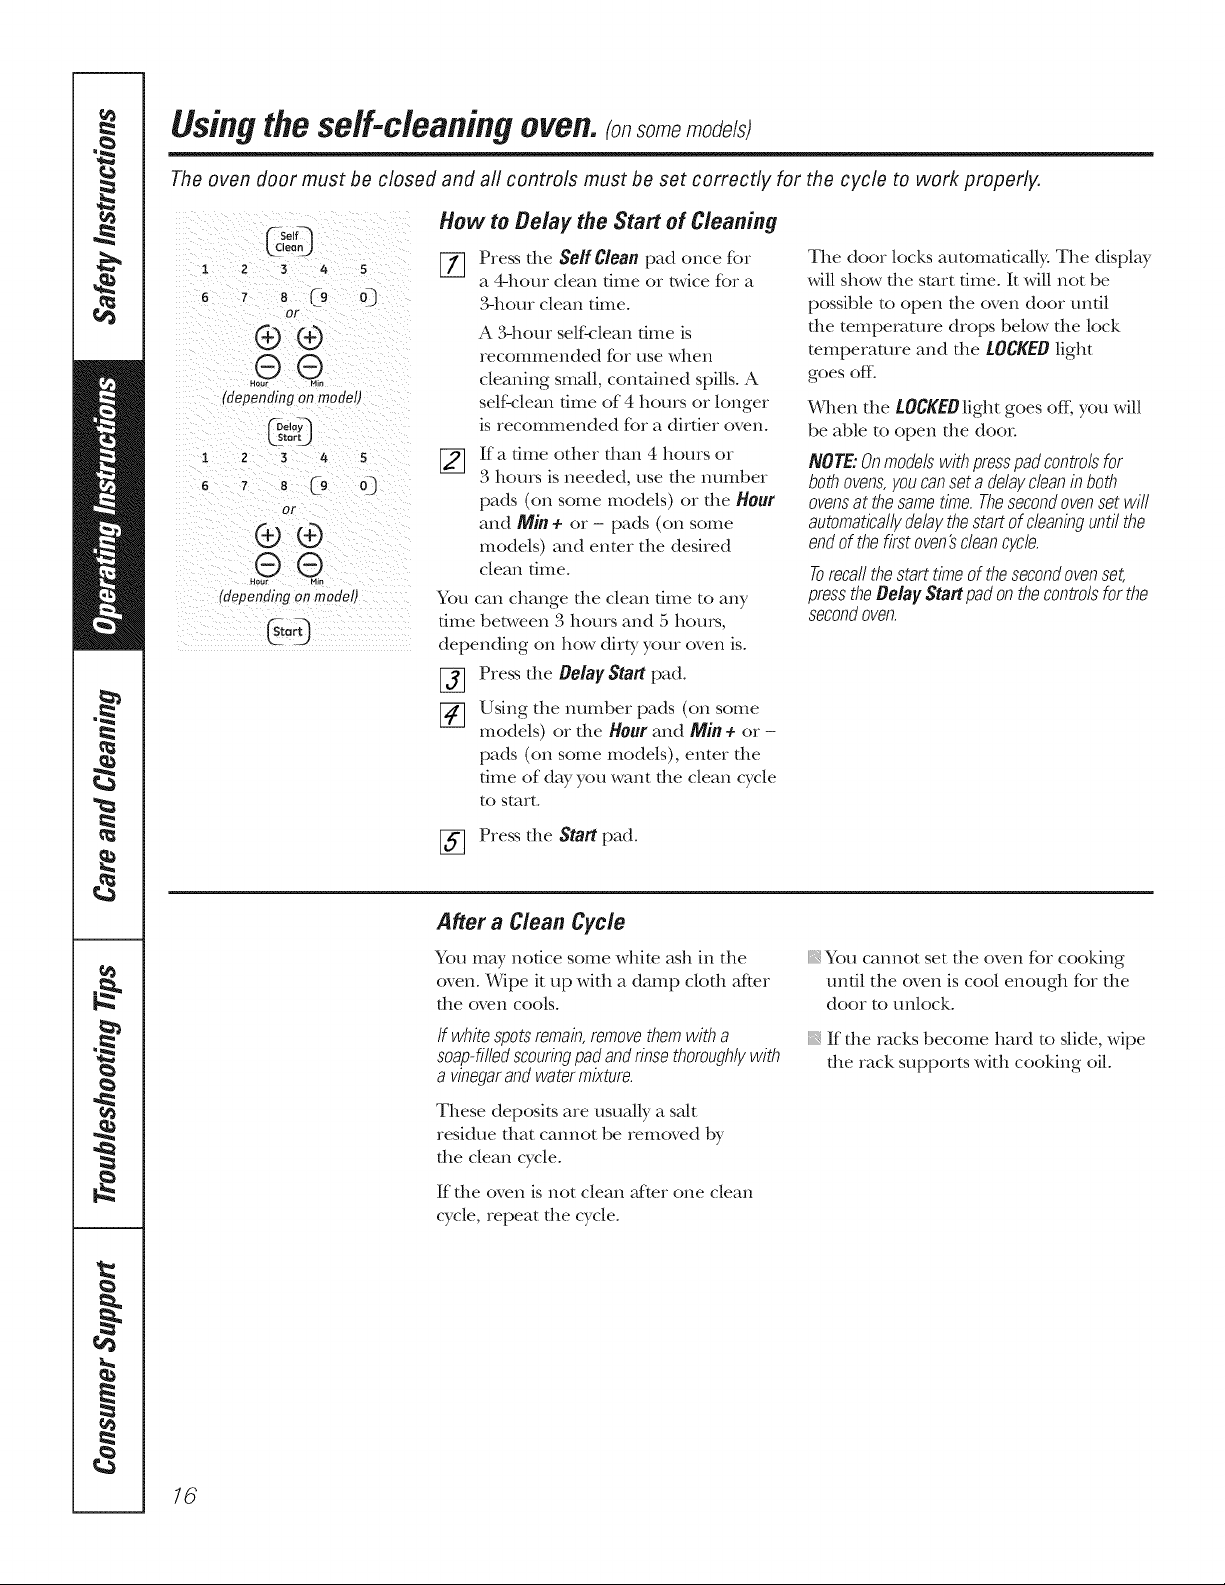
Using the self-cleaning oven. somemo e/sJ
The oven door must be closed and all controls must be set correctly for the cycle to work properly.
SetK'l
lean_)
1 2 3 4 s [] Press tlle SellClean pad once for
a 4-hour clean dine or twice fbr a
6 7 8 (9 O) 3-hour clean time.
1
6
OF
®®
.© Q
(dependingonmodel)
2 3 4 5
_ E9 o)
or
®®
.©Q
(dependingonmode/)
How to Belay the Start of Cleaning
A 341our selfk:lean dine is
recommended fbr use when
cleaning small, contained spills. A
selfXclean dine of 4 hours or longer
is recommended Kw a dirtier oven.
If a time odler dmn 4 hours or
3 hem3 is needed, use the number
pads (on some models) or the Hour
and Min + or- pads (on some
models) and enter the desired
clean time.
You can change die clean dine to any
dine between 3 hours and 5 hom_,
depending on how dirt), your oven is.
[_ Press the Delay Staff pad.
[_ Using the numt)er pads (on some
models) or the Hour and Min + or -
pads (on some models), enter the
time of day you want the clean cycle
to start.
The door locks automadcMly. The display
will show the start dine. It will not be
possible to open the oven door until
the temperature drops below the lock
mmperamre and the LOCKED light
goes off--.
When the tOCKEOlight goes off; you will
be able to open tile doom
NOTE:Onmodelswithpresspadcontrolsfor
bothovens,youcanseta delaycleanin both
ovensat thesametime.Thesecondovenset will
automaticallydelaythestartofcleaninguntilthe
endof thefirstoven'scleancycle.
Torecallthestarttimeof thesecondovenset,
presstheDelay Staffpad onthecontrolsforthe
secondoven.
[_] Press the Staffpad.
After a Clean Cycle
You may notice some white ash in the
oven. Wipe it up with a damp clod1 after
tile oven cools.
If whitespotsremain,removethemwith a
soap-filledscouringpadandrinsethoroughlywith
a vinegarandwatermixture.
These deposits are usually a salt
residue that cannot be removed by
the clean cycle.
If tile oven is not clean afYer one clean
cycle, repeat the cycle.
}_ You cannot set the oven for cooking
until the oven is cool enough for tile
door to unlock.
}_ If the racks become hard to slide, wipe
the rack supports with cooldng oil.
/6
Special features of your oven control. CEApp.ance .com
Yournew press pad control has additional features that you may choose to use. The following are the features
and how you may activate them.
The special feature modes can only be activated while the display is showing the time of day. They remain
in the control's memory until the steps are repeated.
When the display shows your choice, press the Start pad. The special features will remain in memory after
a power failure, except for the Sabbath feature, which will have to be reset.
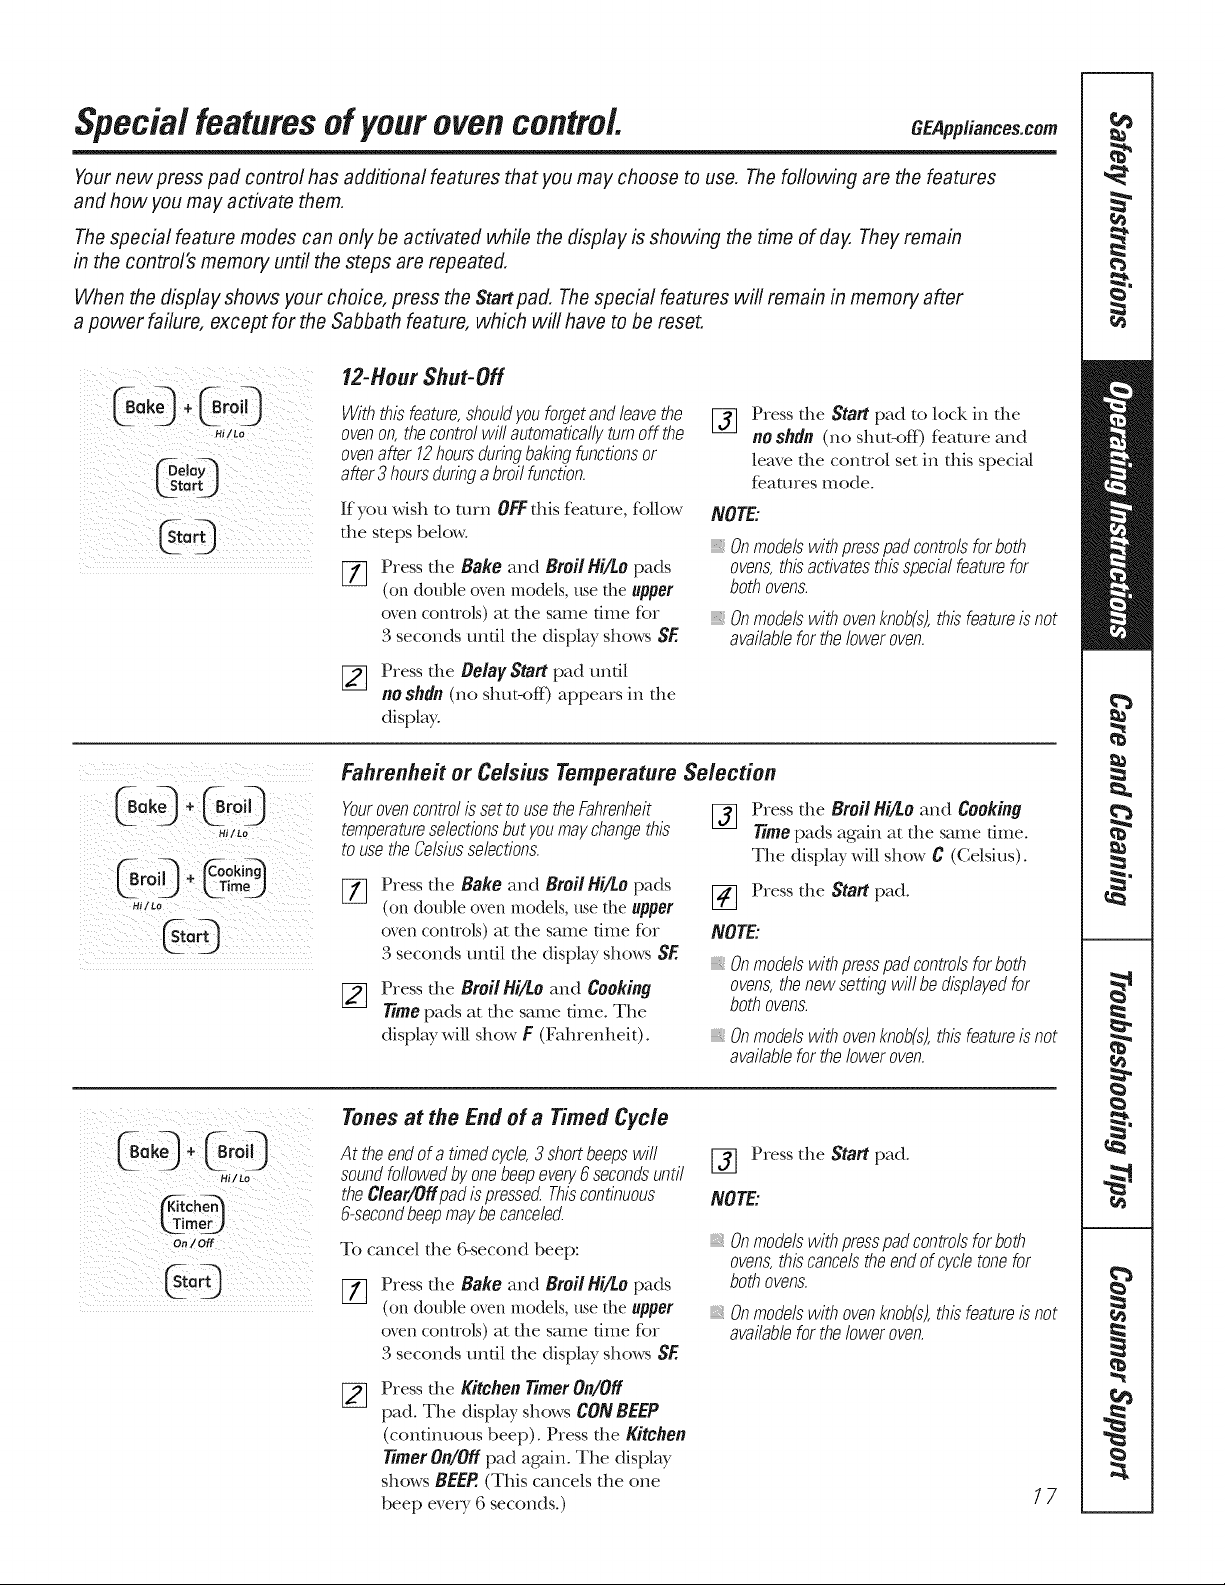
12-Hour Shut-Off
Withthisfeature,shouldyouforgetandleavethe
ovenon,thecontrolwill automaticallyturnoff the
ovenafter 12hoursduringbakingfunctionsor
after3 hoursduringabroil function.
If you wish m mrn OFF this featme, fbllow
the steps below.
%
Press the Bake and Broil Hi/to pads
(on double oven models, use the upper
oven controls) at die same time fbr
3 seconds until the display shows SE
Press the Belay Start pad undl
no shdn (no shm<_fl) appears in the
display°
%
Press the Start pad to lock in the
no shdn (no sitar-off) feature and
leave the control set in this special
fe.amres mode°
NOTE:
Onmodelswithpresspadcontrolsforboth
ovens,thisactivatesthisspecialfeaturefor
bothovens.
Onmodelswithovenknob(s),thisfeatureisnot
availablefortheloweroven.
Fahrenheit or Celsius Temperature Selection
Yourovencontrolis setto usetheFahrenheit
temperatureselectionsbutyoumaychangethis
to usetheCelsiusselections.
%
Press the Bake and Broil Hi/to pads
(on double oven models, use the upper
oven controls) at the same time for
3 seconds until the display shows SE
Press the Broil Hi/to and Cooking
time pads at die same dmeo The
display will show F (Fahrenheit).
[_ Press the Broil Hi/to and Cooking
time pads again at die same dineo
The display will show C (Celsius)°
[_ Press the Start pad.
NOTE:
Onmodels with press pad controls for both
ovens,the new setting will be displayed for
both ovens.
Onmodels with ovenknob(s),this feature is not
available for the lower oven.
@B@
Hi/to
Tones at the End of a Timed Cycle
At theendof a timedcycle,3 shortbeepswill
soundfollowedby onebeepevery6 secondsuntil
theClear/Offpadis pressed.Thiscontinuous
6-secondbeepmaybecanceled.
To cancel the 6-second beep:
Press the Bake and Broil Hi/to pads
(on double oven models, use the upper
oven controls) at the same time for
3 seconds until the display shows SE
Press the Kitchentimer On/Off
pad. The display shows CON BEEP
(continuous beep). Press the Kitchen
timer On/Offpad again° The display
shows BEER (This cancels the one
beep every 6 seconds°)
[_] Press the Start pad.
NOTE:
Onmodelswith presspad controlsfor both
ovens,thiscancelstheendof cycletonefor
bothovens.
Onmodelswith ovenknob(s),thisfeatureisnot
availablefortheloweroven.
17
Special features of your oven control
Bake_ * _mil_
Hi/Lo
L g_
On/Off
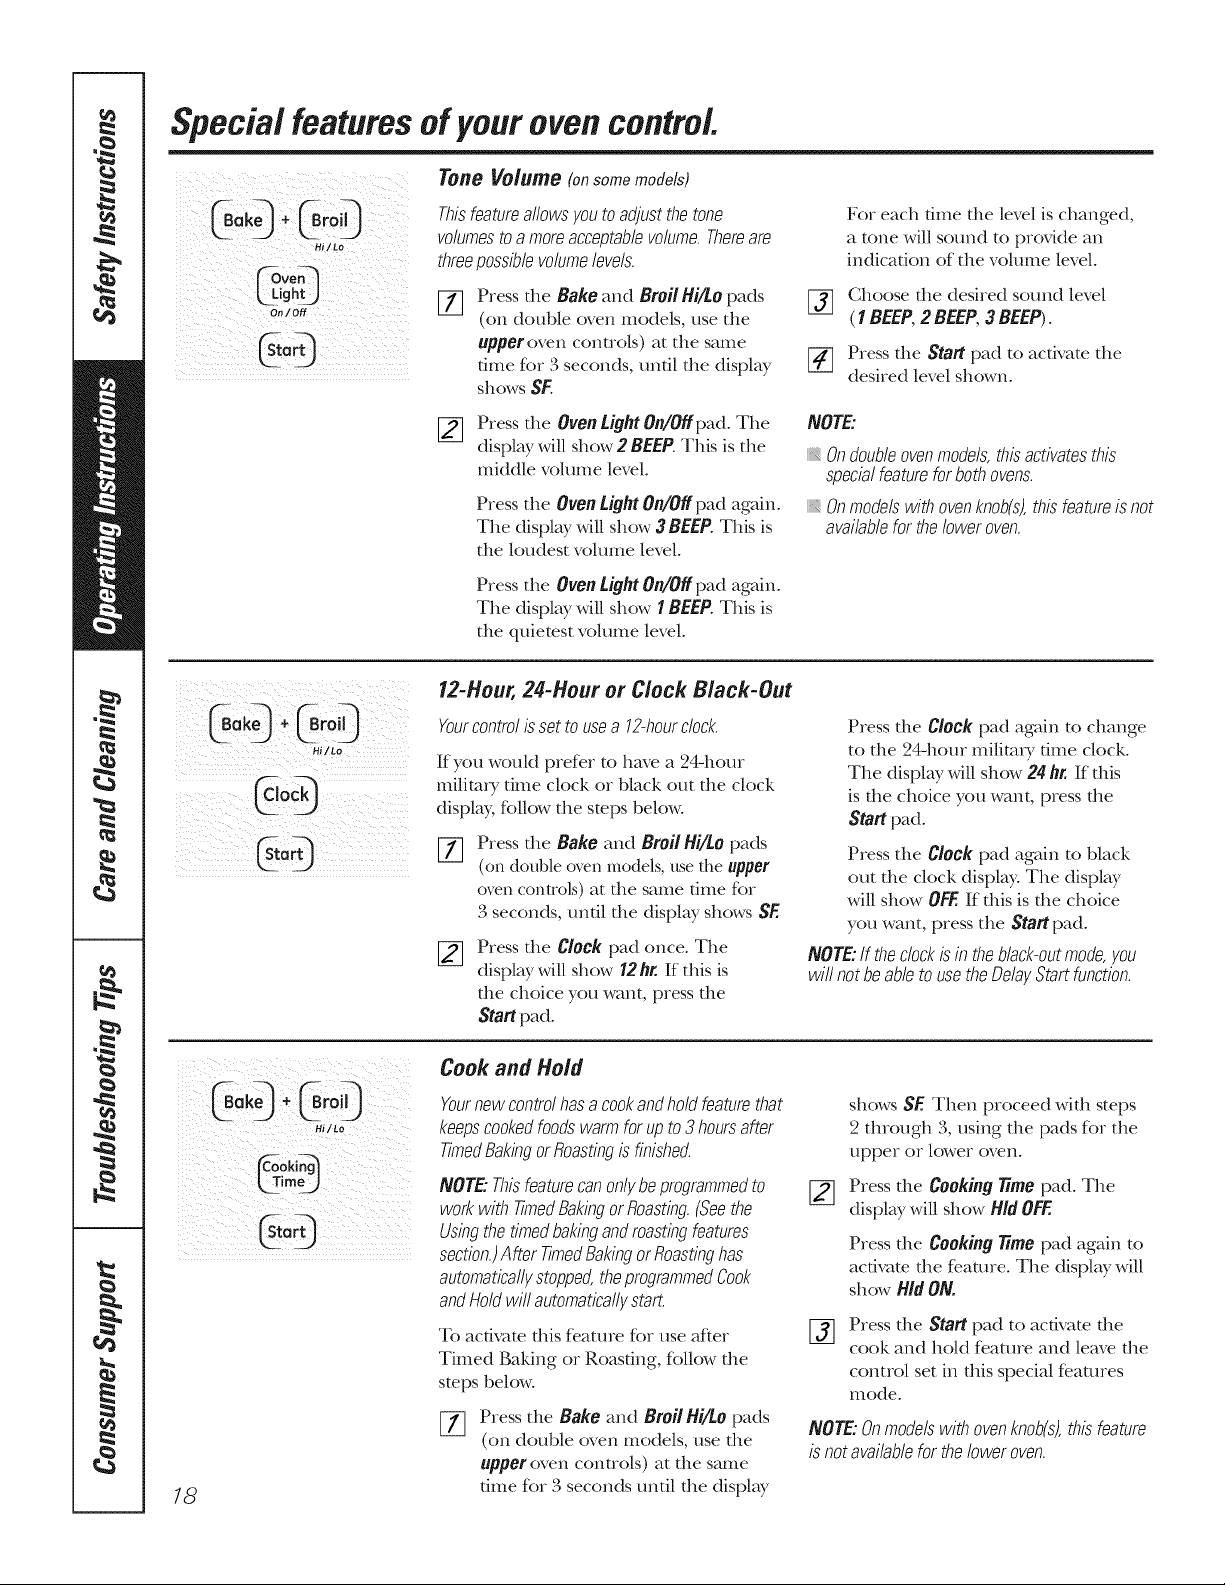
TONe Volume (on some models)
Thisfeatureallowsyouto adjustthetone
volumesto a moreacceptablevolume.Thereare
threepossiblevolumelevels.
_] Pressthe Bake and BroilHi/Lo pads
(on double oven models, use the
upperoven controls) at the same
time for 3 seconds, until the displ W
shows SE
For each dine the level is changed,
a tone will sound to provide an
indication of the volume level.
[_] Choose the desired sound level
(1BEEP,2 BEEP,3BEEP).
[-_ Press tile Start pad to activate the
desired level shown.
[]
Press the Oven LightOn/Offpad. The
display will show 2 BEEP.This is the
middle volume level.
Press the Oven Light On/Off pad again.
The display will show 3 BEEP.This is
the loudest volume level.
NOTE:
Ondoubleovenmodels,thisactivatesthis
specialfeatureforbothovens.
Onmodelswithovenknob(s),thisfeatureisnot
availablefortheloweroven.
Press the OvenLight On/Offpad again.
The display will show 1 BEEP.This is
the quietest volume level.
ili_i_i iii_ i _i _ _ i _i_i_
H /Lo
12-Hour, 24-Hour or Clock Black-Out
Yourcontrolis set to usea 12-hourclock.
If you would prefer to have a 24-hour
milim_T time clock or black out the clock
display, follow the steps below.
%
Press the Bake and Broil Hi/Lopads
(on double oven models, use the upper
oven controls) at the same dine for
3 seconds, until the display shows SF.
Press tlle Clock pad once. The
display will show 12 hr. If this is
tile choice you want, press tile
Start pad.
Press die Clock pad again to change
to die 24-hour milim, T dine clock.
The display will show 24 hr. If this
is the choice you want, press the
Start pad.
Press the Clock pad again to black
out die clock display. The display
will show OFF.If dfls is the choice
you want, press the Startpad.
NOTE:If theclockis in theblack-outmode,you
will notbe ableto usetheDelayStartfunction.
18
Cook and Hold
Yournewcontrolhasa cookandholdfeaturethat
keepscookedfoodswarmfor upto 3 hoursafter
TimedBakingorRoastingis finished.
NOTE"Thisfeaturecanonlybeprogrammedto
workwith timedBakingorRoasting.(Seethe
Usingthe timedbakingandroastingfeatures
section.)A fter TimedBakingorRoastinghas
automaticallystopped,theprogrammedCook
andHoldwill automaticallystart.
To activate tiffs feature for use after
Timed Baking or Roasting, follow the
steps below.
%
Press the Bake and BroilHi/Lopads
(on double oven models, use the
upperoven controls) at the same
time for 3 seconds until the display
shows SE Then proceed wkb steps
2 through 3, using the pads for the
upper or lower oven.
[_ Press tile Cooking time pad. The
display will show HidOFF.
Press tile Cooking time pad again to
acfixate the feature. The display will
show Hid ON.
%
Press tile Start pad to activate tlle
cook and hold feature and leave the
control set in this special fe.amres
mode.
NOTE:Onmodelswithovenknob(s),this feature
is notavailablefor theloweroven.
GEPpp/iances.com
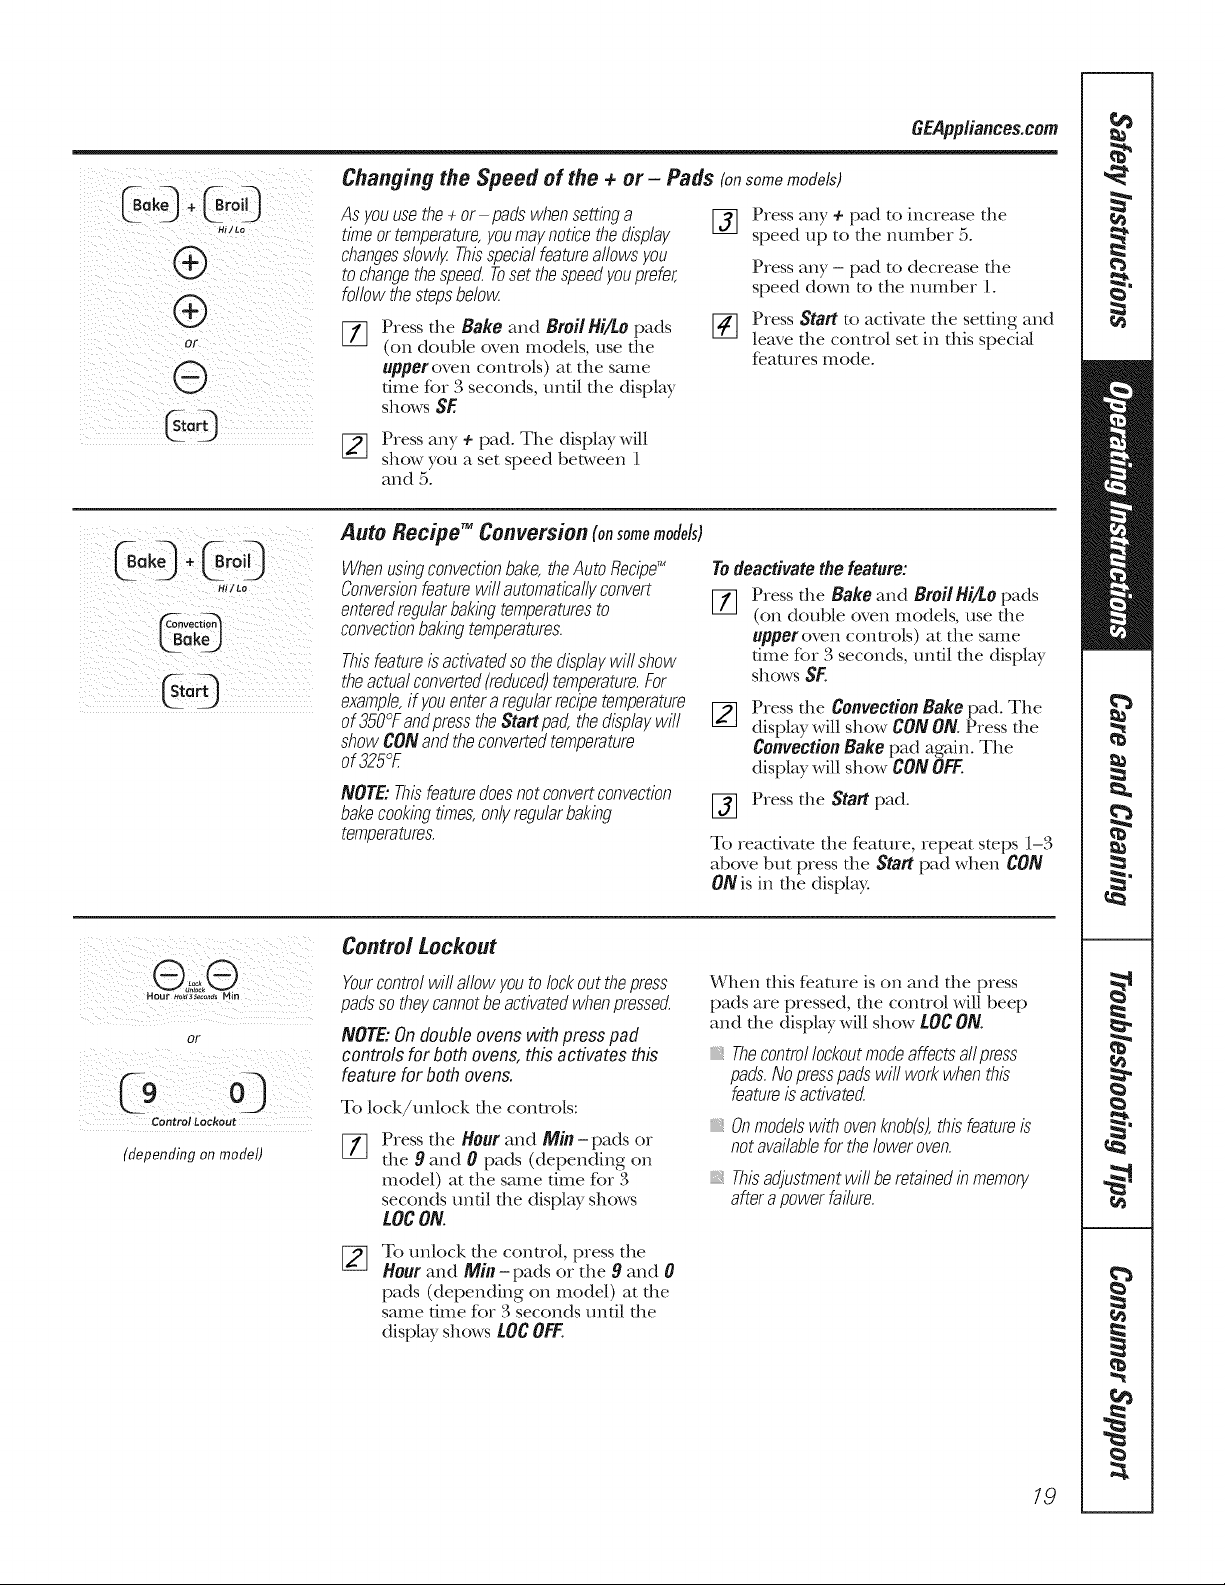
Changing the Speed of the + or - Pads fen
Asyouusethe÷ or-pads whensettinga
timeortemperature,youmaynoticethedisplay
changesslowly Thisspecialfeatureaflowsyou
tochangethespeed.Toset thespeedyouprefer,
followthestepsbelow
[_ Press the Bake and Broil Hi/to pads
(on double oven models, use the
upper oven controls) at the same
time for 3 seconds, until the display
shows SE
[_ Press any + pad. The display will
show you a set speed between 1
and 5.
some models)
[_ Press any ÷ pad to increase the
speed up to the number 5.
Press any - pad to decrease the
speed down to the nmnber 1.
[_ Press Start to acfix.ate the setting and
leave the control set in this special
fe.atures mode.
)i 42:2:i
Auto Recipe TM Conversion(onsomemodels)
Whenusingconvectionbake,theAutoRecipe'_
Conversionfeaturewill automaticallyconvert
enteredregularbakingtemperaturesto
convectionbakingtemperatures.
Thisfeatureis activatedso thedisplaywill show
theactualconverted(reduced)temperature.For
example,if youentera regularrecipetemperature
of 350°FandpresstheStartpad,thedisplaywill
showCONand theconvertedtemperature
of 325°E
NOTE: This feature does not convertconvection
bakecooking times, only regular baking
temperatures.
Todeactivatethe feature:
Press the Bake and Broil Hi/to pads
(on double oven models, use the
upper oven controls) at the same
time fkm" 3 seconds, until the display
shows SF.
Press the ConvectionBake pad. The
display will show CONON. Press the
Convection Bake pad again. The
display will show CONOFF.
[_ Press the Staff pad.
To reactivate the fe.amre, repeat steps 1-3
above but press the Start pad when CON
ON is in the display.
OF
ControlLockout
(depending on model)
Control Lockout
Yourcontrolwill allowyouto lockout thepress
padssotheycannotbeactivatedwhenpressed.
NOTE:Ondoubleovenswith press pad
controls for both ovens,this activates this
feature for both ovens.
To lock/unlock the controls:
Press the Hour and Min - pads or
the 9 and 0 pads (depending on
model) at the same time for 3
seconds until the display shows
LOCON.
To tmlock the control, press the
Hour and Min- pads or the 9 and 0
pads (depending on model) at the
same time for 3 seconds until the
display shows LOC OFF.
When this feature is on and the press
pads are pressed, the control will beep
and the display will show tOC ON.
Thecentre/lockoutmodeaffectsa//press
pads.Nopresspadswill workwhenthis
featureisactivatecZ
Onmodelswithovenknob(s),this featureis
notavailablefor theloweroven.
Thisadjustmentwill be retainedin memory
afterapowerfailure.
19
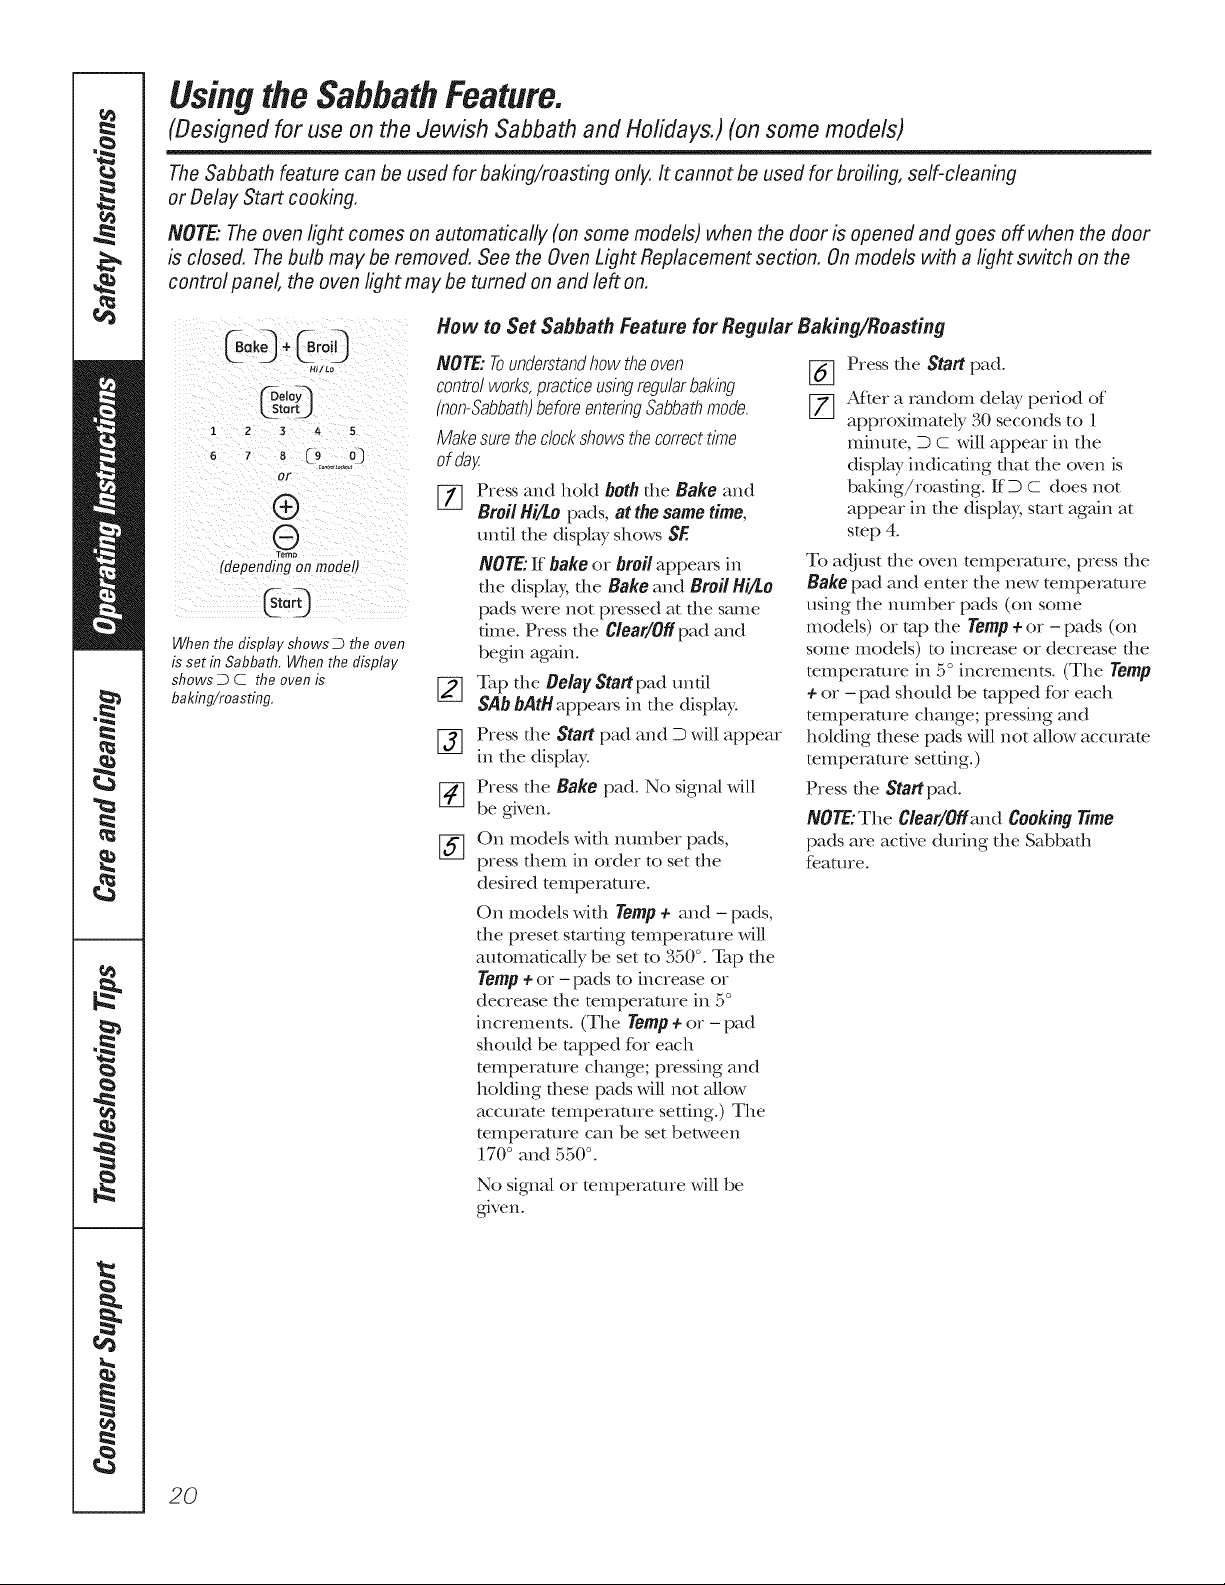
UsingtheSabbathFeature.
(Designed for use on the Jewish Sabbath and Holidays.) (on some models)
The Sabbath feature can be used for baking/roasting only, It cannot be used for broiling, self-cleaning
or Delay Start cooking,
NOTE"The oven light comes on automatically (onsome models) when the door is opened and goes off when the door
is closed, The bulb may be removed, See the Oven Light Replacement section, Onmodels with a light switch on the
control panel, the oven light may be turned on and left on,
1
6
Bake +
HJZLO
@,°yq
tarU
2 3 4 5
7 8 (9 03
or
®
®
romp
(dependingon modeh
Gt, )
When the display shows D the oven
is set in Sabbath, When the display
shows D C the oven is
baking/roe sting,
How to Set Sabbath Feature for Regular Baking/Roasting
NOTE: Tounderstandhow the oven
control works,practice usingregular baking
(non-Sabbath)before entering Sabbath mode.
Make sure the clockshows the correct time
of day
[_ Press and hold both die Bake and
Broil Hi/to pads, at the same time,
undl tile display shows SE
NOTE: If bake or broil appeaIs in
the display, the Bake and Broil Hi/to
pads were not pressed at the same
time. Press die C/ear/Off pad and
begin again.
[_ Tap the Oelay Start pad until
SAb bAtHappea_ in the display:
[_ Press tlle Start pad and D will appear
in the display°
[_ Press the Bake pad. No signal will
be given.
[_] On models with number pads,
press them in order to set the
desired temperature.
On models \,vkh Tamp + and i pads,
the preset starting temperature will
automatically be set to 350 °. Tap die
Tamp+ or - pads to increase or
decrease file temperature in 5°
increments. (The Tamp + or - pad
should be tapped for each
mmperamre change; pressing and
holding these pads will not allow
accumm mmpemmre setting.) The
temperature can be set bet_,veen
170 ° and 550 °.
[_] Press the Start pad.
[77 After a random delay period of
approximately 30 seconds to 1
mimKe, D C will appear in the
display indicating that the oven is
baiting/roasting, ff D C does not
appear in the display, start agNn at
stop 4.
To adjust the oven mmperamre, press the
Bake pad and enmr the new mmpemmre
using the number pads (on some
models) or mp the Tamp÷ or - pads (on
some models) to increase or decrease the
temperature in 5 ° increments. (The Temp
÷ or - pad should be tapped for each
mmperamre change; pressing and
holding these pads will not allow accuram
mmpemmre setting.)
Press the Startpad.
NOTE:The Clear/Off and Cooking time
pads are active during the Sabbath
feature.
No signal or temperature will be
given.
2O
GEPpp/iance&com
GoO Gro
LstortJ
ooki_
imeJ
I 2 3 z_ 5
or
®®
{depending on model)
1 2 3 4 5
OF
®
®
Tem_
tdependingon model)
When the display shows D the oven
is set in Sabbath, When the display
shows D C the oven is
baking/roasting,
How to Set Sabbath Feature for Timed BaMng/Roasting - Immediate Start and
Automatic Stop
NOTE: Tounderstandhow the ovencontrol
works,practice using regular (non-Sabbath)
Immediate Start and Automatic Stop before
entering the Sabbathmode
Make sure the clockshows the correct time
of day
[_ Press and hold both tile Bake and
Broil Hi/to pads, at the same time,
unOl the display shows SE
NOTE: If bake or broil appears in
the display, the Bake and Bmi/Hi/to
pads were not pressed atthe same
time. Press file Clear/Offpad and
begin again.
[_ Tap tile Belay Start pad until SAb
bAtH appears in tile display:
[_] Press tile Start pad and D will appear
in the display:
[_ Press tile Cooking Time pad.
%
g2
%
On models with number pads, press
them to set tile desired length of
cooldng time between 1 minute and
9 houls and 99 minutes.
On models widl Hourand Min + or -
pads, press diem to set the desired
lengfll of cooldng 0me bet_,veen 1
mim_te and 9 hams and 59 mimlws.
Tile cooking time that you entered
will be displayed°
Press tile Start pad.
Press the Bake pad. No signal will
be given.
On models with nmnber pads, press
them in order to set tile desired
temperatme.
%
On models with Temp+ and - pads,
tile preset starting temperature will
automatically be set to 350 °. Tap the
Tamp+ or - pads to increase or
decrease tile mmperamre in 5 °
increments. (The Temp + or - pad
should be tapped for each
temperature change; pressing and
holding these pads will not allow
accmam temperature setting.)
Tile temperature can be set
be_,veen 170 ° and 550 °.
No signal or temperature will be
given.
Press tile Start pad.
After a random delay period of
approximately 30 seconds to 1
minum, D C will appear in the
displ W indica0ng that the oven is
baking/ro_Lsdng. If D C does not
appear in tile display, start again
at step 7.
To adjust tile oven temperature, press tile
Bakepad and enmr the new mmperamre
using tile number pads (on some
models) or mp tile Tamp+or - pads (on
some models) to increase or decrease the
temperature in 5° increments. (The Tamp
÷or - pad should be rapped for each
mmperamre change; pressing and
holding these pads will not allow
accuram temperature setting.)
Press the Startpad.
When cooking is finished, the display
will change fiom D C to D and 0:00will
appem; indicating that the oven has
mined 0FFbut is still set in Sabbath.
Remove the cooked fbod.
k_0ff_) :
LstarL)
How to Exit the Sabbath Feature
[_ Press tile Clear/Off pad.
[_ If tile oven is cooldng, wait
for a random delay period of
approximately 30 seconds to 1
minute, until only D is in tile display.
[_ Press and hold both tlle Bake and
Broil Hi/to pads, at the same time,
until tile display shows SE
[_ Tap tile Oelay Start pad until 12shdn
or nOshdn appears in tile display: 12
shdn indicates that tile oven will
automaOcally mrn off _d*er 12 hems.
no shdn indicates that tile oven will
not automa0cally turn off.
[_] Press tile Start pad.
NOTE: If a power outage occurred while
tile oven \,wksin Sabbath mode, tile oven
will automa0cally turn off and tile oven
control must be reset.
21

Careand cleaning of the oven.
Be sure electrical power is off and all surfaces are cool before cleaning any part of the oven.
How to Remove Protective Shipping Film and Packaging Tape
Careflflly grasp a corner of the protective
shipping fihn with your fingers and slowly
peel it fiom the appliance smfhce. Do
not use any sharp imms to remove die
film. Remove all of the film befbre using
the appliance for the first time.
To assme no damage is done to tlle
finish of tile product, tile safe.st way to
remove the adhesive from packaging
tape on new appliances is an application
of a household liquid dishwashing
demrgent. Apply with a soft cloth and
allow to soak.
NOTE:Theadhesivemustbe removedfromall
parts.It cannotbe removedif it is bakedon.
Control Panel
It's a good idea to wipe rite conuol
panel after each use. Clean wifll mild
soap and water or vinegar and wam_;
rinse with clean water and polish dry
with a soft cloth.
Do not use abrasive cleansers, suong
liquid cleansers, plastic scouting pads or
oven cleane_ on the conuol panel--they
will damage tlle finish. A 50/50 solution
of vinegar and hot wamr works well.
Control/(nob (onsomemodels)
Thecontrolknobsmaybe removedforeasier
cleaning.
Make sure file lulobs are in die OFF
positions and pull them smdght off the
smms for cleaning.
The knobs can be cleaned in a
dishw_Mler or dley may also be washed
with soap and water Make sure the inside
of tlle knobs are dry before replacing.
Replace the knobs in the OFFposifion to
ensme proper placement.
Slot
Hingeloci(
Pull hinge locks down to unlock
Removal position
22
Lift-Off Oven Door
Thedooris veryhea_ Be carefulwhen
removingandliftingthe door.
Donot lift thedoorbythehandle.
Toremove the door:
%
Fully open the door
Pull the hinge locks down toward
tile door flame, to tlle unlocked
position. A tool, such as a small
flat-blade screwdfive,; may be
required.
Firmly grasp bodl sides of the door
at tile top.
Close door to die door removal
position, which is halfi, vay between
the broil stop position and flflly
closed.
[_ Lift door up and out until the hinge
arm is clear of tlle slot.
Toreplacethe door:
[7] Firmly grasp bodl sides of the door
at tile top.
With the Bottom e arm
door at the edge
same angle as 0fslo
the removal
position, seat tlle
indentation of
tlle hinge am1
into the bottom
edge of the hinge
slot. The notch in the hinge am1
nmst be flflly seated into the bottom
of the slot.
%
Fully open the dooI: If the door will
not flflly open, tlle indentation is
not seated correctly in tlle bottom
edge of tlle slot.
[_ Push tlle hinge locks up against tile
flont flame of tlle oven cavity; to tile
locked position.
H122"%,/,1
Hinge10cl<
Push hinge locks up to lock
[_ Close tile oven door
GEPpp/iances.com
Do not rub or clean the door gasket--
it has an extremely low resistance to
abrasion.
If you notice the gasket becoming worn,
frayed or damaged in any way or if it has
become displaced on the door, you should
have it replaced.
BOOr (onself-clean ovens)
To dean the inside of the door:
Because die area inside die gasket is
cleaned dining file self clean cycle, you
do not need to clean fills by hand°
Tile area outside the g_Lsket and
file door liner call be cleaned widl a
soap-filled scorning or plastic pad,
hot water and detergent° Rinse well
widl a vinegar and water solution.
To clean the outside of the door:
Use soap and water to thoroughly
clean die top, sides and flont of die
oven door Rinse well. You may a/so
use a glass cleaner to clean the glass
on die outside of the door Do not let
water &ip into die vent openings°
If ally st;fin on die door vent aim is
peIsistent, use a soft abrasive cleaner
and a sponge-scrubber K_r best results.
Spillage of marinades, fluitj uices,
tomato sauces and basting materials
c(mtaining acids m W cause
discoloration and should be wiped up
imInediately. _,qlen surfitce is cool,
clean and iinse.
Do not use oven cleaners, cleaning
powders or harsh abrasives on the
outside of die door
Do not allow food spills with a high
sugar or acid content (such as
tomatoes, sauerkraut, fruit juices or
pie filling) to remain on the surface.
They may cause a dull spot even
after cleaning,
DOOr (on models with a knob for the lower oven)
To clean the inside of the door:
,, Soap and water will nornia/ly do die
job. Heavy spattering or spillovers may
require cleaning with a mild abrasive
cleaner Soal>filled scouring pads may
a/so be used.
If necessary,gnumay usean ovencleaner Follow
thepackage directions.
_* Clean die inside of die oven window
widl a mild non_cratching cleaner and
a damp clodl.
To dean the outside of the door:
Use soap and wamr to dlorougbly
clean die top, sides and flont of die
oven door Rinse well. You may a/so use
a glass cleaner to clean die glass on the
outside of the door Do not let wamr
drip into die vent openings.
Spillage of marinades, fruit
juices, tomato sauces and b_sdng
mateiia/s containing acids nl W cause
discoloration and should be wiped
up immediately. When surf_tce is
cool, clean and rinse.
Do not rise oven cleanei_, cleaning
powdeI_ or harsh abrasives (m die
outside of die door
Oven Racks
Clean die oven racks widl all abnMve
cleanser or soap-filled scouring pad.
At*or cleaning, rinse the racks with clean
water and dry with a clean cloth.
NOTE:Theovenracksmaybe cleanedin theself-
cleaningoven.However,therackswill darkenin
color,losetheirlusterandbecomehardtoslideif
cleanedduringtheself-cleaningcycle.Youcan
wipe theracksupportswith cookingoilafter self-
cleaningto maketheracksslidemoreeasily
After broiling, remove the broiler
pan from the oven,
Do not store a soiled hroiler pan and
grid anywhere in the oven,
Broiler Pan & Grid
Donot clean thebroiler pan or grid in a
self-cleaning oven.
After broiling, iemove the broiler pan
flom die oven. Remove die grid fionl die
pail. Carefldly pour out the grease flom
die pail into a proper container
_!asb and rinse die broiler pail and grid
ill hot water with a soal>fllled or pl_ksdc
scorning pad.
If food has burned on, sprinkle die grid
with demrgent while hot and cover with
wet paper towels or a dishclodl. Soaking
die pail will remove burned-on foods.
Both the broiler pail and grid may be
cleaned with a commercial oven cleaner
Both the broiler pail and grid call a/so be
cleaned ill a dishwasheI:
23
Care and cleaning of the oven.
IA WARNING
IA CAUTION
Receptacle . Socket
L G&35Buie
onsomemooets
Receetacle Socket
_GgBulb
(onsomemodels
I HOCKORBURNHAZARD.Before replacing oven light bulb, dbconnect the electrbalpower to the oven at the main fuse or circuit breaker panel. Failure to do so may result
b electric shock or bum.
BURN HAZARD. Theglass cover and bulb should be removed when cool. Touchinghot glass
with bare hands or a damp cloth can cause bums.
Oven Light Replacement
TOremove:
[_] Turn the glass cover
counterclockwise 1l/4 turn until
tile tabs of the gl_L_s cover clear the
grooves of tile socket° Wearing latex
gloves may ofi:e.r a better g_Jp.
[_ Using gloves or a (hT cloth, remove
the bulb by pulling it straight out.
Toreplace:
[_ Use a new 120/130-volt halogen
bulb, not to exceed 50 watts.
Replace die bulb widl die same
type of bulb flint was removed. Your
model will have one of the ta,vo types
shown on the left To determine the
correct replacement bulb, check the
bulb terlninals. Bulbs with 2 straight
pin mmflna/s are 06.35 bulbs° Bulbs
with 2 looped mmflna/s are (;9
bulbs. (DO not interchange.)Be sure
the replacement bulb is mind 120
volts or 130 volts (NOT 12 volts).
Using gloves or a (hT cloth, remove
the bulb flom its packaging. Do not
touch the bulb with bare finge_s. Oil
flom skin will damage the bulb and
shorten its life..
%
[]
Push the bulb straight into the
receptacle all the way.
Place the robs of the glass cover into
the grooves of the socket. Turn the
gl_ss cover clockwise 1l/4 turn.
For improved lighdng inside
die oven, clean the glass cover
flequen@ using a wet cloth. This
should be done when the oven is
complemly cool.
[] Reconnect electrical power to
the oven°
I I
x , , i i _ i
i ,_1/,n, _ ,
JMaximurn( '_,
IIength _:
Glasscover
Oven Light Bulb (onsomemodels)
Toremove:
Turn the glass cover counterclockwise
1/4 mrn until the tabs of the glass cover
clear the grooves of the socket. Remove
the bulb.
Toreplace:
Put in a new 40-watt appliance bulb.
Place the robs of the gl_tsscover into
the grooves of the socket. Turn the glass
cover clockwise 1l/4 turn.
NOTE:
A 40-wattappliancebulbis smallerthan
a standard40-watthouseholdbulb.
Installandtightenthecoverclockwise.
Reconnectelectrica/powerto theoven.
Forimprovedlightinginsidetheoven,clean
theglasscoverfrequentlyusinga wet cloth.
Thisshouldbe donewhentheovenis
completelycool.
24
GEPpp/iance&com
Non-Self-Clean Oven Interior (onsomemodels)
Wifll proper care, file porcelain enamel
finish on file inside of file oven--top,
bottom, sides, back and inside of file
door_will stay new-looldng fbr yem_.
Let file oven cool before cleaning. We
recommend fllat you wear rubber gloves
when cleaning file oven,
Soap and water will nomla/ly do the job.
Hea_ T spattering or spilloveI_ may
require cleaning wifll a mild abrasive
cleaner Soap-filled scouring pads may
a/so be used.
Donotallowfoodspillswith a highsugaror acid
content(suchastomatoes,sauerkraut,fruitjuicos
orpiefilling)to remainonthesurface.Theymay
causeadullspotevenaftercleaning.
Household ammonia may make the
cleaning job easier: Place 1/2 cup in a
shallow ,glass or pottery container in a
cold oven overnight.
Tile ammonia flmles will help loosen file
burned-on grease and K_od.
If necessaiy, }¢011 Illay use all oven cleanei:
Follow the package directions.
Donot sprayovencleaneron theelectrical
controlsandswitchesbecauseit couldcausea
shortcircuitandresultinsparkingorfire.
Donot allowa film from thecleanerto buildup
onthetemperaturesenso_it couldcausethe
oventoheatimproperl;_(Thesensoris located
at thetopof theoven.)Carefullywipethe
sensorcleanaftereachovencleaning,being
carefulnot tomovethesensorasa changein
itspositioncouldaffecthowtheovenbakes.
Donot sprayanyovencleanerontheoven
door,handlesoranyexteriorsurfaceof the
oven,cabinetsor paintedsuffaces.Thecleaner
candamagethesesurfaces.
Painted Surfaces
Clean with soap and water or a vinegar
and water soludono
Do not use commercial oven cleaners,
cleansing powders, steel wool or harsh
abrasives on any painmd smface.
Glass Surfaces
To clean file outside glass finish, use a
glass cleaner Rinse and polish with a
&Y cloth.
Do not allow file water or cleaner
to run down inside file oven door
while cleaning.
Stainless Steel Surfaces (on somemodels)
Be netuse a steel woe/pad; it will scratch
the surface.
To clean die stainless steel stnface,
use warm sudsy water or a stainless steel
cleaner or polish. Ah,vays wipe tile surface
in the direction of tile grain. Follow the
cleaner insuucfions for cleaning the
stainless smel smface.
To inquire about purchasing stainless
smel appliance cleaner or polish, or to
find the location of a dealer nearest you,
please ca/1 our toll-flee number:
National Parts Center
1.800.626.2002
GEPpp/iances.corn
25
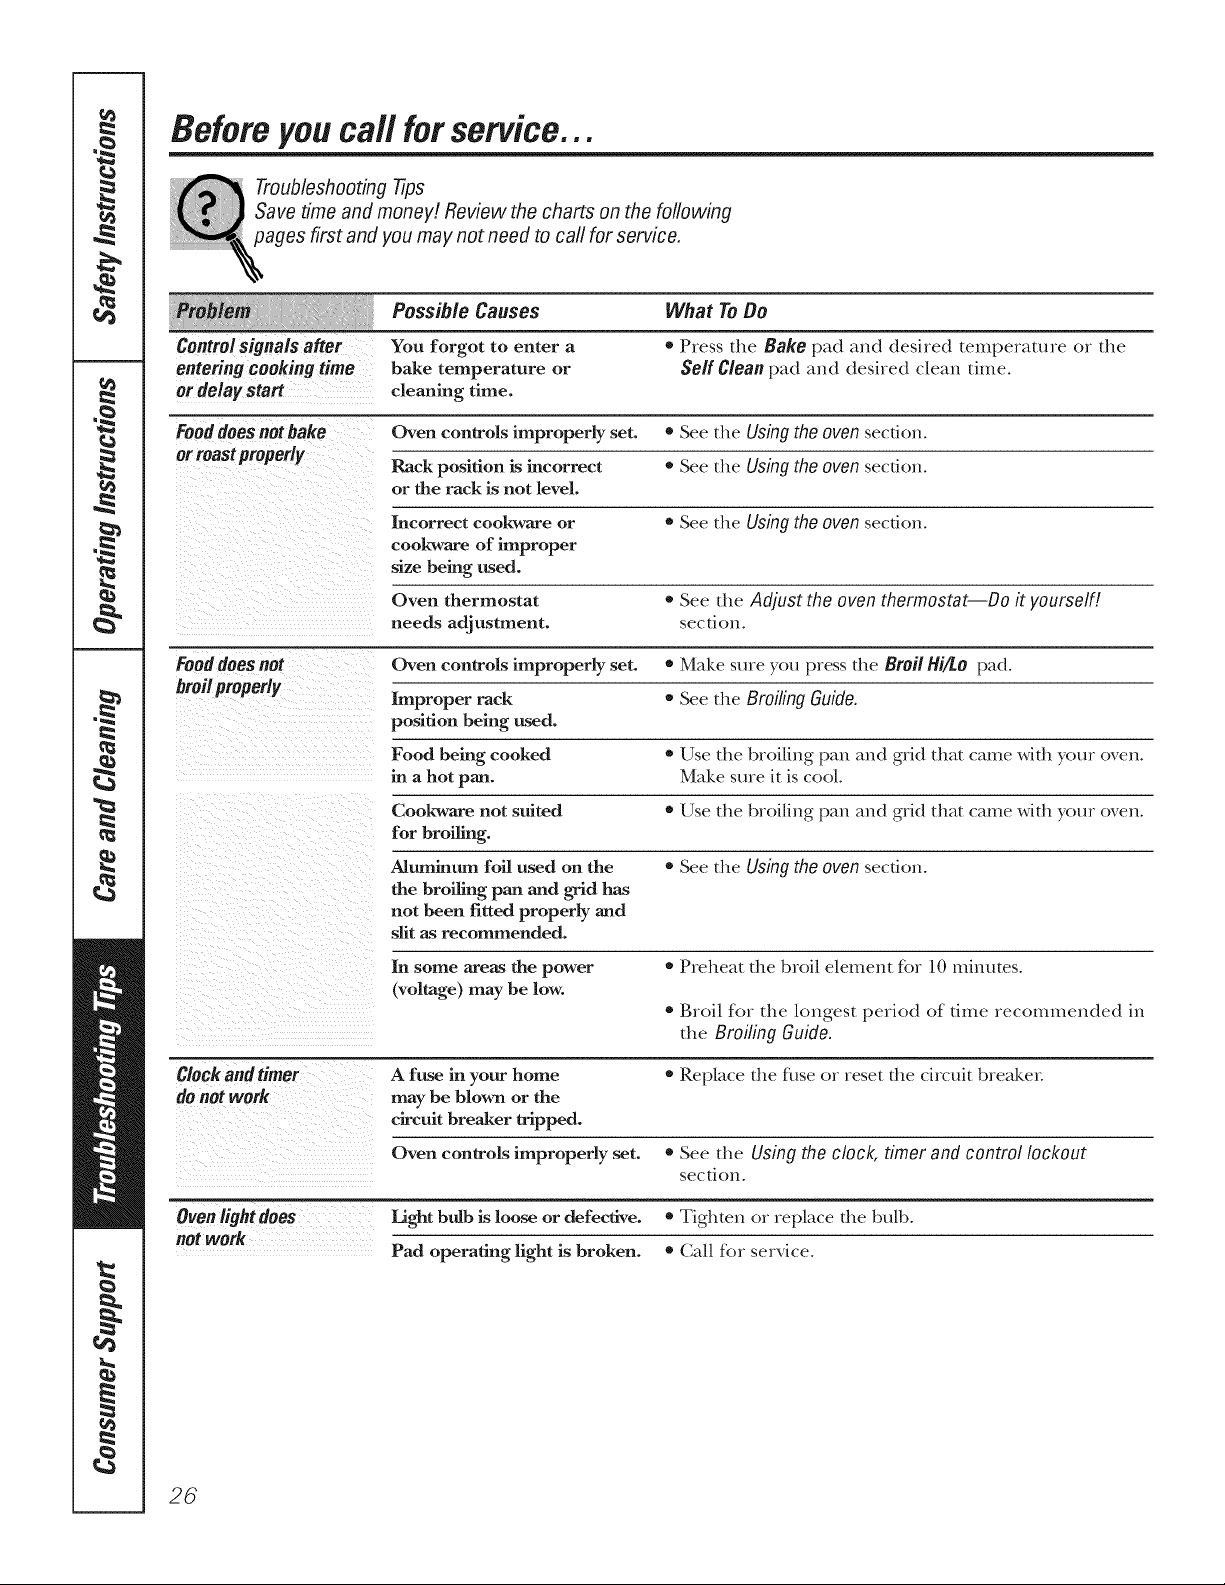
Before you ca//for service..,
Troubleshooting tips
Save time and money! Reviewthe charts on the following
pages first and you may not need to carl for service,
Possible Causes What To Do
Control signals alter You forgot to enter a * P_ess the Bake pad and desired temperatme oY the
entering cooking time bake temperature or Self Clean pad and desired clean time.
ordelay start cleaning time.
Fooddoesnotbake Oven controls improperly set. = See the Usingthe oven secdon.
orroastproper/y Rack position is incorrect * See the Usingthe oven section.
or the rack is not level.
Incorrect cookware or • See the Using the oven section.
cookware of improper
size being used.
Oven thermostat . See the Adjust the oven thermostat--Do it yourself!
needs adjustment, secdon.
Food does not Oven controls improperly set. * Make sure you p_ess the Broil Hi/Lo pad.
broilproperly Improper rack * See the Broiling Guide.
position being used.
Food being cooked * Use the broiling pan and grid that came with youYoven.
in a hot pan. Make sure it is cool.
Cookware not suited • Use the broiling pan and grid that came with youYoven.
for broiling.
Aluminum foil used on the . See the Using the oven secdon.
the broiling pan and grid has
not been fired properly and
slit as recommended.
In some areas the power . Preheat the broil element fb_ 10 minutes.
(voltage) may be low.
• Broil fbY the longest period of dine Yecommended in
the Broiling Guide.
Clockandtimer A fuse in your home . Replace die fhse oFreset die circuit breaker:
do not work may be blown or the
circuit breaker tripped.
Oven controls improperly set. * See the Using the clock, timer and control lockout
secdon.
Oven light does Light bulb is loose or defective. * Tighten oF;eplace the [)tall).
notwork
Pad operating light is broken. * (;all fb, service.
26
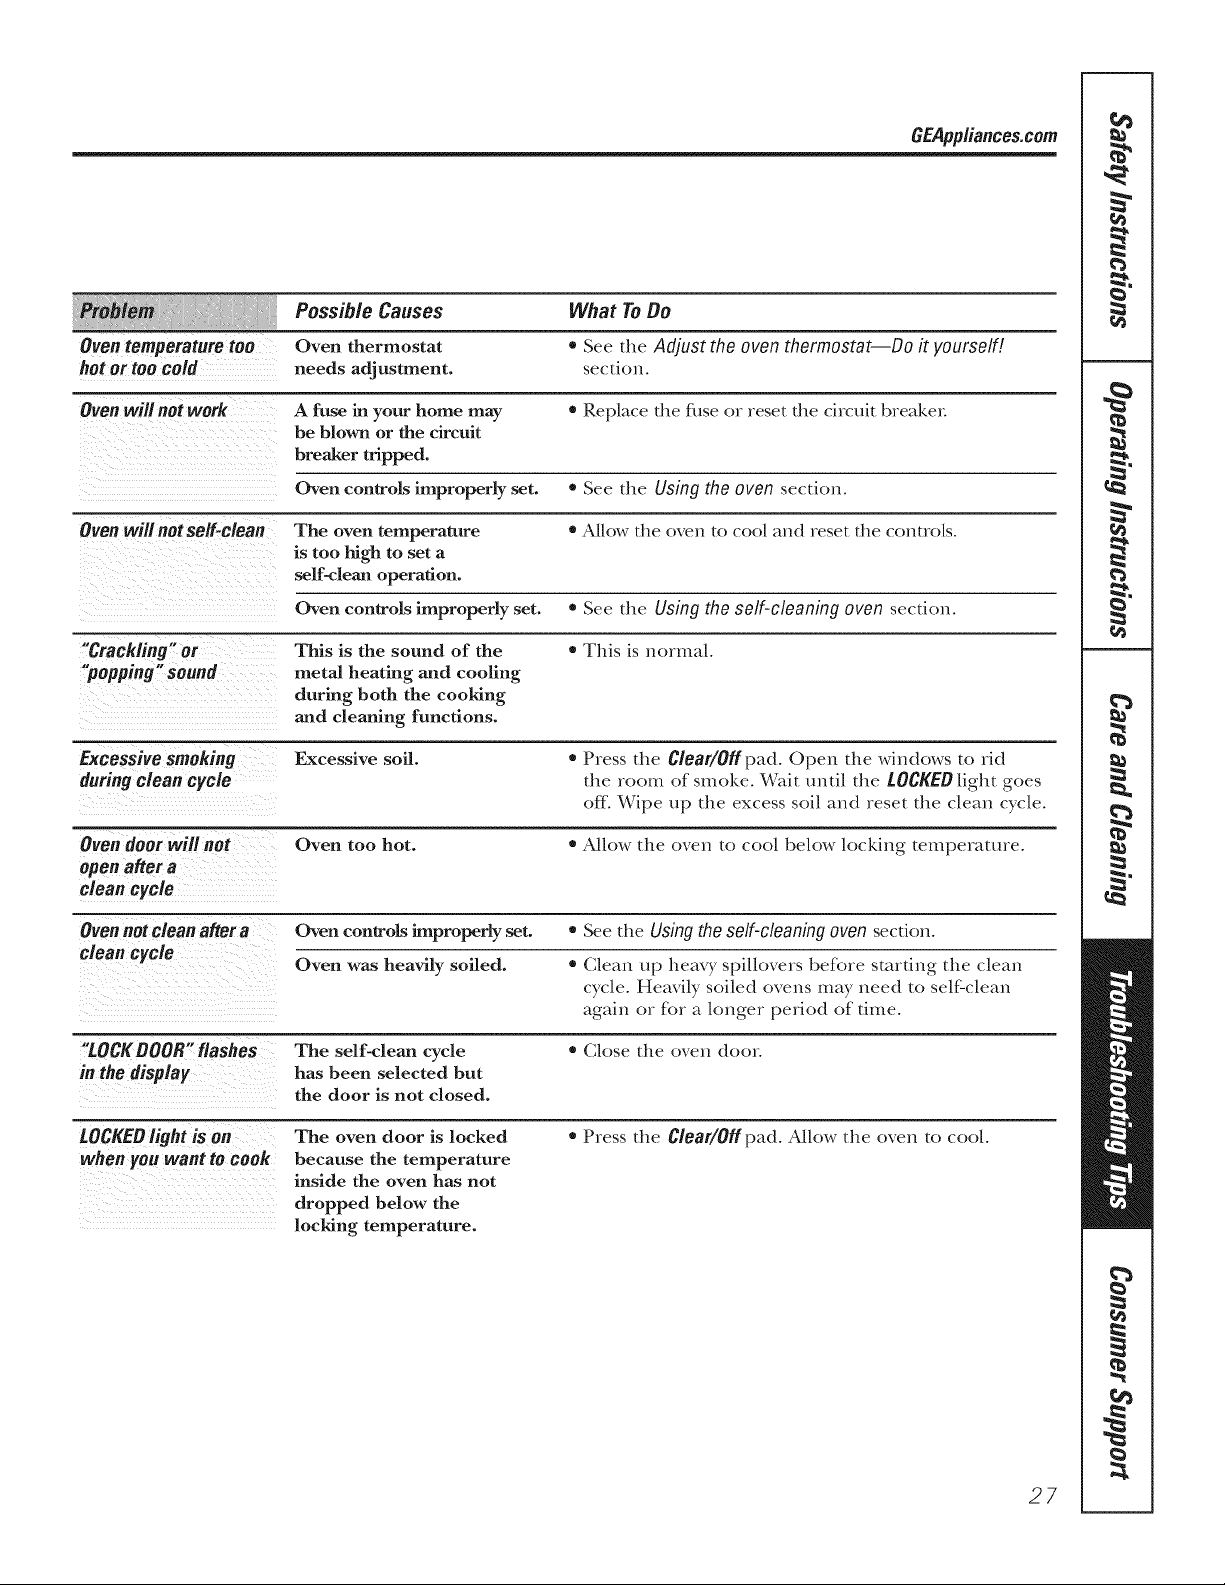
GEPpp/iances.com
Possible Causes What To Do
Oven temperature too Oven thermostat = See die Adjust the oven thermostat--Do it yourself!
hot or too cold needs adjustment, secdon.
Oven willnot work A fuse in your home may • Replace the fl_se or reset the circuit breaker:
be blown or the ckcuit
breaker tripped.
Oven controls improperly set. * See tile Using the oven section.
Oven will not self-clean The oven temperature * Allow tile oven to coo/and reset tile comro/s.
is too [figh to set a
self-clean operation.
Oven controls improperly set. • See the Using the self-cleaning oven secdon.
"Crackling" or This is the sound of the • This is normal.
"popping" sound metal heating and cooling
during both the cooking
and cleaning functions.
Excessive smoking Excessive soil. • Press the Clear/Off pad. Open the windows to rid
during clean cycle the room of smoke. Wak until the LOCKED light goes
ell Wipe up tile excess soft and reset tile clean cycle.
Oven door will aot Oven too hot. • Allow tile oven to cool below locking temperature.
open after a
clean cycle
Oven not clean after a Oven controls improperly set. • See the Using the self-cleaning oven secdon.
clean cycle
Oven was heavily soiled. • (;lean lip heax T spillovers before starting the clean
cycle. Heavily soiled ovens may need to self'clean
again or fbr a longer period of time.
"LOCK BOOR" flashes The self-clean cycle * Close the oven doe*:
in the display has been selected but
the door is not closed.
LOCKED light is on The oven door is locked • Press tile Clear/Ogpad. Allow tile oven to cool.
when you want to cook because the temperature
inside the oven has not
dropped below the
locking temperature.
27
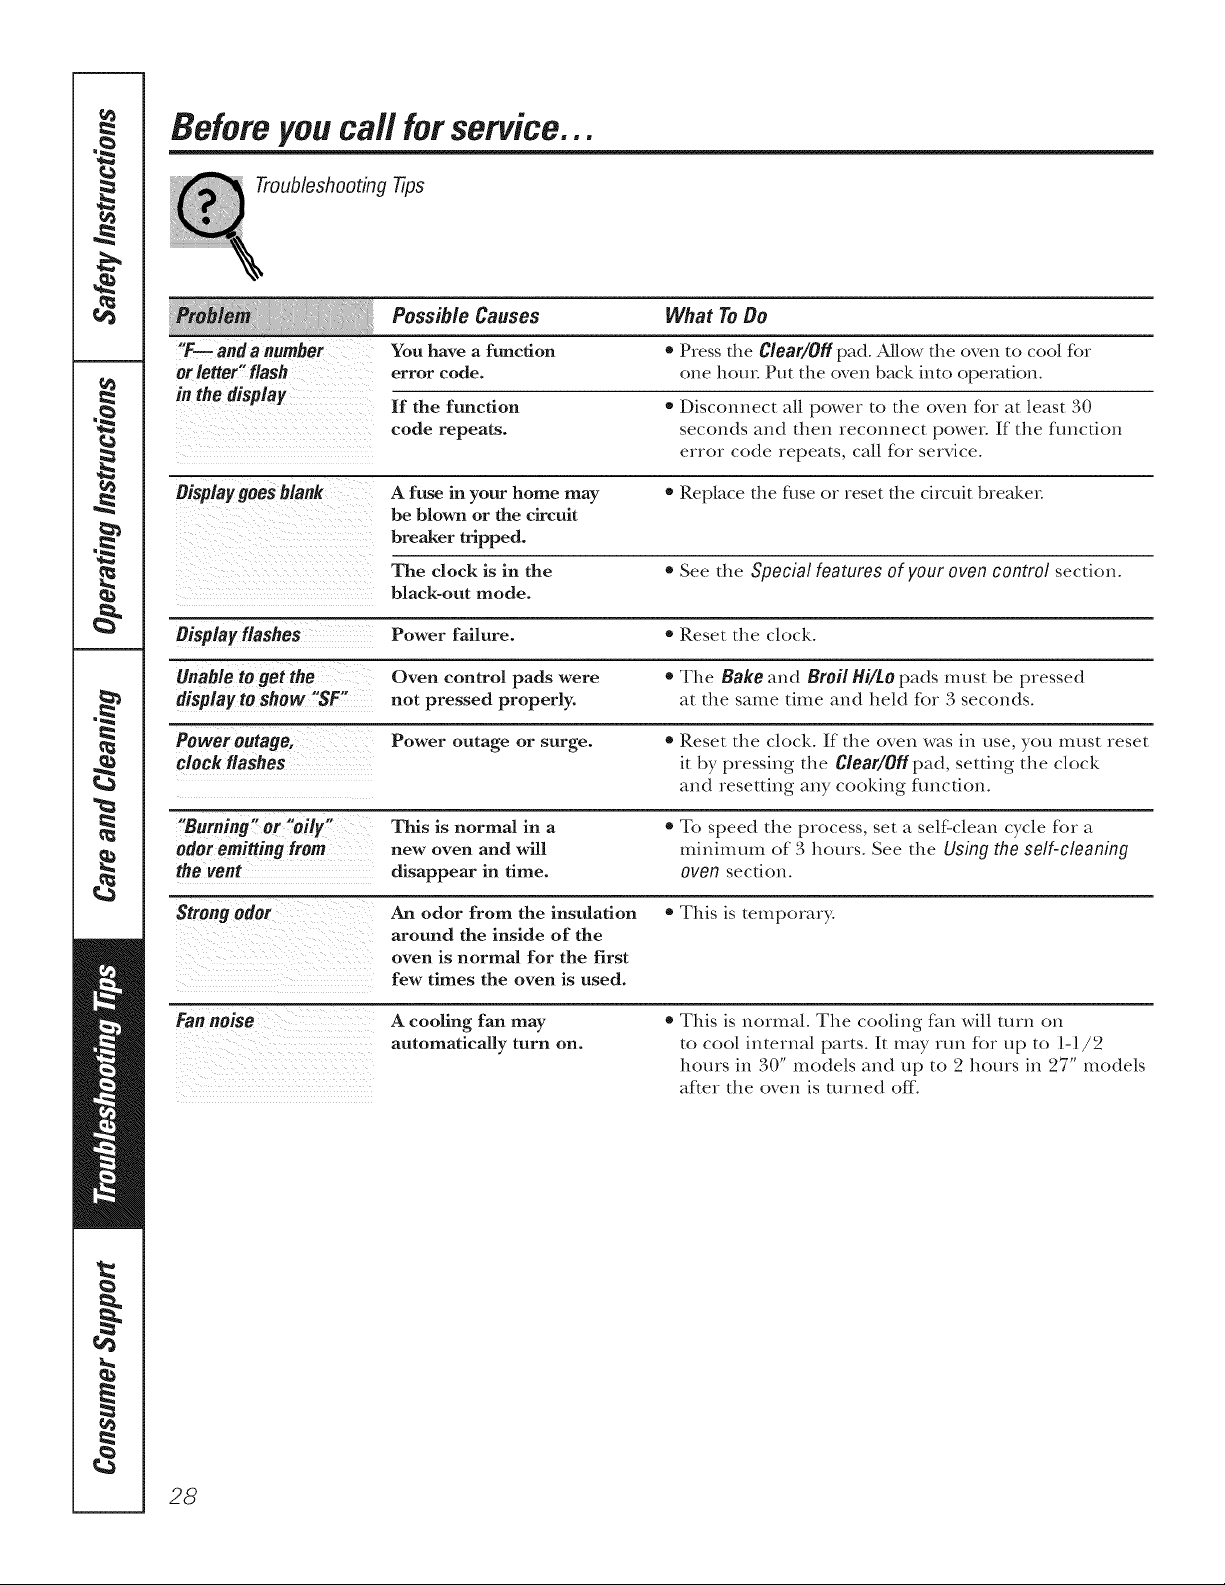
Before you call for service...
Troubleshooting tips
Possible Causes What To Be
"F--and a number You have a function * Press the Clear/Off pad. Allow the oven to coo] fbr
or letter" flash error code. one horn: Put the oven back into operation°
in the display If the function • Disconnect all power to the oven for at least 30
code repeats, seconds and then reconnect power. If the flmction
error code repeats, call fbr service.
Oisplayooes blank A fuse in your home may * Replace the fuse or reset the circuit breakeI:
be blown or the ckcuk
breaker tripped.
The clock is in the . See the Special features of your oven control section.
black-out mode.
Bisplayflashes Power failure. * Reset the clock.
Unable togetthe Oven control pads were • The Bake and Broil Hi/to pads must be pressed
display to show "SF" not pressed properly, at the same time and held fbr 3 seconds.
Poweroutaoe, Power outage or surge. • Reset the clock. If the oven was in use, you must reset
clock flashes it by pressing the Clear/Off pad, setting the clock
and resetting any cooking flmcdon.
This is normal in a * To speed the process, seta self:clean cycle fbra
odor emitting from new oven and will mininmnl of 3 hours. See the Using the self-cleaning
the vent disappear in time. oven secdon.
Strong odor An odor from the insulation * This is temporary.
aroundovenis normaltheinsideforOthef thefirst
few times the oven is used.
Fannoise
A cooling fan may
automatically turn on.
* This is normal. The cooling tim will mrn on
to cool internal parts. It may run for up to 1-1/2
hours in 30" models and up to 2 hours in 27" models
after the oven is turned off.
28
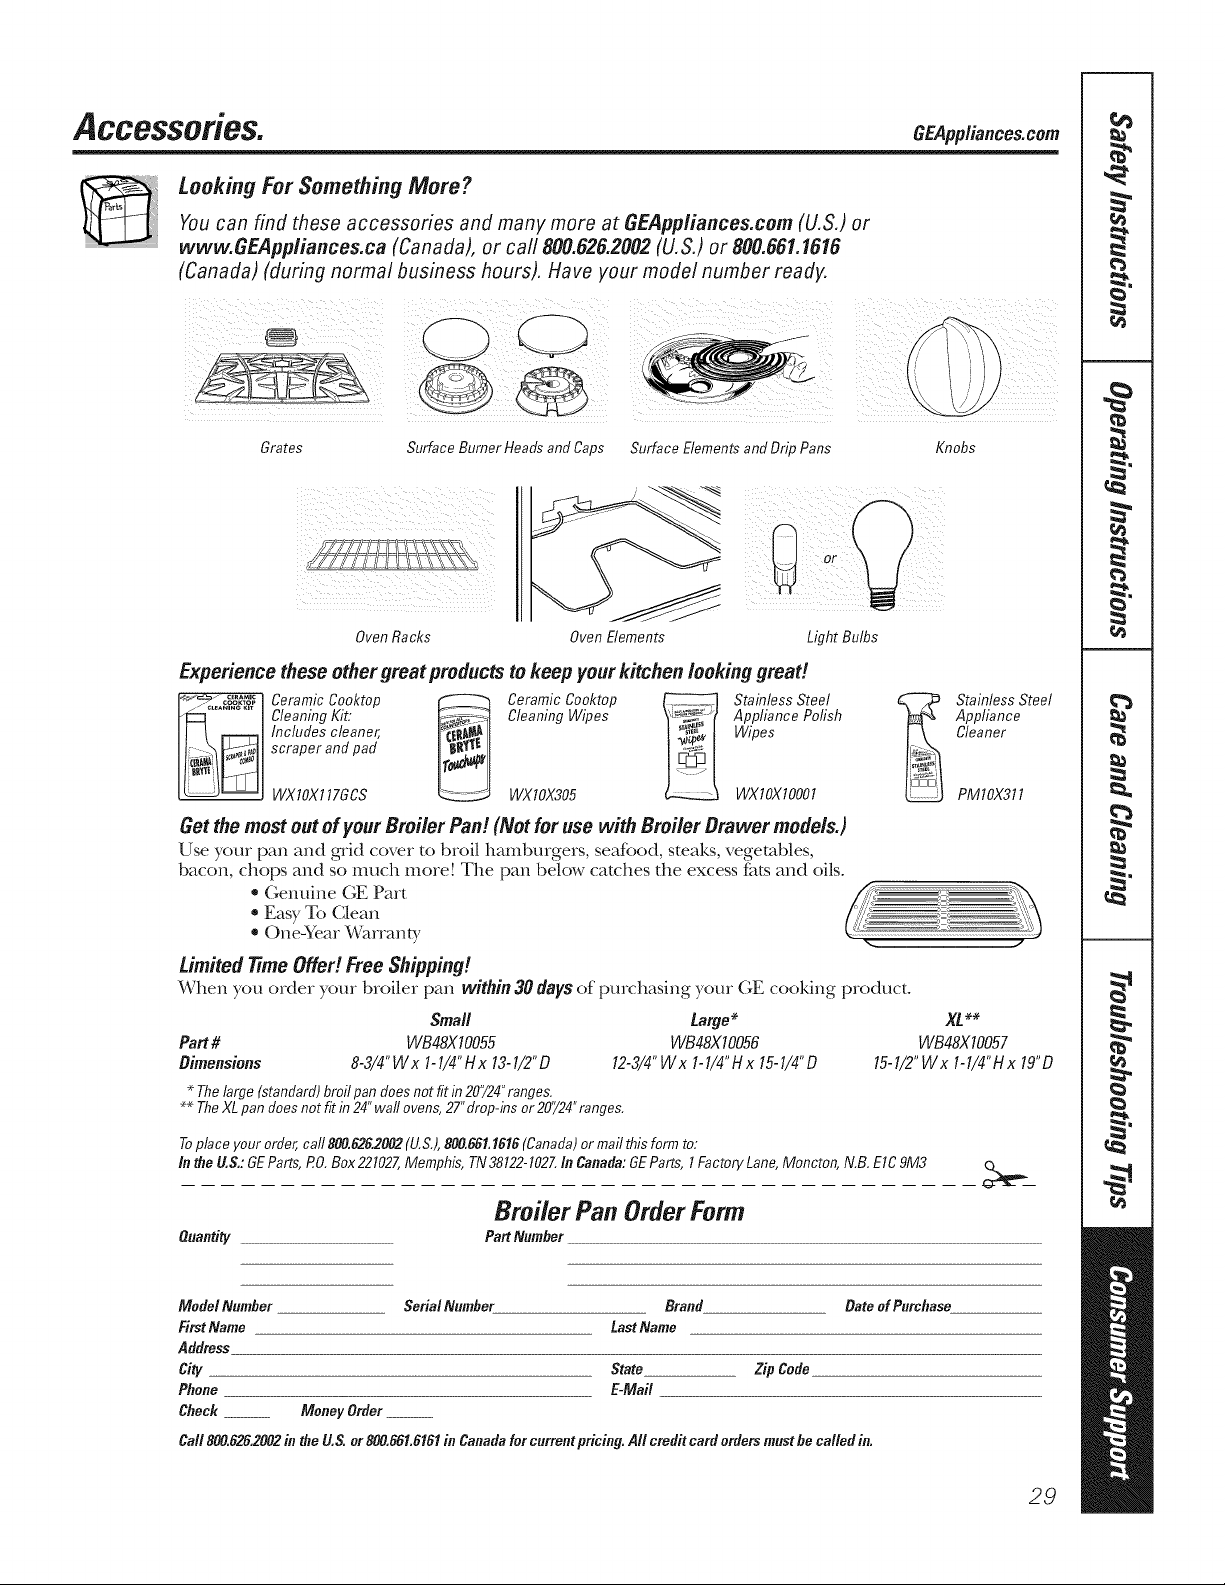
Accessories. CEAppliances.co
Looking For Something More ?
You can find these accessories and many more at GEAppliances.com (U.S.) or
www.GEApp/iances.ca (Canada), or carl 800.626.2002 (U.S.) or 800.661.1616
(Canada) (during normal business hours). Have your model number ready.
Grates
Surface Burner Heads and Caps Surface Elements and Drip Pans
Knobs
Oven Racks Oven Elements
Experience these other groat products to keep Four kitchen looking great!
__ Cleaning Kit: Cleaning Wipes Appliance Polish
Includes cleaner, Wipes
scraper and pad
WXIOX117GCS WXIOX305 WXIOXIO001
Getthe most out of Four Broiler Pan! (Not for use with Broiler Drawer models.)
Use your pan and g_id cover to broil hamburgers, seafbod, steaks, vegetables,
bacon, chops and so much more! The pan below cat(;hes the excess f_tts and oilso
• Genuine GE Part
• Easy To Clean
• One'Year Wananty
Limited time Offe!! Free Shipping!
When you order your broiler pan within 30 days of purchasing your GE cooking product.
Stainless Steel
Appliance
Cleaner
PM10X311
Small Large* XL**
Part # WB48X10055 WB48X10056 WB48X10057
Dimensions 8-3/4"Wx 1-1/4"Hx 13-1/2"D 12-3/4"Wx 1-1/4"Hx 15-1/4"D 15-1/2"Wx 1-1/4"Hx 19"D
* The large (standard)broil pan does not fit in 20'/24"ranges,
** TheXL pan does not fit in 24" waft ovens,27"drop-ins or 20"/24"ranges,
Toplace your order,call 800.6262002(U.S,),800.661.1616(Canada)or mail this form to:
In the O.S.:GEParts,RO,Box 221027,Memphis, TN 38122-102ZIn Canada:GEParts, 1FactoryLane,Moncton, N,B, E1C911//3
Broiler Pan Order Form
Quantity PartNumber
ModelNumber
FirstName
Address
City
Phone
Check
MoneyOrder
Serial Number Brand Bateof Purchase
LastName
S_te Zip Code
E-Mail
Call 800.626.2002in the U.S or 800.661.6161in Canadafor currentpricing.All credit card orders mustbe called in.
29
Notes.
,0
,0
3O
GEBuilt-In Electric Oven Warranty.
Aft warranty service provided by our Factory Service Centers, or
an authorized Customer Care_ technician. To schedule service,
visit us on-line at GEAppliances.com, or call 800.GE.CARES
(800.432.2737). Please have serial number and model number
available when calling for service.
m
ii i i_ii _i I ii
one Year
Staple your receipt here.
Proof of the original purchase
date is needed to obtain service
under the warranty.
Fromthe date of the
origina!purchase
GE Will Replace:
Any part of the oven which fifth due to a defect in materials or workmanship.
Driving this limitedone-year warranty,GE will also provide, free of charge, all labor
and in-home service to rephce the defective part.
Service trips to your home to teach you how to
use the product.
Improper installation, delivery or maintenance.
Failure of the product if it is abused, misused,
or used for other than the intended purpose
or used commercially.
Replacement of house fuses or resetting of circuit
breakers.
Damage to the product caused by accident, fire, floods
or acts of God.
Incidental or consequential damage caused by possible
defects with this appliance.
Damage caused after delivery.
Product not accessible to provide required service.
EXCLUSIONOFIMPLIED WARRANTIES--Your sole and exclusive remedy is product repair as provided in this Limited
Warranty. Any implied warranties, including the implied warranties of merchantability or fitness for a particular purpose,
are limited to one year or the shortest period allowed by law.
This warranty is extended to the original purchaser and any succeeding owner for products purchased for
home use within the USA. If the product is located in an area where service by a GEAuthorized Servicer is not
available, you may be responsible for a trip charge or you may be required to bring the product to an Authorized GE
Service location for service. In Alaska, the warranty excludes the cost of shipping or service calls to your home.
Some states do not allow the exclusion or limitation of incidental or consequential damages. This warranty
gives you specific legal rights, and you may also have other rights which vary from state to state. Toknow
what your legal rights are, consult your local or state consumer affairs office or your state's Attorney General
Warrantor:General Electric Company. Louisville, KY 40225
31

ConsumerSupport.
GEAppliancesWebsite
GEApp/iances.com
Have a quesdon or need assistance with your appliance? Try the GE Appliances Website 24 hours a day,
any day of the year! For greater convenience and faster service, you can now download Owner's Manuals,
order parts or even schedule service on-line.
ScheduleService GEapp/iances.com
Expert GE repair service is (rely one step away f}om your door Get on-line and schedule your service at
your convenience any day of the year! Or call 800.GE.CARES (800.432.2737) dining normal business hours.
RealLife DesignStudio
GEApp/iances.com
(;E supports the Universal Design concept--products, services and envhomnents that can be used by
people of all ages, sizes and capabiliOes. _!e recognize the need to design for a wide range of physical and
mental abilities and impah_nents. For derails of GE's Unive,_al Design applications, including ldtchen
design ideas for people with disabiliOes, check out our Website today. For the hearing impaired, please ca/1
800.TDD.GEAC (800.833.4322).
ExtendedWarranties
GEApp/iances.com
Purchase a GE extended warranty and learn about special discounts that are mailable while your warranty
is soil in effect. You can purchase it onqine anytime, or call 800.626.2224 during nomml business hom_.
GE Consumer Home Services will still be there after your warranty expires.
PartsandAccessories
GEApp/iances.com
Individuals qualified to service their own appliances can have parts or accesscnJes sent direcdy to their
homes (VISA, MasterCard and Discover cards are accepted). Order on-line today, 24 hom_ eve_T day or
by phone at 800.626.2002 during norlnal business hours.
Instructions containedin thismanualcoverproceduresto beperformedbyanyuser. Otherservicing generally
should be referredto qualifiedservice personnel.Cautionmustbe exercised,since improper servicing may cause
unsafeoperation.
ContactUs
GEApp/iances.com
If you are not saOsfied widl die service you receive flom (;E, contact us on our Websim widl all die details
including your phone numbe_; or w_Jm to: General Manage_; Customer Relations
GE Appliances, Appliance Park
Louisville, KY 40225
RegisterYourAppliance GEApp/iances.com
Register your new appliance on-line--at your convenience! Timely product registration will allow for
enhanced communicaOon and prompt service under the temls of your warranty; should the need arise.
You may Nso mail in the pre-printed registration card included in the packing mate,Jal.
GEPpp/iances.com
Impreso en los Estados Unidos
Instrucdones de seguridad ........ 2-4
Instrucdones de operad6n
Asado y horneado cronometrado ...... 10
Bloqueo de controles ............... 19
Controles ........................ 5, 6
Convecci6n ..................... 11-13
Funciones especiales ............. 17-19
Homo ........................... 7, 8
Homo autolimpiante ............ 15, 16
Modo Sabbath .................. 20, 21
Rel(0 y temporizador ................. 9
Termostato ........................ 14
Cuidados y limpieza
Asadera y rejilla .................... 23
Bombilla ......................... 24
Cinta de empaque ................. 22
Interior del homo .................. 25
Panel de control ................... 22
Parrillas .......................... 23
Perilla ............................ 22
Puerta del homo de levantar ...... 22, 23
Superficies de acero inoxidable ...... 25
Superficies de vidrio ................ 25
Superficies pintadas ................ 25
Consejos para resolud6n
de problemas .................. 26-28
Accessorios ....................... 29
Soporte al consumidor
Garantfa .......................... 31
Soporte al consumidor .............. 32
Escriba los n#meros de modelo
y serie aquk
N ° de modelo
N° de serie
i,os puede encontrar en tma
edquem en la moldma lateral o
en ]a parte delantera de] homo
(inferior) demis de la puerta del
homo.
,]KP 30=Horno
,fl_30-Horno
,]KP70-Horno
simple
f l'P70-Horno
simple
,]KP 35=Horno
,fl_35-Horno
,]KP5 5-Horno
,flTU 5-Horno
simple de pared de 27"
simple de pared de 30"
de pared de conveccidn
de 27"
de pared de conveccidn
de 30"
doble de pared de 2 7"
doble de pared de 30"
doble de pared de 2 7"
doble de pared de 30"
,]KP75-Horno de pared de conveccidn
doble de 2 7"
fl'P75-Horno de pared de conveccidn
dob# de 30"
Impresoenpapel
reciclado
49-80598 08-09JR
/NFORMACIONIMPORTANTEBE SEGUR/BAB.
tEA TOBASLASINSTRUCCIONESANTESBEUSAR.
&iADVERTENCIA!
Si no se sigue exactamente /a infoFmacion de este manual, puede OCUFFiFun incendio, una explosi6n
o un coFtocircuito que podr[a causar dafios a/a propiedad,/esiones persona/es o/a muerte.
AVISOIMPORTANTEDESEGURIDAD
La Ley de tdxicos y agua potable segura de California (California Safe Drinking Water and Toxic
Enforcement Act) exige al gobemador de California publicar una lista de las sustancias conocidas
en el estado que causan c#ncer, defectos de nacimiento u otros dafios, y exige alas empresas que
alerten a los clientes sobre la exposicidn potencial a dichas sustancias,
El aislamiento de fibra de vidn'o en los homos de autolimpieza emite una pequefia cantidad de
mondxido de carbono durante el ciclo de limpieza. Puede minimizarse la exposicidn permitiendo
la ventilacidn con una ventana abierta o utilizando un ventilador,
2
PRECAUCIONESDESEGURIDAD
Cuando se utilizan aparatos el#ctricos, se deben seguir las precauciones de seguridad b#sicas,
incluyendo las siguientes:
: Use este aparato Onicamente para los fines
descritos en este Manual del propietano.
AsegOrese de que su aparato sea instalado
y conectado a fierra correctamente por
un tOcnico calificado, de acuerdo con
las instrucciones de instalaci6n suministradas.
No intente reparar o reemplazar ninguna
parte de su horno a menos que este manual
lo recomiende de manera especffica. Todos
los dem_s ser_4cios de mantenimiento deber_n
derivarse a un t_cnico calificado.
Pk'ta al instalador que le muestre la ubicaci6n
del cortacircuitos o flmible. M_r(luelo para unfl
referencia f_cil.
: Antes de realizar cualquier ser_4cio de
mantenimiento, desconecte el suministro de
energfa del homo en el panel de distribuddn
domdsdco quitando el flisible o apagando
el cortacircuitos.
: No deje a los nifios sin super_4sidn; los nifios
no deben estar solos o sin super_4sidn en
un firea en la que un aparato estfi en uso.
No se les debe pemddr sentarse o pamrse
sobre ning_ma de las partes del apamto.
: No deje que nadie se suba, se pare o se cuelgue
de la puerta. Podrfan daflar el homo o sufl_ir
lesiones personales graves.
: Asegxirese de que el homo est_ instalado
correctameme en un armafio que estd bien
sujeto a la estmcmm de la casa. Nunca pel-mita
que alguien se trepe, se siente, se pare o
se cuelg_m de la puerta del homo.
: Nunca deje la puerta del homo abierta cuando
no est_ observfindolo.
: Siempre mantenga tapices, cordnas o patios
que pue_'tan prenderse flmgo a una distanda
segxlm del homo.
: Siempre mantenga los patios de cocina,
repasadores, guantes pare cacerolas y todo fipo
de tela a una distancia segura de su homo.
: Siempre mantenga los utensilios de madem
y plfisdco, asf como alimentos enlatados, a
una distancia seg_lra de su homo.
: Ensefie a los nifios que no debenjugar
con los controles ni con ninguna otto parte
del artefi_cto.
: Los rayones o impactos severos sobre
las puertas de _4dfio podrfan romper
o astillar el _4drio.
GEPpp/iances.com
&iADVER' i
PRECAUCIONESDESEGURIDAD
: No g_uarde materiales inflamables en un horno. :
PRECAtIC/ON:Losar culos
de interds pare los nifios no deben gxiardarse :
en armalios aniba de un horno; ya que los
nifios podrfan suKir lesiones graves al intentar
trepase sobre _l para alcanzar los objetos.
: Nunca use vesfimenta floja o que cuelgue
miemras hace uso del aparato. Tenga cuidado
al intentar alcanzar artfculos gx_ardados en
armanos sobre el homo. i,os matefiales
inflamables podrfan encenderse si entmnen
contacto con superficies calientes o elementos
calefactores y podrfan provocar quemaduras
graves.
: Use 6nicamente guantes pare cacerolas que
estdn secos; los guantes h6medos o mojados
sobre superficies calientes podrfan causar
quemaduras debido al vapor. No permita
que los guantes entrenen comacto con
los elementos calefhctores calientes. No use
una toalla u otto dpo de tela voluminosa.
: Por su seguridad, nunca use su aparato pare
calentar la habitad6n.
: No pel_ita que la grasa de la cocd6n u otros
materiales inflamables se acumulen dentro o
cerca del homo.
: No use agua para apagar incendios con
grasa. Nunca tome una cacerola que se est_
quemando. Apagxle los controles.
i,as llamas en el homo pueden apagarse
por completo al cerrar la puerta del horno
y apagado o al udlizar un producto qufmico
mulfiuso seco o un exfintor de fipo espuma.
: Nunca deje fiascos o latas con grasa de came
asada dentro o cerca de su homo.
: No guarde ni use materiales combustibles,
gasolina u otros lfquidos y vapores inflamables
cerca de este apamto ni ning_in otto.
Al@se del homo cuando abra la puerta.
E1 aire o vapor caliente que sale puede cmlsar
quemaduras en las manos, la cara y los ojos.
No caliente recipientes de alimentos sin abfir.
i,a presidn podrfa acumularse y el recipiente
podrfa explotar y pr()vocar una lesidn.
Mantenga libre la vendlacidn del homo.
No permita que se acumule grasa en el horno.
Coloque la parnlla del horno en la posicidn
que desee miemras el homo estd fifo. Si es
necesario manipular las parfillas cuando estfin
calientes, no pem_ita que los guantes pare
cacerolas entren en contacto con los elementos
calefi_ctores.
Cuando udlice bolsas pare cocinar o asar en
el horno, siga las indicaciones del fid)ricante.
No toque los elementos calefi_ctores ni la
superficie interna del homo. Estas superficies
podrfan estar lo suficientemente calientes como
pare quemar atin si estfin oscuras. Dumnte
el uso y luego de dste, no toque ni pem_ita
que las prendas u otros rnamfiales inflamables
entrenen contacto con ningSn firea interna
del homo; deie que se enflfe primero.
Las superfides que pueden estar calientes
inclwen: orificios de vendlacidn del homo,
superficies cercanas a los orifidos, grietas
alrededor de la puerta del homo, los bordes
de la ventana y los ribetes metfilicos sobre
la puerta.
RECUERDE:La superficie imerna del horno
puede estar caliente al abrir la puerta.
Nunca coloque utensilios de cocina ni otros
elememos en el piso del homo. Debaio del piso
del homo hay un elemento calefhctor. Si coloca
elementos sobre el piso del homo, dste podrfa
sobrecalentarse y _'tafiarse al igual que
los ammrios.
3
/NFORMAC/ONIMPORTANTEDESEGURIDAB.
tEA TOBASI.ASINSTRUCCIONESANTESDEUSAR.
iADVER' i
PRECAUCIONESDESEGURIDAD
iiiiiil
iii}i}}li_
iii}i}}li_
iii}i}}li_
Sacar la parrilla basra el tope resulta ddl
para levantar comidas pesadas. Tambi_n
es una precauci6n para e_,itar quemarse
al tocar las superficies calienms de
la puerta o las paredes del homo.
No utilice el homo para secar peri6dicos.
Si se sobrecalientan, pueden incendiarse.
No udlice el horno como area de
almacenamiento. Los elementos
almacenados en un horno pueden
incendiarse.
No deje ob,jetos hechos de papel, utensilios
de cocina o alimentos en el homo
mientras no est_ en uso.
::_Luego de asar a la parrilla, siempre
redre la asadera del homo y lfmpiela.
La g,asa que quede en una asadera puede
incendiarse la pr6xima vez que utilice
la bandeja.
::_r0nicamente limpie las partes enlistadas
en este Manual del propietario.
iii}i}i
No udlice papel de aluminio para revestir
la parte inferior del horn(), a excepci6n de
lo sugerido en este manual. La instalaci6n
incorrecta del papel de a|uminio puede
provocar un riesgo de descarga eKcuica
o incendio.
CUEZALASCARNESYELPOLLOCOMPLETAMENTE...
Cuezala cameroja }/de avepot completo. la cameroja a una temperaturaINTERNAde al menos 160°F}/la de
avea unatemperaturaINTERNAde al menos 180 °£ Lacocci6na estas temperaturasofreceprotecci6ncontra
enfermedadesde transmisi6npot alimentos.
AUTOLIMPIEZADELHORNO
}} No limpie el empaque de la puerta. }}
E1empaque de la puerta es esencial para
un buen cierre. Debe tenerse cuidado de
no desgastar, dafiar o mover el empaque.
iii}i}i
No utilice limpiadores. NingOn limpiador
comercial para hornos ni ninguna cubierta
promcmra para hornos debe utilizarse
dentro o a|rededor de las parms del horn().
Los resi&los de los limpiadores de hornos
dafiar_in el interior del homo cuando
se utilice el ciclo de aumlimpieza.
iii}i}i
iii}i}}li_
Antes de la autolimpieza del horn(),
remueva cualquier cacerola para asa_,
parrilla y otros utensilios de cocina.
Antes de comenzar un ciclo de
autolimpieza, aseg_irese de limpiar
con un trapo los derrames.
Si el modo de autolimpieza
no funciona bien, apag_e el horn() y
desconecm el suministro de corriente.
Haga que un tdcnico calificado tea|ice
la reparaci6n.
LEAYSIGAESTAINFORMACIONDESEGURIDAD
CUIDADOSAMENTE.
GUARBEESTASINSTRUCCIONES
4
Use de los contro/esde/homo, tenalgunosmodelos) GEApp/iances.com
A Io larqo de este manual, las caractedsticas y apariencia pueden variar con los de su modelo.
.
Se muestra el control del homo doble,
2
7
Controlde/homo,caracterfsticasy configuracionesde/reloj
(Clock)y de/temporizador(Timer)
Bot6nBake(Homeaflo)
Presione para seleccionm la flmcidn homeado.
Bot6nBroilHi/Lo(Asara laParrillaAlto/Bajo)
Presione paraseleccionm la fimcidn asar a la parrilla.
BotSn Convection Bake
(Homeado per convecciSn)
Presidnelo para seleccionar el horneado con
la flmci6n de comecci6n.
Bot6n Convection Roast
(Asado per convecci6n)
Presidnelo pare seleccionar el asado con
la flmcidn de comeccidn.
Bot6nStart(Inicio)
Debe presionarse para iniciar cualquiel ftllX('idI1
de coccidn o limpie/._l.
Pantalla
Muestra la hoia del (t_a, la temperamni del homo,
si el homo es_ en el mode de horneado, de asar
a la parrilla o de antolimpieza y las horas establecidas
pa}_l el tempori/_ldor o las operaciones automfiticas
del homo.
Si una "F- y un numemo [etra" parpadeanen la pantalla y [as
so#ales de controlde/homo, esto indica un c6digode error de
la funci6n. Presioneel botdnClear/O_ Permitaque elhomoseenfrfe
duranteunahera.Pongaelhomonuevamenteen operacidn.Si elcbdigo
de errordela funci6nserepite,desconecteel cablede cordentedelhomo
y comun/quesecon elserviciode mantenimiaTto.
Si su homofee configurado para unaoperaci6n cmnometrada del
homo y se present6ena intermpci6n en el fleido electrico,
el relojy todas/asfuncionesprogramadas&ben restablecerse.
ta hera del dia (puedeset incorrecta) parpadear_en la pantalla
cuandose hayapresentadouna interrupci6n en el fluido
electrico.
0
0
0
0
e
0
0
BotSn Self Clean (Limpieza autom#fica)
Plesione para seleccionar la funcidn de autolimpie/_l.
Consulte la seccidn Use del homo autolimpieza.
Bot6nOvenLightOn/Off(Luzdelhomoencenfler/apagafl
Plesione para encender o apa_w la luz del homo.
Bot6n Delay Start (Inicio postergado)
Utilice itmto con los botones Cooking Time o Self
Clean pma coniigmm el homo pma fine inicie y
se detenga automfiticamente en el memento que
usted p1ogl:mle.
Bot6n Cooking Time(Tiempode cocci&)
Presione y luego presione los botones numdficos
para esmblecei la cantidad de tiempo que desea
cocinar sus alimentos. E1 homo se apagar:i
automfiticamente cuando se haya agotado
el tiempo de coccidn, a menos que se hava
configurado la flmcidn "Cook and Hold';
(Cocinar y mantener).
Bot6n Clear/Off
Presione para cancelar TOBASlas operaciones
del homo excepto el reloi y el tempori/_l(to_:
Bot6nClock(Reloj)
Plesione antes de configmar el tel@
Bomnes num&icos
Utilice pare configurar cualquier fimcidn que
necesite ndmeros come la hera del (t_a en el tel@
el temporizador, la temperamra del homo,
la tempemtura intema de la comida, la hoia
de inicio v la duracidn de la operacidn pa};l
el homemade cronometrado y la antolimpie/_.
Bot6n Kitchen Timer On/Off
(Temporizadorde cocina encender/apagar)
Presione pa}a seleccionar la ca}_cter&tica del
tempori/_dor
5
Usode los contro/esde/homo. (en a/gunos mode/os)
A Io lar#o de este manual,/as caracterfsticas y apariencia pueden variar con los de su mode/o,
e
_e,O /°°'°°"
G,oD 1
OT ,n £1:½
[,, Time J [._Start.) _-
_so_fq _ovenq
lean_ L Light )
' tor ® ....® ® ®
wer Ow_n
Hi/to
imeJ LstartJ ,_
@eJiq Covo,'_
leanj_ L Light_
I
@
Se muestra el control del homo doble.
Controldel homo,caracterfsticasy configuracionesdel reloj
(Clock)_orizador (Timer)
@
@
@
@
0
Bot6n Bake (Homeaflo)
Presione para seleccionar la fimcidn homeado. T,!
Bot6n Broil Hi/Lo(Asar a la Parrilla Alto/Bajo)
Presione para seleccionar la fimcidn asar
a la parrilla.
BotSn Self Clean (Limpieza autom#fica)
P}esione pa}a seleccionar ]a flulcidn de autolimpieza.
Consu]te la seccidn Usedel homo auto/impieza.
BotSn Start (Inicio)
Debe presionarse pma iniciar Ctlalqtlier ftlllCidI1 de
coccidn o limpie/_L
O
Bot6n Delay Start (Inicio postergado)
Utilicejtmt() con los botones Cooking Time o Se#
Clean pa}a configmm el homo pa}a que imcie v
se detenga automfiticamente en el momenta que
usted p1 ogl:lme.
Bot6n CookingTime (Tiempode cocci6n)
Presione este botdn y luego piesione los botones
+ v -de Hour (Hora) y Min (Min.) pani @_smr
lacantidad de tiempo que desea cocinar su comida.
E1 homo se apaga% automfiticamente cuando
se haya agotado el tiempo de coccidn, a menos
que se hava configtu:lch)la flmcidn "Cook and Hold"
(Cocinar y mantener).
Pantalla
Muestra la hoia del (t_a, la temperamni del homo,
si el homo es_ en el maria de horneado, de asar
a la parrilla o de autolimpie/_l y las horas establecidas
pa}}l el tempori/_dor o las operaciones atltOlilaticas
del homo.
Siuna"F-y ennhmeroo/etra"parpadeanenlapantal/ay
lasse#alesdecontroldelhomo,estoindica encMigo deerror
de lafenci6n.PresioneelbotdnClear/OffPermitaqueelhomo
seenfr/eduranteunahera.Pongaelhomonuevamenteenoperacibn.
Sielcbdigodeerrorde/afundbnserepite,desconecteelcablede
corrientedelhomoy cornunfqueseconelserviciodemantenimiento.
Sisehomofeeconfigeradoparaunaoperaci6ncmnometradadel
homoysepresent6enainterrupci6nenel fleidoelectrico,
elrelojy todaslosfuncionesprogramadasdebenrestablecerse.
ta heradeldia(peedeserincormcta)parpadear_en lapantalla
ceandosehayapresentadoenainterrupci6nenel fluido
electrico.
Bot6n Oven Light On/Off(Luzdel homo encenfler/apagar)
Presiorle para ellcellder o apagar la luz del }101"110,
O
O
O
e
0
Bot6n Clear/Off
Presione para cancelar TODASlas operaciones
del homo excepto el relpi y el temporiz_ldo_:
Botones + y- de Temp(Temp,)
Plesione estes botones para ;_!itlstar 1;4 telilpel;_tttlra de
coccidrl que desea usan
BoNn Clock(Reloj)
Plesione antes de configmar el tel@
Botones ÷ y- de Hour (Hera)y Min (Min.)
Presione estes botones pa}a @_star tiempos
de hasta 9 horas v 59 minutos; par eiemplo, la hora
del (ira en el tel@ el tempori/_ldoi; el comienzo v
la duracidn del tiempo de coccidn pa}_l el home'ida
cronometrado, v el comienzo v la (hmicidn del
tiempo de limpieza pal:l la limpie/_ automfitica.
Bot6n Kitchen Timer On/Off
(Temporizadorde cocina encender/apagar)
Presione pa}a seleccionar la (a}_cter&tica del
tempori/_dor
Configuracionesdecontroldelhomobferiorenbs modelosconperilla
Perilla OVEN (Homo)
(;ire esta perilla
basra la configuracidn
de temperamn_ que desee.
Laluz OvenCycle(Cicloc/elHomo)permaneceencendidahastaque
el homoa/canza/a ternperaturaseleccionada,y /uegoseapagay
enciendeconel(los)e/emento(s)c/elhomodurante/a coccibn.
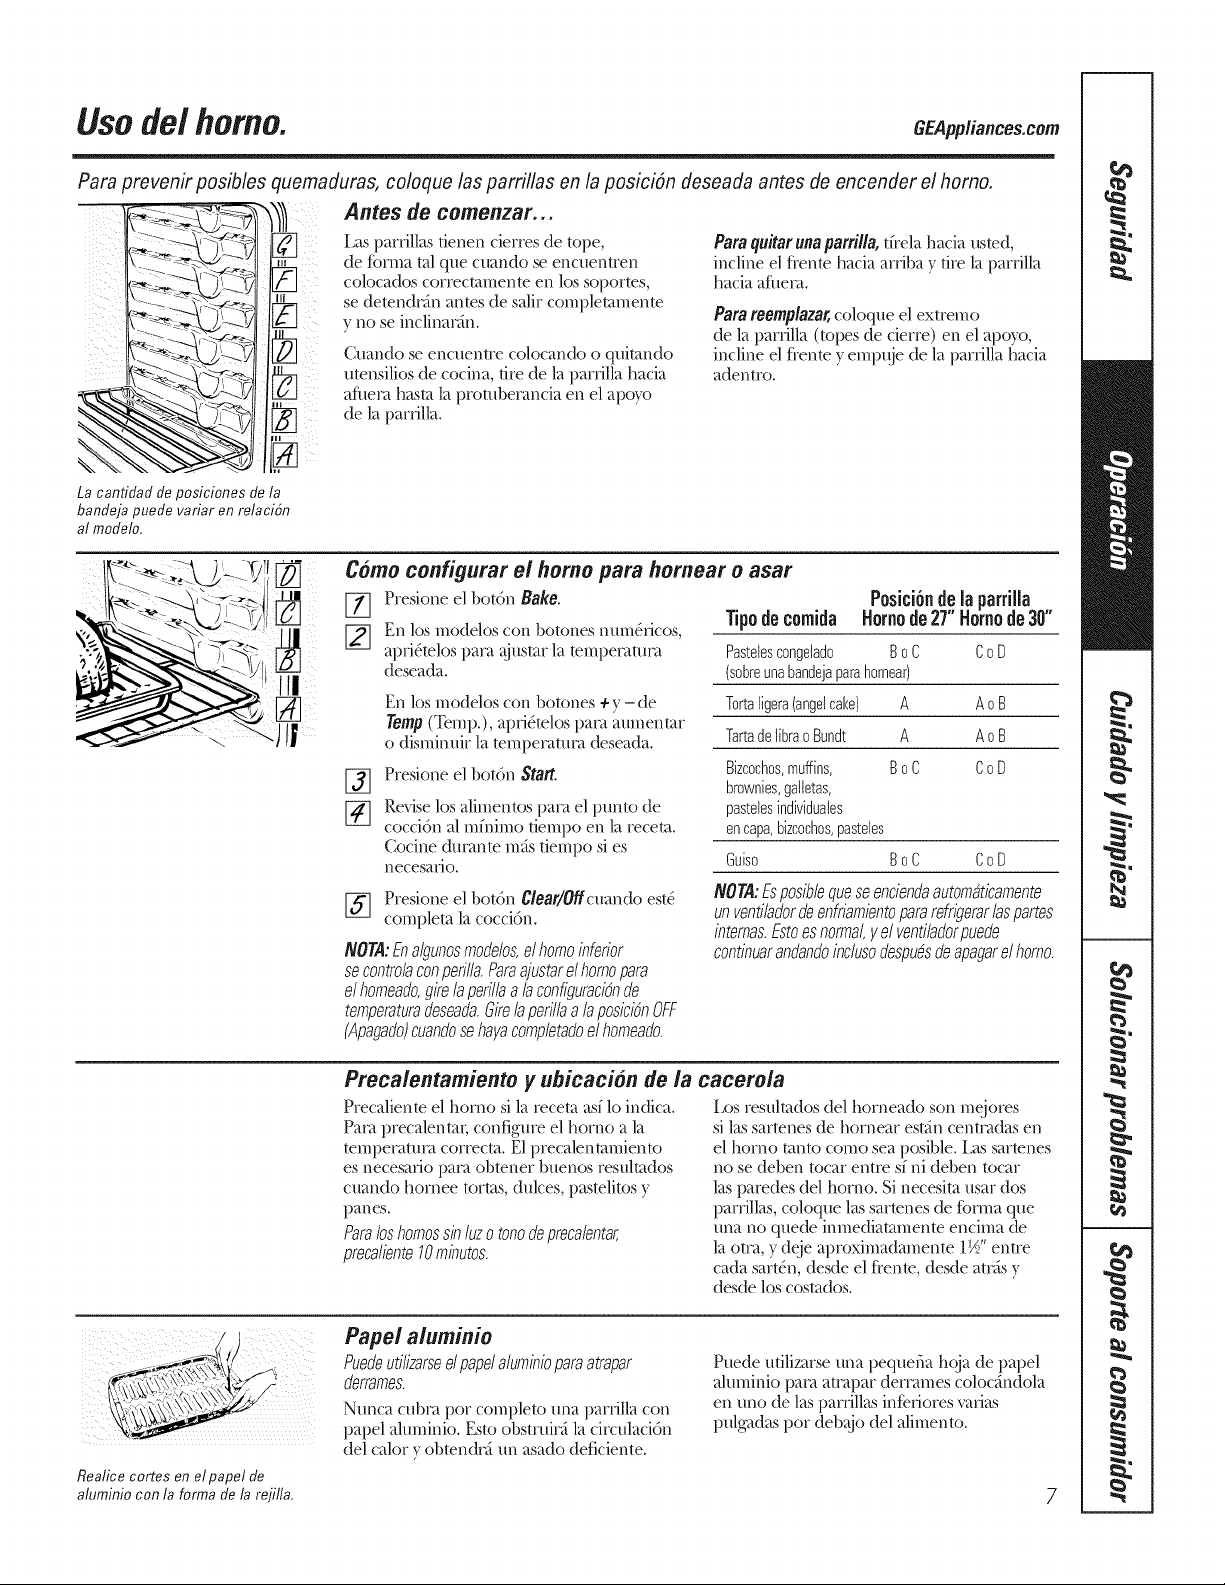
Pare prevenir posibles quemaduras, coloque Ins parrillas en la posici6n deseada antes de encender el horno.
Antes de comenzar...
I__._ I _ Laspardllas tienen cierresde tope, Pareqdtar.na patti//a,tfrela ha(in usted,
Ilk----_.<-,"_ _ -" II nf de fbnna tal qua cuando se encuentren incline el flente hacia arriba v tire la parrilla
_-_ colocados correctamente en los soportes, hacia aflm_>t.
se(le en(IF n.n es(les.liFco,nple .,nen e
I1_-.F_-_,<_---_ll I_--_ y no se inclimu'_n. Parereemp/azar,coloque el extremo
Cuando se encuentre colocan(kt o quitando
utensilios de co(inn, fire de la parrilla ha(in
aflm[>_ haste la prombe[>mcia en el apoyo
de la parrilla.
de la parrilla (topes de cierre) en el apoy'o,
incline el ffente y emp/ge de la pardlla hacia
adentro.
La cantiflafl de posiciones de la
banfleja puefle verier en relaciSn
al moflelo,
III ¸
C#mo configurar el homo pare homear o asar
1_ Presione el bot6n Bake. P0sici0nde la parriiia
En los modeloscon botones num_.ficos, Tipodecomida H0m0de27"H0m0de30"
apd_telos pant _Oustarla tempenmmt Pasteiescongetado BoC CoD
deseada. (sobreunabandejaparahornear)
%
En los modelos con botones ÷ y - de
Temp (Temp.), apd_telos pant aumentar
o dismimdr la tempecamca deseada.
Presione el bot6n Start.
Revise los alimentos pant el punto de
cocci6n al mfnimo tiempo en la re(eta.
Cocine dunmte m_s tiempo si es
necesalio.
[_ Presione el bot6n Clear/Ofcuando est4
completa la cocci6n.
NOTA:Enalgunosmodelos,el homoinferior
secontrolaconperilla.Pareajustare/homopare
el homeado,girelaperillaala configuraci6nde
temperaturedeseada,girelaperillaala posici6nOFF
(Apagado)cuandose hayacompletadoel homeado.
Torteligera(angelcake) A AoB
TartadelibraoBundt A AoB
Bizcochos,muffins, BoC CoD
brownies,gatletas,
pastetesindividuales
encapa,bizcochos,pastetes
Guise BoC CoD
NOT.d:Esposiblequeseenciendaautomaticamente
un ventiladordeenfriamientoparerefrigerar/aspartes
internes.Estoesnormal,y el ventiladorpuede
continuerandandoinclusodespudsdeapagarelhomo.
Preea/entamiento y uhicaeion de/a eaeero/a
Precaliente el homo si la re(eta asf lo indica.
Paca precalentah configure el homo a la
tempenmm_ correcta. E1precalentamiento
es necesafio paca obtener buenos resul/ados
cuando homee tortes, dulces, pastelitos y
panes.
Pareloshomossinluzo tonodeprecalentar,
precaliente10minutos.
[z)s resulmdos del bomeado son mejores
si lassarmnes de homear est>h]centcadas en
el homo mnto como sea posible, i.as sarmnes
no se (leben to(at entre sf ni (leben to(at
las paredes del homo. Si necesim usar (los
pamllas, coloque las sarmnes de fbm]a que
una no quede inmediammenm encima &
la otca, y deje aproximadamente 1½" entre
cada sart_n, desde el flenm, desde au-asy
desde los cosmdos.
Realice cortes en el papel de
aluminio con la forma de la refill&
Pape/ aluminio
Puedeutilizarseelpapelaluminiopare atrapar
derrames.
Nunca cubnt pot completo una pamlla con
papel aluminio. Esto obstruicAla circulaci6n
del calory obtendca un asado deficiente.
Puede udlizarse una pequefia bcoa de pal)el
aluminio pace atntpar den'ames coloc_ndola
en uno de las parrillas inDfiores varies
pulgadas pot deb@t del alimento.
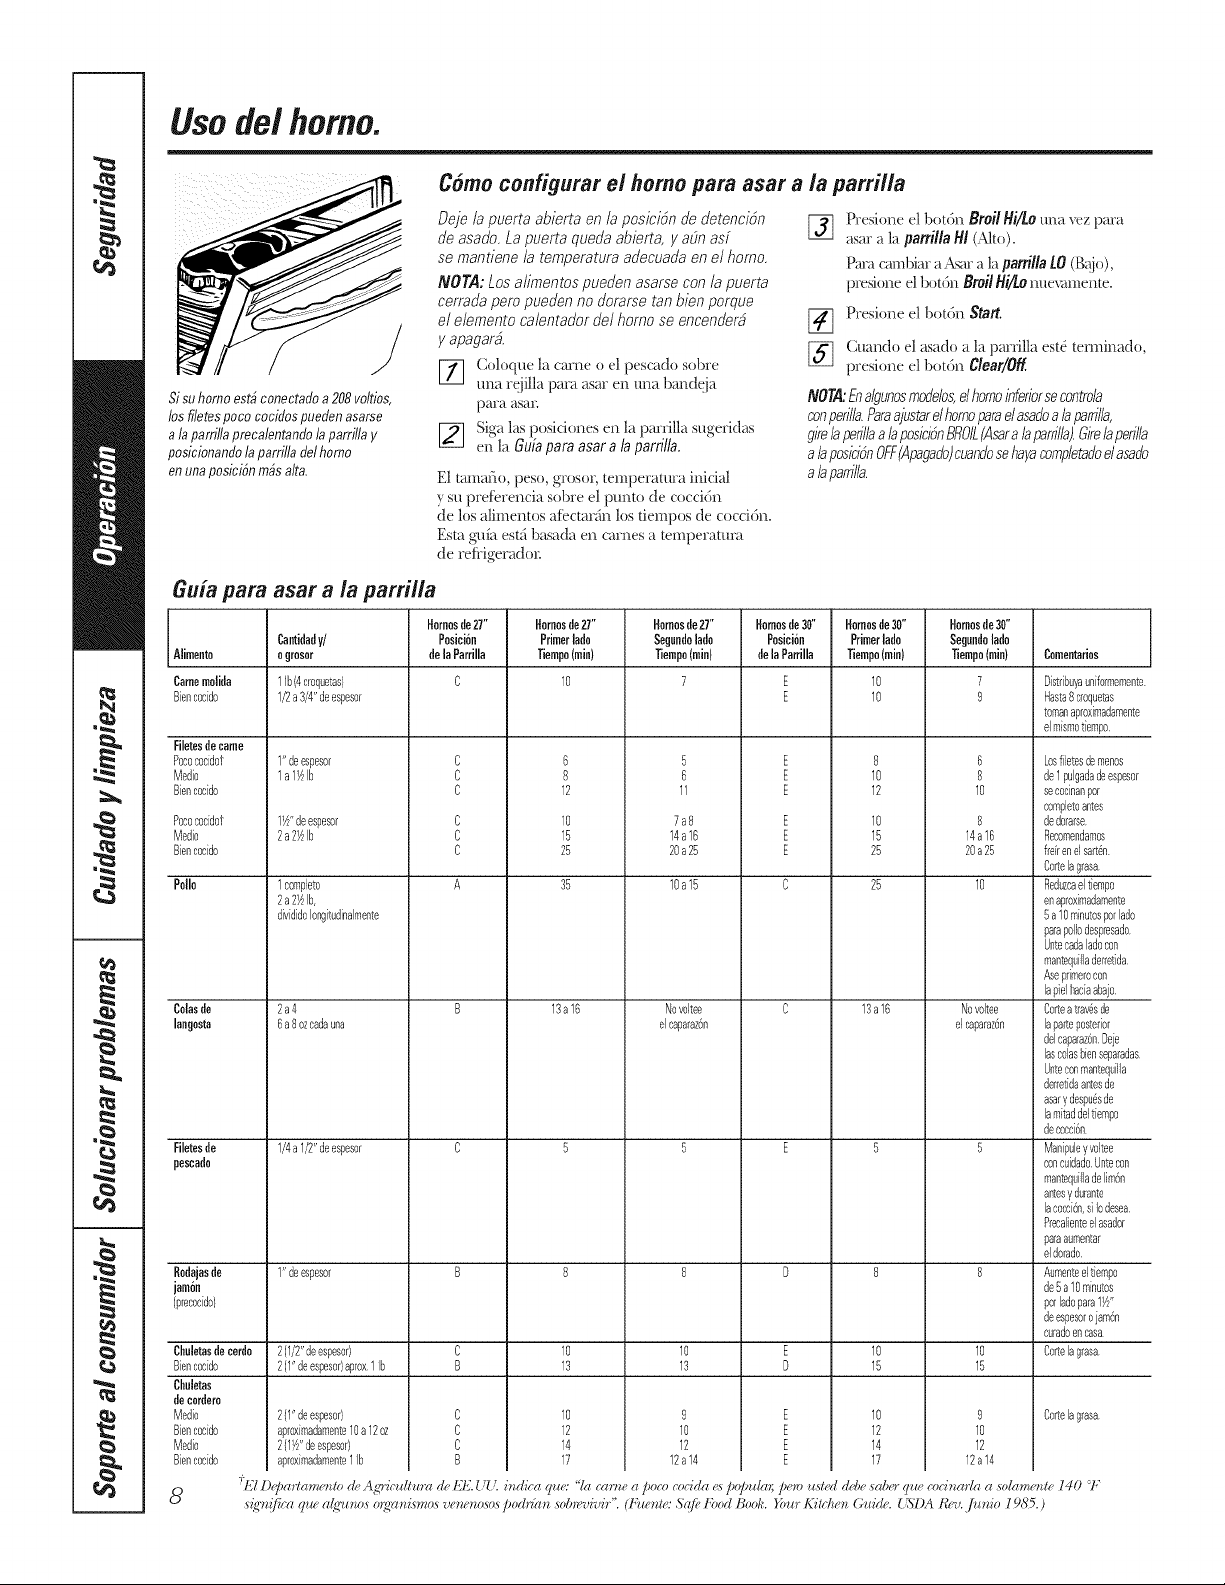
Usode/homo.
Como configurar el homo para asar a la parrilla
/
Sisu homo est& conectado a208 vo/tios,
los fi/etes poco cociflos pueden asarse
a/a pardlla preca/entando /a parfilla y
posicionando /a parfilla de/homo
en una posicbn m&s a/ta.
Deje la puerta abierta en la posicibn de detencibn
de asado. La puerta queda abierta, y aEmasf
se roantiene la teroperatura adecuada en el homo.
NOT.d: Los aliroentos pueden asarse con/a puerta
cerrada pero pueden no dorarse tan bien porque
el eleroento calentador de/homo se encenderb
y apagarb.
E_] oloque la came o el pescado sol)re
m_a r@lla para asm" en mm band_ja
paya asan
[_ iga las p()siciones erl la parrilla sugeridas
en la Gub para asar a b parrilb.
E1 tamafio, peso, grosor, temperature inicial
y su preieiencia sobre el ptmto de coccidn
de los alimentos aiectar:ha los tiempos de coccidn.
Esta gufa estfi basada en carnes a temperamra
de leffigerado_:
%
Presione el botdn BroilHi/iotma xez pare
asar a la parrilla/-//(Nto).
Pare cambiar a A_ara la parrillalO (B@O,
presione el botdn BroilHi/Lom_ev4merlte.
[_] Plesione el botdn Start.
[_ ;uando el asado a la parrilla est_ terminado,
[xesione el bot6n Clear/Off
NON: Enalgunosmodebs,e/homoinferiorsecontrob
conper@.Paraajustarelhomoparaelasadoalaparrilla,
girelaperillaalaposici@BROIL(Asaralaparr@),girelaperilla
alaposiciOnOFF(Apagado)cuandosehayacompletadoelasado
alaparnTla.
Guia pare asar a ia parrilla
Hornosde2T' Hornosde2T' Homesde2T' Homesde30" Homesde30" Homesde30"
Cantidady/ Posicirn Primerlade Segandolade PosMrn Primerlade Segandolade
Aiimento ogrosor delaParrilla Tiempo(rain) Tiempo(rain) delaParrilla Tiempo(rain) Tiempo(rain) Comentarios
Caraemolida 1 Ib(4croquetas} C 10 7 E 10 7 Distribuyauniformemente
Biencocido 1/2a3/4"deespesor E 10 9 Hasta8croquetas
romanaproxirnadamente
elmisrnotiernpo
Filetesdecame
Pocococidot
Medio
Biencocido
Pocococidot
Medio
Biencocido
Polio
Colasde
langosta
Filetesde
mseado
1"deespesor
lal_lb
1½"deespesor
2a2½1b
1completo
2a2½1b,
dvididoIongitudinalmente
2a4
6 a8 ozcadauna
1/4a 1/2"deespesor
C
C
C
C
C
C
6
8
12
lO
15
25
13a16
5
6
11
7a8
14a18
20a25
10a15
Novoltee
elcaparazdn
E
E
E
E
E
E
8
10
12
lO
15
25
25
13a16
6
8
10
8
14a16
20a25
Rodajasde 1"deespesor B 8 8 D 8 8
am6n
(precocido}
2(1/2"deespesor) C 10 10 E 10 10
2(1"deespesor)aprox1Ib B 13 13 D 15 15
E
E
E
E
2(1"deespesor)
aproximadamente10a 12oz
2(17±"deespesor)
aproxirnadamente1Ib
Chuletasdecerdo
Biencocido
Chaletas
decordero
Medio
Biencocido
'_.4edio
Biencocido
8
9
10
12
12a14
lO
12
14
17
lO
12
14
17
C
C
C
B
Novoltee
elcaparazdn
9
10
12
12a14
Losfibresdemenos
de1pulgadadeespesor
secocinanpor
completoantes
dedorarse
mecomendarnos
frdrenelsart6n
Cortelagrasa
aeduzcaeltiempo
enaproximadamente
5a10minutospotlado
parapoliodespresado
Untecadaladocon
mantequilladerretida
Aseprimerocon
lapielhaciaabajo
Corteatrav6sde
laparteposterior
delcaparazdnUeje
lascolasbienseparadas
Unteconmantequilla
derretidaantesde
asary despa_sde
lamitaddeltiempo
decocci6n
Manipuley voltee
concuidadoUntecon
mantequilladelim6n
antesydurante
lacocci@,siIo@sea
Precalienteelasador
paraaumentar
eldorado
Aumenteeltiempo
de5 a 10minutos
potladopara17/'
deespesoro jam6n
curadoencasa
Cortelagrasa
Cortelagrasa
-'[t_21l)(j)arlame_do de Agdc_dhtra de t@2 _ zU. i_zdica q_te: "[a carlze a poco cocida (<_/)@_da) /)(m_ _t,_l#ddd)e sabc.r q_(e coci_zar[a a so[ame_de 140:2;
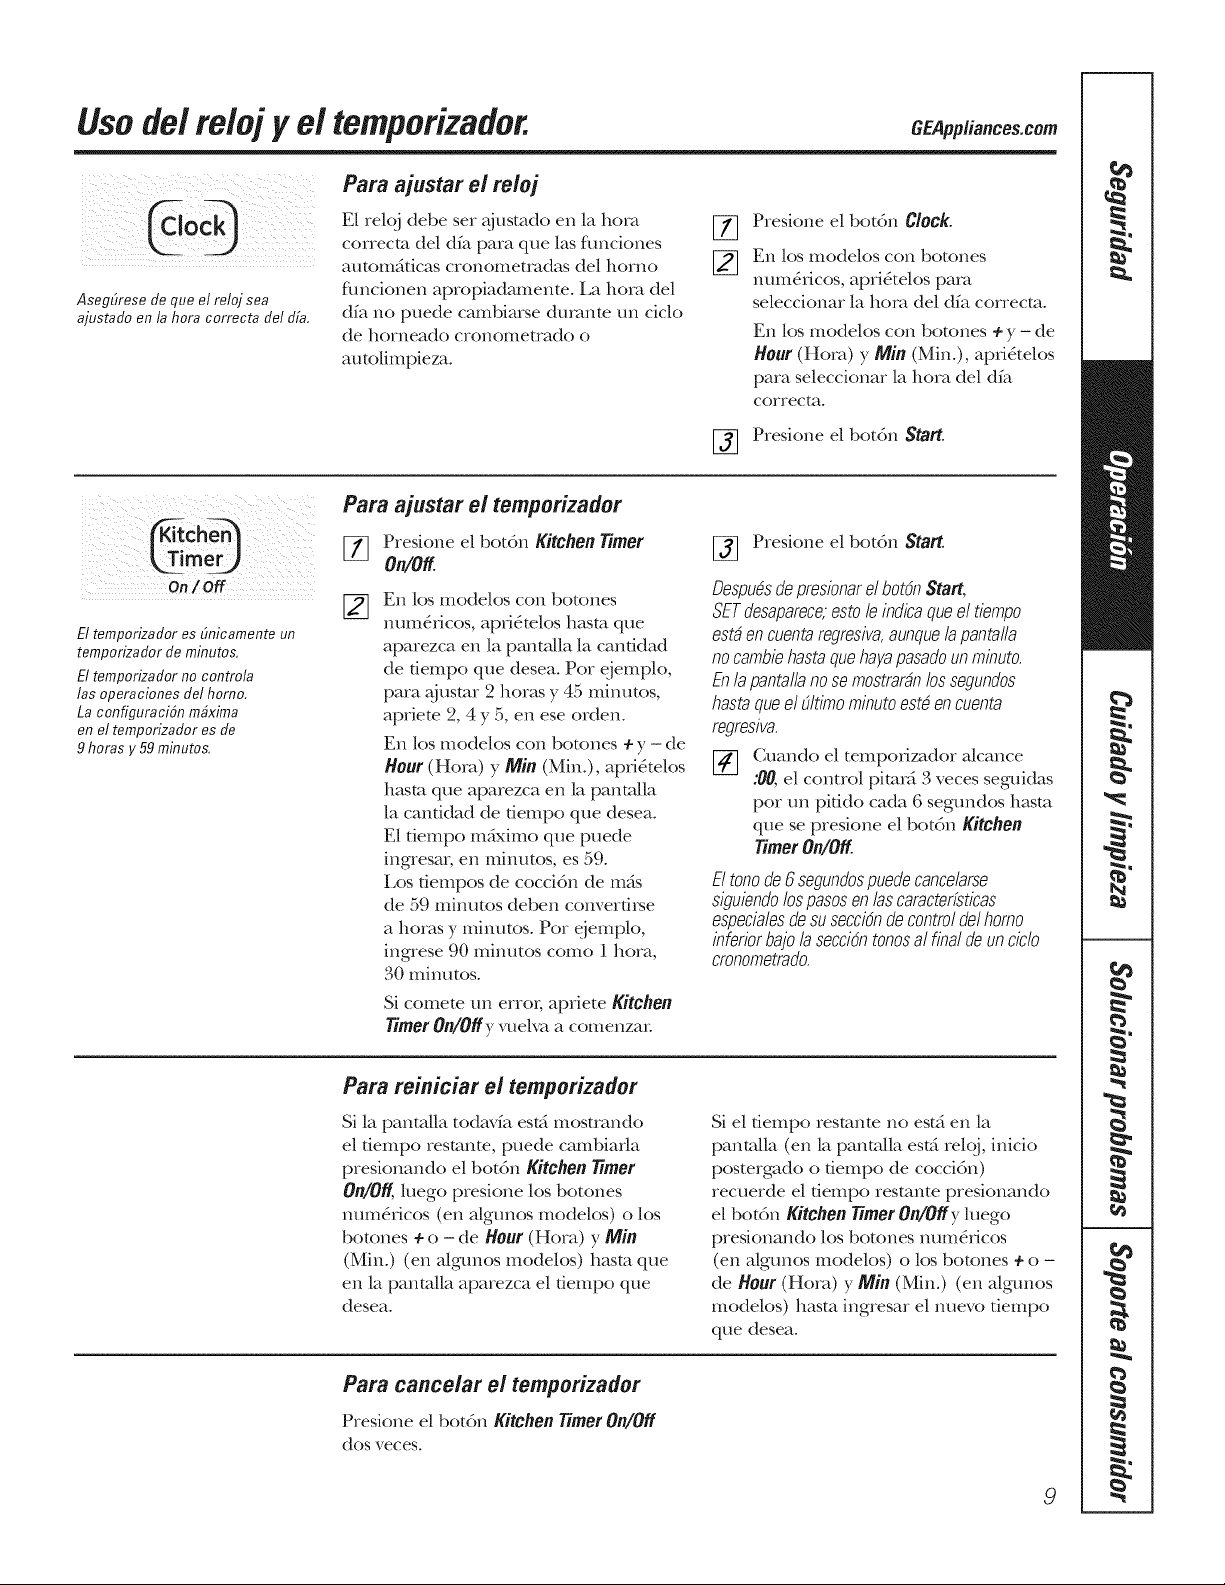
Use de/reloj y el temporizador. C ap..ance .com
AsegEJresefie que el reloj sea
ajustado en la hera correcta del d[a.
Para ajustar el re/oj
E1 reloj debe set @_smdo en la hera
correcm del dfa para que hs flmciones
autom_idcas cronometradas del homo
flmcionen apropiadamente. La hera del
dfa no puede cambiarse durante un ciclo
de horneado CionolIlelTt-tdo o
autolimpieza.
%
Presione el bot6n ({/0ok.
Ell los Illodelos con botones
nmn&icos, apri&elos para
seleccionar la hera del dfa correcm.
En los modelos con botones ÷ y - de
Hour (Hera) y Min (Min.), apfi&elos
para seleccionar la hera del dfa
correcm.
[_ Presione el botdn Start°
£U tT; ¸
[._T_!mer)
On/Off
El temporizador es Emicamente un
temporizador de minutes.
El temporizador no controla
las operaciones del homo,
La configuraci6n mgxima
en el temporizador es de
9 horas y 59 minutes.
Para ajustar el temporizador
[_ Presione el botdn Kitchen timer
On/Off.
[]
En los modelos con botones
num_.ficos, apfi_.telos hasm que
aparezca en la panudla la canudad
de fiempo que desea. Per eiemplo,
para _j usmr 2 horas y 45 minutes,
apriem 2, 4 y 5, en ese orden.
En los modelos con botones + y - de
Hour (Hem) y Min (Min.), apfi&elos
hasm que aparezca en la panmlla
la canfidad de dempo que desea.
E1 fiempo m_iximo que puede
ingresm; en minutes, es 59.
Los fiempos de coccidn de m_is
de 59 minutes deben converdi_e
a horas y mimm_s. Pot ejemplo,
ingrese 90 minutes come 1 hera,
30 minutos.
Si comete un err(n; apriete Kitchen
timer On/Offy xamlva a comenzar
[_ Presione el botdn Start°
DespudsdepresionarelbotdnStart,
SETdesaparece,estoleindicaqueeltiempo
estdencuentaregresiva,aunquelapantalla
nocambiehastaquehayapasadounminute.
Enlapantallano semostrardnlossegundos
hastaqueel 91timeminuteestden cuenta
regresiva.
[_ Cuando el tempofizador alcance
:00,el control pimrd 3 veces seguidas
per un piudo cada 6 segundos hasm
que se presione el bot6n Kitchen
rimer On/Off.
Eltonede6segundospuedecancelarse
siguiendolospasosenlascaracterfsticas
especialesdesuseccidnde controldelhomo
inferiorbajolaseccidntonesal finalde unciclo
cronometrado.
Para reiniciar el temporizador
Si la panudla todavfa est;i mosuando
el fiempo resmnte, puede cambiafla
presionando el bot6n Kitchen timer
On/Off, luego presione los botones
mm).&icos (en aigtmos modelos) o los
botones ÷ o - de Hour (Hera) y Min
(Min.) (en a/gtmos modelos) hasm que
en la pantalla aparezca el fiempo que
desea.
Si el fiempo resmnte no est_ en la
pantalla (en la pantalla est;i reloj, inicio
postergado o fiempo de coccidn)
recuerde el fiempo resmnte presionando
el botdm Kitchen rimer On/Off y luego
presionando los botones num_.ficos
(en algunos modelos) o los botones + o -
de Hour (Hera) y Min (Min.) (en a[gtmos
modelos) hasm ingresar el nuevo fiempo
que desea.
Para cancelar el temporizador
Presione el botdn Kitchen timer On/Off
dos veces.
9
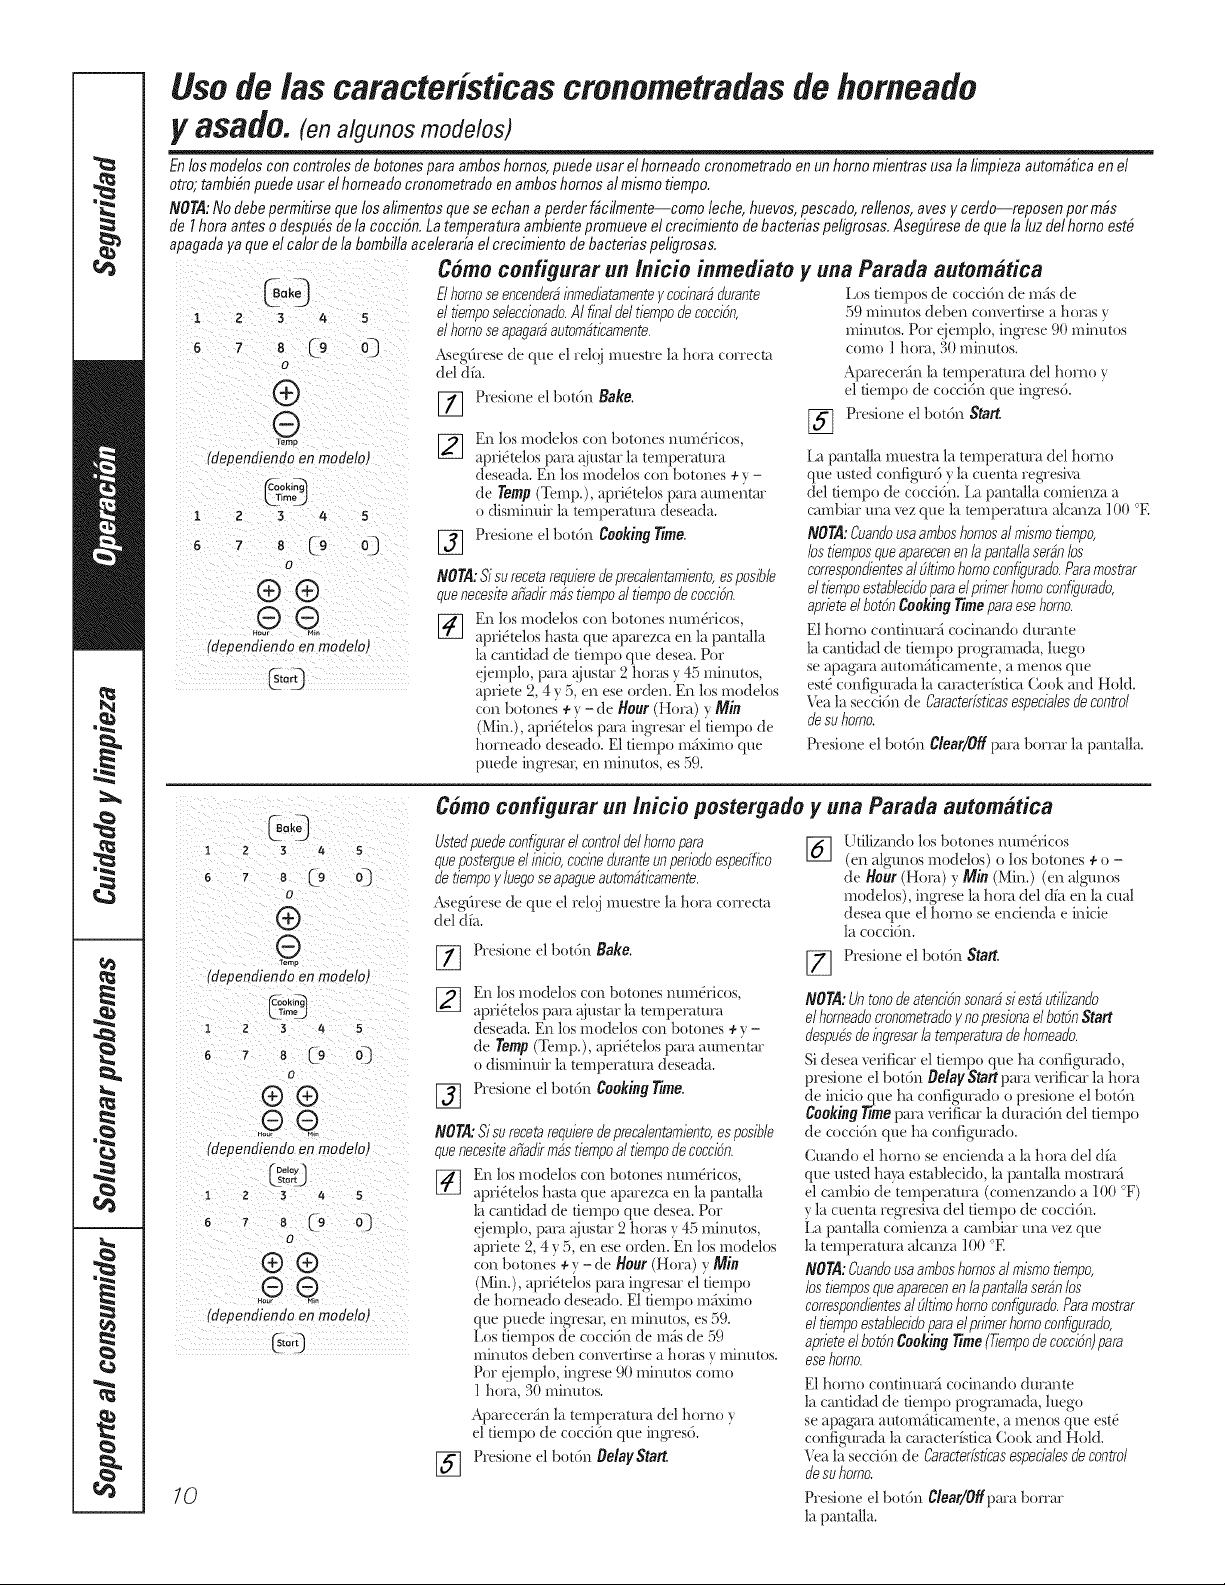
Use de/as caracteristicas cmnometradasde homeado
y asad&(en algunos modelos)
En los moflelos con controles de botones pare ambos hornos, puede usar el horneado cronometrado en un homo mientras usa la limpieza autom#tica en el
otto; tambi#n puefle usar el horneado cronometrado en ambos homes al mismo fiempo.
NOTA:No flebe permitirse que los alimentos que se echan a pettier f#cilmente--como leche, huevos, pescado, re#enos,aves y cerflo--reposen per m#s
de I hera antes o flespu#s de la cocciSn.La temperature ambiente promueve el crecimiento de bacterias peligrosas. Aseg(irese de que la luz fiel homo est#
apagada ya que el calor de la bombilla aceleraria el crecimiento de bacterias peligrosas.
Come configurar un Inicio inmediato y una Parade automatica
(dependiendoen modelo)
1 2 3
Sour M{n
(dependiendo en modelo)
Elhomose encenderbinmediatamaTtey cocinarbdurante
el tiemposeleccionado.AI final deltiempode coccibn,
el homoseapagarbautombficamente.
Aseg(lrese de que el relQi i:ouestre ]a hora correcta
del (tf_l.
[] Plesione el botdn Bake.
En los IllOdelos coil 1)()t()iles mlmdricos,
apridtelos para @_star la tempeiamra
deseada, en los modelos con botones ÷_ -
de Temp (Temp.), apri_telos pare aumeiktar
o disminuir la tempeiamra deseada.
[] Plesione el botdn Cooking rime.
NOT,d: Sisu recetarequieredeprecdaTtamiento,esposib/e
quenecesitearia& robstiempoal tiempode coccibn.
[_ ll los modelos cor_ bOtOlleS llllIIlericos,
apri_telos haste que aparezca en la pantalla
la cantidad de tiempo que desea. Poi
eiemplo, pm:l @_star 2 horasy 45 minutes,
apriete 2, 4 y 5, en ese olden. En los modelos
con botones + v - de Hour (Hole) y Min
(Min.), apiKteios pm:_ ingi esar el tiempo de
horneado deseado. E1 tiempo mfiximo que
puede ingn'esar, en minutes, es 59.
%
Los tiempos de coccidn de mils de
59 minutes (leben convertirse a hol;ls v
minutes. Per eiemplo, ingrese 90 minutes
come ] hole, 30 minutes.
Aparecer_n la tempeiatm;l del homo v
el tiempo de coccidn que ingresd.
Presione el botdn Start.
i ,apantalla muestia la temperature del homo
que usted configurd y la cuenta reg_ esix_i
del tiempo de coccidn, i ,a pantalla comienza a
cambiar tma xvz que la temt)eiaUn_l alcanz_1100 E
NON: Cuandousa amboshomesal mismotiempo,
los tiemposqueaparecenen /apanta//aserbnlos
correspondiaTtesal #/timohomoconfigurado.Paremostrar
el tiempoestab/ecidopare elprimerhomoconfigurado,
aprieteel bot6nCooking Timepareese homo.
E1 homo contintmr;_ cocinando dm ante
la cantidad de tiempo programada, luego
se apagara antomfiticamente, a mends que
est_ configurada la cal;lctei fstica Cook and Hold.
Vea la seccidn de Caracterfsticasespecialesdecontrol
desu homo.
Presione el botdn Clear/Off pm _lbenin la parLtalla.
IO
1 2 3 4 5
7 8 Cg 03
o
®
®
Temo
(dependiendo en modelo)
Cooking
1 2 3 4 5
_ 8 L9 Q
0
®®
(dependiendo en modelo)
Deloy
1 2 3 /4 5
d
®®
(dependiendoen modelo)
G,° O
Come configurar un /nicio postergado y una Parade automatica
Ustedpuedeconfigurarel controldelhomopare
quepostergueel inicio,cocineduranteunperiodoespecffico
de tiempoy /uegoseapagueautombticamente.
Asegdrese de que el reh!i muestre la hera correcta
del (till.
Presione el botdn Bake.
%
Ell los IllOde]os COil botOileS llUIIlel'iCos,
apri_telos pma @_star la tempeiatura
deseada. Ell los modelos con botones ÷ v -
de Temp (Temp.), aprKtelos para aumeI_tm
o disminuir la tempeiamra deseada.
Presione el botdn Cooking Time.
NOTA:Si surecetarequieredepreca/entam/ento,esposib/e
quenecesMaria& robstiempoal tiempode coccibn.
Ell los nlodelos COil bo[olleS lllllilelicos_
apri_telos haste que aparezca en la pantalla
la cantidad de tiempo que desea. Poi
eiemplo, pm:l @_smr 2 horasy 45 minutes,
apriete 2, 4 y 5, en ese olden. En los modelos
con botones + v - de Hour (Hole) y Min
(Min.), aprKteios pa_ ingresar el tiempo
de hoiaeado deseado. E1 tiempo m_iximo
que puede ingresai; en minutes, es 59.
i ,os tiempos de coccidn de mils de 59
minutes (leben corn eiti_e a holes v minutes.
Per eiemplo , ingnese 90 minutes come
] hera, 30 minutes.
Apareceifn la tempeiamra del homo v
el tiempo de coccidn que ingresd.
_] Plesione el botdn Delay Start.
[_] tilizando los botones hum&ices
(en algunos modelos) o los botones ÷ o -
de H0ur (Hera) y Mla (Mill.) (en algunos
modelos), inglese la hera del dfa en la cual
desea que el homo se encienda e inicie
la coccidn.
[_ Plesione el botdn Staff.
NOTA:Untonede atencibnsonarbsi estbutilizando
el horneadocronometradoyno presionaelbotbnStart
flespubsde ingresar/a temperaturede homeado.
Si desea xerificm el tiempo que ha configurado,
presione el botdn Delay Start i)ara xeiificar la hera
de inicio que ha configurado o presione el botdn
Cooking Time pare xerificar la duracidn del tiempo
de coccidn que ha configurado.
Cuando el homo se encienda ala hera del (t_:_
que usted haya esmblecido, la pantalla mostiar_
el cambio de temperature (comem'_mdo a ]00 F)
v la cuenta regresix:t del tiempo de coccidn.
,a pantalla comienz_ a cambiar tma xvz que
la temperature alcanza 100 E
NON: Cuandousa amboshomesal mismotiempo,
los tiemposqueaparecenen /apanta//aserbnlos
correspondia_tesal #ltimohomoconfigurado.Paremostrar
el tiempoestab/ecidopare elprimerhomoconfigurado,
aprieteel botbnCooking Time(Tiempodecoccibn)pare
esehomo.
E1 homo continuar_i cocinando durante
la cantidad de tiempo programada, luego
se apagm_ autom_iticamente, a mends que est_
configurada la cm:_ctei fstica Cook and Hold.
Vea la seccidn de Caracterfsticasespecialesdecontrol
desu homo.
Presione el botdn Clear/Off pare borrm
la pantalla.
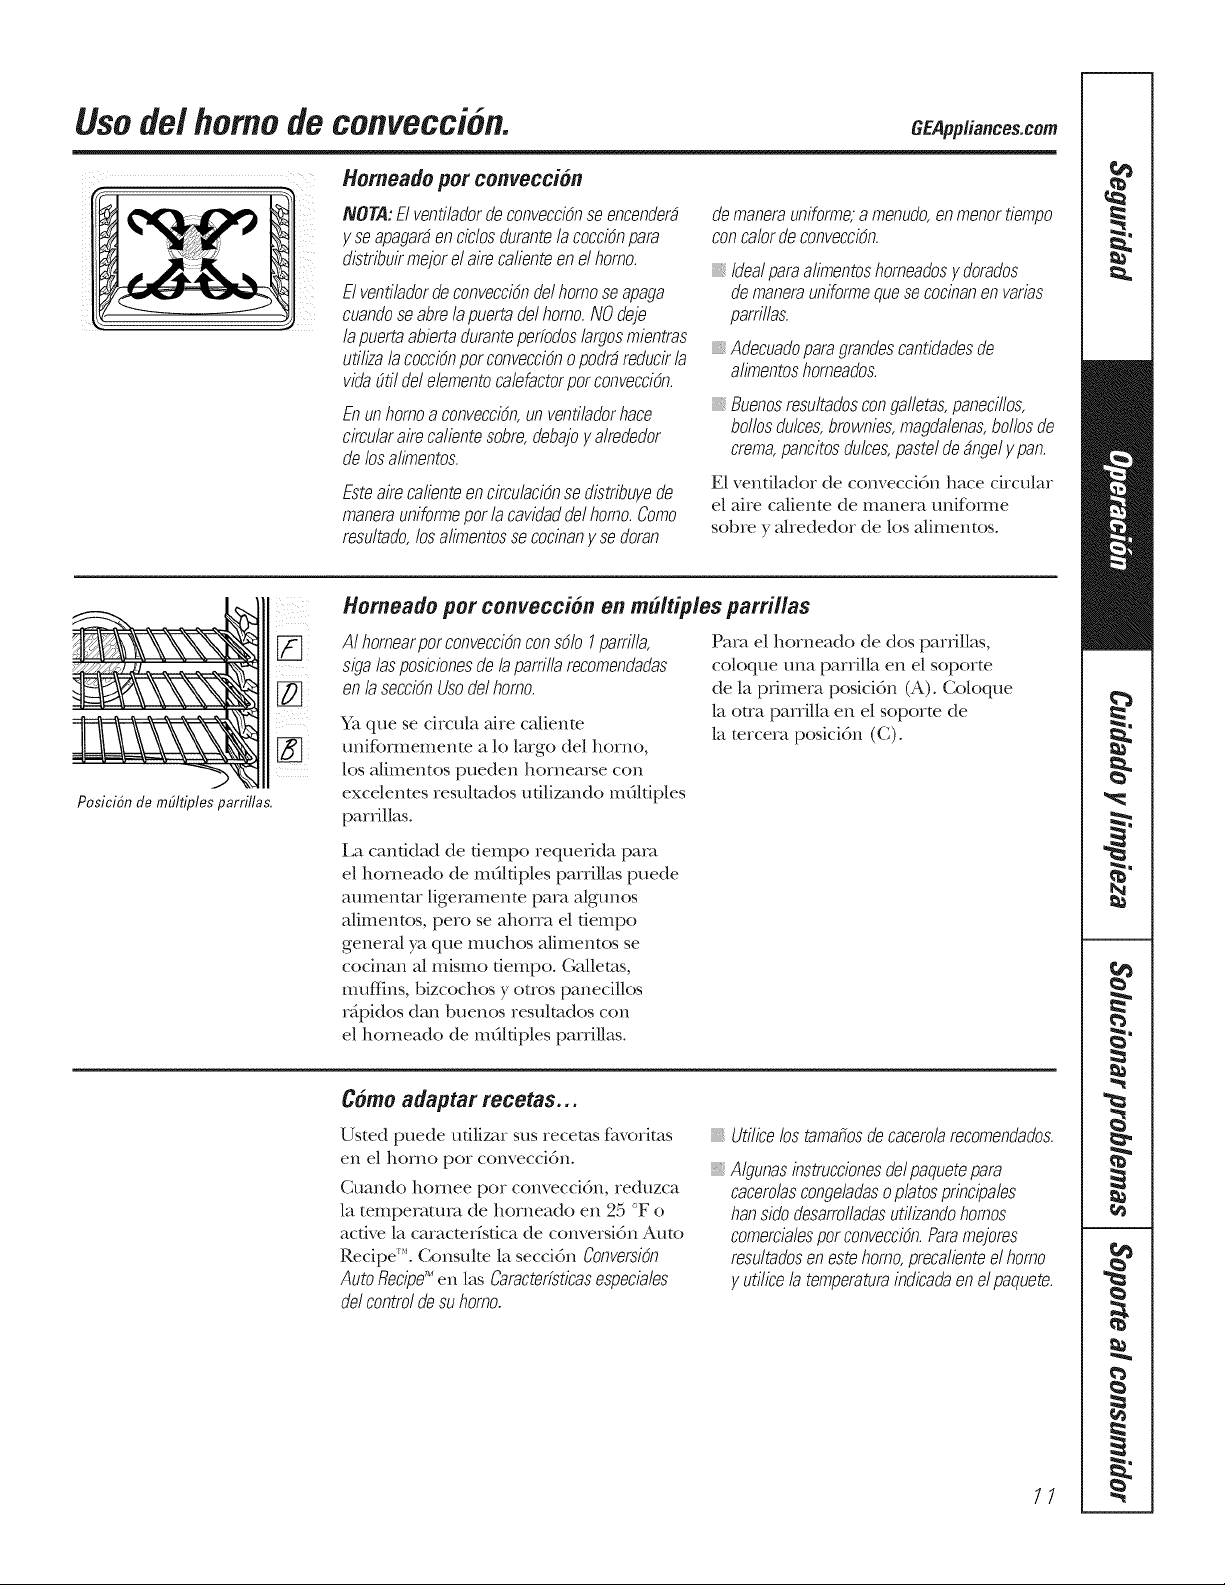
Usode/homo de convecci n.
Homeado pot conveccion
NOTA:Elventi/adorde convecci_nseencender_
y seapagar_en ciclosdurantela cocci6npara
distribuirmejorelairecalienteenel homo.
ElvenfiladordeconvecciOndel homose apaga
cuandoseabrelapuertadelhomo.NOdeje
lapuertaabiertaduranteperfodoslargosmientras
ufilizala cocciOnpor convecciOno podrdreducirla
vida_fil delelementocalefactorporconvecciOn.
EnunhomoaconvecciOn,unventiladorhace
circularaimcalientesobre,debajoy alrededor
delosalimentos.
EsteaimcalienteencirculaciOnsedistribuyede
manerauniformeporla cavidaddelhomo.Como
resultado,losalimentossecocinany sedoran
demanerauniforme;a menudo,enmenortiempo
concalordeconvecciOn.
Idealparaaliroentoshomeadosy dorados
demanerauniformequesecocinanenvarias
parrillas.
Adecuadoparagrandescantidadesde
alimentoshomeados.
Buenosresu/tadosconga//etas,paneci//os,
bollosdulces,brownies,magdalenas,bollosde
crema,pancitosdulces,pasteldedngely pan.
E1 venfilador de convecci6n hace circular
el aire cafiente de manera tmifbmle
sobre y ahededor de los aUmentos.
Posici6n de mbltiples parrillas.
iiii
Homeado per convection on m#/tip/es parri//as
AI homearporconvecciOnconsolo I parrilla,
sigalasposicionesdelaparrillarecomendadas
enlasecciOnUsodelhomo.
Ya que se circula ahe caliente
uniffwmemente a lo largo del homo,
los afimentos pueden hornearse con
excelemes resultados ufilizando mfilfiples
parnllas.
Para el horneado de dos panillas,
coloque una parrilla en el soporte
de la piimera posici&n (A). Coloque
la otra parrilla en el soporte de
la tercera posici6n (C).
i,a canddad de fiempo requedda pare
el horneado de mfildples parrillas puede
aumenmr ligeramenm pare algunos
Nimentos, pero se ahorm el fiempo
generN ya que muchos Nimentos se
cocinan N mismo fiempo. (;alletas,
muffins, bizcochos y ouos panecillos
r_pidos dan buenos resulmdos con
el horneado de mdldples parrillas.
Como adaptar recetas...
Usted puede ufilizar sus recetas f_tvorims
en el homo pot conveccidn.
Cuando hornee pot conveccidn, reduzca
la temperature de horneado en 25 °F o
active la caracmrfsfica de conversidn Auto
Recipe _'. Consulte la seccidn ConversiOn
Auto Recipe'_en las Caracterfsticasespeciales
del control de su homo.
Utilicelos tamafiosdecacerolarecomendados.
_,Algunasinstruccionesdelpaquetepara
cacerolascongeladasoplatosprincipales
hansidodesarrolladasutilizandohomos
comercialesporconvecciOn.Paramejores
resultadosen estehomo,precalienteel homo
y utilicelatemperaturaindicadaenelpaquete.
11
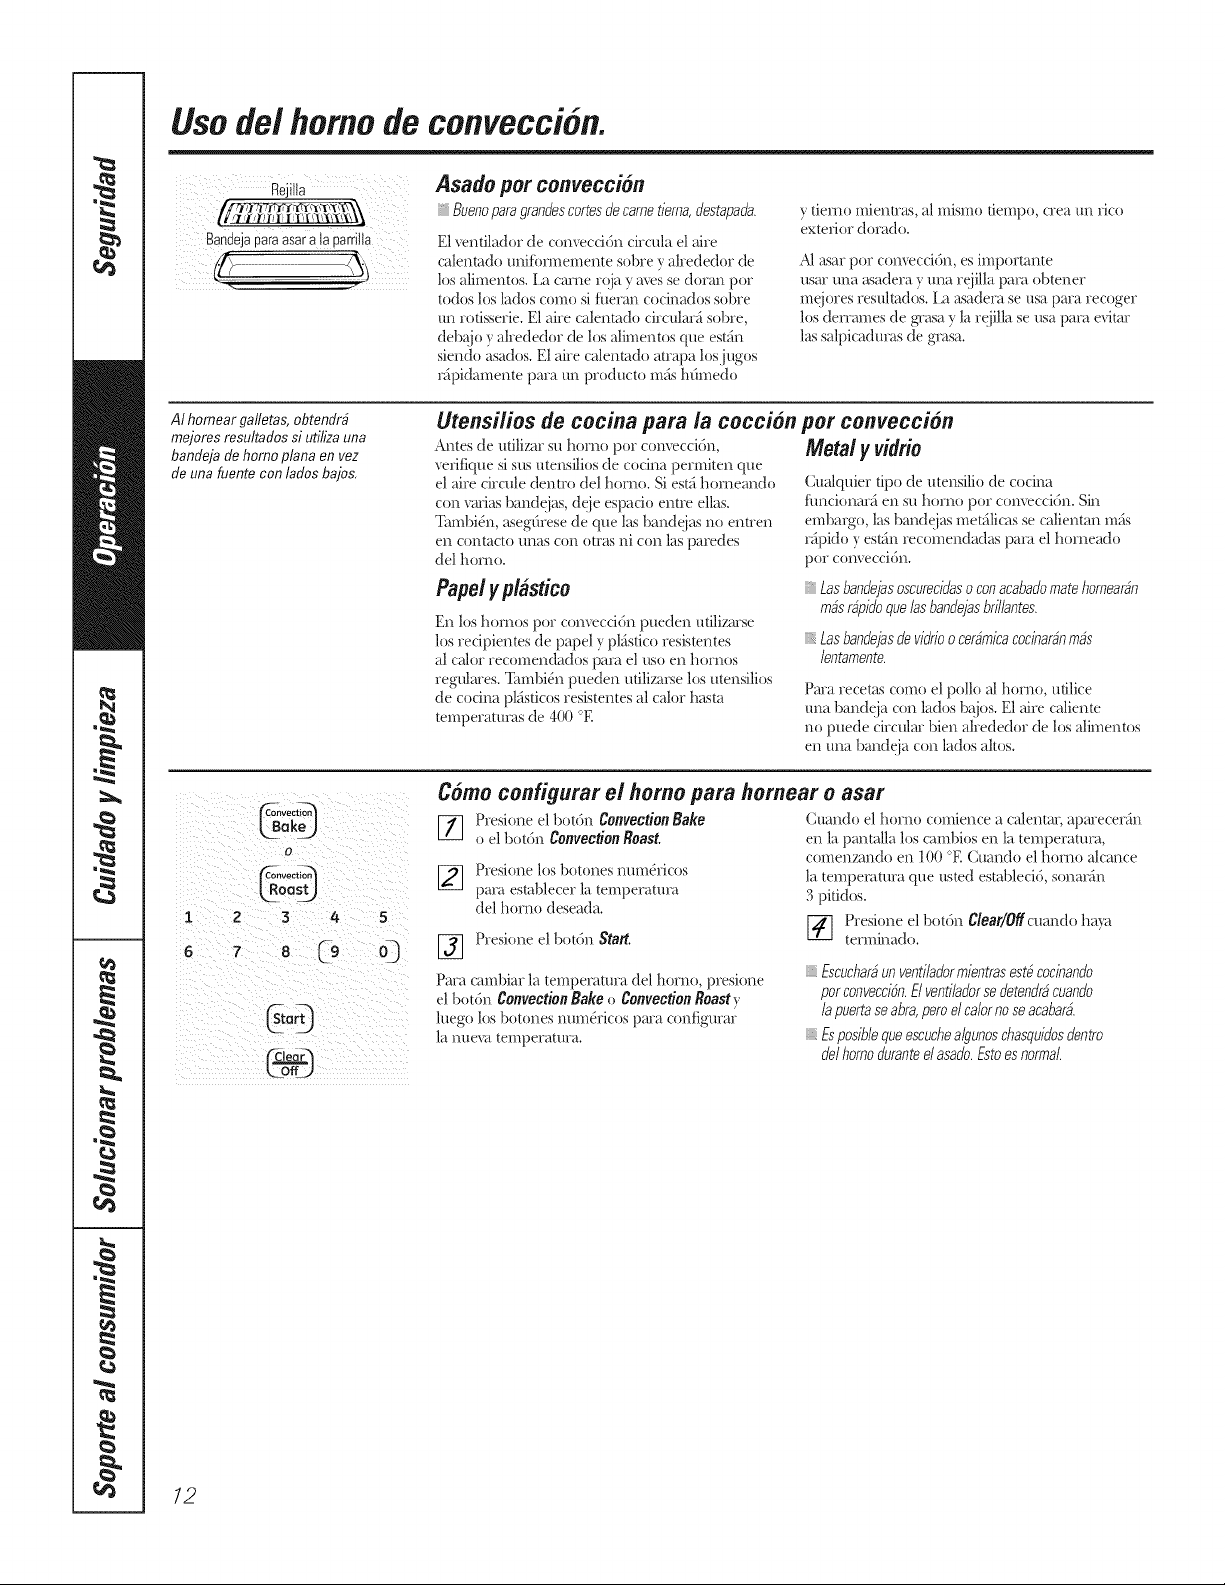
Use de/homo de convecci n.
Rejilla
Bandejaparaasara ta parrilla
Asado per conveccion
Buenoparagrandescortesde cametierna,destapada.
E1 ventilador de comvccidn circula el aire
calentado tmifi_rmemente sobre v alrededor de
los alimentos, i ,a came rqia y ayes se doran per
to(los los lades come si fueian cocinados sobre
tm rotisserie. E1 aire calentado circularfi sobre,
debajo y alrededor de los alimentos que estfin
siendo asados. E1 aire calentado atrapa losjugos
r_ipi(tamente para tm pioduct(_ mils hfimedo
V, [iel'no Illiell[I'2ts, al illisiilo [ieii1]9o, crea till rico
exterior dorado.
_Masar per C()II_CCi()I1, eS import_ulte
usar una asadera v tma reiilla pare obtenei
meioies resultad(;s, i,a asadeia se usa para recogei
los derrames de g_asa y la reiilla se usa pare evitar
las salpicadums de gIasa.
AI homear gafletas,obtenflr9
mejores resultaclossi utiliza una
banfleja de homo plana en vez
de una fuente con &dos bajos.
Utensilios de cocina para la coccion
Antes de utiliz_u su homo per comvccidn,
verifique si sus utensilios de cocina permiten que
el aire circule dentro del homo. Si estfi horneando
con x_ifiasbandeias, deie espacio entre ellas.
T:lmbi_n, asegdrese de que las bandeias no entren
oil contacto tlnas cell otras ni cell las paredes
del homo.
Papelyplastico
En los homes per comvccidn pueden utili/_lrse
los recipientes de papel y plfistico resistentes
al calor recomer_(tados pare el use el1 hoi'Bos
regulares. Tambi_n pueden utili/;use los utensilios
de cocina plfisticos resistentes al calor hasta
temperatures de 400 °F.
per conveccion
Metal y vidrio
Cualquiei ripe de utensilio de cocina
flmcionarfi el1 su homo poi comvccidn. Sin
embaNo, las bandeias metfilicas se calientan mils
r_ipi(to y estfin recomendadas pare el horneado
poI CoIl_ ecci()I1.
Lasbandejasoscurecidasoconacabadomatehomeargn
robsrbpidoque/asbandejasbri//antes.
Lasbandejasdevidrioo cergmicacocinargnrags
/entamente.
Para recetas come el pollo al homo, utilice
tma bandeia con lades b;!ios. E1aire caliente
no puede circular bien alrededor de los alimentos
el1 tma bandeia con lades altos.
1
6
0
2 3 4
7 8 _9
5
©
Come configurar el homo para hornear o asar
[_ Presione el botdn Convection Rake
o el botdn Convection Roast.
[_ resione los botolleS llllIIlt_l'i€os
para establecer la temperamra
del homo deseada.
[_ Presione el botdn Start.
Para cambiar la temperamra del homo, presione
el 1)otdn Convection Bake o Convection Roastv
luego h)s botones llllIIleri€os Di_llaCOIl_iglll2|l
l_t lllle_I [elIl_)el'2i[Ul'2L
Cuando el homo comience a calentar, aparecer_n
el1 la pantalla los cambios el1 la tempeiamm,
comenmndo el1 ] O0 E Cuando el borne alcance
la temperamra que usted establecid, sonm_in
3 pitidos.
[_] resione el botdn Clear/Off cuan(to haya
terminado.
:_Escuchar9un venti/adormientrasestbcocinando
pot convecci6n.El venti/adorsedetendr9cuando
/a puertaseabra,pero elca/ornoseacabarg.
:_Espos/b/equeescuchea/gunoschasquidosdentro
c/elhomoduranteel asado.Estoesnormal
12
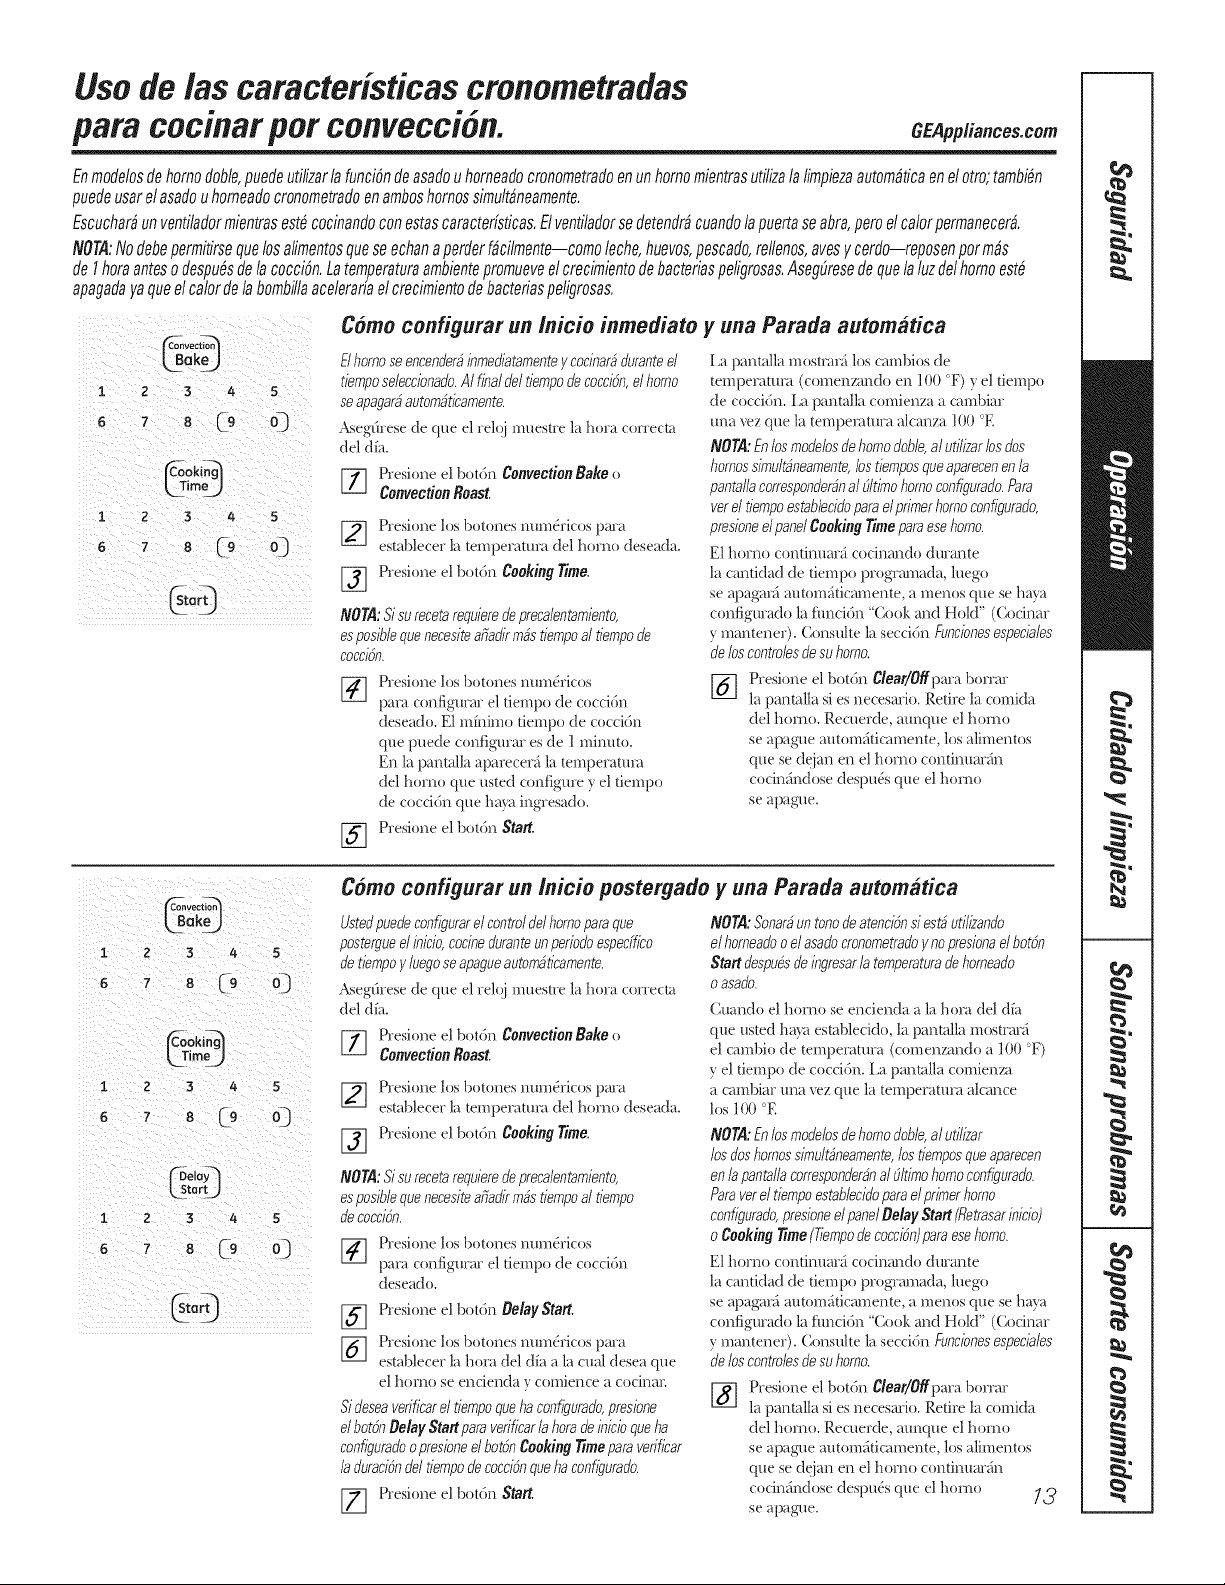
Use de/as caracteristicas cronometradas
para cocinarper convection. GEApp/iances.com
Enmodelosde homodoble,puedeutilizarla funciOndeasadou homeadocronometradoenun homomientrasutilizalalimpiezaautom#ficaenel otto;tambi#n
puedeusarelasadouhomeadocronometradoenamboshomessimult#neamente.
Escuchar#un ventiladormientrasest#cocinandoconestascaractefisticas.Elventiladorsedetendr#cuandolapuertaseabra,pore elcalorpermanecer#.
NOTA:Nodebepermitirsequelosalimentosqueseechanaperderf#cilmente--comoleche,huevos,pescado,reflenos,ayesy cerdo--reposenperm,s
de 1heraantesodespu#sde la cocci6n.Latemperaturaambientepromueveelcrecimientodebacteriaspeligrosas.Aseg(Jresede quelaluzdelhomoest#
apagadayaqueelcalordela bombillaacelerariael crecimientode bacteriaspeligrosas.
Como configurar un /nicio inmediato y una Parada automatica
C_oki_
UrneJ
2 3 4 5
Elhomoseencenfler9inmefliatamenteycocinar_,fluranteel
tiemposeleccionaflo.AI final c/eltiempodecoccibn,elhomo
se apagar9automgficamente.
Asegdrese de que el rel(!i muestre la hora corre(-t_l
77 Plesione el botdn ConvectionBake o
ConvectionRoast.
[_ resione los botoiles lllliilericos Dal_l
establecei la temt)eramra del homo deseada.
_] resione el botdn Cooking Time.
NON: Sisurecetarequieredeprecalentamiento,
esposib/equenecesiteafiaflir robstiempoal tiempode
cocci6n.
[_ resione los 1)O[OlleS lllliileiicos
para configmar el tiempo de coccidn
deseado. E1 mfnimo tiempo de coccidn
que puede configurar es de ] minute.
En la panmlla aparecer_i la temperature
del homo que usted configure y el tiempo
de coccidn que hay_l ingresado.
[-_ Presione el botdn Start.
i _apantalla mostrm:i los cambios de
tempeiatum (comenmndo en 100 F) y el tiempo
de coccidn, i _apantalla comienza a cambiar
una vez que la temt)eiatura alcanza 100 E
NON: Enlos modelosdehomodoble,al utilizarlos dos
homessimult_,neamente,los tiemposqueaparecenen /a
panta//acorresponder_',na191timehomoconfigurado.Para
verel tiempoestab/ecidopara elprimerhomoconfigurado,
presioneel panelCookingTimepara esehomo.
E1homo (-ontimmr;i cocinando dinante
la (antidad de tiempo programada, luego
se apagar_i automfiticamente, a menos que se ha_a
configurado la flmcidn "Cook and Hold" (Cocinar
y mantenei). Consulte la seccidn Funcbnes espec/a]es
deloscontrolesde suhoma
Presione el botdn Clear/Offpara borrm
[_] la pantalla si esnecesmio. Retile la comida
del homo. Recuerde, mmque el homo
se apague antom_ticamente, los alimentos
que se dejan el1 el hoiao continuarfin
cocinfindose despu_s que el hoiao
se apague.
1 2 3 4
6 7 8 (9
oki_
im%)
1 2 3 4 5
6 7 s C9
elay_
tartJ
1 2 3 4 5
6 7 8 (-9 03
Como configurar un /nicio postergado y una Parada automatica
Ustedpuedeconfigurarel controldel homopara que
postergueel bicio, cocineduranteunperiodoespecffico
de tiempog /uegoseapagueautombticamente.
Asegdrese de que el rel_!i muestre la hera correcta
del (t_.
Presione el b(_tdn Convection Bake o
ConvectionRoast
[_ Presiol_e los botoY_es lllliilericos Dal'_l
establecei la temperamra del horno deseada.
[_ Presione el botdn Cooking Time.
NORA:$/su recetarequieredepreca/entam/ento,
espos/b/equenecesiteafiad/rragstiempoal tiempo
decoeci_n.
[_] Presione los 1)otol_es llllIIleIiCos
para configmar el tiempo de coccidn
deseado.
_ Presione el 1)otdn Delay Start.
[_] Presione los bOtOlles llUIIlel'iCos [)aY_t
establecei la hera del dfa a la cual desea que
el }/OI'110Se er_cier_(ta v c()mier_ce a cocinaE
Sideseaverificarel tiempoqueha con@urado,presione
elbotbnDelay Start para verificar/ahera deinicioqueha
configuradoo presioneelbotbnCooRingTimepara verificar
/aduracibnc/eltiempode cocc/bnqueha conf/gurado.
Presione el botdn Start.
NORA:Sonar9un tonede atencibnsi estbutilizando
elhomeadoo elasadocronometradoy nopresionaelbotbn
Start despubsde ingresarla temperaturadehorneado
o asado.
Cuando el horno se encienda a la hera del (tf_
que usted haya establecido, la pantalla mostrar_i
el cambio de tempeiatura (comenmndo a 100 F)
y el tiempo de coccidn, i _apanmlla comienm
a cambiar una vez que la temperamra alcance
los 1O0E
NON: Enlosmode/osdehomodob/e,a/ uti/izar
los doshomessimultbneamente,los tiemposqueaparecen
en/a panta//acorresponderbnal 9/timehomoconfigurado.
Paravet el tiempoestab/ecidopara elprimerhomo
configurado,presioneel panelDelay Start (Retrasar/nicio)
o CookingTime(Tiempodecoccibn)para esehomo.
E1 homo ((mtimmr_i cocinando dinante
la cantidad de tiempo programada, luego
se apagar_i automfiticamente, a menos que se ha_a
configurado la flmcidn "Cook and Hold" (Cocinar
y mantenei). Consulte la seccidn Funcbnes espec/a]es
deloscontrolesde suhoma
Presione el botdn Clear/Offpara borrar
[_] la pantalla si es necesario. Retile la comida
del homo. Recuerde, mmque el hoiao
se apague antomfiticamente, los alimentos
que se dejan el1 el holao continuarfin
cocimindose despu_s que el holao _3
se apague.
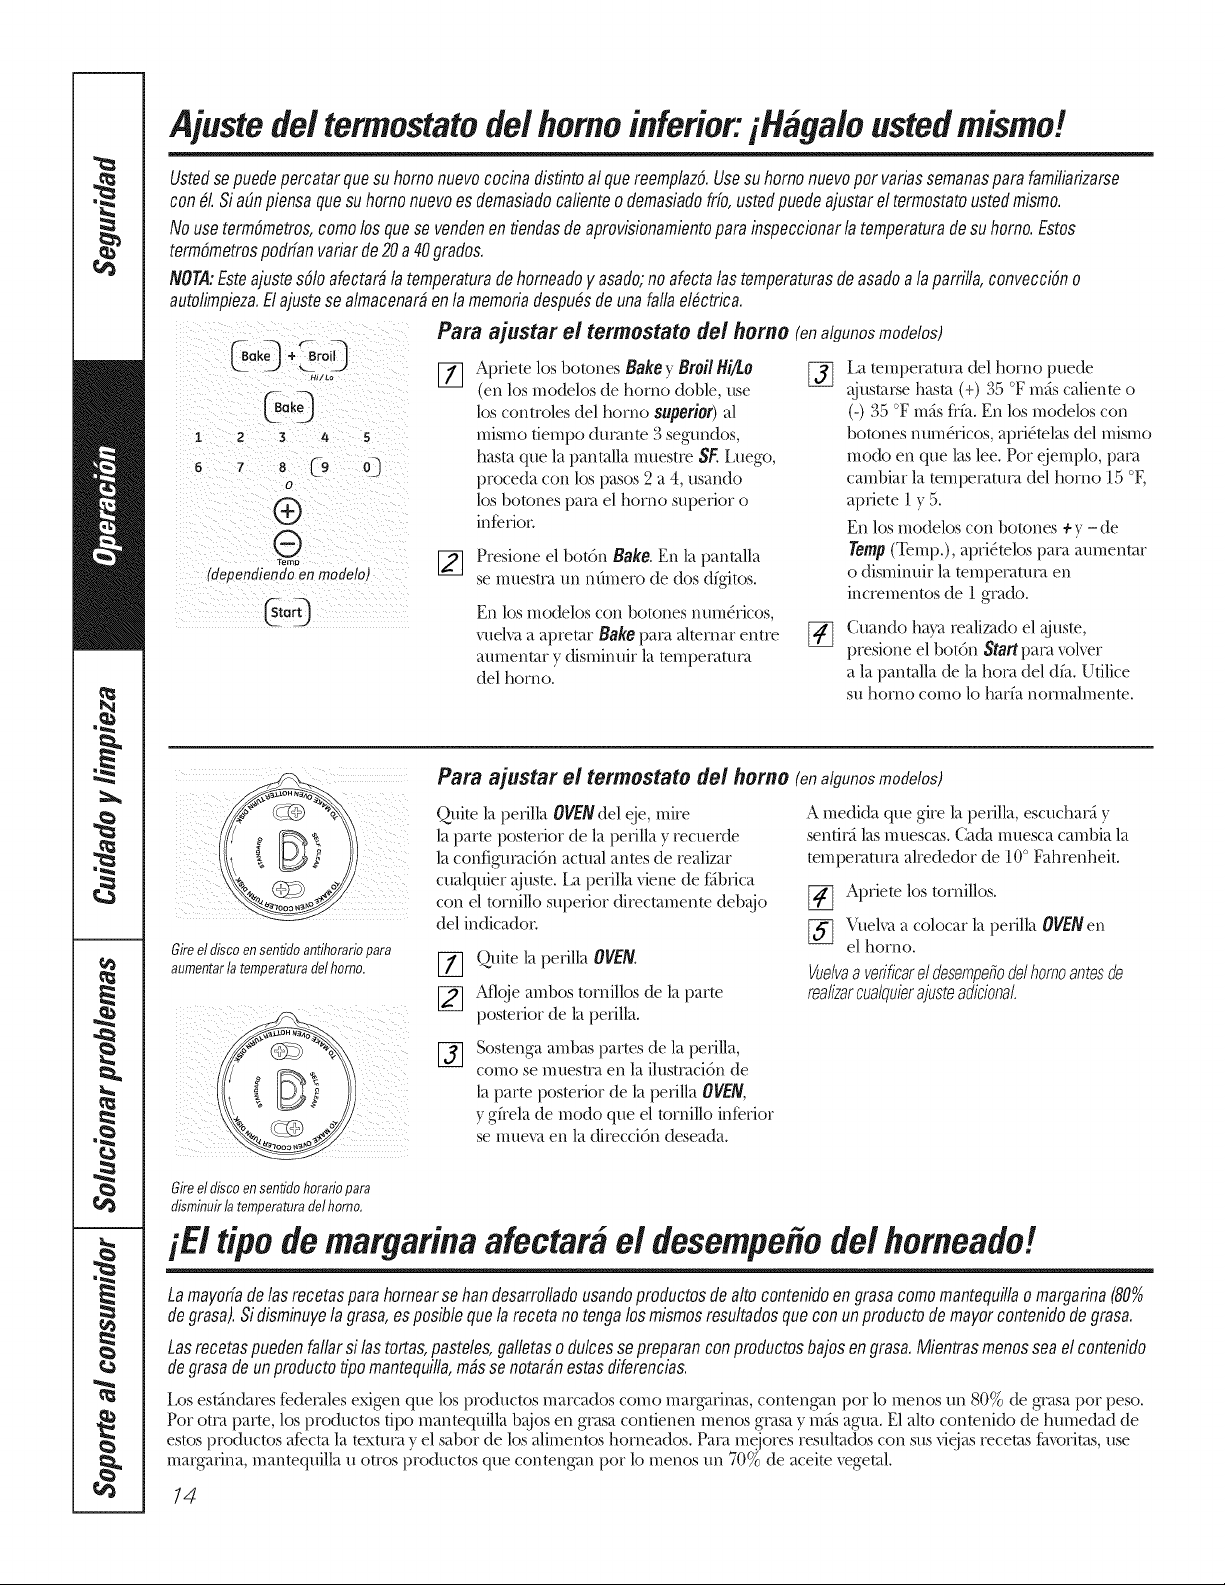
Ajustede/termostatode/homoinferior:iHaga/o ustedmismo!
Ustedsepuedepercatarquesuhomonuevococinadistintoal quereemplaz6.Usesuhomonuevoparvariassemanasparafamiliarizarse
con#LSi a(mpiensaquesuhomonuevoesdemasiadocalienteodemasiadofdo,ustedpuedeajustarel termostatoustedmismo.
Nouseterm6metros,comalosquese vendenentiendasdeaprovisionamientoparainspeccionarla temperaturadesuhomo.Estos
termSmetrospodfianvariarde20a 40grados.
NOTA:Esteajustes61oafectar#la temperaturadehomeadoy asado;noafectalastemperaturasdeasadoalaparrilla,convecciSno
autolimpieza.Elajustesealmacenar#en la memoriadespu#sdeunafallael#ctrica.
Para ajustar el termostato de/homo (enalgunosmodelos)
( 00q+3,o,0
m/La
1 2 3 4 5
o
®
®
Temp
(dependiendo en modelM
0°0
Apfiete los botones Bake) Broil Hi/Lo []
(en los modelos de homo doble, use
los controles del horno superior) "al
mismo fiempo ducante 3 se#mdos,
hasm que la panmlla muestre _. Luego,
proceda con los pasos 2 a 4, usando
los botones paca el homo superior o
inDfioL
_] Presione el botdn Bake. En la pantalla
se muestm un nfimero de (los dfgitos.
En los modelos con botones hum&ices,
vuelva a apretar Bake pare alternar entre
aumentar y disminuir la temperature
del homo.
[_a tempecatuca del homo puede
>yusmtse hasm (+) 35 °F m_s caliente o
(-) 35 °F mils fl-fa. En los modelos con
botones num_ricos, apri_telas tel mismo
modo en que las lee. Par ejemplo, paca
cambiar la mmpecamca del homo 15 °E
apfiete 1 y 5.
En los modelos con botones ÷y -de
getup(Temp.), apfi_.mlos paca aumenmr
o dismimdr la mmpecamca en
incrementos de 1 gcado.
Cuando ha}a realizado el @/ste,
presione el botdn Startpare velvet
a la pantalla de la ham del dfa. Utilice
su homo comolo harfa nommlmente.
Gireel discoensentidoantihorariopara
aumentarla temperaturade/homo.
PBr8 8justBr O[ togmostNtO de[ homo (en algunos modelos)
Qui/e la pefilla OVENdel eje, mire
la parm posmfior de la pefilla y recuerde
la configm'aci6n actual anms de realizar
cualquier L@s/e.i.a pefilla viene de fiibfica
con el tomillo superior direcmmenm deb@)
del indicado_:
[y] Quite la pefilla OVEN.
[_ Allcoeambostornillosde laparte
posteriorde lapefilla.
A medida que gire la pefilla, esctmhac5 y
sentic5 las muescas. Cada muesca cambia la
temperature alrededor de 10 ° Fahrenheit.
[_ Apfiete los tornillos.
[_ Vuelvaa colocar la pefilla OVENen
el homo.
Vue/vaa verificare/desempefiode/homoantesde
rea/izarcualquierajusteadicional.
%
Sostenga ambas partes de la pefilla,
como se mueswa en la ilustmci6n de
la parm posmcior de la pecilla OVEN,
y gfiela de mode que el tomillo inDfior
se mueva en la direccidn deseada.
Gire el disco en sentido horario para
disminuir la temperatura del homo,
iEi tipo de margarina afectara el desempe#ode/homeado!
Lamayodadelasrecetasparahomearsehan desarrofladousandoproductosdealtocontenidoengrasacomamantequillao margarina(80%
degrasa).Sidisminuyela grasa,esposiblequelarecetano tengalosmismosresultadosqueconunproductodemayorcontenidodegrasa.
Lasrecetaspuedenfallarsi lastortas,pasteles,galletaso dulcessepreparanconproductosbajosengrasa.Mientrasmenosseaelcontenido
degrasadeunproductotipomantequifla,m#ssenotar#nestasdiferencias.
i.os est>indares fedemles exigen que los productos marcados coma margafinas, contengan par lo menos un 80% de gmsa par peso.
Par otto parm, los productos tip() manmquilla b@)s en gmsa contienen menos gmsa y m_s agua. E1 alto conmni(b de humedad de
es/os productos afecm la rex/urn y el saber de los alimentos homeados. Pata mejores resulmdos con sus viejas recems fitvofims, use
margafina, manmquilla u otros productos que conmngan pot lo menos un 70% de aceim _egeml.
14
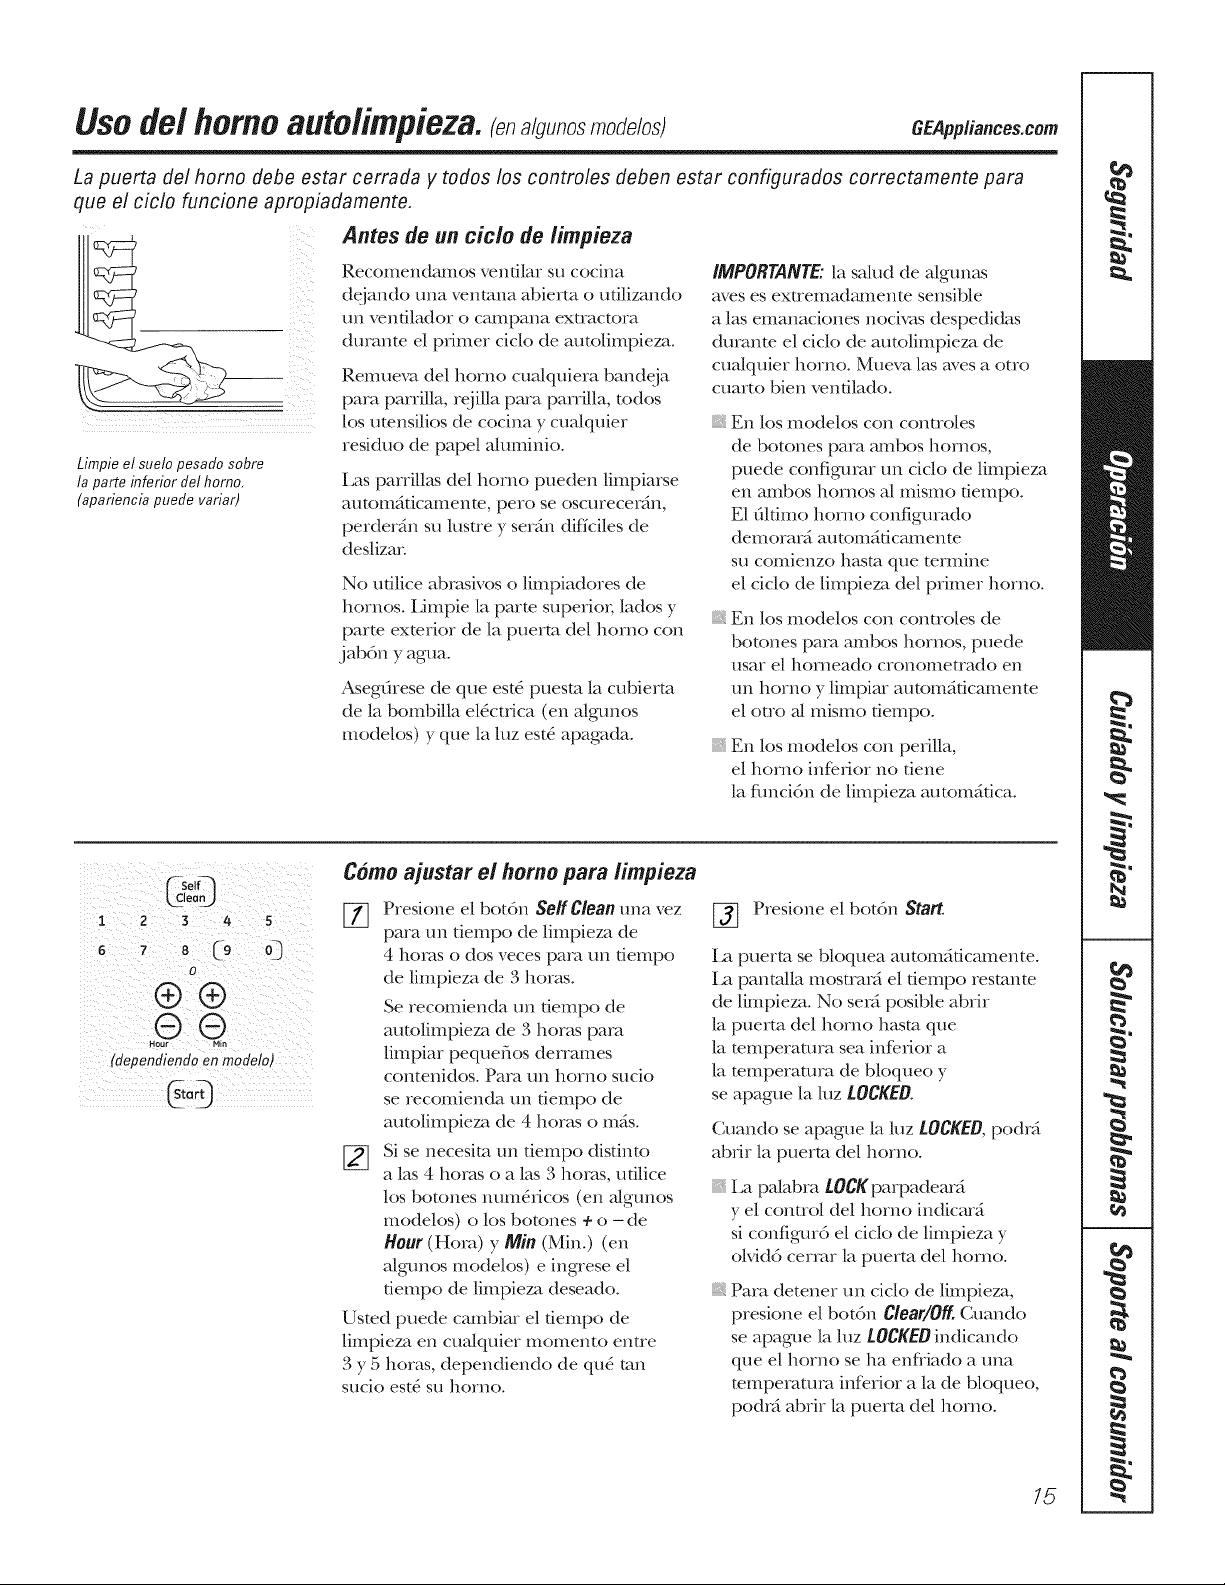
Uso de/homo auto/impieza, a/gu,osmo /osj GEapp/iances.com
La puerta de/homo flebe estar cerrada y todos los contro/es deben estar configuraflos correctamente para
que e/cic/o funcione apropiadamente,
i i i i i
Limpie el suelo pesaflo sobre
la parte inferior flel homo,
(apariencia puefle variar)
Antes de un cicio de limpieza
Recomendamos ventilar su cocina
dejando una ventana abierm o ufilizando
tm venfilador o campana extractora
dumnm el primer ciclo de autolimpieza.
Remueva del homo cua/quiera bandeja
pare parrilla, rejilla pare parrilla, todos
los umnsilios de cocina y cua/quier
residuo de papel a/uminio.
Las parrilkks del homo pueden limpiarse
atl[oIIla[icaulen[e, [)el() se osctlreceran,
perderfin su lusne y serfin difl'ciles de
deslizar
No udlice abrasivos o limpiadores de
hornos. Limpie la parm supericm lados y
parm exmrior de la puerto del homo con
jabdn y agua.
Asegfirese de que est4 puesm la cubierm
de la bombilla el4ctdca (en algm_os
modelos) y que la luz est4 apagada.
IMPORTANTE: la saMd de a/gtmas
ayes es extremadamente sensible
alas emanaciones nocivas despedidas
durante el cido de autolimpieza de
cua/quier homo. Mueva las ayes a otto
cuarto bien venfilado.
iii}iiiiii_
iii}i}}ii_
iii}i}}ii_
En los modelos con conQo[es
de botones para mnbos hornos,
puede configumr un ciclo de limpieza
en ambos hornos N mismo dempo.
E1 6lfimo homo configmado
demorar_ automfificamenm
su comienzo hasm que termine
el ciclo de limpieza del primer homo.
En los modelos con controles de
botones pare ambos hornos, puede
tlsar el horneado cronolne[lado ell
un horrid y limpiar autom_ificamente
el oUo a/mismo fiempo.
En los modek_s con penlla,
el homo inferior no tiene
la fimcidn de limpieza automgtica.
Self_'_
leonJ
1 2 3 4 5
6 7 8 (9 ©
o
(90
.©Q
(dependiendoen modeloJ
Coredajustar el homo para limpieza
Presione el botdn Self Clean una vez
pare un dempo de limpieza de
4 horas o dos veces pare un fiempo
de limpieza de 3 horas.
Se recomienda un dempo de
autolimpieza de 3 horas pare
limpiar pequefios derrames
contenidos. Para un homo sucio
se recomienda un fiempo de
autolimpieza de 4 horas o m_s.
_] Si se necesim un tiempo distinto
alas 4 horas o alas 3 horas, udlice
los botones num_IiCOS (en a/gtmos
modelos) o los botones + o - de
Hour (Hora) y Min (Min.) (en
a/gmK_s modelos) e ingrese el
6empo de limpieza deseado.
Usmd puede cambiar el dempo de
limpieza en cua/quier momento entre
3 y 5 horas, dependiendo de qu5 mn
sucio est6 su homo.
[_ Presione el botdn Start.
ia puerto se bloquea autom_ificamente.
la panm/la mostmrfi el fiempo resmnm
de limpieza. No ser5 posible abrir
la puerto del homo hasm que
la mmperamm sea inferior a
la mmperamm de bloqueo y
se apague la luz LOCKED.
Cuando se apague la luz LOCKED,podr_i
abfir la puerto del homo.
iii}iiiiii_
iii}i}}ii_
La pa/abra LOCK parpadem5
y el control del homo indicarg
si configmd el cido de limpieza y
olvid6 cermr la puerto del homo.
Para detener un ciclo de limpieza,
presione el botdn Clear/Off Cuando
se apague la luz LOCKEDindicando
que el homo se ha enfliado a una
mmpemmm inferior a la de bloqueo,
podrfi abrir la puerto del homo.
15
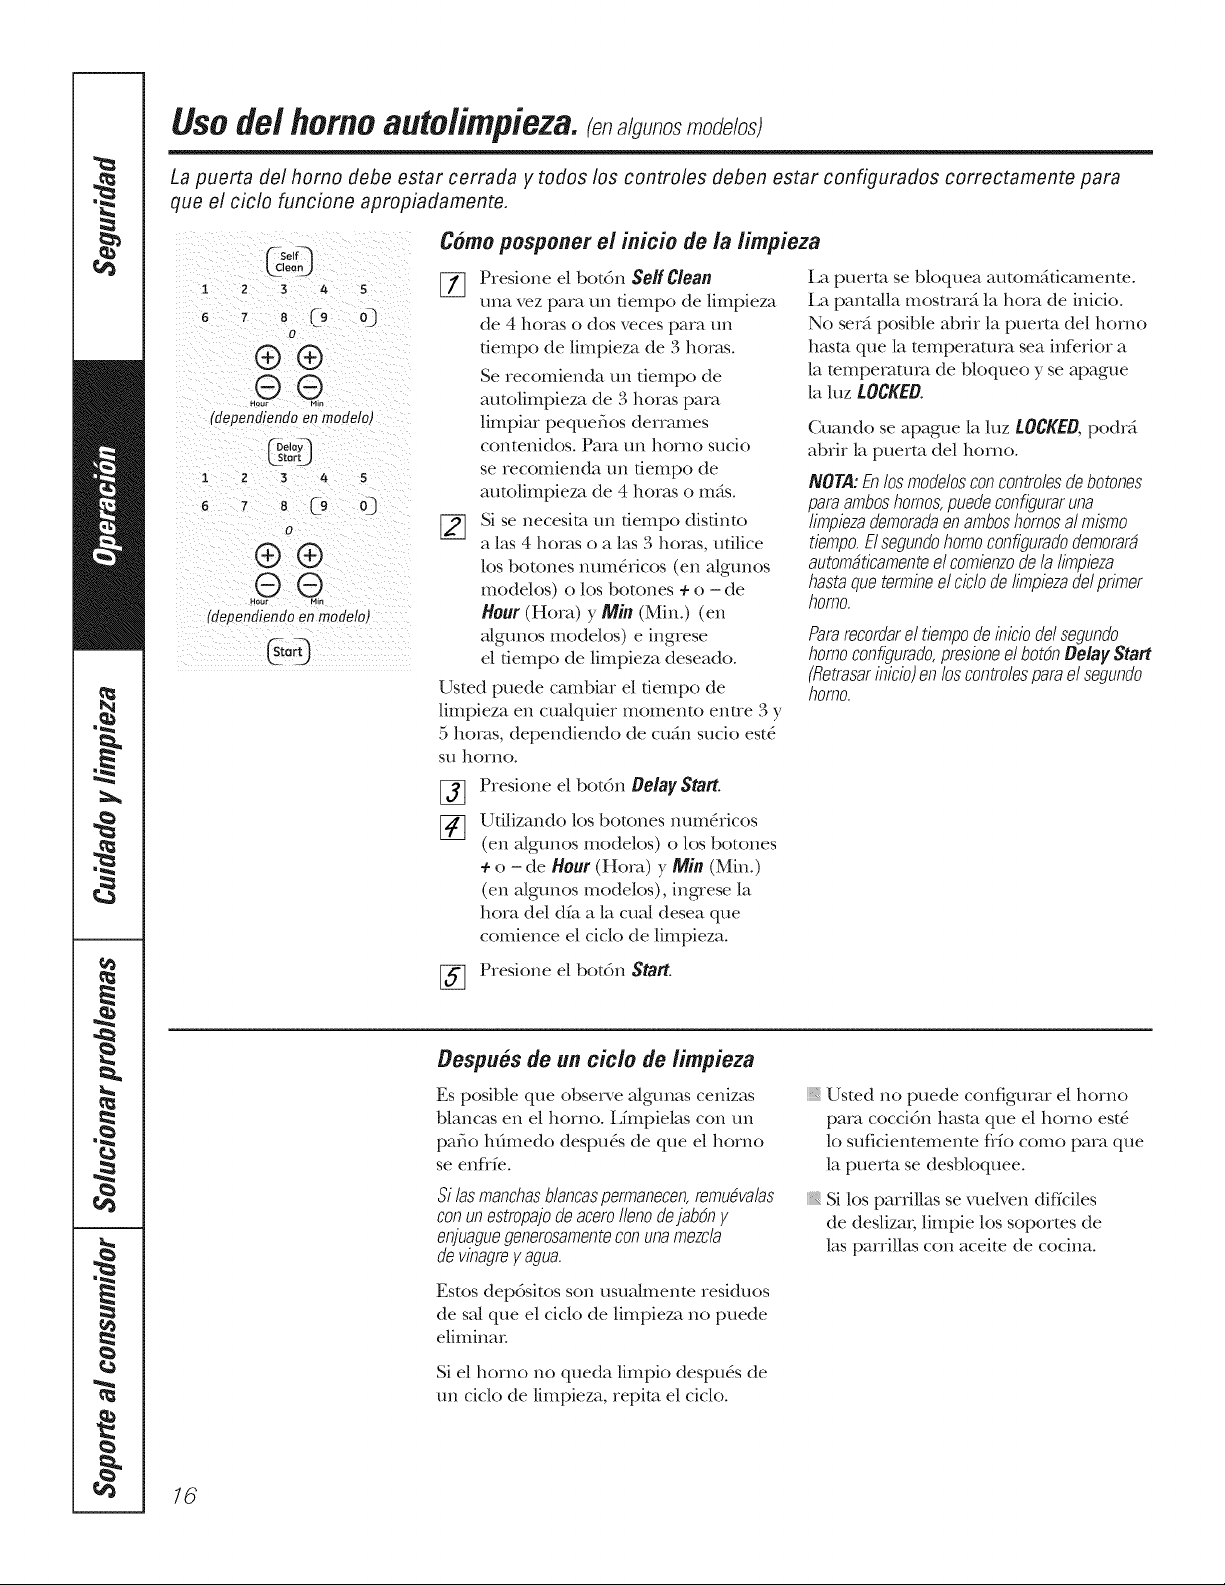
Usode/homo auto/impieza.
La puerta de/homo debe estar cerrada y todos los contro/es deben estar configuraflos correctamente para
que el cic/o funcione apropiadamente.
'-cSelf_
leon_,)
1 2 3 4 5
6 7 8 r9 o)
o
®®
(dependiendoenmodelo)
tart)
I 2 3 4 5
_ _ C9 o3
o
®®
(dependiendoen modeloJ
Cs,or;)
Comoposponer el inicio de ia limpieza
[_] Preskme el botdn SeffClean
una vez pma un fiempo de limpieza
de 4 horas o dos veces para un
fiempo de/impieza de 3 horas.
Se recomienda un fiempo de
autolimpieza de 3 horas para
limpiar pequeflos derrames
con[ellidos. Para/ln horno S[ICiO
se recomienda un fiempo de
autolimpieza de 4 horas o m_s.
Si se necesim un fiempo disfinto
alas 4 horas o alas 3 horas, ufilice
los botones num_ricos (en a/gunos
modelos) o los botones + o - de
Hour (Hora) y Min (Min.) (en
a/gunos modelos) e ingrese
el fiempo de/impieza deseado.
Usted puede cambiar el fiempo de
limpieza en cua/quier momento entre 3 y
5 horas, dependiendo de cumin sucio est6
su homo.
Presione el bot6n Belay Start.
%
Utilizando los botones mml_ricos
(en algunos modelos) o los botones
+ o - de Hour (Horn) y Min (Min.)
(en a/gtmos modelos), ingrese la
hora del dfa a la cua/desea que
comience el cido de limpieza.
La puerto se bloquea autom_idcamente.
La panta/la mostmr_i la horn de inicio.
No serd posible abfir la puerto del homo
hasm que la mmperamm sea inferior a
la mmpemmm de bloqueo y se apague
la luz tO6gEOo
Cuando se apagne la luz LOCKEB, podr_i
abrir la puerto del homo.
NOTA:Enlosmodelosconcontrolesdebotones
paraamboshomos,puedeconfiguraruna
limpiezademoradaenamboshomosalmismo
tiempo.Elsegundohomoconfiguradodemorard
automgticamenteelcomienzodela limpieza
hastaquetermineel ciclode Iimpiezadelprimer
homo.
Pararecordarel tiempode iniciodelsegundo
homoconfigurado,presioneel botchBelay Start
(fletrasarinicio)en loscontrolesparael segundo
homo.
[_ Presione el botdn Start.
Oespu#s de un cicio de limpieza
Es posible que observe a/gunas cenizas
blancas en el homo. Lfmpielas con un
patio hfimedo despu_s de que el homo
se enflfe.
Silasmanchasblancaspermanecen,remudvalas
conunestropajode aceroIlenodejab6ny
enjuaguegenerosamenteconunamezcla
devinagrey agua.
Estos depdsitos son usualmente residuos
de sal que el ciclo de limpieza no puede
elimina_;
Si el homo no queda limpio despu6s de
un ciclo de limpieza, repim el ciclo.
Usted no puede configurar el homo
pare coccidn hasm que el homo est6
lo suficientemenm flfo comb pare que
la puerto se desbloquee.
Si los parfillas se vuelven dif_ciles
de deslizai; limpie los soportes de
las parrillas con aceite de cocina.
16
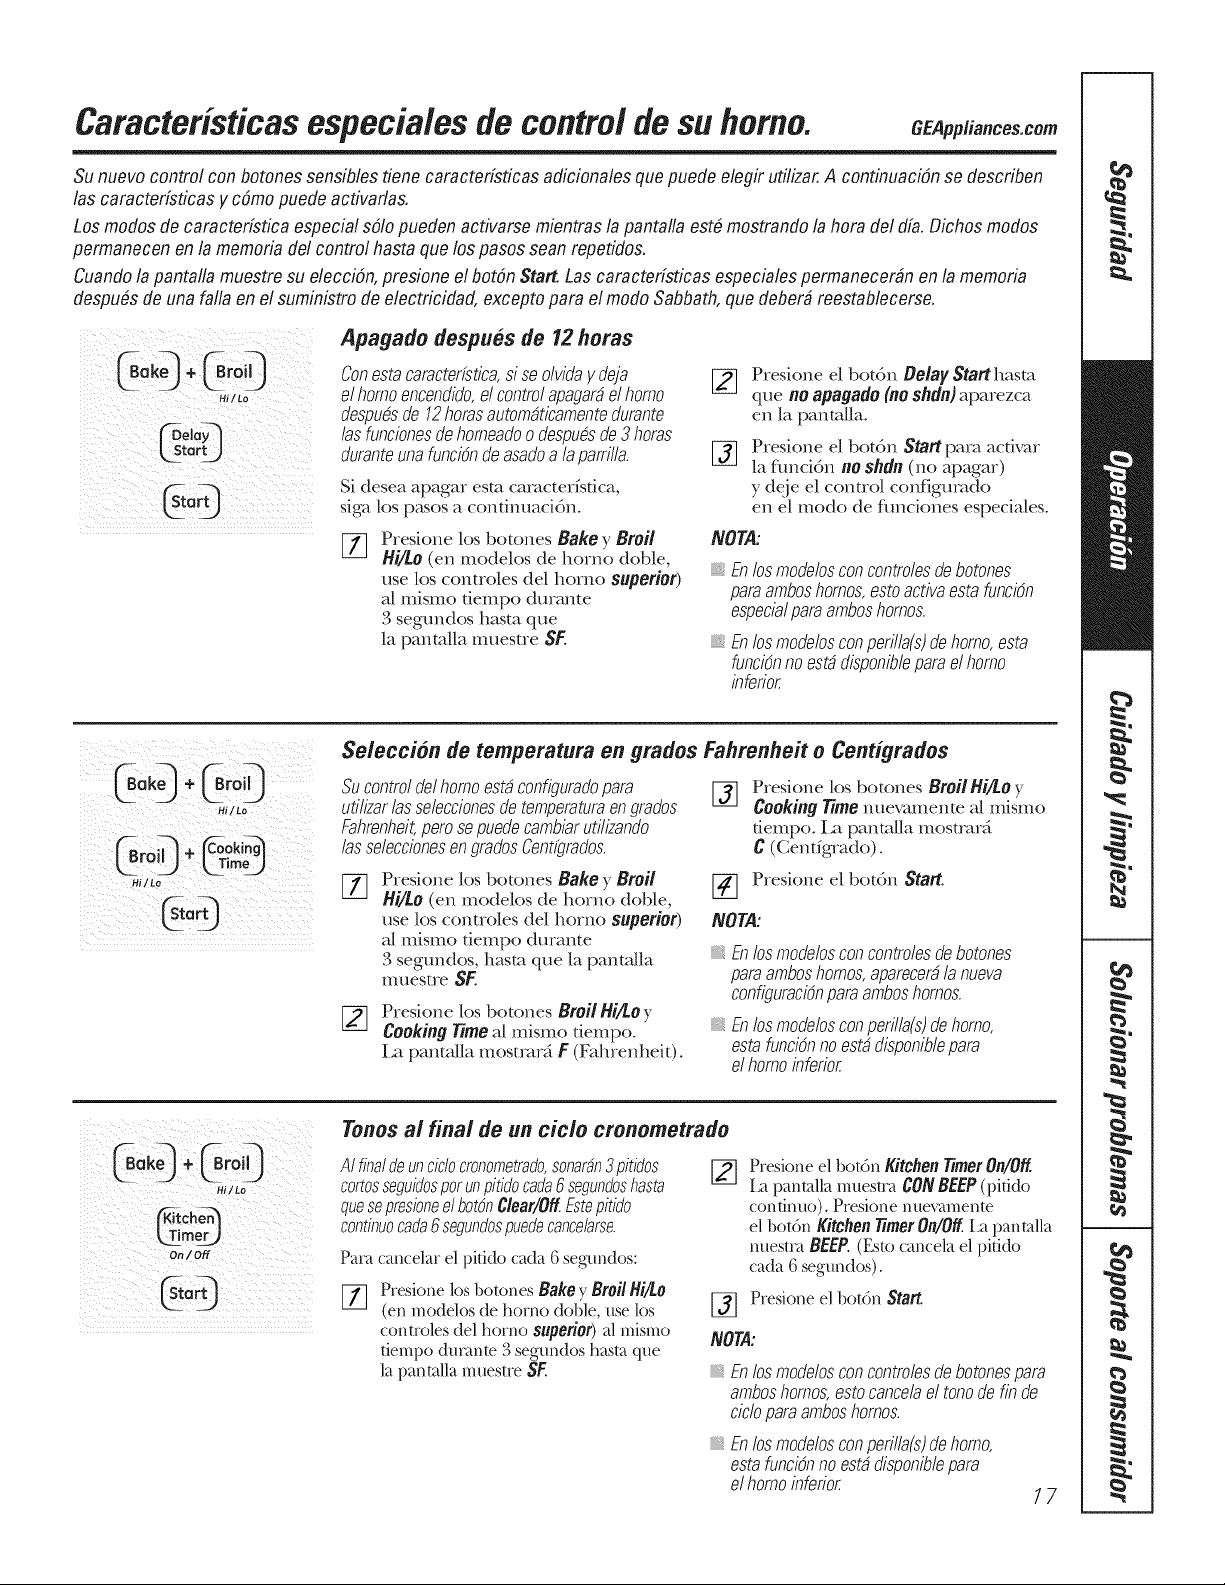
Caracteristicasespecia/es de controlde su homo. CEApp.ance .om
Sunuevo control con botonessensiblestiene caracterfsficas adicionales que puede elegir utilizar.A continuacidnse describen
las caractedsticas y c6mo puede activaflas.
Los modes de caractedstica especial solopueden activarsemientrasla pantalla est6 mostrandola hera del dfa.Dichosmodes
permanecenen la memoria del control hasta que los pasos sean repetidos.
Cuandolapantalla muestre su elecciOn,presione el botdn Start. Las caractedsticas especialespermanecer#n en la memoria
despuOsde unafalla enel suministro de electricidad, excepto para elmode Sabbath,que deber#reestablecerse.
Apagado despu_.sde 12horas
Conestacaracterfstica,si seolvidag deja _]
elhomoencendido,el controlapagardelhomo
despudsde 12horasautomdticamentedurante
/asfuncionesde homeadoo despudsde3horas
duranteuna funci_ndeasadoa laparrilla. []
Si desea apagar esta caracterfsfica,
siga los p_ksos a continuacidn.
Presione el bot6n Delay Starthasm
que noapagado(noshdn) aparezca
en la panmlla.
Presione el botdn Startpara acdvar
]a fimci6n noshdn (no apagar)
y deje el control configurado
en el mode de fimciones especiales.
[_ Presione los botones Bake y Broil NOTR:
Hi/Lo (en modelos de homo doble,
use los controles del homo superior)
a/mismo dempo durante
3 segundos hasm que
la pantaUa muesue SF.
Enlosmode/osconcontro/esdebotones
paraamboshomes,estoactivaestafuncidn
especialparaamboshomes.
Enlosmodelosconperilla(s)dehomo,esta
funcidnnoestddisponibleparael homo
inferior
Hilto
Hi/Lo
Seleccion de temperatura en grades Fahrenheit o Centigrades
Sucontroldel homoestdconfiguradopara
utilizar/asseleccionesde temperaturaengrades
Fahrenheit,petesepuedecambiarutilizando
/asseleccionesengradesCentfgrados.
[Z]
Presione los botones BaRe y Broil
Hi/lo (on modelos de homo doble,
use los controles del homo superior)
a[ mismo fiempo durante
3 segundos, hasm que la pantaUa
muestre SF.
[_ Presione los botones Broil Hi/Lo y
Cooking Time al mismo tiempo.
La panmlla mostrarg F (Fahrenheit).
%
Presione los botones Broil Hi/Loy
Cooking Time nuevamente al mismo
dempo. La panmlla mostrarfi
C (Centfgqado).
Presione el botdn Start.
NOTA:
Enlosmode/osconcontro/esdebotones
paraamboshomes,aparecerdla nueva
configuraci6nparaamboshomes.
Enlosmodelosconperilla(s)de homo,
estafuncidnnoestddisponiblepara
elhomoinferior
On/Off
Tones ai final de un cicio crenometrado
A/ finaldeunciclocronometrado,sonaran3pitidos
cortesseguidosperunpitidocada6 segundosbasra
quesepresioneelbotchClear/OffEstepitido
continuecada6segundospuedecancelarse.
Pare cancelar el pitido cada 6 segundos:
Presione los botones BaRey Broil Hi/Lo
(en modelos de homo doble, use los
controles del homo superior) al mismo
tiempo dumnte 3 segundos hasta que
la pantalla muestre SF.
Presione el botdn KitchenTimerOn/Off.
La pantalla muesua CONBEEP(pitido
contim_o). Presione nue_amenm
el botdn KitchenTimerOn/OffLa panmlla
nuestm BEEP.(Esto cancela el i)iti(b
cada 6 segundos).
[_ Presione el botdn Start.
NON:
Enlosmode/osconcontrelesde botonespara
amboshomes,estocancelael tonedefin de
cicloparaamboshomes.
Enlosmodelosconperilla(s)dehomo,
estafunci6nnoestddisponiblepara
elhomoinferior
17
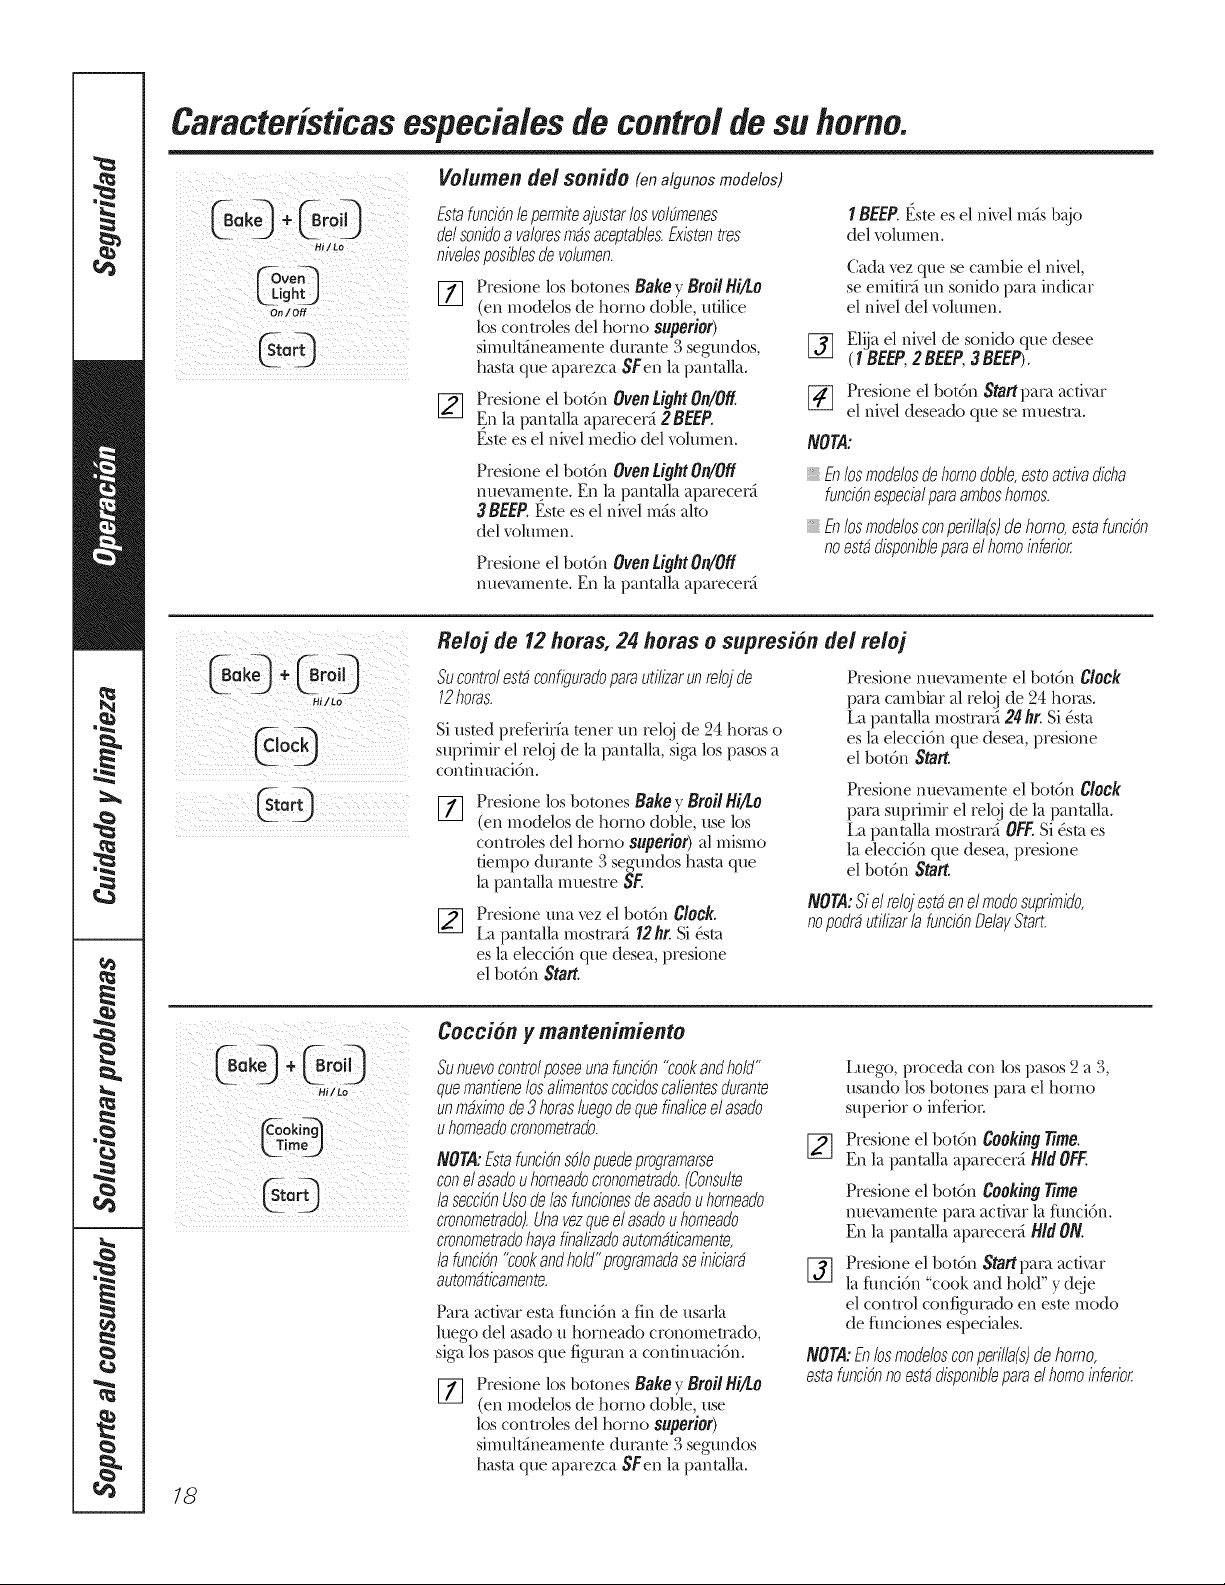
Caracteristicasespecia/es de control de su homo.
: Bo@ ¸¸
On/Off
Vo/umen de/sonido (enalgunosmodelos)
Estafunci_nfepermiteajustarlosvol(/menes
de/sonidoa valoresmasaceptabfes.Existentres
nivelesposibfesde vo/umen.
Ftl
Presione los botones Bake y Broil Hi/to
(en modelos de homo doble, udlice
los controles del homo superior)
simult_neamente dumnte 3 segundos,
hasta que aparezca SF.en la pantalla.
[_ Presione el botdn Oven Light On/Off
En la pantalla aparecec_ 2 BEEP.
Este es el nivel medio del volumen.
Presione el botdn Oven Light On/Off
nuevamente. En la pantalla aparecec_
3 BEE/a,Este es el nivel mils alto
del volumen.
Presione el bot6n OvenLightOn/Off
nuevamente. En la pantalla aparecec_
1BEEP.t_stees el nivel m_s b@_
del volumen.
Cada vez que se cambie el nivel,
se emitic_ un sonido pare indicar
el nivel del volumen.
[_ Elijael nivel de sonido que desee
(1 BEEP,2 BEEP,3 BEEP).
Presione el botdn Staff[)a_>_activar
[_ el niveldeseado que se mueswa.
NorA:
fn losmodefesdehomodobfe,estoactivadicha
funci_nespecialparaamboshomos.
Enlosmodefesconperilla(s)dehomo,estafunci_n
noestadisponibfeparaelhomoinferior
¸¸7¸¸¸¸¸
0÷"i°O S.controlestacon ig.radopara.tili ar.nrelojde
._/to 12horas.
Si usted preDcirfa tenet un relqj de 24 hocas o
supfimir el rel(o de la pantalla, siga los pasos a
contimmci6n.
Reloj de 12 horas, 24 horas o supresion de/reioj
Presione los botones Bake y Broil Hi/to
(en modelos de homo doble, use los
controles del homo superior) al mismo
tiempo dumnte 3 segundos basra que
la pantalla muestre SF..
[_ Presione una vez el botdn Clock.
l[a pantalla mostcacA 12hr. Si &ta
es la elecci6n que desea, presione
el botdn Staff,
Presione nuexmnente el botdn C/0ck
pare cambiar al rek_ de 24 horns.
La panmlla mostmc_ 24 hr. Si &m
es la elecci6n que desea, presione
el botdn Staff.
Presione nuevamente el bot6n C/0ok
pare suprimir el reloj de la panmlla.
La panmlla mostcac_OFF.Si &mes
la elecci6n que desea, presione
el botdn Staff.
NON: Sielrefejestaenelmodosuprimido,
nopodrautilizarlafunci_nDelayStart.
18
Coccion Y mantenimiento
Sunuevocontrolposeeunafunci_n"cookandhold"
quemantienelosa/imentoscocidosca/ientesdurante
unm&imo de3 horasluegode quefinaliceel asado
u homeadocronometrado.
NorA: Estafunci_ns_fepuedeprogramarse
conelasadou homeadocmnometrado.(Consulte
/a secci_nUsode/as funcfenesdeasadou homeado
cronometrado).Unavezqueel asadou homeado
cronometradohayafina/izadoautomaticamente,
/a funci_n"cookandhold"programadaseiniciara
automaticamente.
Paca activar esta flmci6n a fin de usarla
luego del asado u horneado cronomewado,
siga los pasos que figumn a contimmci6n.
Presione los botones Bake y Broil Hi/Lo
(en modelos de homo doble, use
los controles del homo superior)
simult_neamente dumnte 3 segundos
basra que aparezca $Fen la pantalla.
Luego, proceda con los pasos 2 a 3,
usando los botones pare el homo
superior o inDfioL
[_ Presione el botdn Cooking time.
En la pantalla aparecec5 HidOFF.
Presione el botdn Cooking Time
nuevamente pare activar la flmci6n.
En la pantalla aparecec5 Hid ON.
%
Presione el botdn Staff paca activar
la flmci6n "cook and hold" y deje
el control configm'ado en este modo
de flmciones especiales.
NOra:& losmodelosconperilla(s)dehomo,
estafunci6nnoestadisponibleparaelhomoinferior
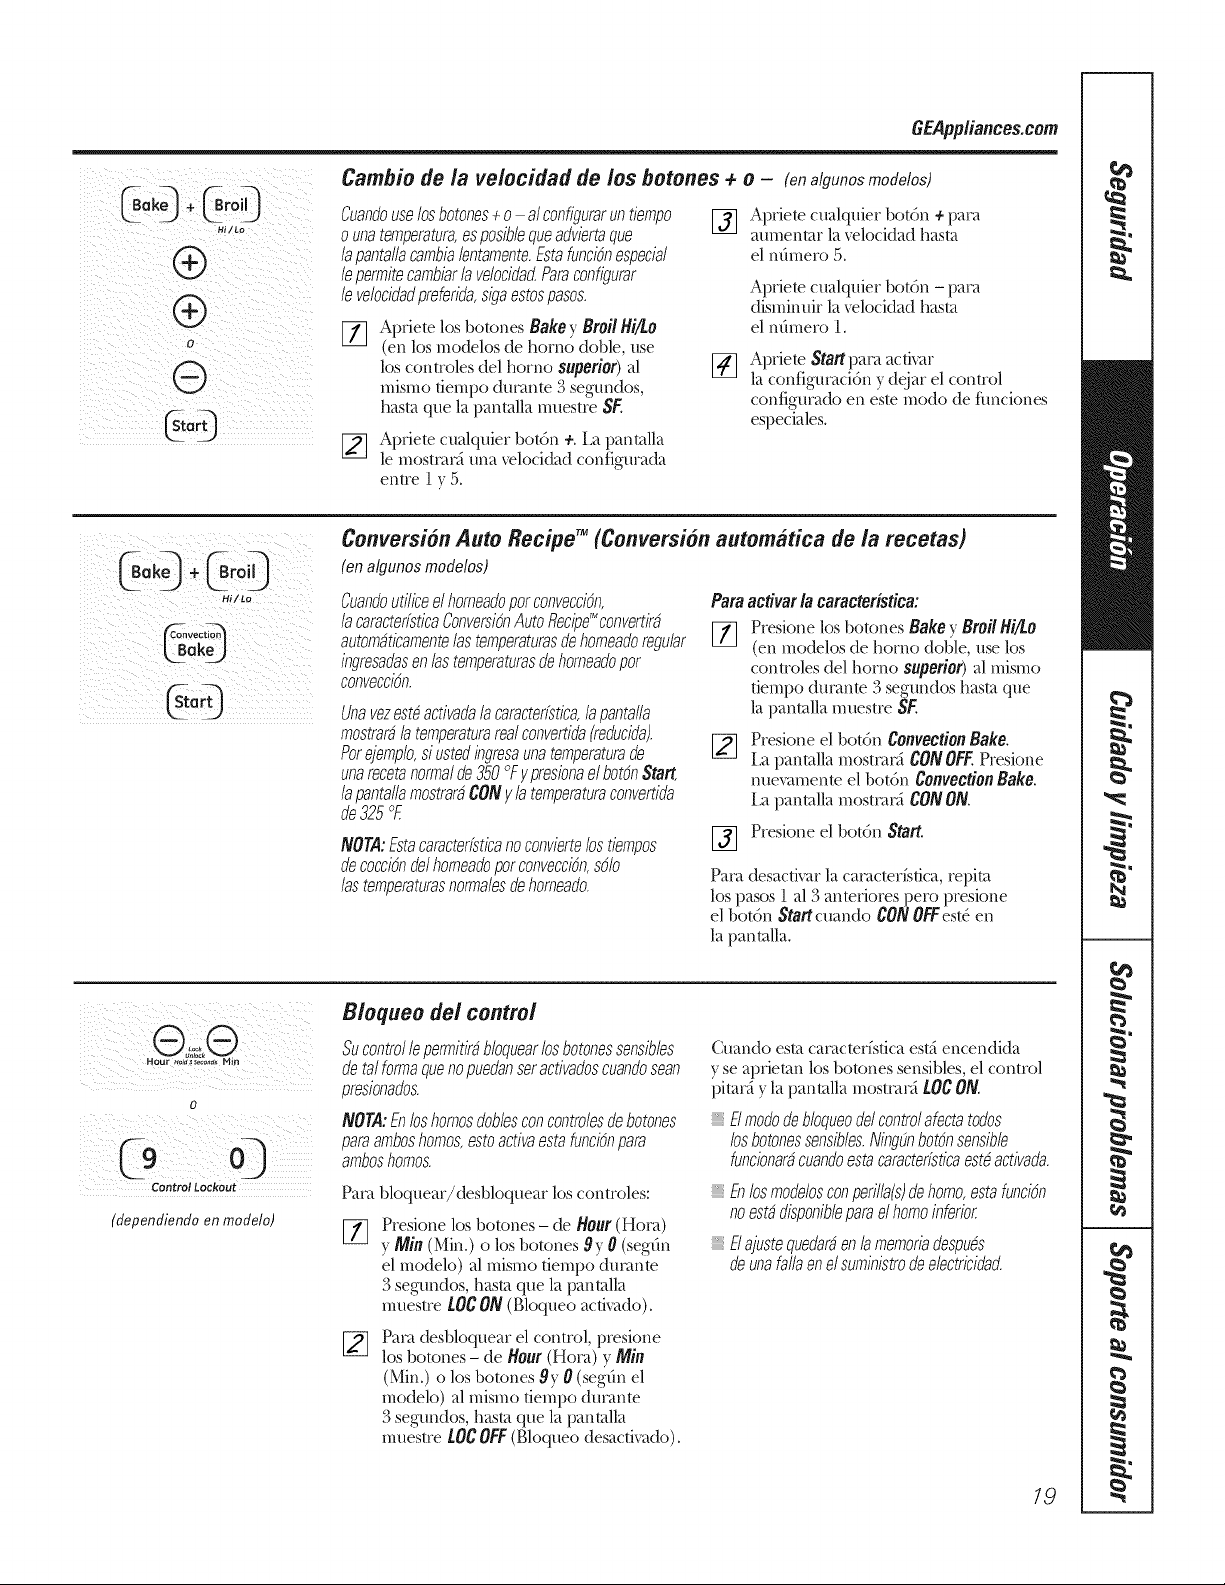
GEPpp/iances.com
Hi/LO
0
Cambio de/a velocidad de/os botones + o - (enalgunosmodelos)
Cuandouselos botones÷o al configurarun tiempo
o unatemperatura,esposiblequeadviertaque
lapantallacambialentamente.EstafunciOnespecial
lepermitecambiarla velocidadParaconfigurar
le velocidadpreferida,sigaestospasos.
[_ Apfiete los botones Bake) Broil Hi/Lo
(en los modelos de homo doble, use
los controles (]el homo superior) "al
mismo tiempo ducante 3 segundos,
hasta que la pantalla muestre SE
[_ Apfiete cualquier bot6n +.La pantalla
le mostcav,_ una velocidad configurada
entre 1 y 5.
Apfiete cualquier bot6n + l)at>t
amnentar In velocklad hasta
el nfimero 5.
Apfiete cualquier botOn - l)at>i
dismimfir la velocidad hasta
el ndmero 1.
Apfiete Start l)m>tactivar
la config, mM6n y dejar el control
configm_do en este modo de flmciones
especiales.
5 :: [ [
Hi/Lo
Conversi6n Auto Recipe TM (Conversi6n automMica de la recetas)
(en algunos modelos)
CuandoutiliceelhomeadopotconvecciOn,
lacaracterfsticaConversionAutoRecipeT_convertira
automaticamente/astemperaturasdehomeadoregular [_
ingresadasen/astemperaturasdehomeadopot
convecciOn.
Unavezestdactivadalacaracterfstica,lapantalla
mostraralatemperaturarealconvertida(reducida).
Porejemplo,siustedingresaunatemperaturade _]
unarecetanormalde350°Fypresionael botOnStart,
lapantallamostraraCONylatemperaturaconvertida
de325OF.
NOTA:Estacaracterfsticanoconviertelostiempos
decocciOndelhomeadopotconvecciOn,solo
/astemperaturasnormalesdehomeado.
Pareactivarla caractefistica:
%
Presione los botones Bake v Broil Hi/Lo
(en modelos de homo dol)le, use los
controles del homo superior) al mismo
tiempo dm_mte 3 segundos hasta que
la pantalla muestre $E
Presione el bot6n ConvectionBake.
La pantalla mostcav_CONOFF.Presione
nuevamente el bot6n ConvectionBake.
i;t pantalla mostcaca CONON.
Presione el bot6n Start.
Pacadesactivar la catvtcteKstica,repita
los pasos 1 al 3 antefiores pero presione
el botdn Start cuando CONOFFest_ en
la pantalla.
0
Control Lockout
(dependiendo en modelo)
Bioqueo dei control
Sucontrol/epermitirabloquearlosbotonessensibles
detal formaqueno puedanseractivadoscuandosean
presionados.
NOTA:Enloshomosdoblesconcontrolesdebotones
paraamboshomos,estoactivaestafunciOnpara
amboshomos.
Paca bloquear/desbloquear los controles:
%
Presione los botones - de Hour(Ho_>t)
y Min(Min.) o los botones 9y 0 (segdn
el modelo) al mismo tiempo ducante
3 segundos, basra que la pantalla
muestre tOCON (Bloqueo acdvado).
Pacadesbloquear el control, presione
los botones - de Hour (Ho,vt) y Min
(Min.) o los botones 9y 0 (segdn el
modelo) al mismo/iempo dmvmte
3 segundos, basra que la pantalla
muestre tOCOFF(Bloqueo desacfivado).
Cuando esta cacacteffstica est_ encendida
y'se apfietan los botones sensibles, el control
pita_'_y'la pantalla mostcac_ LOgON.
Elmododebloqueode/controlafectatodos
losbotonessensibles.NingOnbotOnsensible
funcionaracuandoestacaracterfsticaestdactivada.
Enlosmodelosconperilla(s)dehomo,estafunciOn
noestadisponibleparael homoinferior
Elajustequedaraenlamemoriadespuds
deunafallaenel suministrodeelectricidad.
19
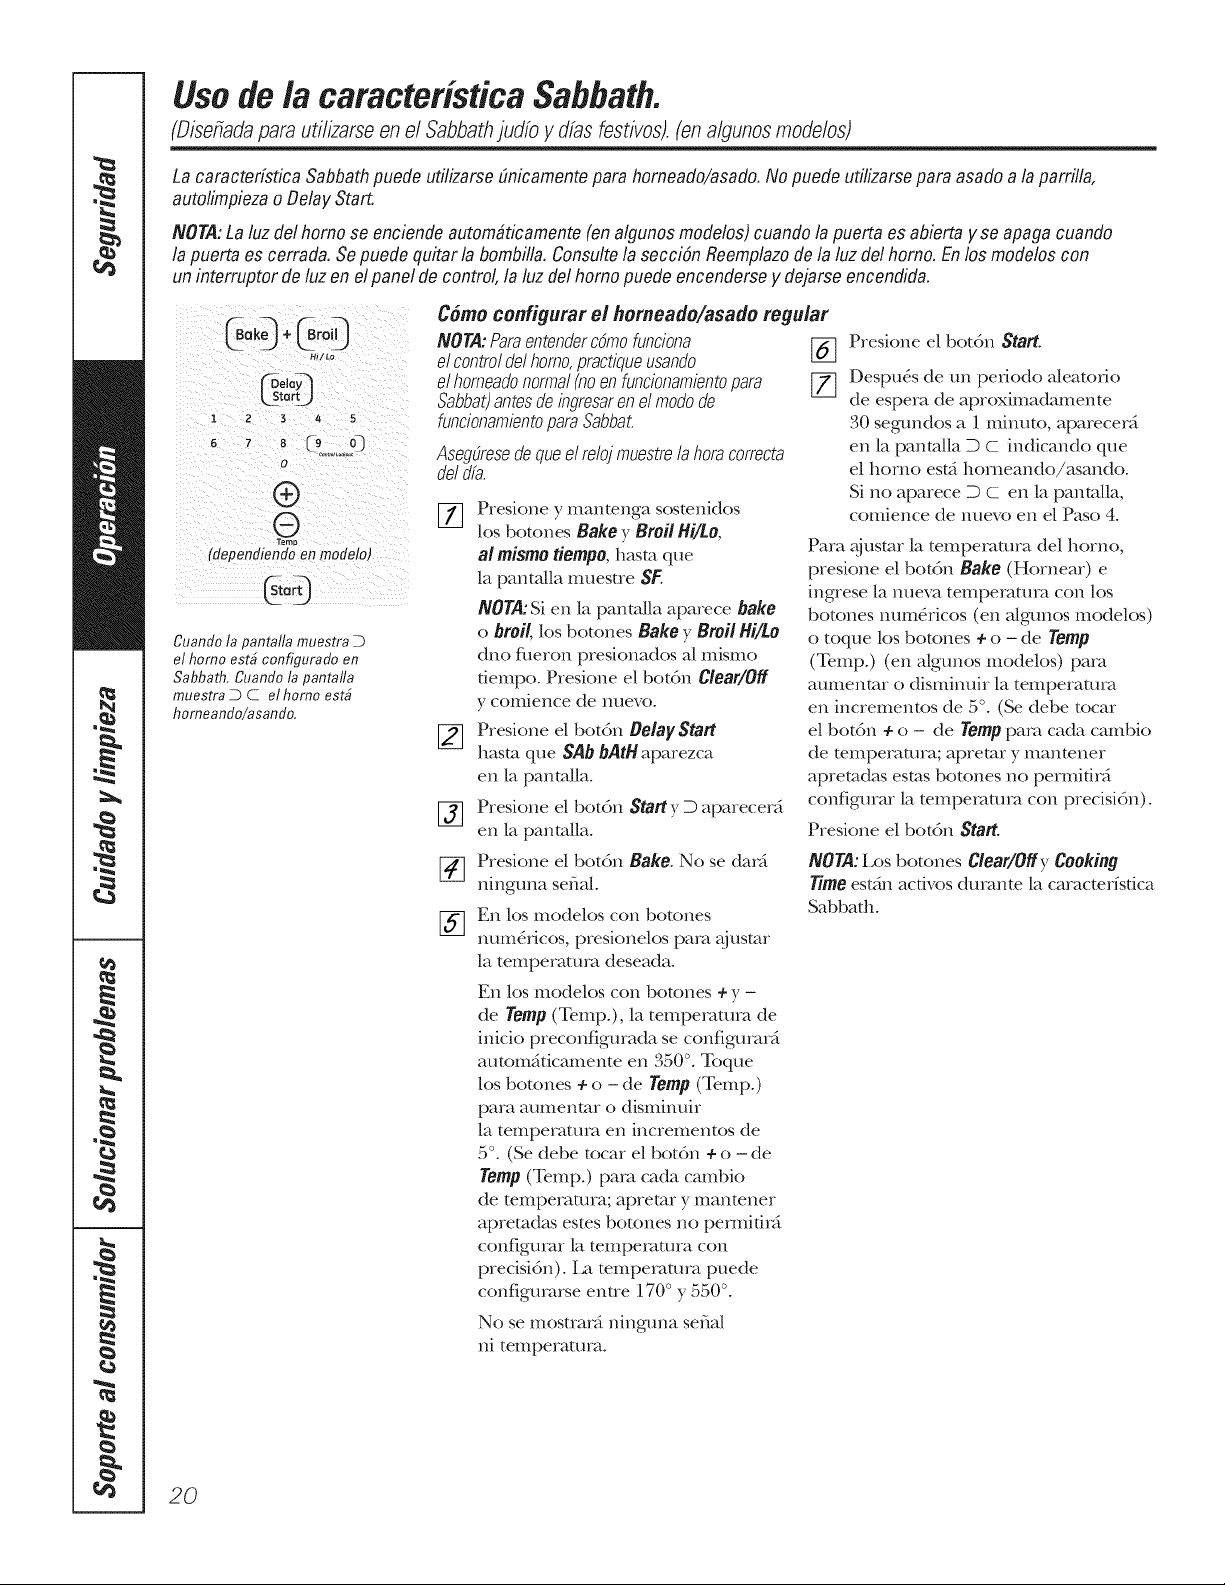
Use de/a caracteristica Sabbath.
(Disefiadapare utilizarseen el Sabbathjudfo y dfas festivos),fen algunosmodelos)
Lacaracterfstica Sabbathpuede utilizarse(micamentepare homeado/asado.No puede utilizarsepare asado a laparrilla,
autolimpiezao Delay Start.
NOTA:Laluz delhomo se enciende autom#ficamente(on algunosmodelos)cuando la puerta es abierta y se apagacuando
la puerta es cerrada. Sepuede quitar la bombilla.Consultela secciSnReemplazode la luz del homo. Enlos modeloscon
uninterrupter de luz en elpanel de control,la luz del homo puede encenderse y dejarseencendida.
u zLa
tertj
1 2 S 4 5
0
®
®
Temp
(dependiendo en modelo)
Cuando la pantalla muestra D
el homo estb configurado en
Sabbath, Cuando la pantafla
muestra D C el homo estb
homeando/asando.
Come cenf(gurar el horneade/asado regular
NOTA:Pareentenderc6mofunciona [_]
elcontroldel homo,practiqueusando
elhomeadonormal(noenfuncionamientopare [7]
Sabbat)antesdeingresaren el modede
funcionamientopareSabbat
Aseg&esedequeel reloj muestrelaheracorrecta
deldfa.
[77 Presione y mantenga sostenidos
los botones Bakey Broil Hi/to,
al mismotiempo, hasm que
la panta/la muesue SF.
NOTA:Si en la panMla aparece bake
o broil,los botones Bake y Broil Hi/to
dno flmron presionados a/mismo
dempo. Presione el bot6n Clear/Off
y comience de nuevo.
_] Presione el botdn DelayStart
hasm que SAb bAtH aparezca
en la panm/la.
[_] Presione el bot6n Starty D aparecer_i
en la panm/la.
[_] Presione el bot6n Bake.No se dar_i
ninguna serial.
[_] En los modelos con botones
num_dcos, presionelos pare _justar
la temperature deseada.
En los modelos con botones + y -
de Yemp (Temp.), la temperatura de
inicio preconfigurada se configma_5
automfificamente en 350 °. Toque
los botones + o - de Temp (Temp.)
para aUlilen[ar O disminuir
la temperatma en incrementos de
5°. (Se debe tocar el botdn +o - de
Temp (Temp.) para cada cambio
de temperatura; apretar y mantener
apremdas estes botones no pemddrfi
configurar la temperamra con
precisidn), ia temperature puede
configurarse enue 170° y 550 °.
No se mosuar_ ninguna serial
ni temperature.
Presione el botdn Start.
Despu& de un pedodo aleatodo
de espera de aproximadamente
30 segundos a 1 minute, aparecerd
en la panm/la D C indicando que
el homo est_i horneando/asando.
Si no aparece D Cen la panm/la,
comience de nuevo en el Paso 4.
Para _j usmr la temperature del homo,
presione el bot(m Bake (Hornear) e
ingrese la nueva temperature con los
botones num&icos (en a/gunos modelos)
o toque los botones + o i de Ternp
(Temp.) (en algunosmodelos) para
aumentar o disminuh latemperatura
en incrementos de 5 °. (Se debe tocar
el botdn + o - de Temp para cada cambio
de temperature; apremr y mantener
apremdas estas botones no perInifir_
configurar la temperature con precisidn).
Presione el bot6n Start.
NOTA:Los botones Clear/Offy Cooking
time est;in acdvos durante la caracterfsdca
Sabbath.
20
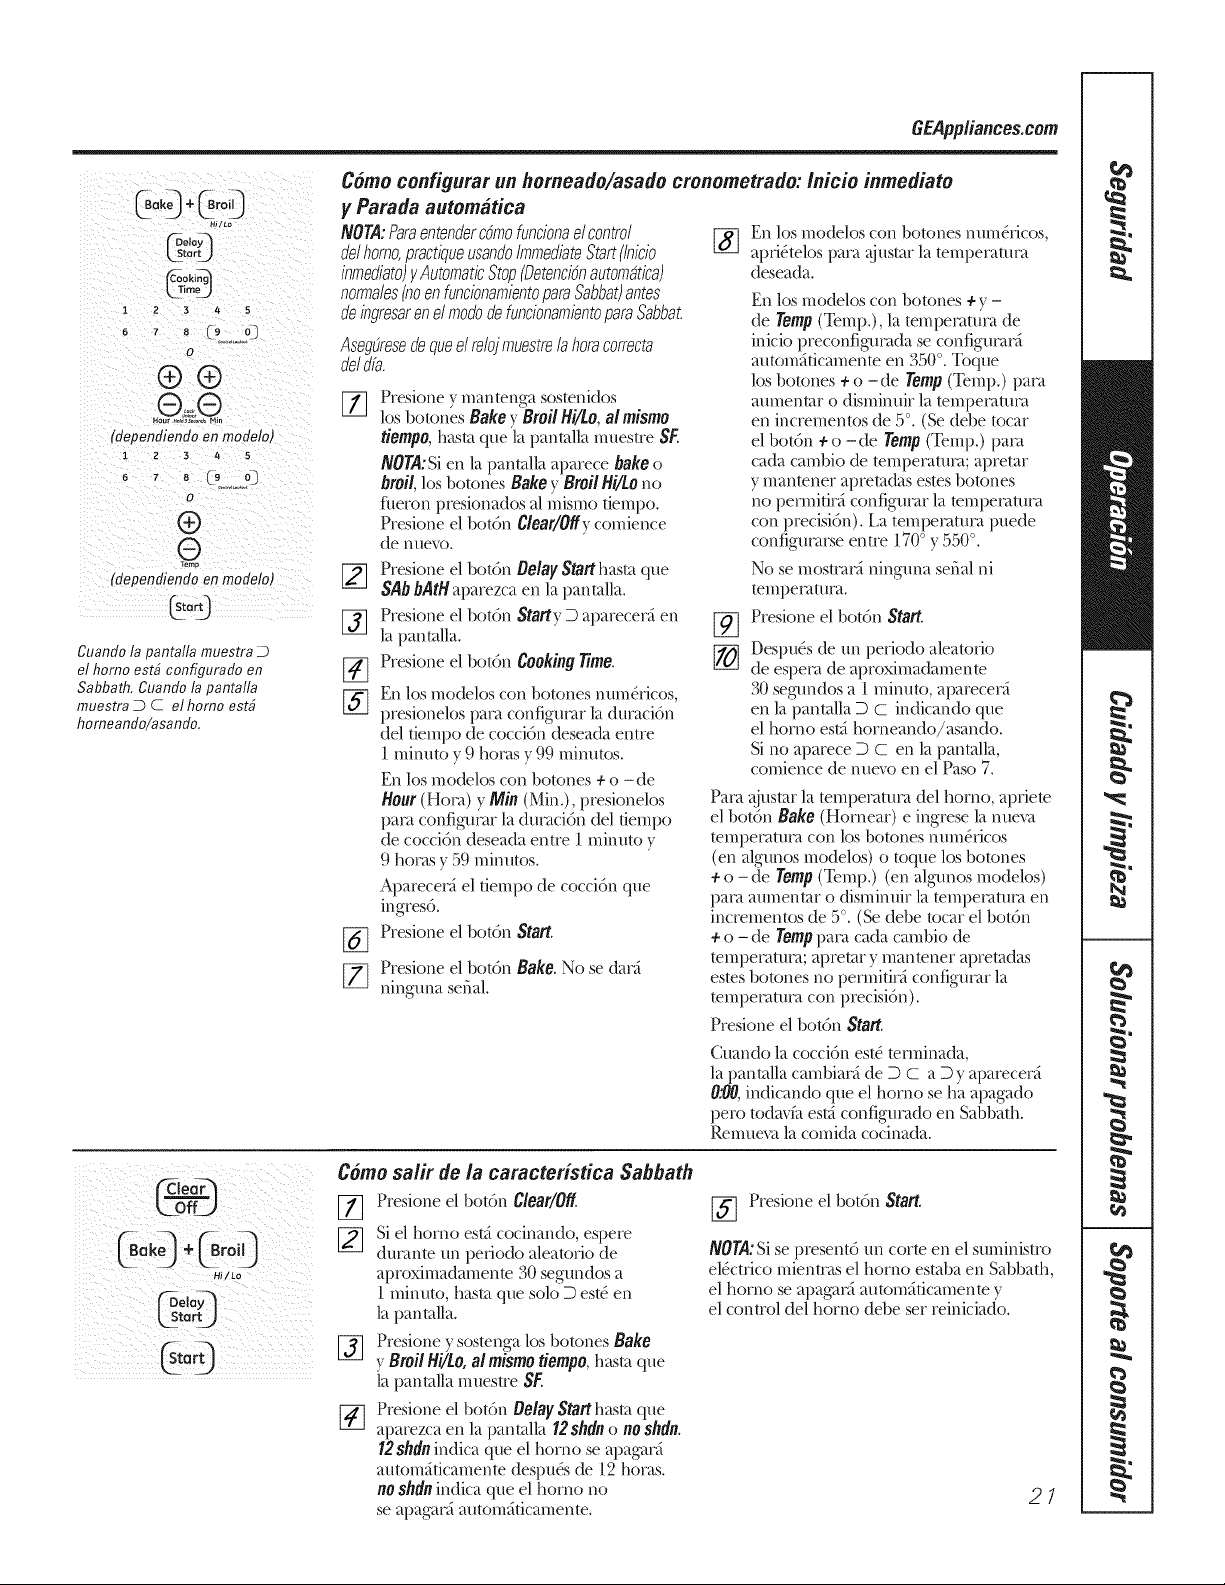
GEPpp/iances.com
_,lLo
LstorU
imeJ
1 2 3 4 5
6 7 8 C9 o3
o
®®
(dependiendoen modeloJ
1 2 3 4 5
7 8 C9 o]
o
®
Q
(dependiendoon modelo)
(start]
Cuando /a panta/la muestra D
el homo est# configurado en
Sabbath, Cuando la pantalla
muestra D C el homo est#
homeando/asando,
Come configurar un homeado/asado cronometrado: /nicio inmediato
F Parada automatica
NORA:Paraentenderc6mofuncionael control
delhomo,practiqueusandoImmediateStart(lnic/o
inmediato)y AutomaticStop(Detenc/6nautomatica)
norma/es(noen funcionam/entopara Sabbat)antes
de ingresaren elmododefuncionam/entopara Sabbat.
AsegOresedequeelrelojmuestrelahoracorrecta
deldfa.
[]
[]
%
[]
%
%
[]
Presione v mantenga sostenk]os
los botones Bake }."BroilHi/to, al mismo
tiempo,hasm que la panmlla muestre SF.
NON:Si en la panmlla aparece bake o
broil,los botones Bake y Broil Hi/to no
fileron presionados al mismo tiempo.
Presione el botdn Clear/O#ycomience
de 13tlevo.
%
Presione el botdn Belay Staff hasta que
SAbbAtH aparezca en la pantalla.
Presione el botdn Staffv D aparecec_ en
la pantalla. ' [_
Presione el botdn Cooking Time,
En los modelos con botones num_.ficos,
presionelos pare configumr la dumci6n
del tiemi)o de cocci6n deseada entre
1 minute y 9 hems y 99 minutes.
En los modelos con botones +o - de
Hour (Hem) y Min (Min.), presionelos
pare configumr la dumci6n del dempo
de cocci6n deseada entre 1 minute y
9 hotas y 59 minutes.
Apm_cec_ el tiempo de cocci6n que
ingres6.
Presione el botdn Staff.
Presione el botdn Bake.No se (tm"_
ninguna serial.
En los modelos con botones num_ficos,
apd_.telos pare @/star la temperature
deseada.
En los modelos con botones + y -
de remp (Temp.), la tempemum_ de
inicio preconfigumda se configumr_
automrticamenm en 350 °. Toque
los botones + o -de romp(Temp.) i)ata
aumentar o disminuir la temi)emtum
en incrementos de 5 °. (So debe tocar
el botdn +o - de Temp (Temp.) pata
cada cambio de temperature; apretar
y mantener apretadas estes botones
no pemdtirA configumr la mmpetatum
con l)recisidn). La teml)emmta l)uede
contigum_e entre 170 ° y 550 °.
No se nlosttac_ ninguna serial ni
tempemumt.
Presione el botdn Staff.
Despu& de un pefiodo aleatorio
de espem de apmximadamente
30 segundos a 1 minute, aparece_
en la panmlla D C indicando que
el homo est_i homeando/asando.
Si no apm_ce D C en la panmlla,
comience de nuevo en el Paso 7.
Pm_ @_smr la temi)e_mm_ del homo, apfiete
el botdn Bake (Homear) e ingrese la nueva
temperature con los botones ntIllle.lJcos
(on algunos modelos) o toque los botones
+o - de romp(Temp.)(on algunos modelos)
i)ata aumenmr o dismimnr la mmi)emmta en
incrementos de 5 °. (So debe tocar el botdn
+o - de Temppata cada cambio de
temi)emtum; apretar y mantener apretadas
esms botones no i)emdtic_ configmar la
mmpemmm con precisi6n).
Presione el botdn Staff.
Cuando la cocci6n es/# temdnada,
la panmlla cambiac_ de D c a D y aparece_
0:00,indican(b que el homo se ha apagado
pore todavfa es/>_configumdo en Sabbath.
Renmeva la comida cocinada.
Come salir de la caracteristica Sabbath
Presione el botdn Clear/Off
Si el homo est_ cocinando, espere
din>rote un pefiodo aleatofio de
aproximadamenm 30 segundos a
1 minute, hasm que solo D esl(" en
la panmlla.
Presione y sostenga los botones Bake
y Broil Hi/to, al mismo tiempo, hasta que
la panmlla muestre SF.
Presione el botdn Belay Staff hasta que
aparezca en la pantalla _2 shdn o no shdn.
12shdnindica que el homo se ai)a_ar_
autom_ticamenm desl)u_.s de 12 hems.
noshdnindica que el horno no
se apa_arA autom_ticamenm.
[_] Presione el botdn Staff.
NORA:Si se presentd un corte en el suministro
el_ctrico mientcas el homo estaba en Sabbath,
el homo se apag,m_autom_ticamente y
el control del homo debe ser reiniciado.
21
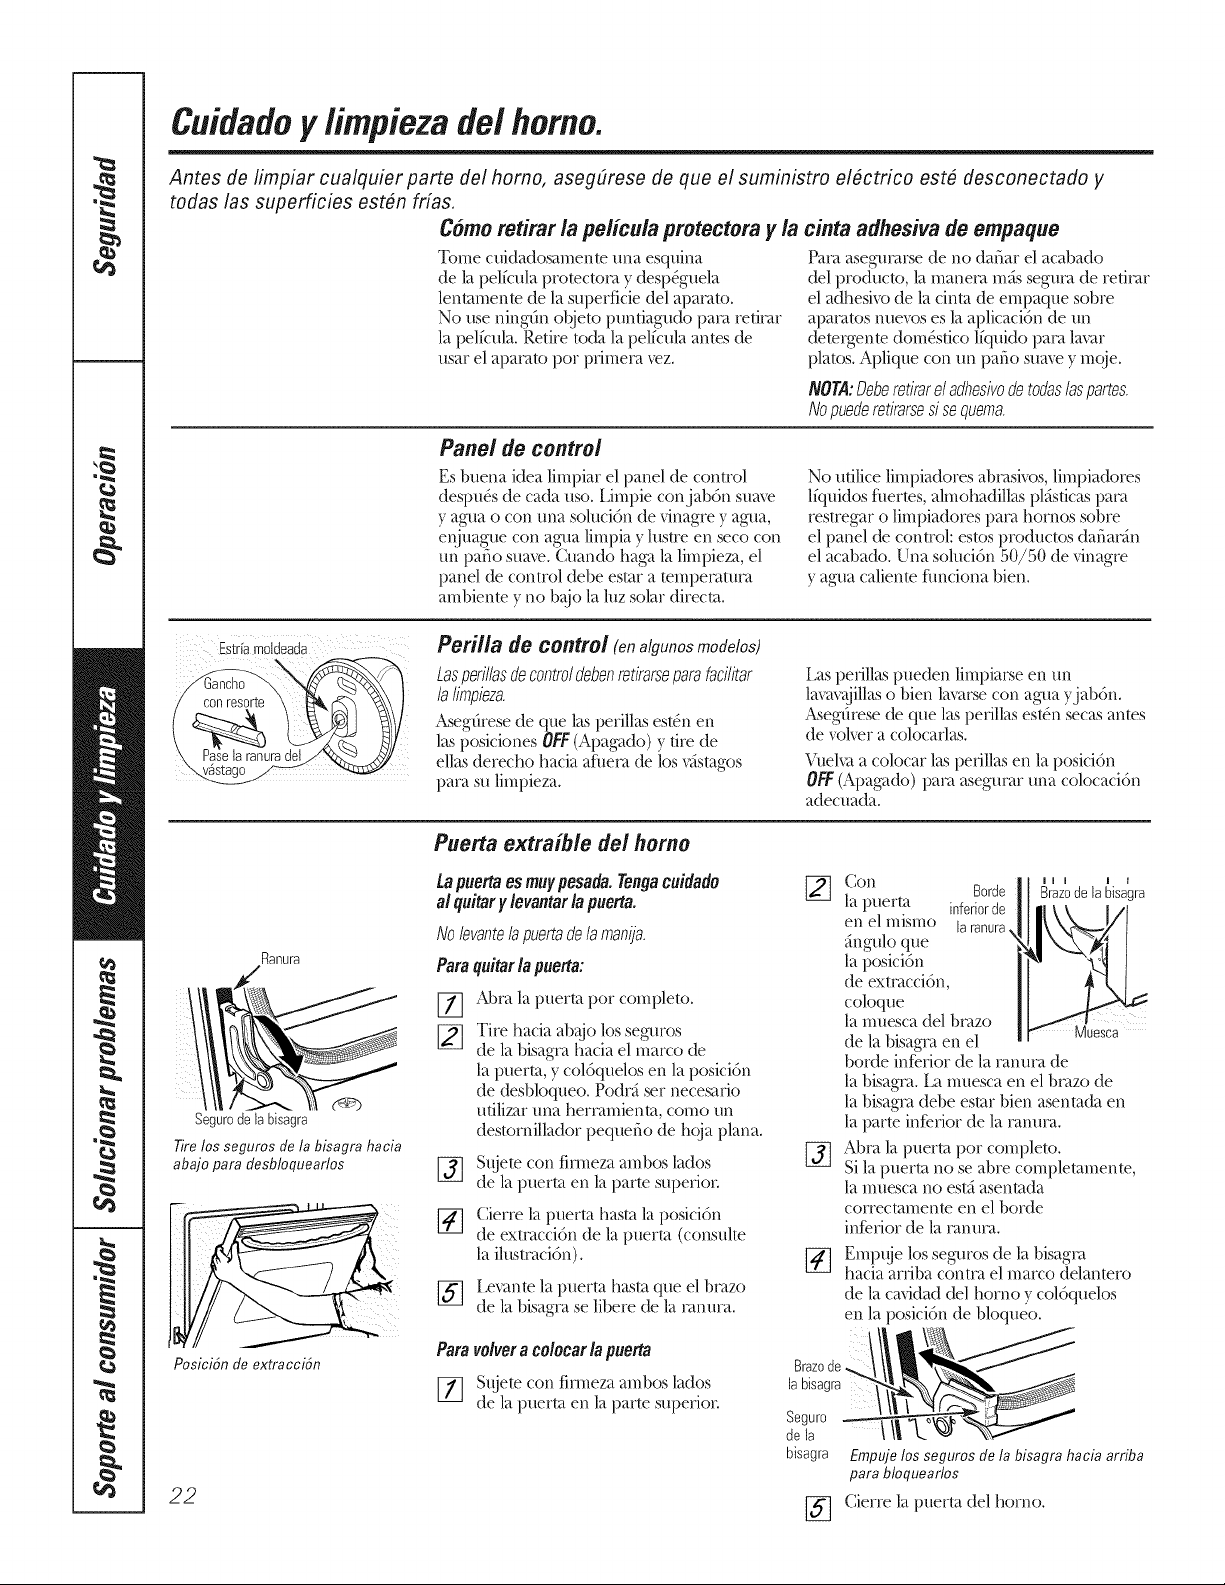
Cuidadoy limpieza de/homo.
Antes de limpiar cualquier parte de/homo, asegSrese de que e/suministro e/#ctrico est# desconectaflo y
todas las superficies est#n fdas.
C#mo retirar la pelicula protectora y la
Tome cuidadosamente una esquina
de la pelicula promctom y desp_guela
lenmmenm de la superficie del apatato.
No use ningdn objeto puntiagu(b pm'a retimr
la pelkula. Retire/oda la pelfcula anms de
usar el apamto pot pfimem _ez.
cinta adhesiva de empaque
Brat asegu_'a_e de no dafiar el acabado
del produc/o, la manet'a mils segtu'a de redrar
el adhesivo de la cinm de empaque sobre
apm'atos nuevos es la aplicaci6n de un
demrgenm dora&rico lfquido pm'a lavar
platos. Aplique con un patio sua,_ y m(0e.
NORA:Deberetirarel adhesivodetodas/aspartes.
Nopuederetirarsesisequema.
Panel de control
Esbuena idea limpiar el panel de control
despu& de cada uso.iJmpie conjabdn suaxv
y agua o con una solucidn de vinagre y agua,
enjuague con agua limpia y lustre en seco con
un patio suaxe. Cuando haga la limpieza, el
panel (D control debe es/ar a tempe_'attu'a
ambienm y no b@_la luz solar (ti,ecm.
No udlice limpiadores abmsivos, limpiadores
liquidos filerms, ahnohadillas plfisticas pare
resuegar o limpiadores pare hornos sobre
el panel (le control: es/os productos (tafim'_n
el acabado. Una solucidn 50/50 de vinagre
y agua calienm timciona bien.
Estriamoideada
Perilla de control (onalgunosmodelos)
Lasperillasdecontroldebenretirarseparafacilitar
lalimpieza.
Asegdrese de que las pefillas es/0n en
las posiciones OFF(Apagado) y Ore de
elias derecho hacia afhera de los v&mgos
pm'a su limpieza.
Las pefillas pueden limpiatse en un
lavavajillaso bien lavmse con agua }jabdn.
Asegdrese de que lasperillas es/_n secas antes
de volvera colocarlas.
\.51elvaa colocar las pefillas en la posici6n
OFF(Apagado) pm'aasegm'ar una colocaci6n
adecuada.
Ranura
Segurodelabisagra
Tire los seguros de la bisagra hacia
abajo para flesbloquearlos
PosiciSn de extracciSn
22
Puerta extraible dei homo
Lapuertaesmufpesada.Tengacddado
alqu#ary levantarlapuerta.
No/evante/apuertade/amanija.
Paraqdtar/apuerta:
[77 Abra la puerta pot completo.
Tire hacia ab@) los seguros
de la bisagt'a hacia el marco de
la puerto, y col6quelos en la posici6n
de desbloqueo. Po(h'a set necesario
ufilizaruna hemmfienm, comoun
des/omillador pequefio de hc_aplana.
[_ St0ete con timmza ambos lados
de la puerta en la parte superior:
[_] Cierre la puerta hasta la posici6n
de exmtcci6n de la puerta (consulte
la ilusmtci6n).
[_ Levante la puerta hasta que el bmzo
de la bisagra se libere de la ranura.
Paravolveracolocar/apuerta
[77 S/gete con finneza ambos lados
de la puerta en la parte superior:
[_ I i I ! tCop, Borde Brazede la bisagra
la puerta inferiorde
en el mismo
_ngulo que
la posicidn
de extt'acci6n,
coloque
la nmesca del b,'azo
de la bisag_'aen el Muesca
borde inDrior de la ,'antu'a de
la bisagI'a, i_t muesca en el brazo de
la bisag_'adebe estar bien asentada en
la parte inDrior de la ranura.
[_ Abra la puerta pot completo.
Si la puerta no se abre completamente,
la muesca no estfiasentada
correctamente en el borde
inferior de la ramu'a.
Empire los seguros de la bisagm
hacia arfiba contm el marco delantero
de la cavidad del homo y coldquelos
en la posici6n de bloqueo.
Brazede.
labisagra
Seguro
de la
bisagra Empuje los segums de la bisagra hacia arriba
para bloquearlos
[_ Cierre la puerta del homo.
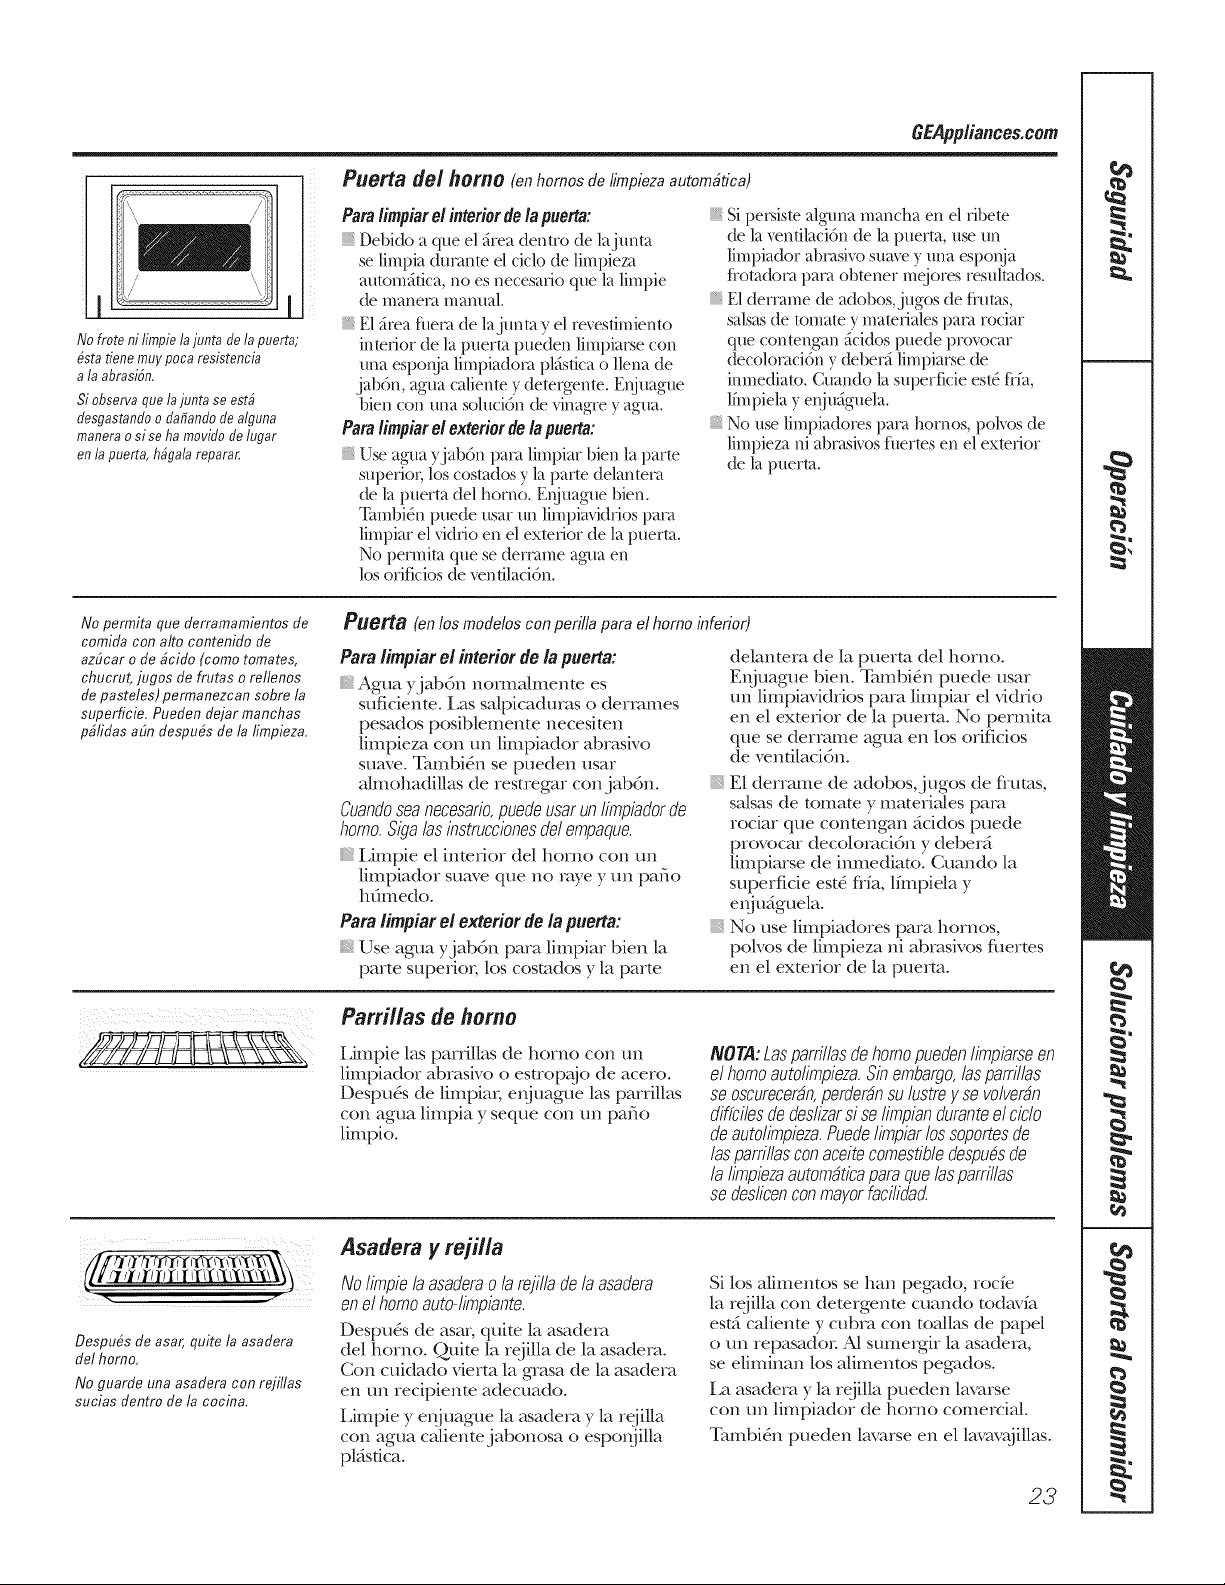
I I
Nofrotenilimpiela juntadelapuerto;
#statienemuypocaresistencia
alaabrasiSn.
Siobservaquelajunta se est#
desgastandoo dafiandodealguna
maneraosi sehamovidodelugar
en/apuerta, h@a/a reparar.
GEPpp/iance&com
Puerta de/homo (en homos delimpiezaautom#tica)
Para limpiarel interior de/a puerto:
Debido a que el grea dentro de lajunta
se limpia ducame el ciclo de limpieza
amomfifica, no es necesafio que la limpie
de manera manual.
E1 grea flle_t de lajunta y el re_sfimiento
interior de la puerto pueden limpia_e con
una espoI_a limpiac]o_ pl_sfica o llena de
jab6n, agua caliente y detergente. Enjuague
bien con una soluci6n de vinagre y agua.
Paralimpiarel exterior de la puerto:
Use agua yjabdn pro( limpiar bien la porte
superior; los cosmdos y la parte delante_t
de la puerta del homo. Enjuague bien.
TambiSn puede usar un limpiavidrios i)m_
limpiar el vidrio en el ex/ecior de la puerta.
No pemfita que se demm_e agua en
los ofificios de _nfilacidn.
Si pe_:sis/e alguna mancha en el ribete
de la x_nfilaci6n de la puerto, use un
limpiador abcasivo sua_ y una esponja
fiom(bm pare obmner mejores resulmdos.
E1 dermme de adobos, jugos de fiums,
salsas de tomato y matefiales pata rociar
que conmngan gci(bs puede provocar
decolomci6n y debecA limpim_e de
imnediato. Cuando la superficie es/4 fi-fa,
lfinpiela y eqjuSguela.
No use limpiadores pare hornos, polvos de
limpieza ni abmsivos fl/erms en el exmfior
de la puerto.
No permita que flerramamientos de
comifla con alto contenido de
azScar o de #ciflo (como tomates,
chucrut, jugos de frutas o rellenos
de pasteles) permanezcan sobre la
superficie. Pueflen flejar manchas
p#fiflas aSn flespu#s de la fimpieza,
Puerta (on los rnodeloscon perilla para el homo inferior)
Pare limpiar el interior de la puerta:
Agua yjabdn nomm/mente es
suficiente. Los saJpicaduras o derrames
pesados posiblemente necesimn
limpieza con un limpiador abrasivo
suave. Tambi&_ se pueden usar
ahnohadillas de restregar con jabdn.
Cuandosea necesario,puede usar un Iimpiador de
homo. Siga los instruccionesdel empaque.
., Limpie el interior del homo con un
limpiador suave que no raye y un patio
hdmedo.
Pare limpiar el exterior de/a puerta:
Use agua yjabdn pare limpiar bien la
parte supericm los costados y la parte
delantera de la puerto del homo.
E_juague bien. Tambi&_ puede usar
un limpiavidrios pare limpiar el vidiio
en el exm_Jor de la puerto. No permim
que se derrame agua en los orificios
de vendlacidn.
E1 derrame de adobos, j ugos de flutas,
so/sos de tomato y materia/es pare
rociar que conmngan gcidos puede
provocar decolomcidn y deberfi
limpiarse de inmediato. Cuando la
superficie est6 ffia, lflnpiela y
ei_ju_guela.
No use limpiadores pare hornos,
polvos de limpieza ni abrasivos filetms
en el exm_Jor de la puerto.
Parrillas de homo
Limpie los parrillas de homo con un
limpiador abrasivo o esuop_{jo de acero.
Despu& de limpia_; e_juague los parrillas
con agua limpia y seque con un patio
limpio.
NOTA:Losparrillasdehomopuedenlimpiarseen
el homoautolimpieza.Sinembargo,losparrillas
se oscurecerdn,perderdnsulustrey se volverdn
diffcilesde deslizarsi selimpianduranteel ciclo
deautolimpieza.Puedelimpiarlossoportesde
losparrillasconaceitecomestibledespudsde
lalimpiezaautomdticaparaquelosparrillas
se deslicenconmayorfacilidad
Despu#s de asar, quite la asadera
flel homo,
No guarde una asaflera con refillas
sucias flentm de la cocina,
Asadera y rejilla
Nolimpiela asaderaolarejilladela asadera
enel homoauto-Iimpiante.
Despu& de asar, quite la asadera
del homo. Quite la rejilla de la asadera.
Con cuidado vierm la grasa de la asadera
en un recipiente adecuado.
Limpie y e_0 uague la _sadera y la rejilla
con agua ca/ientejabonosa o espo_0illa
pMsfica.
Si los Mimentos se hart pegado, rocfe
la rejilla con detergente cuando todavfa
est;i cMiente y cubra con toMlas de papel
o un repasador A| sume_gir la asadera,
se eliminan los a/imentos pegados.
La asadera y la rejilla pueden lavarse
con un limpiador de homo comercia/.
Zambi&_ pueden lmarse en el lavav@llas.
23
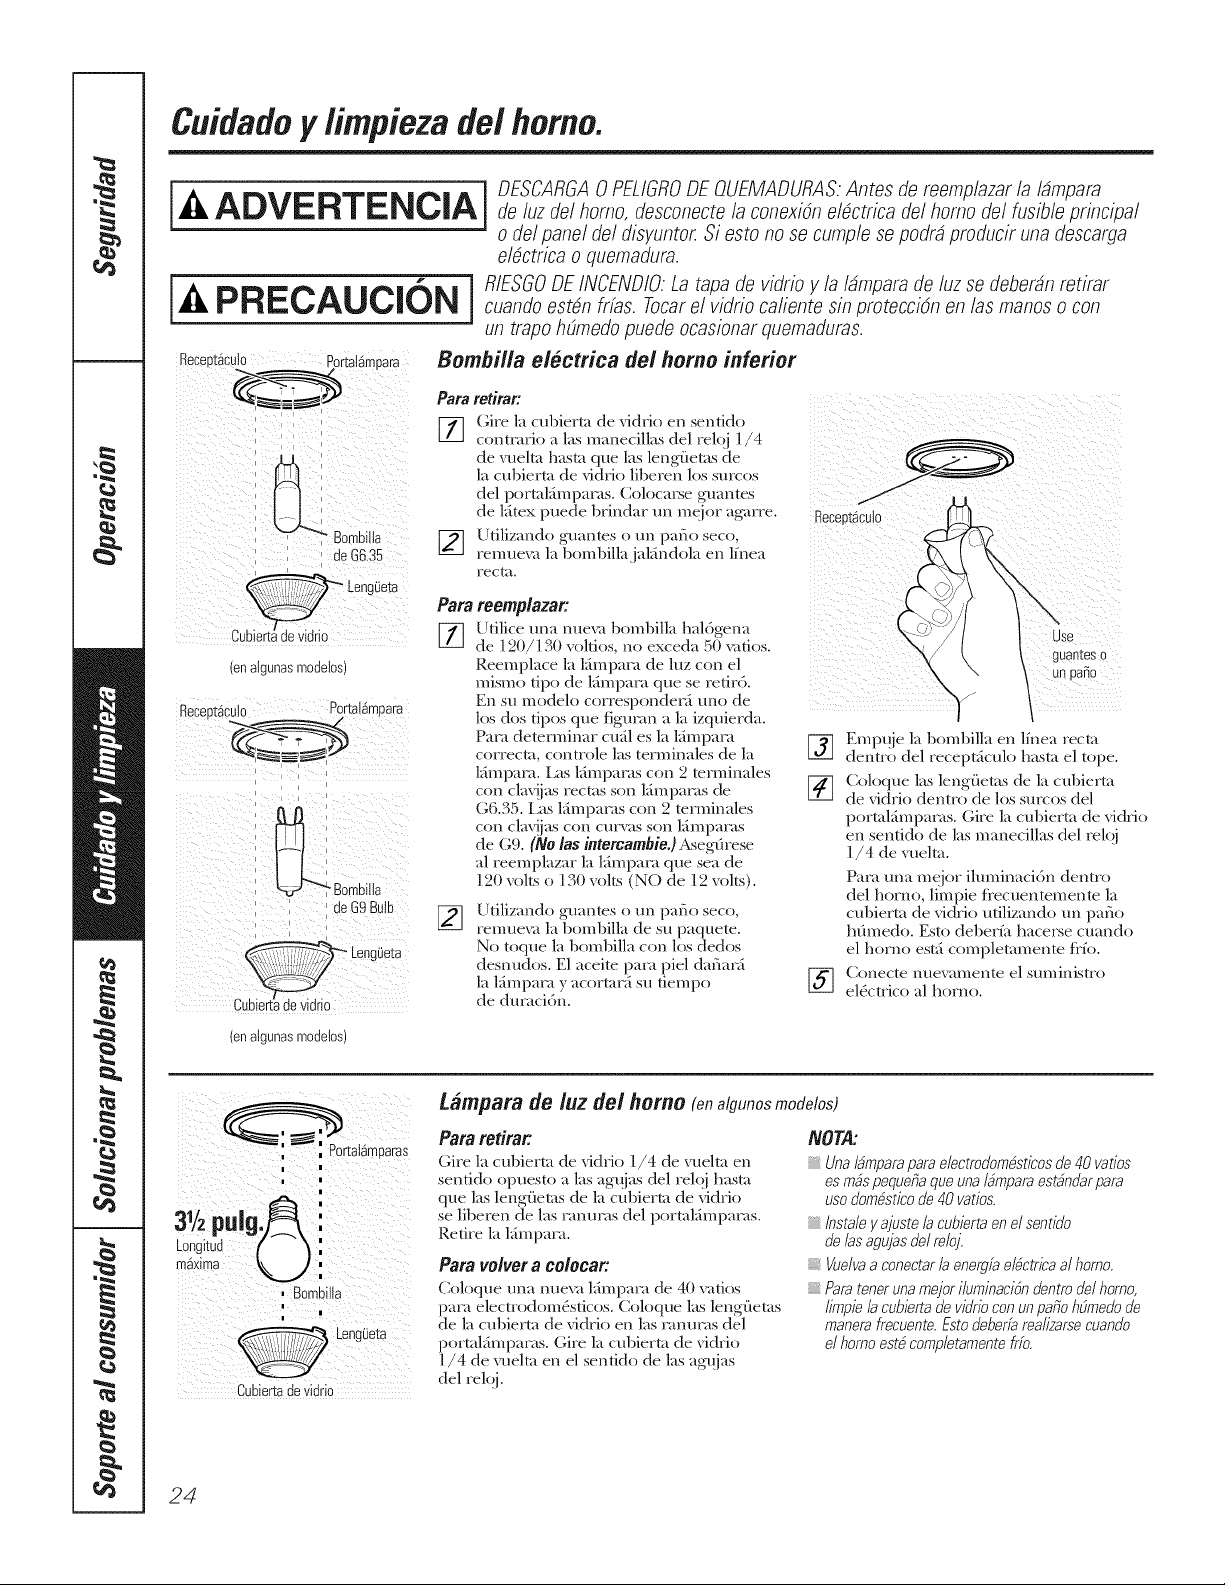
CMdadoy limpieza de/homo.
i^ -ID SCARGA0P UGROaU MADURAS.A,,resdereem /azar
ADVERTENCIA
In ]
de/uz de/homo, desconecte /a conexi6n e/_ctrica de/homo de/fusib/e principa/
o del panel del disyuntoL Si esto no se cumple se podr_ producir una descarga
el_ctrica o quemadura.
i PRECAUCI&N i R' sG°D ,NC ND,O..de deluzsedeber_nretirar
,_ v I cuando est_n frfas. Tocarel vidrio caliente sin protecci6n en las manos o con
I
un trapo Mmedo puede ocasionar quemaduras.
Bombilla electrica dei homo inferior
_ B0mbiih
deG6.35
Leng0eta
ten atc Jnas modelos
ReceDt_culo PortalamDara
_Bombiiia
deG9 Bulb
Para retirar:
_] (;ire la cubierta de vidrio en sentido
contcario alas manecillas del reloj 1/4
de vuelta hasta que las lengfietas de
la cubierta de vidrio lil)eren los surcos
del p(wtal_impan_s. Colocarse guantes
de l_itex puede 1)rindar un mei(w aKarre.
_-] Utilizando guantes o un patio seco,
remue_ la 1)oml)illajal_indola en lfnea
recta.
%
roemp/azar:
Utilice una nue_ boml)illa hal(_gena
de ] 20/130 xoltios, no exceda 50 x_tios.
Reemplace la lfmpaca de luz con el
mismo tip() de lfimpam que se retirt.
En su modelo corresponder, i uno de
los dos tiI)OS que fig'uc, m a la izquierda.
Pare demrminar cull es la lfmpam
correc/a, controle las terminales de la
lfimpam. Las lfimpams con 2 terminales
con clav!ias rectas son lfimpams de
G6.35. Las lfimpams con 2 mrmimdes
con clav!jas con curvas son lfimpacas
de G9. (No/as intercambie.)Asegfirese
al reemplazar la lfimpaca que sea de
120 volts o ] 30 volts (NO de 12 volts).
Utilizando guantes o m_ patio seco,
remue_ la bombilla de su paquete.
No toque la boml)illa con los dedos
desnudos. E1 aceite paca piel dafiani
la lfmpam y acortar5 su tiempo
de duracidrJ.
/; use
unpatio
Empuie la bombilla en lfnea recta
dentro del recept_iculo hasta el tope.
_] Coloque las lengfietas de la cul)ierta
de vidrio dentro de los surcos del
portal_impams. (;ire la cul)ierta de xqdrio
en sentido de las manecillas del reloi
]/4 de vueha.
Pare una meior iluminacidn dentro
del horn(h limpie flecuentemente la
cubierta de vidrio utilizando un patio
hfimedo. Esto deberfa hacerse cuando
el horno est_i completamente fl'fo.
[_ onecte nue_amente el suministro
el_ctrico al homo.
(en aigunasmodetos)
i ,
3Yzpulg '
= a
Longitud
m_xima
m
Cubiertadevidrio
tglmpara rio luz rio] homo (enalgunos modelos)
Pararotirar.
(;ire la cubierta de vidri(:, 1/4 de vueha en
sentido opuesto alas agujas del rel_i hasta
que las lengfie/as de la cubier/a de vidrio
se liberen de las P,muP, ts del por/alfimpams.
Retire la 15inpar, t.
Para VO/VOra CO/OCar:
Coloque una nueva lfimpaca de 40 ratios
para electrodom_sticos. Coloque las leng{ie/as
de la cubierta de vidrio en las ranuras del
por/alfimparas. Gire la cubier/a de vidrio
]/4 de vueha en el sentido de las agqjas
del tel@
NORA:
Una I_mpara para alactrodombsticos de 40 vatios
as robspaquatia qua una /bmpara astbndar para
uso dombstico de 40 vatios.
Instale y ajusta ia cubbrta an el sentido
de/as agujas de/raloj.
Vualvaa conectar ia energfa albctrica al homo.
Para tanar una major iluminacibn dantro de/homo,
limpb ia cubbrta de vidrio con un patio @medo de
manara fracuanta. Esto dabaria raa/izarsa cuando
el homo astb completamenta frfo.
24
GEPpp/iances.com
Interior de/homo sin auto-limpieza (ena/gunosmode/os)
Con el cuidado adecuado, el acabado de
esmake de porcelana de la parm inmrior
del horno----parms supeIJo_; inferi(m
latera|es e inmrna de la puerta--seguird
coI_lo nilevo dtlIan[e IIliichos af/os.
Deje enfliar el homo antes de limpiar
Recomendamos el use de guanms de
goma cuando limpie el homo.
En general, con agua yjabdn se podr_
]impiar bien. Los derrmnes o sa/picadtm_s
rebeldes pueden requerir una ]impieza
con tm producto abrasive suave. Tambi&_
pueden utilizable espo_jillas embebidas
con jabdn.
No permits que derramescon us alto contenido
de azE_caro dcido (comatomates, chucrut,jugos
de fruta o rellenos depasteles)permanezconen la
superficie. Puedenprovocaruna manchasin brillo
despudsde la limpieza.
E1 amonfaco dom&dco puede ayudar
a reaUzar una limpieza meier (_oloque
1_2taza en un recipienm poco proflmdo
de vidfio o cerdmica denuo del homo
flfo dumnm toda la noche.
Los gases del amonfaco ayudardn a
aflojar la grasa y los aUmentos quemados.
Si fl_era necesario, puede udlizar
un limpiador de homo. Siga
las instrucciones del paquem.
Norocfelimpiadordehomosobreloscontroles
einterruptoreseldctricosporquepuede
provocaruncortocircuitoy generarchispas
ounincendio.
Nopermitaqueseacumuleunapelfculade
limpiadorenel sensordetemperatura,porque
puedehacerqueel homocalientede manera
incorrecta.(Elsensorestdubicadoen laparte
superiordelhomo).Limpieel sensorcon
unpatiodespudsde cadalimpiezadelhomo,
teniendocuidadodenomoverel sensor
porqueuncambioen suposicidnpodrfa
afectarel homeadodelhomo.
Norode ning_nIimpiadorde homossabre
lapuerta,manijasy cualquiersupefficie
exteriordelhomo,gabineteso superficies
pintadas.El limpiadorpuededaMr estas
superficies.
Superficies pintadas
Limpie conjabdn y agua o una solucidn
de vinagre y agua.
No use limpiadores de homo
comercia/es, limpiadores en polvo, lana
de acero ni abrasives flmrms en ningmm
superficie pinmda.
Superficies de vidrio
Para limpiar el acabado exterior de
vidrio, use un limpiador de vidrios.
E_iuague y brille con un patio seco.
No permim que el agua ni el limpiador
corran per el interior de la puerto del
homo dumnte la limpieza.
Superficies de acero inoxidable (enalgunosmodelos)
No use una almohadi//ade lanadeacere;
rayarala superficie.
Pare limpiar la superficie de acero
inoxidable, use aguajabonosa con
poca espuma o bien un limpiador o
abrillanmdor para acero inoxidable.
Siempre limpie la superficie en
la direccidn de las vetas. Nga las
instrucciones del limpiador para limpiar
la superficie de acero inoxidable.
Para avefiguar ace_va de la compm
de un limpiador o un lusuador de acero
inoxidable, o pare encontrar la ubicacidn
de su distfibuidor mils cercano, per favor
llame a nuestro nfimero gmtuito:
CentreNational deRefacciones
(National PartsCenter)
1.800.626.2002
GEAppliances.cem
25
Antes de llamar para solic#ar
un servicio de mantenimiento...
iLos consejos para resoluciSn de problemas ahorran tiempo y
dinero/ Revise primero las gr#ficas en las siguientes p@inas
y es posible que no tenga que Ilamar para solicitar servicio de
mantenimiento.
Causas posibles
Sefales de control
despuesde inwesar
el tiempo de cocci#n
oBelay Start
(/nicioposter#ado)
Olvid6 ingresar una
temperatura de horneado o
el tiempo de limpieza.
Qu# hacer
• Presione el botdn Bake y la temperatma deseada o
el bot6n Self Clean y el fiempo de limpieza deseado.
Los alimeatos Controles del horno no • Consuffe |a secci6n Uso del homo.
nose homeano configurados apropiadamente.
asanapropiadamente La posid6n de la bandeja • Consu/te/a secci6n Uso del homo.
es incorrecta o no estfi nivelada.
La posid6n de la parfilla es * Consu|m |a secci6n Uso gel homo.
incorrecta o la par611a no
estfi nivelado.
E1 termostato del horno • Consulte |a secci6n Ajuste del termostato del homo:
necesita ajuste, iH@alo usted mismo!.
Los alimentos no Los controles del horno estfin • Asegqirese de presionar el bot6n Broil Hi/Lo.
so asana la parriila configurados inadecuadamente.
apropiadamente Se est_ ut_zando una posid6n • Consu/te/a Guia para asar a la parrilla.
inadecuada de la parrilla.
Los alimentos se estfin + Para obtener mejores resulmdos, udlice una flmnte
codnando en una fuente caliente, diseflada para asar a la parrilla. Asegdrese de que
est_ flfa.
Los utensilios de codna • Para mejores resultados, ufilice una bandeja diseflada
no son adecuados para asar para asar a la parfilla.
a la parNlla.
El papel metfilico usado • Consu|m la secci6n Uso del horn&
en la asadera y la rejilla
no se ban colocado de manera
correcta y no se han rea|izado
los cortes recomendados.
En algunas _eas
el voltaje puede ser bajo.
• Precaliente el elemento de asado a la parfilla durante
10 minutos.
* Ase a la parrilla durante un periodo m_is prolongado
que el recomendado en la Gufapara asor a la parrilla.
El relo] y el temporizador Un fusible en su casa • Reemplace el fi_sible o reinicie el disyuntor
no funcionan puede estar ftmdido o
el disTtmtor activado.
Los controles del homo estfin * Consu/m la seccidn Uso del reloj y el tempofizador.
configurados incorrectamente.
ta iuzno funciona La bombilla estfi floja o * Apriete o reemplace [a bombilla.
defectuosa.
El botdn de operacidn • lJame para solicitor servicio de manmnimiento.
de la bombilla estfi roto.
26
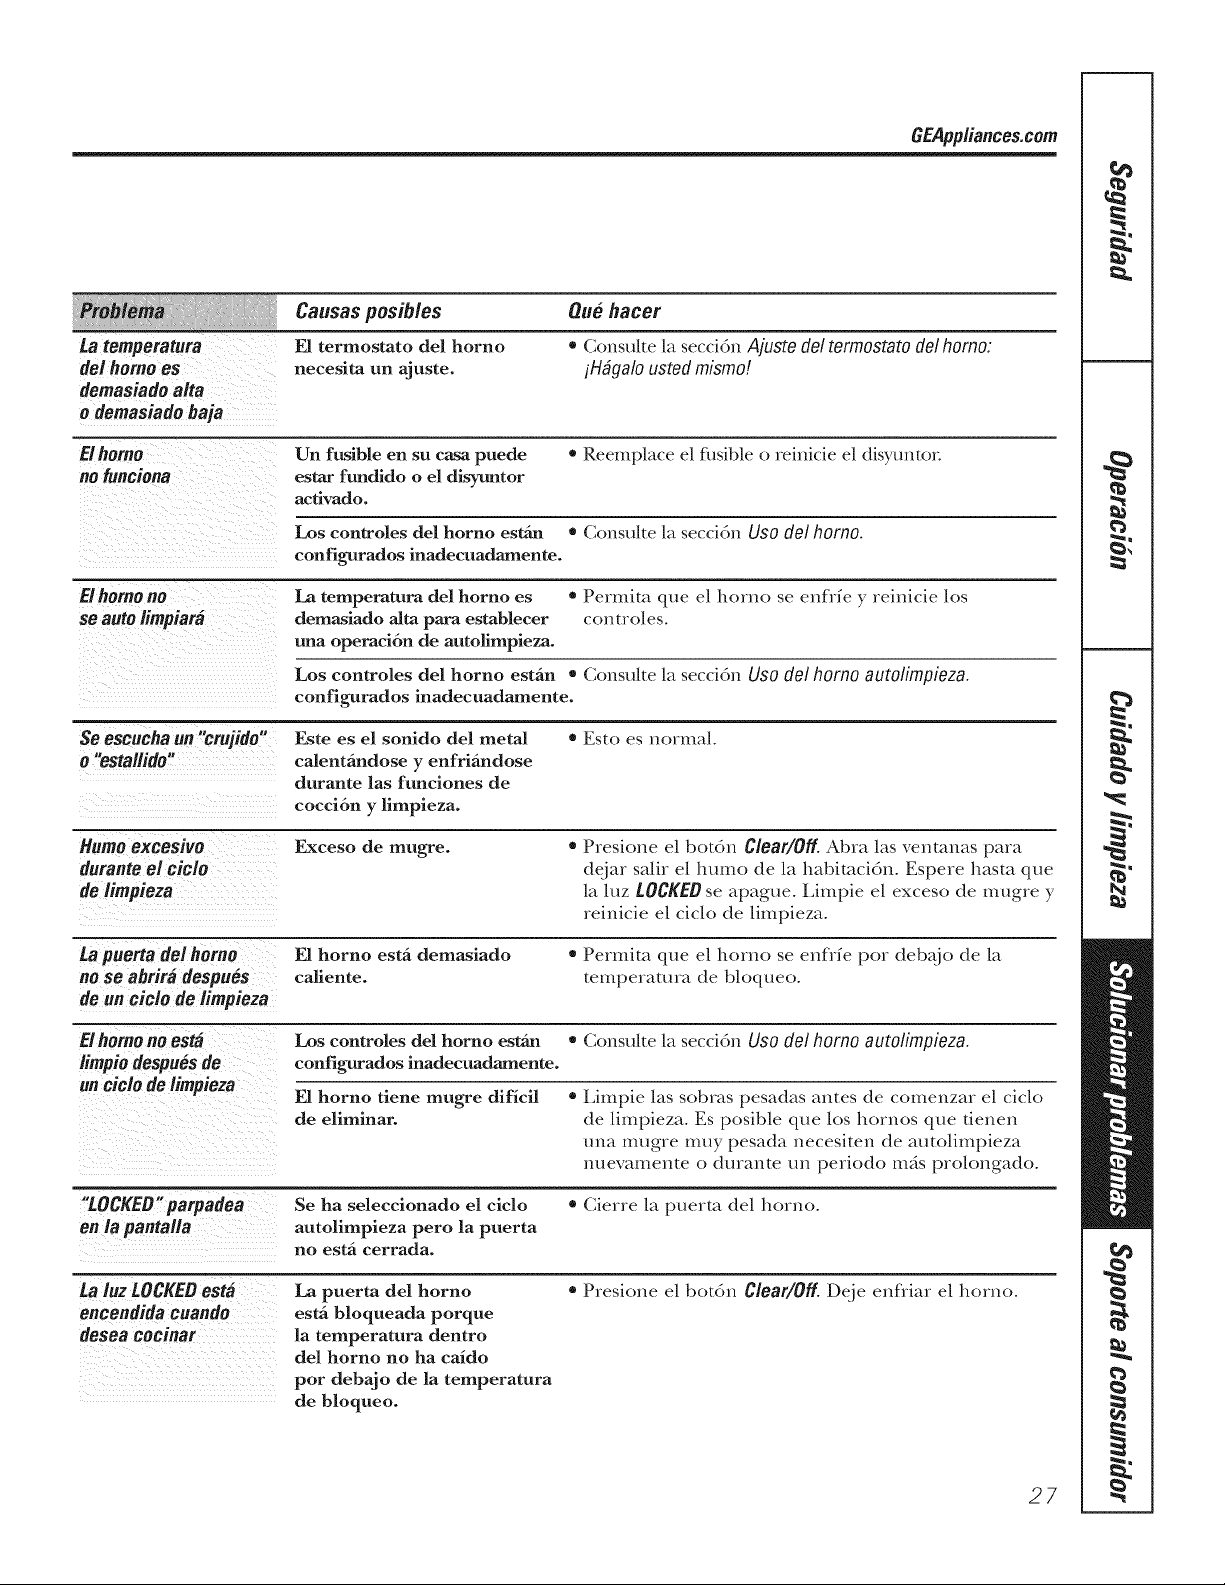
GEPpp/iances.com
Causas posibles Que hacer
La temperatura El termustato del horno = Consulte [a secciGn Ajuste de] termostato de] homo:
del homo es necesita un ajuste, iH@alo usted mismo!
demasiado aita
o demasiado baja
El homo Un fusible en su casa puede = Reemplace el fusible o rehficie el disyuntor
no funciona estar fundido o el disyuntor
activado.
Los controles del horno esffm * Consu/te la secciGn Uso del homo.
configuradus inadecuadamente.
E! homo no La temperatura del horno es • Permim que el homo se enflfe y reinicie los
so auto limpiara demasiado aim para establecer controies.
una operaci6n de autofimpieza.
Los controles del horno estfin o Consuffe h secciGn Uso del homo autolimpieza.
configuradus inadecuadamente.
So escueha un "erufido" Este es el sonido del metal • Esto es normal
o "estailido" calentfindose y enfrifinduse
durante las funciones de
cocci6n y limpieza.
Humo excesJtto Exceso de mugre. • Presione el botGn Clear/Off. Abra las venmnas para
durante el eicio deiar sa|ir el humo de la habimci6n. Espere hasta que
de limpieza la luz LOCKED se apague. Limpie el exceso de mugre y
reinicie el ciclo de lhnpieza.
ta puerta dei homo E1 horno estfi demasiado • Permim que el homo se enflfe per debacle de la
no se abrira despues caliente, temperamra de bloqueo.
de un cielo de iimpieza
E!homo no esM Los controles del horno estfin • Consuke/a secci6n Use del homo autolimpieza.
iimpio despu#s de eonfiguradus inadeeuadamente.
on eicio de limpieza El horno tiene mugre dificil • IJmpie |as sol)ms pesadas antes de comenzar el dclo
de eliminar, de ]inlpieza. Es posible que los ]lornos que fienen
una mugre muy pesada necesiten de autolimpieza
nuevamente o durante un periodo rods prolongado.
"tOCKEO"parpadea Se ha seleeeionado el eielo * Cierre la puerto del homo.
on la pantalla autolimpieza pero la puerta
no estfi cerrada.
La iuz LOCKED esM La puerta del horno • Presione el bot6n Clear/Off. Deje enfiiar el horno.
encendida euando estiL bloqueada porque
desea cocinar la temperatura dentro
del horno no ha caido
per debajo de la temperatura
de bloqueo.
27
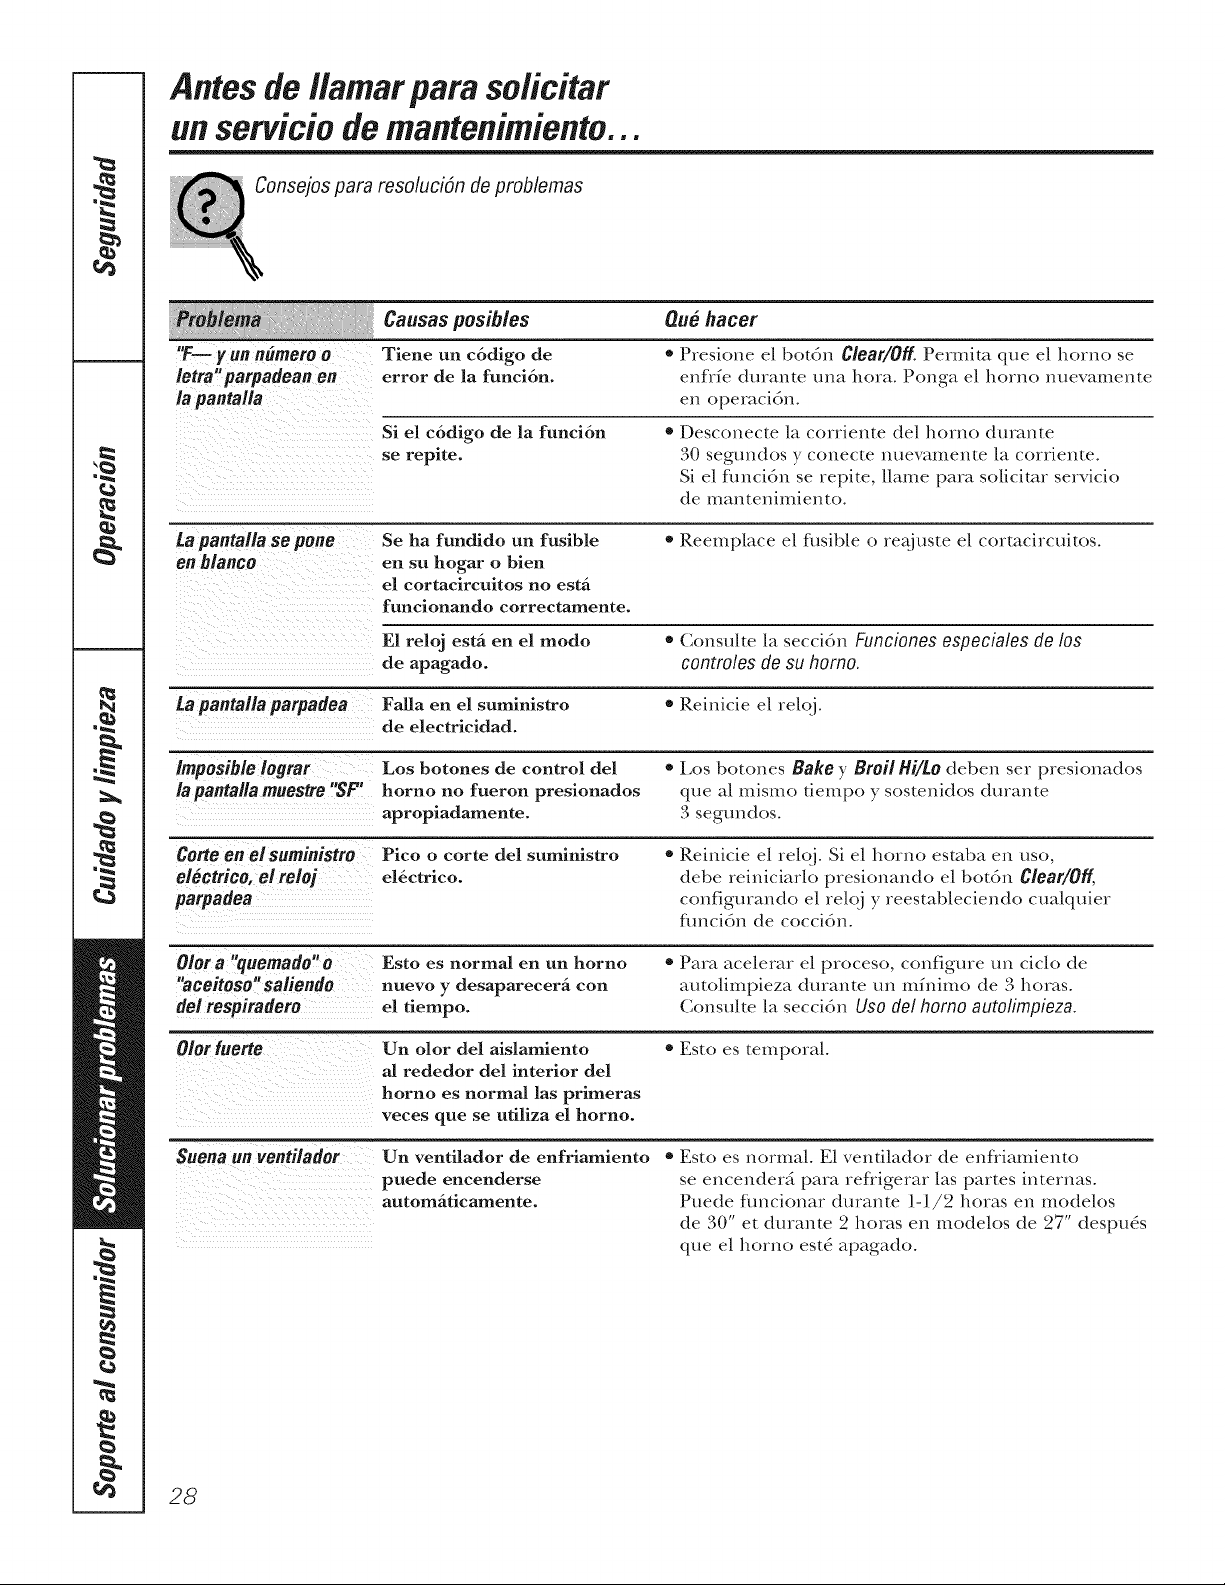
Antes de llamar para solic#ar
un servicio de mantenimiento...
Consejos para resolucidn de problemas
Causas posibles Qu# hacer
"1:_ y un n#mero o Tiene un c6digo de * Presione el bot6n Clear/O_ Permim que el homo se
letra'parpadean en error de la funci6n, enfrfe durante una hora. Ponga el homo nuevan_ente
/a pantal/a en operaciGn.
Si el c6digo de la funci6n • Desconecte la corriente del homo durante
se repite. 30 segundos y conecte nuevamente la corriente.
Si el flmci6n se repite, ]lame para solicitor servicio
de mantenimiento.
La pantalla so pone Se ha fundido un fusible • Reemplace el fl_sible o re_j uste el cormchcuitos.
en blanco en su hogar o bien
el cortacircuitos no esta
funcionando correctamente.
E1 reloj estgt en el modo • Consu/te la secci6n Funciones especiales de los
de apagado, controles de su homo.
La pantallaparpadea Falla en el suministro • Reinicie el reloj.
de electricidad.
imposible Iograr Los botones de control del • Los botones Bake y Broil Hi/to deben set presionados
/apantalla muestre "SF" horno no fueron presionados que al mismo tiempo y sostenidos durante
apropiadamente. 3 segundos.
Corte en eisuministro Pico o corte del suministro • Reinicie el relqj. Si el homo esmba en uso,
electrico, el reloj el&ctrico, debe reiniciarlo presionando el bot6n Clear/Off,
parpadea configmando el relqj y reestableciendo cua|quier
flmci6n de cocci6n.
Olora "quemado'o Esto es normal en un horno • Para acelerar el proceso, configure un cido de
"aceitoso'saliendo nuevo y desaparecerfi con auto|impieza durante un mfnimo de 3 horas.
de/respiradero el tiempo. Consuffe la secci6n Uso del homo autofimpieza.
Oiorfuerte Un olor del aislamiento • Esto es temporal
al rededor del interior del
horno es normal las primeras
veces que se utiliza el horno.
Suenaun Ventilador Un ventilador de enfriamiento
puede encenderse
automaticamente.
• Esto es normal. E1 vendlador de enfliamiento
se encenderg para refiigerar las partes internas.
Puede flmcionar durante 1-1/2 horas en modelos
de 30" et dinante 2 horas en modelos de 27" despu5s
que el homo est_ apagado.
28
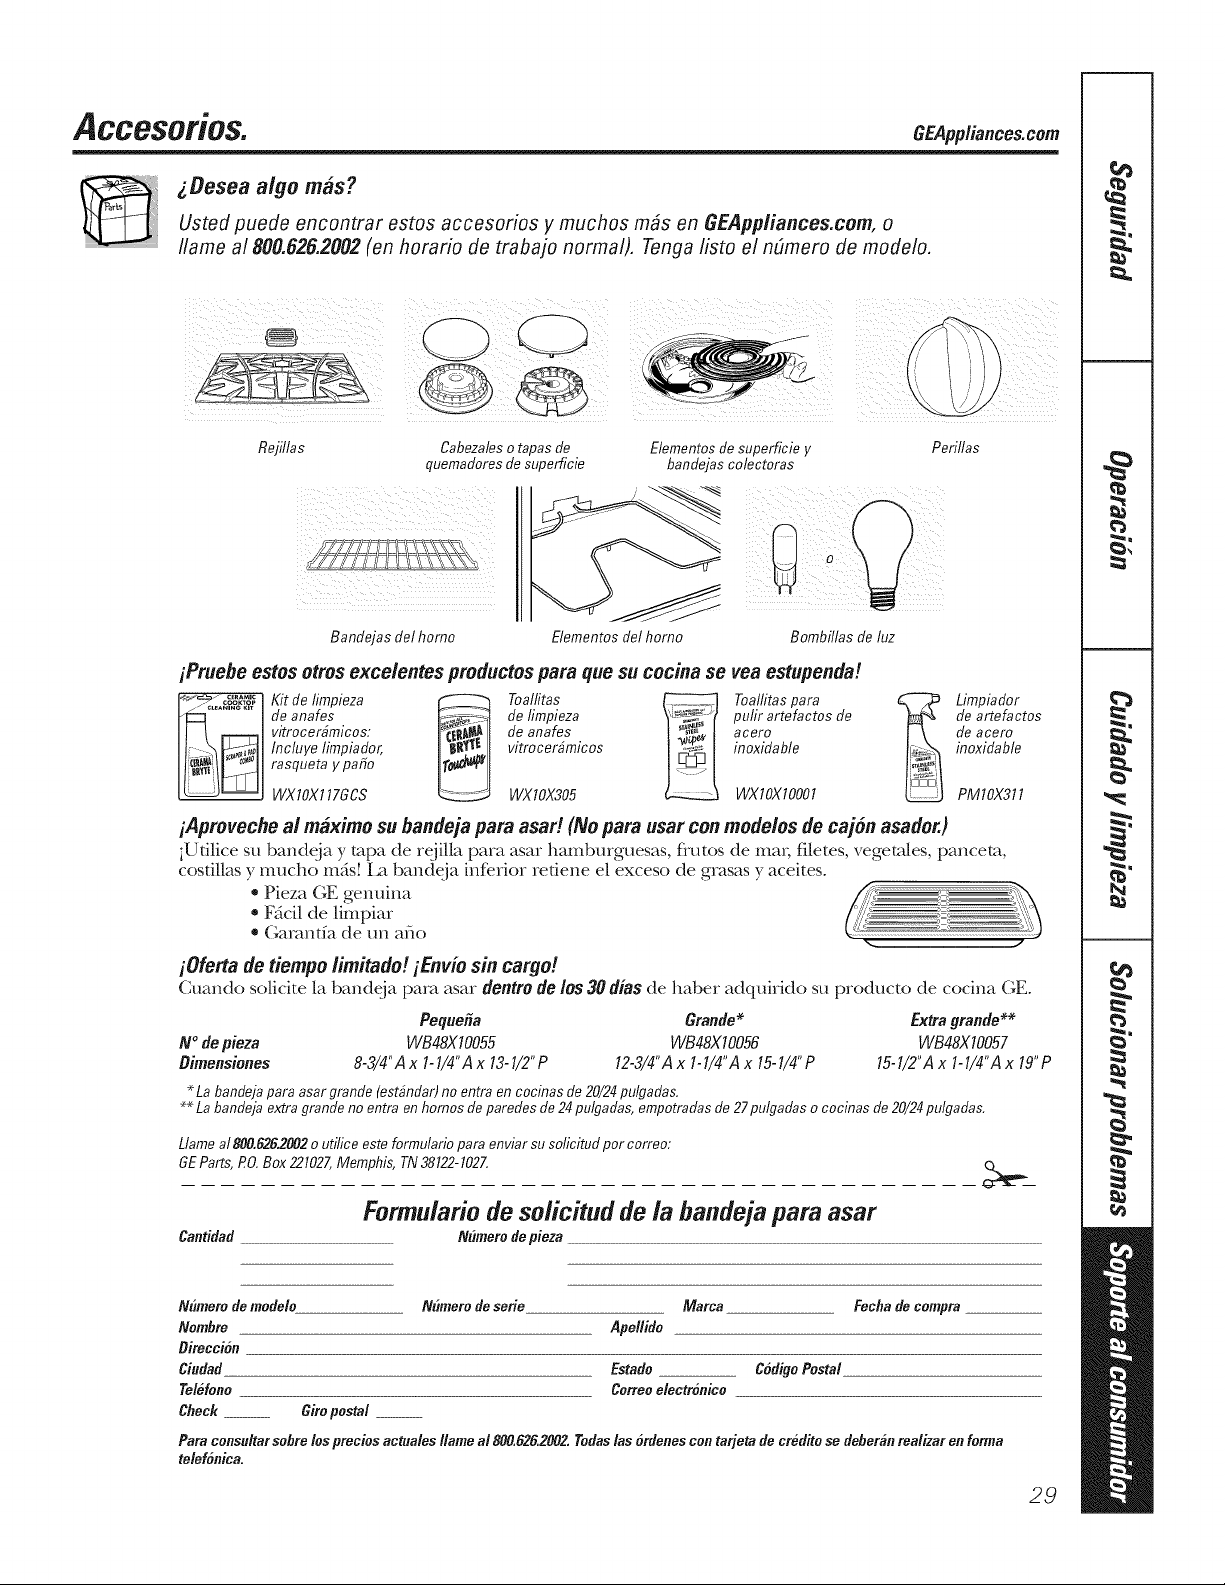
Accesorios. ,EApp,a,ce,.co
i.Oesea aigo mas?
Usted puede encontrar estos accesorios y muchos m_s en GEApp/iances.com, o
Ilame a1800.626.2002 (on horatio de trabajo normal). Tenga listo el nElmero de modelo.
Rejillas Cabezaleso tapas de
quemadores de superficie
Banflejas tel homo
Elementos de superficie y
banflejas colectoras
Elementos tel homo
Perillas
Bombillas de luz
Pruebe estos otros excelentes pmductos para que su cocina se yea estupenda!
__ de anafes de limpieza pulir artefactos de
vitrocerbmicos: de anafes acero
Incluye limpiaflor, vitrocerbmicos inoxiflable
rasqueta y patio
WXIOX117GCS WXIOX305 WXlOXIO001
Limpiaflor
de artefactos
de acero
inoxiflable
PM10X311
iApmveche ai maximo su bandeja para asaH (No pare usar con modeios de cajon asador.)
;Utilice su bandeja y t;_pa de rejilla para asar hamburguesas, flutos de mah filetes, veget_des, [)ancet_t,
costillas y mucho m_s! l_ bandeia inferior refiene el exceso de grasas y aceites.
* Pieza GE genuina
* Fficil de limpiar
* Oarantfa de un aft<>
iOferta de tiempo tim#ad!! iEnvio sin cargo!
Cuando solicke la bandeia para asar dentro de los 30 dias de haber adquhido su producto de cocina GE.
Pequefa Grande* Extragrande**
N ° depieza WB48XIO055 WB48XIO056 WB48X10057
Oimensiones 8-3/4"A x 1-1/4"Ax 13-1/2"P 12-3/4"Ax 1-1/4"Ax 15-1/4"P 15-1/2"Ax 1-1/4"Ax 19"P
* La banfleja para asar grande (est#nflar)no entra en cocinas de 20/24pu/gadas,
** La banfleja extra granfle no entra en homos de parefles de 24 pulgaflas, empotraflas de 27pulgaflas o cocinas de 20/24pulgaflas,
Llame a1800.6262002o uti/ice esteformulario para enviar su solicitud por correo:
GEParts,RO,Box 221027,Memphis, TN38122-102Z
Cantidad
Formulario de solicitud de la bandeja para asar
Nhmerode pieza
Nhmemde modelo Nhmerode serie Marca
Nomhre Apellido
Oireccion
Ciudad Estado CodigoPostal
Telefono Coffee electr6nico
Chock__ Giropostal __
Fechade compra
Para consultarsobre lospmciosactualesIlame a1800.626.2002.Todas/as 6rdenes contarjeta de cred#ose deborahmalizar enforma
telefonica.
29
r _
M_
ML
W
m
Nota$.
3O
Garantia de GEpara su homo e/ectrico empotrado.
Todos los servicios de garanfia los proporcionan nuestros Centros
de Reparaci6n de F#brica o nuestros t#cnicos Customer Care®
autorizados. Para concertar una cita de reparaci6n, en fine&
visite nos en GEAppliances.com, o flame a1800.GE.CARES
(800.432.2737). Cuando flame para soficitar servicio, por favor
tenga a mano el ndmero de serie y el ndmero de modelo.
Pegue aqui su recibo.
Se requiere facilitar prueba
de la fecha de compra original
para obtener un servicio
bajo la garantfa.
Una_o
A partir de la fecha
dela compra original
GE reemp/azara:
Cua/quierpartedel horno que fhlle debido a defectos en los materiales o en la fabIicaci6n.
Durante este garantia limitada de un a#o, GE mmbi_n proporcion_, sin costo a/guno,
toda la mano de obra y los servicios internos para reemplazar partes defectuosas.
Viajes de servicin a su casa para ensefiarle c6mo usar
el producto.
} lnstalaci6n, entrega o mantenimiento inapropiada.
}_Fallas del producto si hay abuso, real uso, o uso para
otros prop6sitos que los propuestos, o uso para fines
comerciales.
}_Reemplazo de fusibles de su casa o reajuste de
interruptores de drcuito.
}_Dafio aLlproducto causado por accidente, fuego,
inundacinnes o actos de Dios.
Dafio incidental o consecuencial causado por posibles
defectos con el aparato.
Dafio causado despu&s de la entrega.
Producto no accesible para facilitar el servicin
requerido.
EXCLUSION DE GARANTJAS/MPLiC/TAS--Su #nico y exc/usivo derecho es la reparaci6n dei pmducto,
tai y como se indica en esta Garantia limitada. Cualquier garantia implicit& incluyendo /as garantias
implicitas de comerciabilidad o adecuaci6n para un fin determinado, estan limitadas a un a#o o el
periodo de tiempo mas breve permitido pot la leF
Esta garantfa se extiende al comprador original y cualquier comprador posterior de productos comprados para
uso residencial dentro des Estados Unidos. Si el producto est# situado en un #rea que no dispone de servicio por
parte de un proveedor de servicio autorizado de GE,podria tener que hacerse cargo de los costes de envio o bien
podria solicit#rsele que Ileve el producto a un centro de servicio de GEautorizado para realizar la reparaciSn. En
Alaska, la garantia excluye el costo de envio o las visitas de servicio a su casa.
Algunos estados no permiten la exclusidn o las limitaciones de dafios incidentales o consecuenciales, Esta garantia
da derechos legales especificos, y usted podda tener otros derechos que variar#n de estado a estado, Para saber
curies son sus derechos legales, consulte a la oficina de asuntos del consumidor local o la oficina del Prucurador
(Attorney General) en su Iocalidad,
Garante: General Electric Company.Louisville, KY#0225
S/
Soportea/ consumidor..
P_ginaWebde GEAppliances GEPpp/iances.com
dTiene alguna pregunta sobre su electrodom_sdco? iPmebe la Digina Web de GE Appliances 24 horns a/
dfa, cualquier dfa del afio! Para mayor conveniencia y servicio m_s r_pido, ya puede descargar los Manua/es
de los Propiem_ios, pedir piezas o incluso hacer una cim en lfnea para que vengan a rea/izar una
reparaci6n.
Soliciteunareparacidn
GEPpp/iances.com
E1servicio de expertos GE estfi a mn s61o un paso de su puerto. ;Entre en lfnea y solicite su reparaci6n
cuando le venga cualquier d/a del afio! O llame al 800.GE.CARES (800.432.2737) durante horas normales
de oficina.
ilealLifeDesignStudo(Estudodedisefioparalavidareal) GEPpp/iances.com
(;E apoya el concepto de Disefio Universa/--productos, servicios y ambientes que pueden usar genre de
to&ks 1asedades, tamafios y capacidades. Reconocemos la necesidad de disefiar para una gran gama de
habilidades y dificulmdes fYsicasy menta/es. Para rods deta/les cobre las aplicaciones de (;E Disefio Universal,
incluyendo ideas de disefio para la cocina para pex_onas con discapacidades, mire nuesua pdgina Web hoy
mismo. Para persom_s con dificulmdes auditivas, favor de llmnar a/800.TDD.GEAC (800.833.4322).
garantfasamplbdas GEPpp/iances.com
Compre una garantfa ampliada y obtenga demlles sobre descuentos especiales disponibles mientras su
garantfa estfi adn acfiva. Puede comprarla en lfnea en cualquier momento, o llamar al 800.626.2224
durante horas normales de oficina. GE Consumer Home Services esmr_i adn ahf cuando su garantfa temflne.
Piezasy accesorios GEPpp/iances.com
Aquellos individuos con la ca/ificaci6n necesaria para reparar sus propios elecuodom4sficos pueden
pedir que se les manden las piez_s o accesorios direcmmente a sus hogares (aceptamos las m(jetas
\qSA, MasterCard y Discover). Haga su pedido en lfnea hoy, 24 horas cada dfa o llamar pot ml4fbno
a/ 800.626.2002 durante hoi_ks normales de oficina.
tas instmccionesdescritaseneste manualcubrenlospmcedimientosa seguir per cualquierusuario. Cualquier
etra reparaciondeberia,per reglageneral,referirse a personalca/ificadoautorizade.Bebe ejereerseprecaucion
ya que/as reparacienesincorrectaspuedencausarcondicienesde funcienamientoinseguras.
P6ngaseen contactoconnosotros GEApp/iances.com
Si no est_i satisfecho con el servicio que recibe de GE, p6ngase en conmcto con nosotros en nuestra pggina
Web indicando todos los demlles asf como su ndmero de tel_fbno o escrfbanos a:
General ManageL Customer Relations
GE Appliances, Appliance Park
Louisville, KY 40225
Registresu electrodom_stico
GEApp/iances.com
iRegistre su nuevo dectrodom6sfico en linea--cuando usted prefiera! E1registrar su producto a fiempo le
proporcionar£ si surgiera la necesidad, una mejor comunicacidn y un servicio rods rdpido b_jo los t_mflnos
de su garantfa. Tdmbi&_ puede enviar su mrjem de regisuo preqmpresa que se incluye en el mamria/
de emba/_je.

