Loading ...
Loading ...
Loading ...
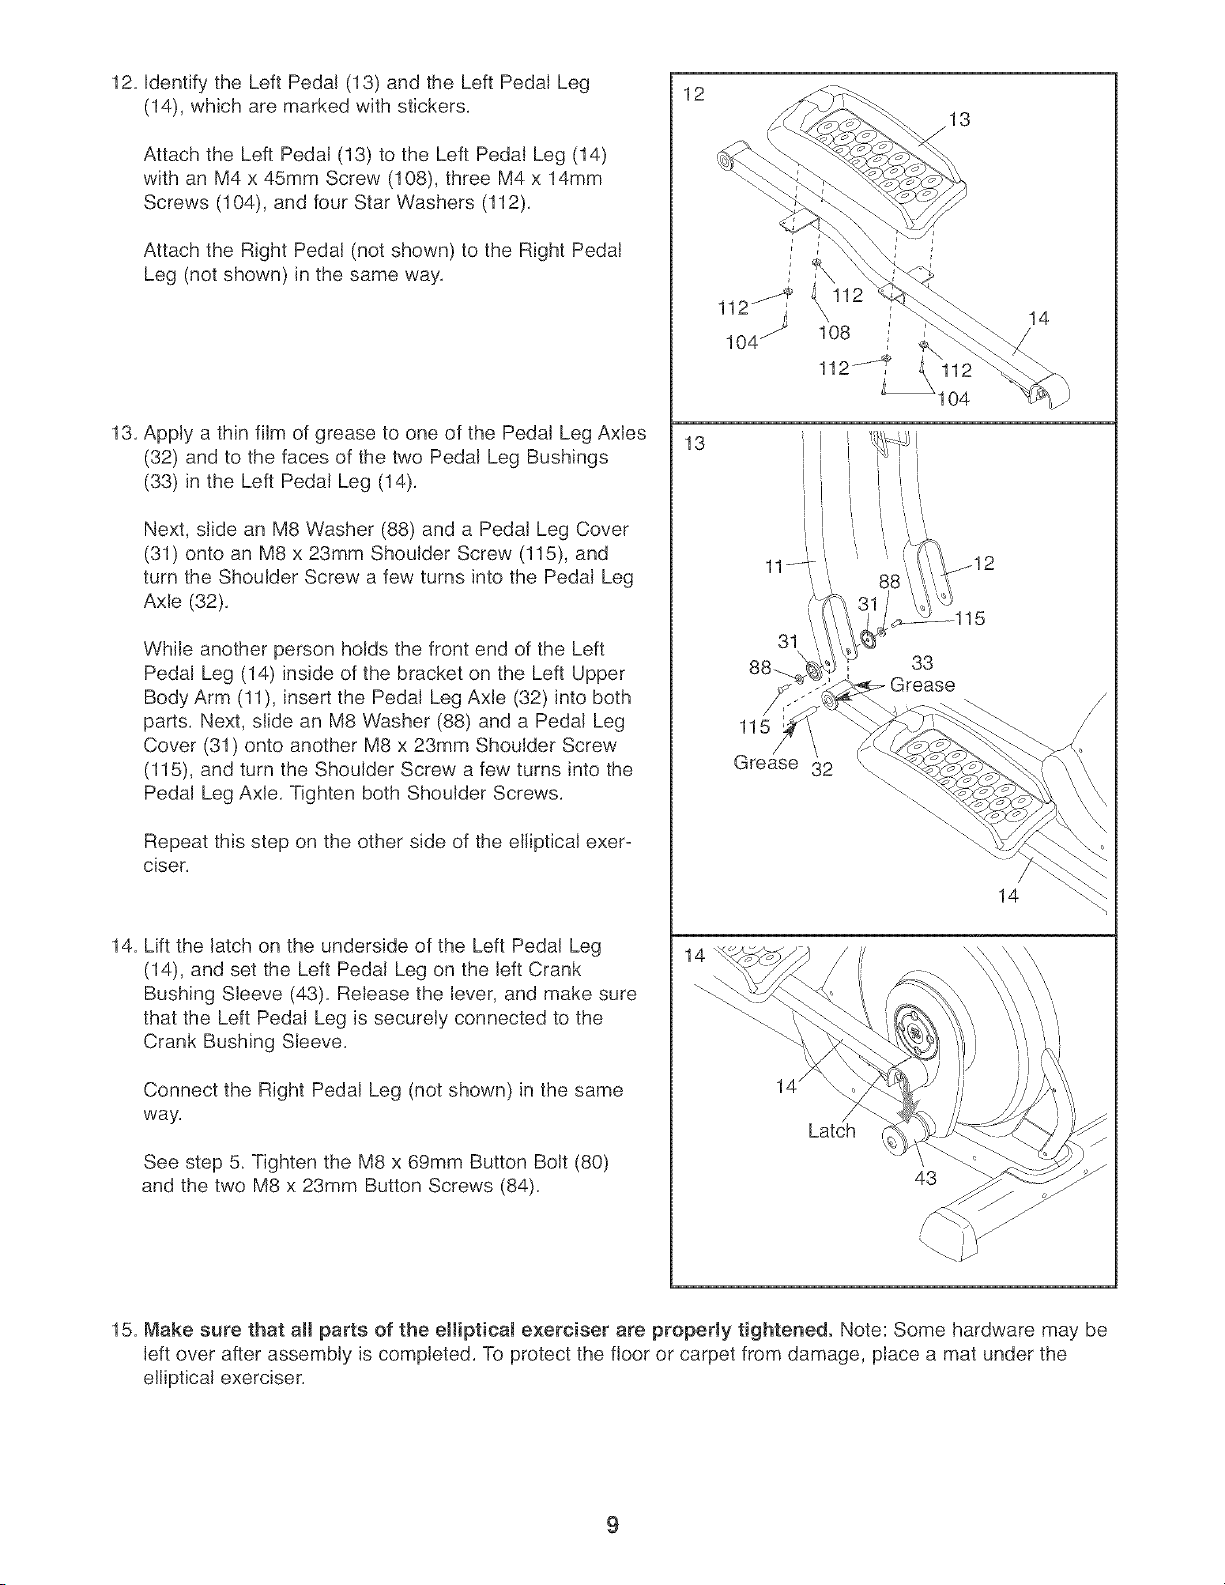
12.IdentifytheLeftPedal(13)andtheLeftPedalLeg
(14),whicharemarkedwithstickers.
AttachtheLeftPedal(13)totheLeftPedalLeg(14)
withanM4x45mmScrew(108),threeM4x 14mm
Screws(104),andfourStarWashers(112).
AttachtheRightPedal(notshown)totheRightPedal
Leg(notshown)inthesameway.
13.ApplyathinfilmofgreasetooneofthePedalLegAxles
(32)andtothefacesofthetwoPedalLegBushings
(33)intheLeftPedalLeg(14).
Next,slideanM8Washer(88)andaPedalLegCover
(31)ontoanM8x23mmShoulderScrew(115),and
turntheShoulderScrewafewturnsintothePedalLeg
Axle(32),
WhileanotherpersonholdsthefrontendoftheLeft
PedalLeg(14)insideofthebracketontheLeftUpper
BodyArm(11),insertthePedalLegAxle(32)intoboth
parts.Next,slideanM8Washer(88)andaPedalLeg
Cover(31)ontoanotherM8x23mmShoulderScrew
(115),andturntheShoulderScrewafewturnsintothe
PedalLegAxle.TightenbothShoulderScrews.
Repeatthisstepontheothersideoftheellipticalexer-
ciser.
14.LiftthelatchontheundersideoftheLeftPedalLeg
(14),andsettheLeftPedalLegontheleftCrank
BushingSleeve(43).Releasethelever,andmakesure
thattheLeftPedalLegissecurelyconnectedtothe
CrankBushingSleeve.
ConnecttheRightPedalLeg(notshown)inthesame
way.
Seestep5_TightentheM8x69mmButtonBolt(80)
andthetwoM8x23mmButtonScrews(84),
12
13
\
108
112J
104
31
33
Grease
115
Grease 32
14
Latch
43
14
15. Make sure that all parts of the eliiptieaJ exerciser are properly tightened. Note: Some hardware may be
left over after assembly is completed. To protect the floor or carpet from damage, place a mat under the
elliptical exerciser.
9
Loading ...
Loading ...
Loading ...