Loading ...
Loading ...
Loading ...
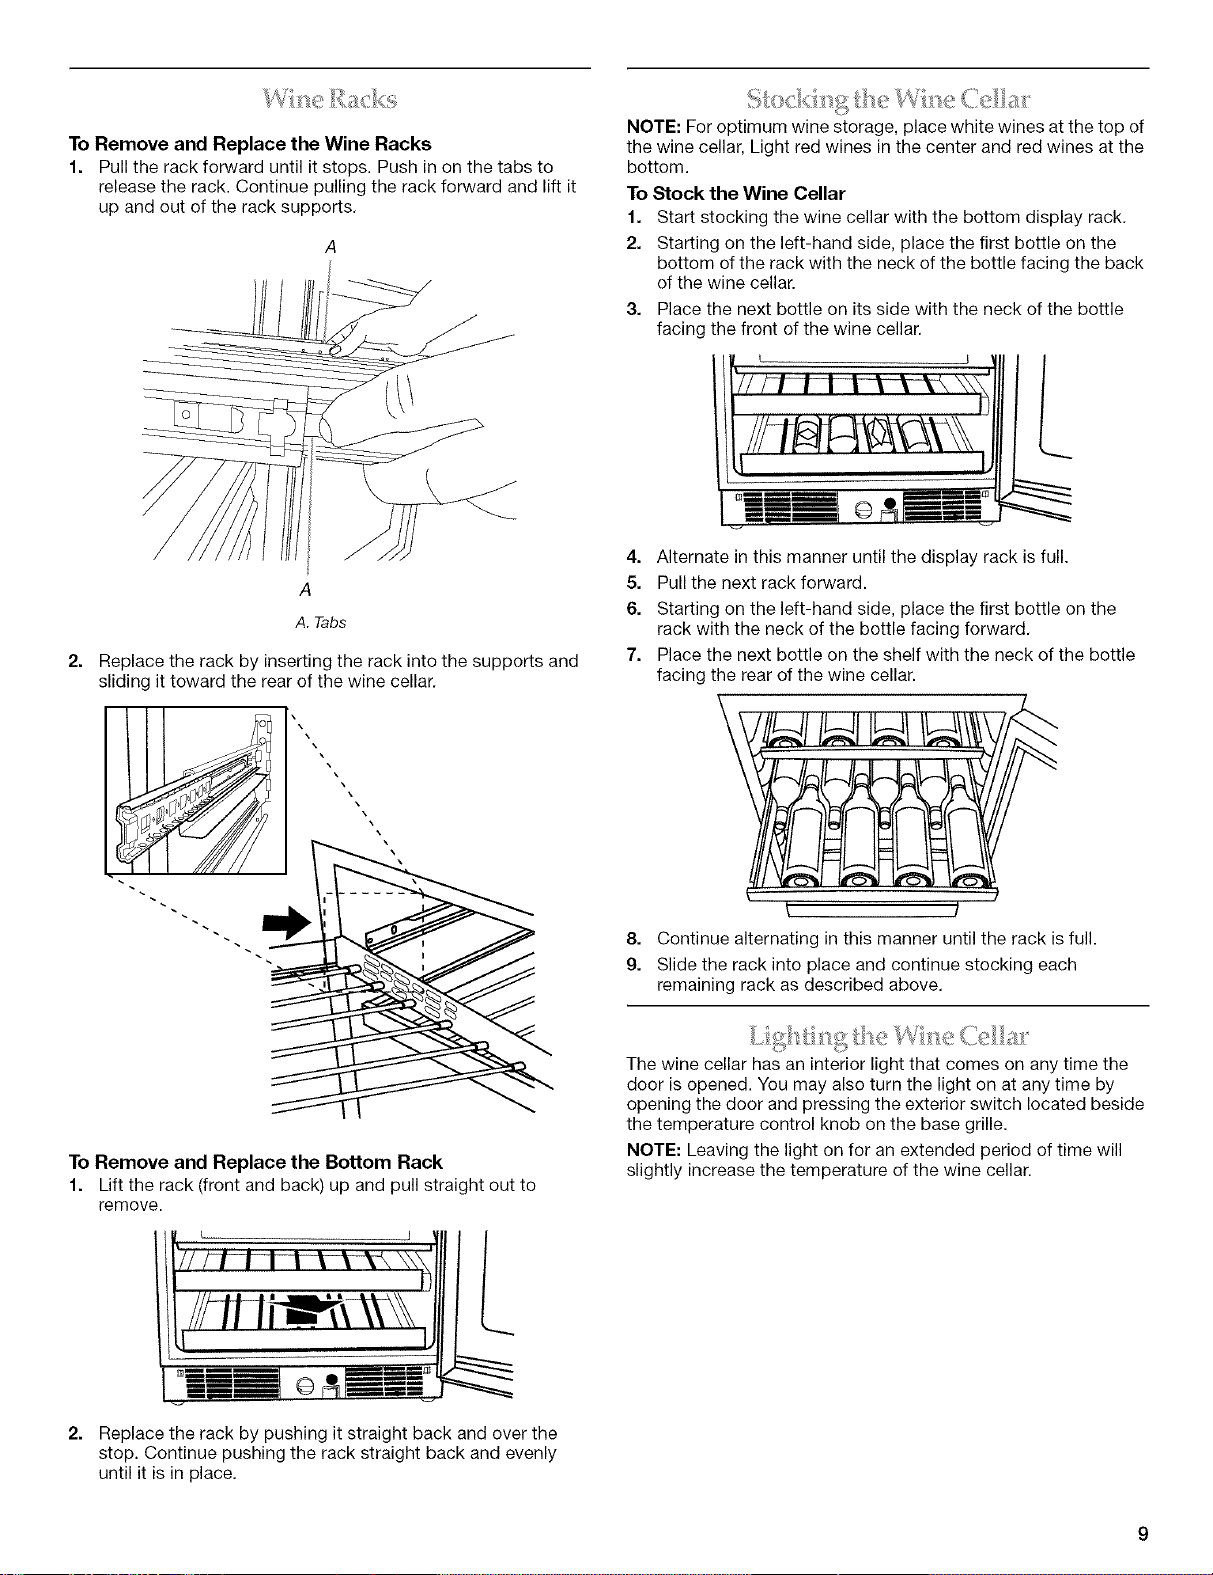
ToRemove and Replace the Wine Racks
1. Pull the rack forward until it stops. Push in on the tabs to
release the rack. Continue pulling the rack forward and lift it
up and out of the rack supports,
NOTE: For optimum wine storage, place white wines at the top of
the wine cellar, Light red wines in the center and red wines at the
bottom.
To Stock the Wine Cellar
1. Start stocking the wine cellar with the bottom display rack.
2. Starting on the left-hand side, place the first bottle on the
bottom of the rack with the neck of the bottle facing the back
of the wine cellar.
3. Place the next bottle on its side with the neck of the bottle
facing the front of the wine cellar,
j
2.
A
A. Tabs
Replace the rack by inserting the rack into the supports and
sliding it toward the rear of the wine cellar.
'\
\
\
4. Alternate in this manner until the display rack is full.
5. Pull the next rack forward.
6. Starting on the left-hand side, place the first bottle on the
rack with the neck of the bottle facing forward.
7. Place the next bottle on the shelf with the neck of the bottle
facing the rear of the wine cellar.
To Remove and Replace the Bottom Rack
1. Lift the rack (front and back) up and pull straight out to
remove.
8. Continue alternating in this manner until the rack is full.
9. Slide the rack into place and continue stocking each
remaining rack as described above.
The wine cellar has an interior light that comes on any time the
door is opened. You may also turn the light on at any time by
opening the door and pressing the exterior switch located beside
the temperature control knob on the base grille.
NOTE: Leaving the light on for an extended period of time will
slightly increase the temperature of the wine cellar.
2. Replace the rack by pushing it straight back and over the
stop. Continue pushing the rack straight back and evenly
until it is in place.
Loading ...
Loading ...
Loading ...