Loading ...
Loading ...
Loading ...
29
INSTRUCTIONS FOR THE INSTALLER
ELECTRICAL CONNECTION
The electrical connection must be carried out in
accordance with the current standards and laws
in force and by an authorised electrician.
• Warning this appliance must be earthed.
• Connection to the electricity supply must be made
by an authorised electrician to a suitable isolating
switch in accordance with the requirements of SAA
:LULQJ5XOHV$61=6
• A cable of the correct rating must be used (see
Electrical components).
• Means of disconnection shall be provided in the
¿[HGZLULQJLQDFFRUGDQFHZLWKWKH$XVWUDOLDQZLULQJ
rules.
• Remember that the earth wire must be longer
than the phase wires.
• Note: The power supply cable must be positioned
so that no part of cable can come into contact with
any surface which could reach temperatures in
H[FHVVRI.
ADJUSTMENTS
• Always disconnect the appliance from
the electricity supply before making any
adjustment.
• All seals must be replaced by the technician
following any adjustment or regulation.
• The adjustment of the reduce rate (simmer)
must be undertaken only with burners
functioning on natural gas while in the case
of burners functioning on Propane, the screw
must be locked down fully (in clockwise
direction).
• “Primary air adjustment” on hob gas burners
is unnecessary.
• If the appliance cannot be adjusted to perform
correctly refer to the authorised service
provider in your area.
19
7$36ÀJ
All gas taps are male cone type with only one way of
passage. The adjustment screw (V) is on the side of
the stem.
Adjustment of the “Reduced rate”SRVLWLRQDVIROORZV
O7XUQWKHEXUQHURQDQGSODFHWKHNQRERQWKH
³5HGXFHGUDWH´SRVLWLRQVPDOOÀDPH
5HPRYHWKHNQRERIWKHWDSZKLFKLVDWWDFKHGE\
simply applying pressure to the rod.
:LWKDVPDOOVFUHZGULYHU&WXUQWRWKHULJKWRU
OHIWWKHDGMXVWPHQWVFUHZ9XQWLOWKHÀDPHRI
the burner is conveniently regulated to the Low
position.
&KHFNWKDWWKHÀDPHGRHVQRWJRRXWZKHQWKHNQRE
is sharply switched from the “Full on” to “Reduced
rate” positions.
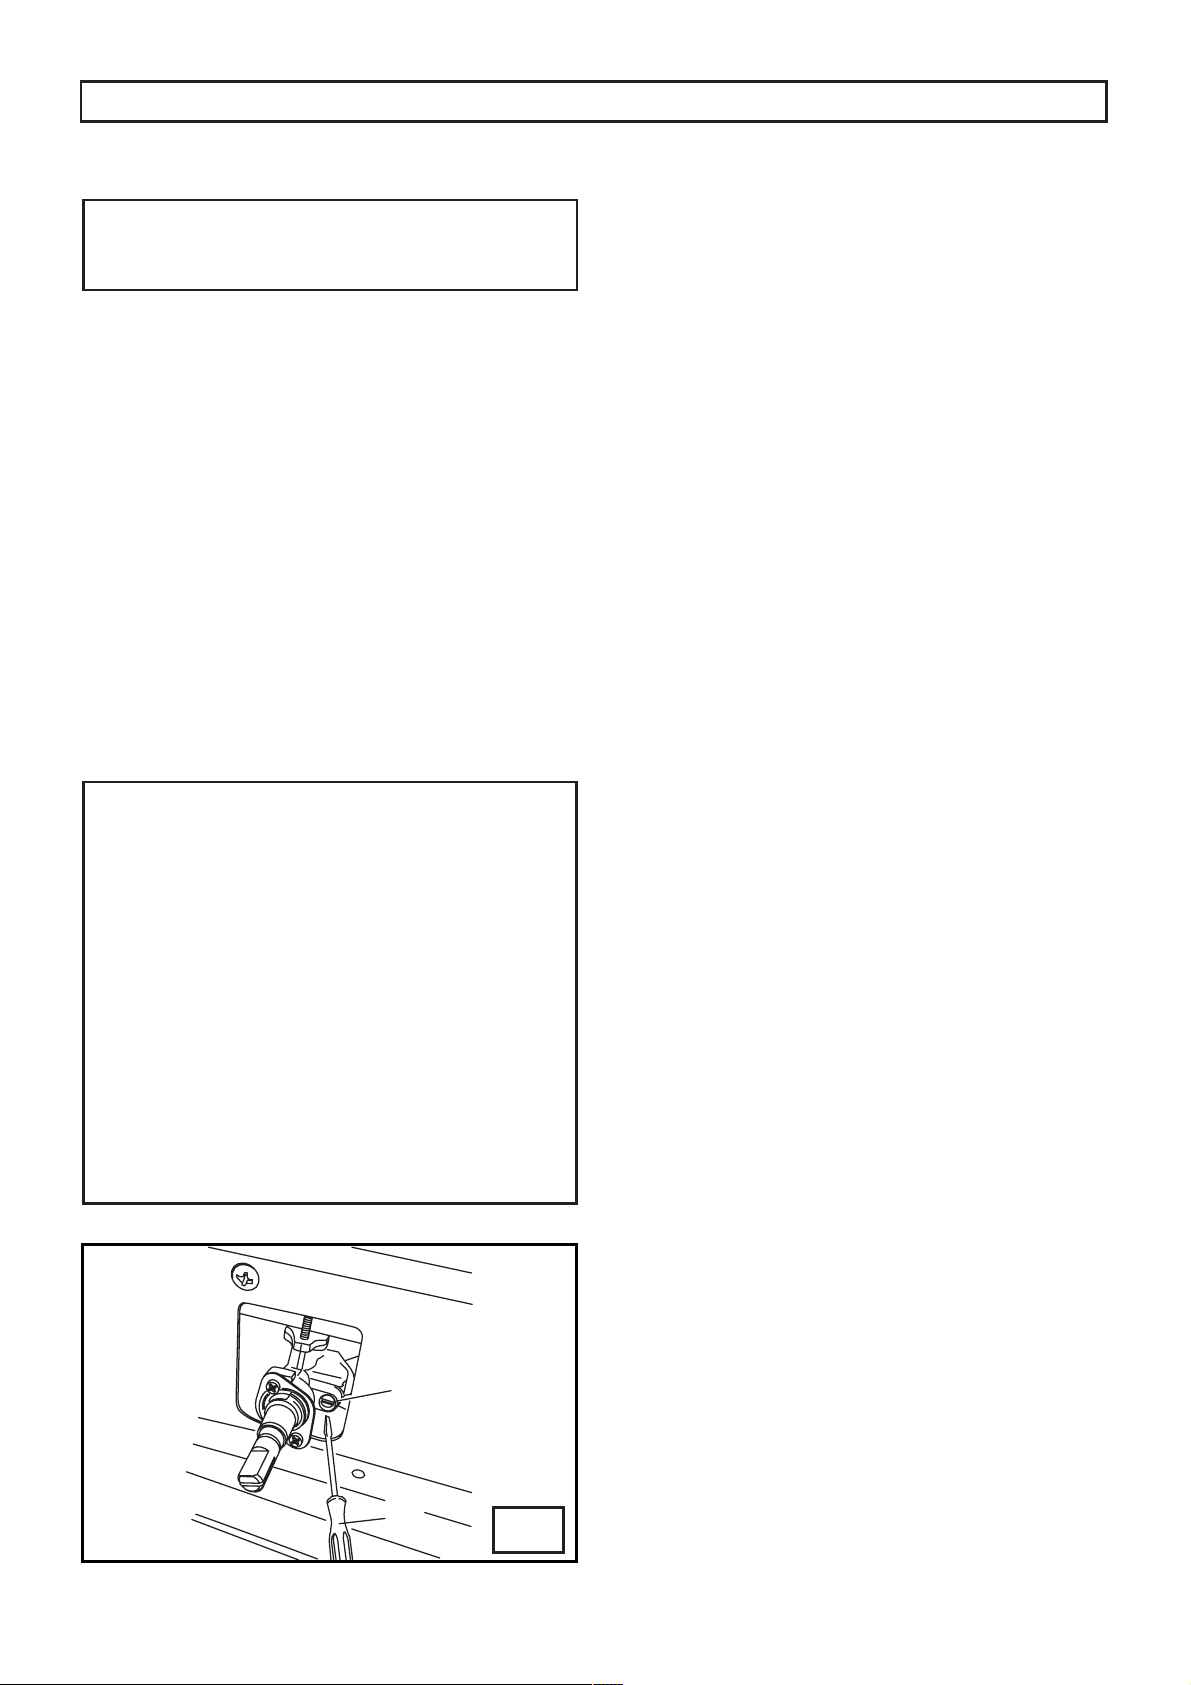
29(17+(50267$7ÀJ
Reduced rate adjustment should be carried out in
WKHIROORZLQJZD\
5HPRYHWKHNQREWKHUPRVWDW
• Switch on the oven burner by turning the relative
NQREWRWKH0D[LPXPSRVLWLRQWKHQZDLWDERXW
minutes.
6ORZO\WXUQWKHNQREEDFNWRWKH0LQLPXPSRVLWLRQ
and, using a small screwdriver (C), turn screw (V) to
WKHULJKWWRORZHUWKHÀDPHRUWRWKHOHIWWRLQFUHDVHLW
7KHÀDPHVPXVWEHVKRUWIRUDQHI¿FLHQW5HGXFHG
rate setting. They must be stable to prevent them
from accidentally going out and must be able to
stand up to normal oven door manoeuvres.
NOTE:
Oven Failure
&KHFNWKHUPRFRXSOHWHUPLQDO
,QVSHFWUHDURIWKHUPRVWDWXQGHUKREWRFKHFNWKDW
thermocouple connections are ”tight” and parallel to
each other.
&KHFNWKHUPRVWDWNQREIRUVXI¿FLHQWFOHDUDQFHIURP
the control panel to allow electromagnet to fully
seat.• If above cannot solve the problem, replace
thermocouple.
Oven Ignition Failure
• Ensure that the electrode lead is not ”earthing”
against cabinet.
&KHFNVSDUNJDSIURPHOHFWURGHWLSWREXUQHU
6KRXOGEHRQO\PP
&KHFNFHUDPLFERG\RIHOHFWURGHIRUREYLRXV
GDPDJHRUFUDFNV
,IQRVSDUNDWDOOFKHFNLJQLWLRQER[IDLOXUHRUSRZHU
source.
Loading ...
Loading ...
Loading ...