Loading ...
Loading ...
Loading ...
25
OPERATIONS MANUAL
REACH-INS & ROLL-INS
WIRE PAN SLIDE RACKS
Reach-In & Pass-Thru Models
Wire rod pan slide racks are attached directly to the left and
right walls in the cabinet and to vertical mounting brackets in
the center sections, between the doors, on 2 & 3-section mod-
els (see Figure 11B). To install Wire Pan Racks in a unit that
previously had shelves or metal pan slides, mounting holes will
need to be drilled in the side walls of the cabinet. Contact the
service department for detailed instructions and a template for
locating the mounting holes.
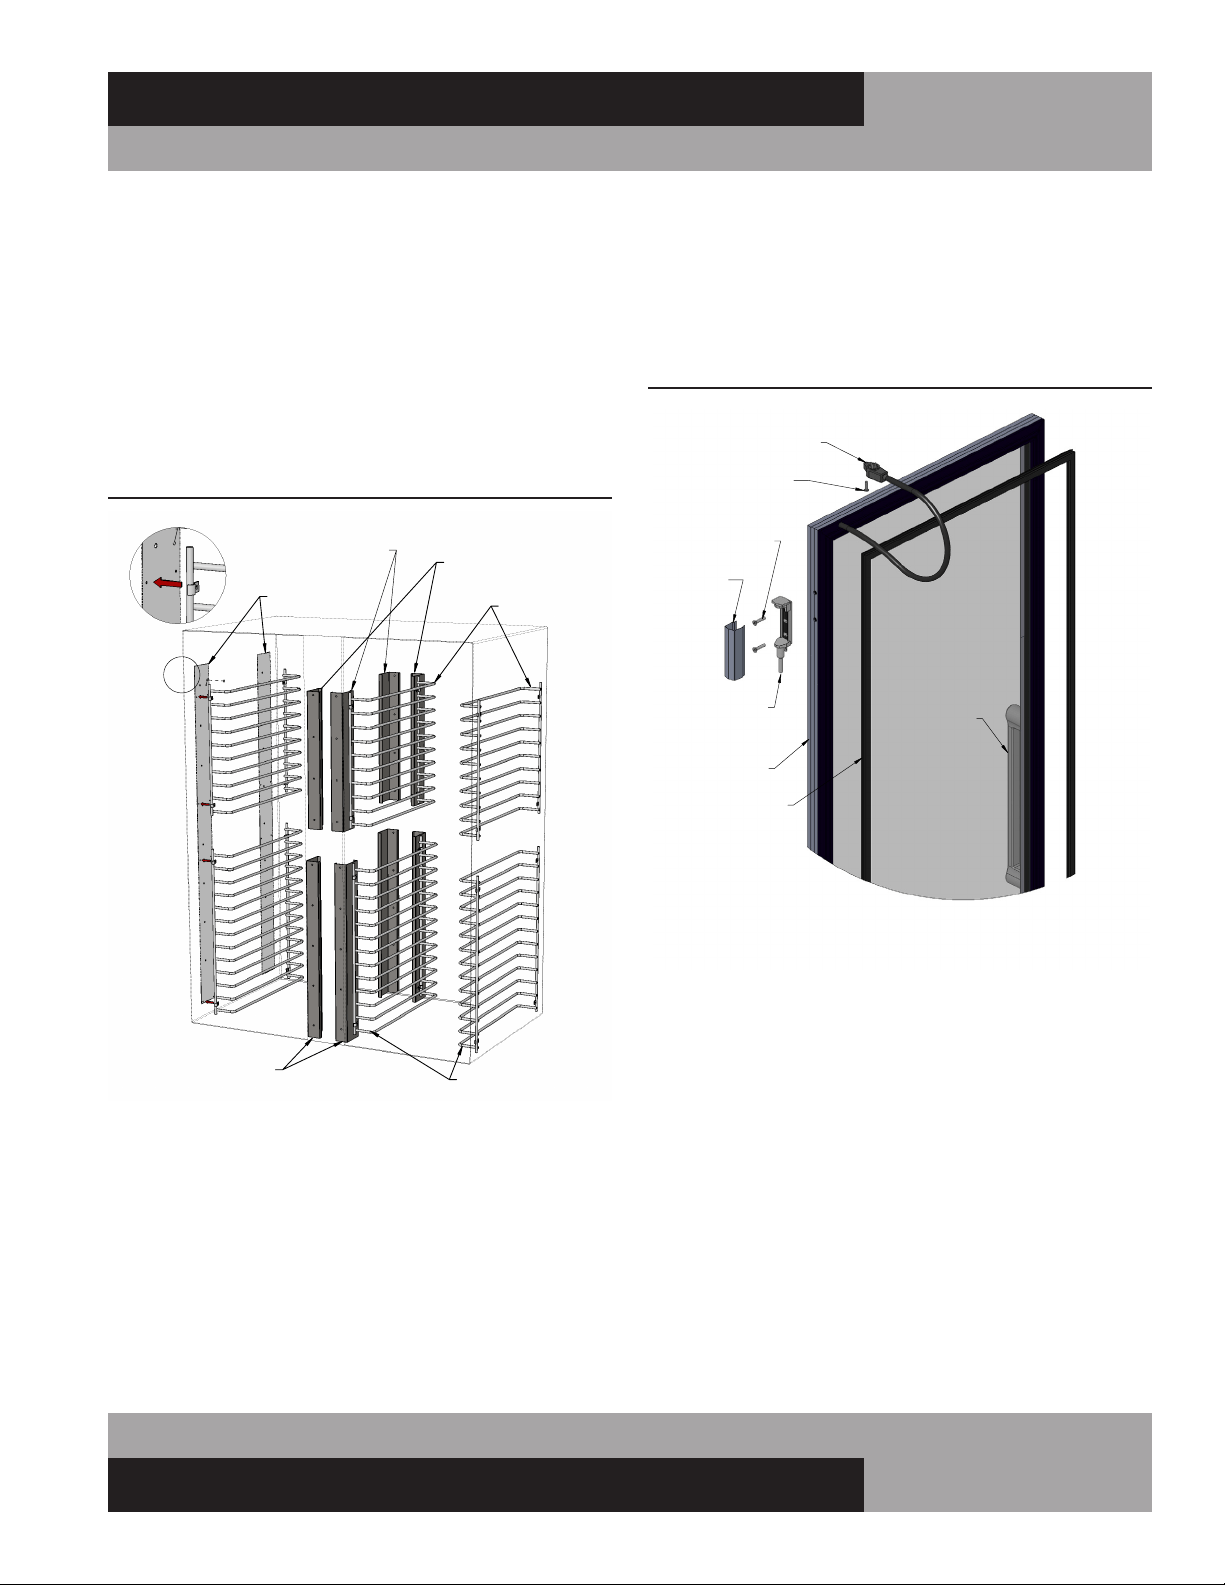
HINGED GLASS DOOR REMOVAL
AND ADJUSTMENT
Removal and adjustment of hinged glass doors are similar to
solid doors except that heated glass doors have an electrical
cord attached to the cabinet. Before attempting to remove a
glass door, disconnect the cabinet from the power supply. Using
a phillips screwdriver, loosen the retaining screw from the mold-
ed plug and gently pull the plug out of the molded receptacle.
Carefully pry off all hinge covers using a sharp tool or knife (see
Figure 12). Swing the door to the open position (90°) and care-
fully lift the door upward, so the hinge pin (attached to the door)
clears the hinge body (mounted to the cabinet). If it is necessary
to remove the hinge bodies from the cabinet, use caution when
loosening the top hinge body, as they contain the light switch
actuator (see Figure 8A).
SLIDING GLASS DOOR REMOVAL
AND ADJUSTMENT
All sliding glass doors are easily removable for thorough clean-
ing. To remove the doors, slide the outer door (see Figure
13) open about half way, grasp the door on both sides and lift
straight up, off roller track, which will remain in the mounting
frame. Tilt the bottom of the door out, so it clears the locating
studs on the roller track and the bottom of the mounting frame.
Gently set the door down, being careful not to over-stretch the
self-closing spring and power cord that are attached to the top of
the door. Move the door towards its closed position, to release
any tension on the spring and power cord. The roller track will
simply lift out of the channel in the bottom of the mounting
frame. Repeat this procedure for the inner door.
TOP WIRE RACKS
TEMPLATE
TOP MOUNTING BRACKETS
(FRONT RH / REAR LH)
TOP MOUNTING BRACKETS
(FRONT LH / REAR RH)
BOTTOM WIRE RACKS
BOTTOM
MOUNTING BRACKETS
DETAIL
VIEW
FIGURE 11B: Wire Rod Pan Slides
FIGURE 12: Hinged Glass Door Components
HINGE
COVER
HINGE
SCREWS
HINGE PIN
POWER CORD
WITH PLUG
ATTACHMENT
SCREW
DOOR
HANDLE
GASKET
DOOR
FRAME
Loading ...
Loading ...
Loading ...