Loading ...
Loading ...

© 2 0 2 3 T R A D E - W I N D M A N U F A C T U R I N G , L L C
P R O V E R B S 2 2 : 2 9
WARNING! TO REDUCE THE RISK OF FIRE, ELECTRICAL SHOCK, OR INJURY TO PERSONS OBSERVE THE FOLLOWING:
a) Installation work and electrical wiring must be done by qualified person(s) in accordance with all applicable codes
and standards, including fire-rated construction codes and standards.
b) Sufficient air is needed for proper combustion and exhausting of gasses through the flue (chimney) of fuel burning
equipment to prevent back drafting. Follow the heating equipment manufacturer's guidelines and safety standards
such as those published by the National Fire Protection Association (NFPA) and the American Society for Heating,
Refrigeration and Air Conditioning Engineers (ASHRAE) and the local code authorities.
c) When cutting or drilling into wall or ceiling, do not damage electrical wiring and other hidden utilities.
d) Ducted fans must always be vented to the outdoor.
PART 1: PLANNING THE INSTALLATION
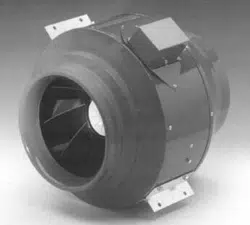
For best and quietest performance, the In-Line Blower should be installed in the attic, near or slightly beyond the mid-
point of the duct system. In installations requiring the blower be in a chase or wood-type hood over the range (e.g., no attic
above the kitchen), the duct silencer will not be as effective in absorbing motor noise. In addition, there will likely be motor
sound transmitted through the walls of the chase, bypassing the duct silencer. Given the high performance of Trade-Wind®
In-Line Blowers, it is highly recommended that the blower NOT be attached directly to the liner or in a chase
immediately above the liner unless a Trade-Wind® brand duct silencer is installed between the blower and liner and
neoprene lined FC Clamps* are used.
Trade-Wind® brand Professional Series ventilation systems can be installed in an infinite variety of configurations. The In-Line
Blower and Duct Silencer can be installed at any angle.
After properly aligning and supporting the blower, connect it to the duct. Fasten in place by using sheet metal screws
and tape or preferably FC Clamps*. Fast Clamps (FC Clamps) are the recommended connectors for connecting the blower
to the duct system. FC Clamps are easy to connect and work extremely well as a vibration absorber and noise
suppressor. They are made of steel and are lined with a 0.3” neoprene pad. If FC Clamps are used to connect the blower
to the duct, it is not as necessary to use them on the Duct Silencer for vibration suppression. FC Clamps are available
from Trade-Wind® through your Trade-Wind® supplier.
CONNECTING THE BLOWER/VENTILATOR:
3
CAUTION: DO NOT hang PSD model blowers/ventilators from the FC Clamp’s hanging tabs. Instead, use the
integral brackets bolted to the blower housing.
Hanger-type vibration isolators and suspension hardware (e.g., threaded rod, slotted angle iron, hurricane
strap) are not supplied with blower. If the blower is suspended with these items, they will absorb much of the
motor’s minor vibration.
For more information about vibration absorbers, visit the following internet sites:
www.grainger.com (e.g., for WW Grainger Item 4C879)
www.vibration-absorbers.com
*FC Clamps are available from Trade-Wind® (Trade-Wind Manufacturing, LLC) through your Trade-Wind®
supplier. Ask for model numbers FC6 (6”), FC8 (8”) or FC10 (10”), 2 per box.
Loading ...
Loading ...
Loading ...
