Loading ...
Loading ...
Loading ...
HE240, HE280 HUMIDIFIER AND INSTALLATION KIT
17 69-2686EF—01
9. Clean the drain fitting, if neces-
sary.
10. Bend the drain hose to loosen
any mineral deposits.
11. Flush the drain hose with pres-
surized water (a running tap)
to clean the hose.
12. Reattach the drain hose to the
drain fitting.
13. Slide a new Honeywell humidi-
fier pad back into the frame.
14. Snap the water nozzle back on
the tray.
15. Reattach the tray to the frame.
16. Place the humidifier pad
assembly in the humidifier
housing and press until the
assembly is completely
seated. Be careful not to pinch
or kink the water feed tube.
17. Replace the humidifier cover.
18. Verify the humidifier operation
by following the steps in the
Checking Your Humidifier for
Correct Operation section.
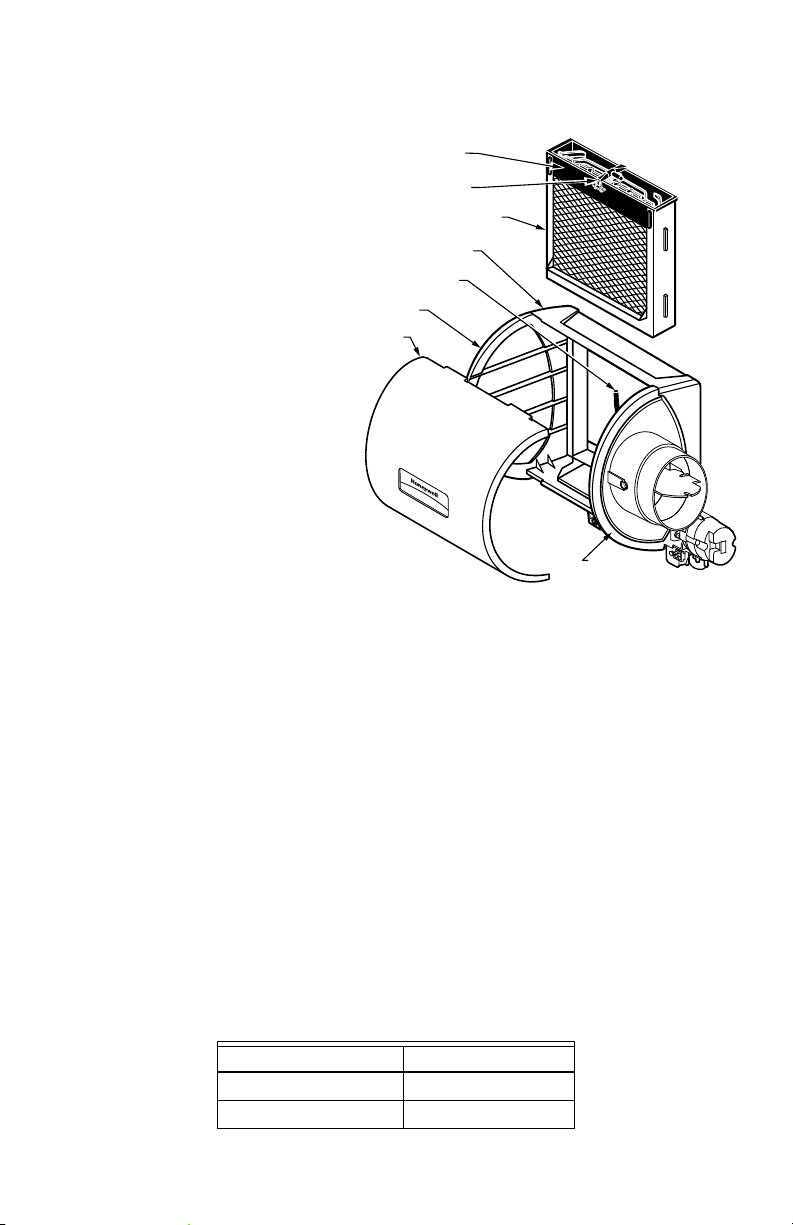
Fig. 18. Cleaning your humidifier.
End of Humidification Season
• Clean the humidifier and shut it off at the end of the heating season.
• Turn the water off at the saddle valve by turning the handle to the right (clockwise)
until the water stops flowing and/or there is resistance.
• Unplug the humidifier at the wall outlet
• Turn the damper blade to the "summer" position.
IMPORTANT
Be sure the humidifier power is off.
Replacement Humidifier Pads
Honeywell recommends replacing the humidifier pad on an annual basis. However, if
your home has hard water, the pad may need to be replaced more frequently because
of the buildup of minerals diminishing its ability to operate normally. If there is access to
a water softener, it is recommended to use softened water.
Table 3. Replacement pad part numbers.
Humidifier Model Replacement Pad
HE240 HC22P
HE280 HC26P
M33328
PerfectFLO™ WATER
DISTRIBUTION TRAY
HUMIDIFIER PAD ASSEMBLY
WATER FEED NOZZLE
HUMIDIFIER HOUSING
SIDEWALL
BYPASS
SIDEWALL
COVER
WATER FEED TUBE
69-2686EF_A.book Page 17 Friday, March 9, 2012 11:37 AM
Loading ...
Loading ...
Loading ...