Loading ...
Loading ...
._ I"ll'llllllll
First Steps (continued)
Unpacking and Leveling - Upright Freezers
To allow door to
close and seal properly, DO NOT let
food packages extend past the front
of shelves,
Shelf Front --
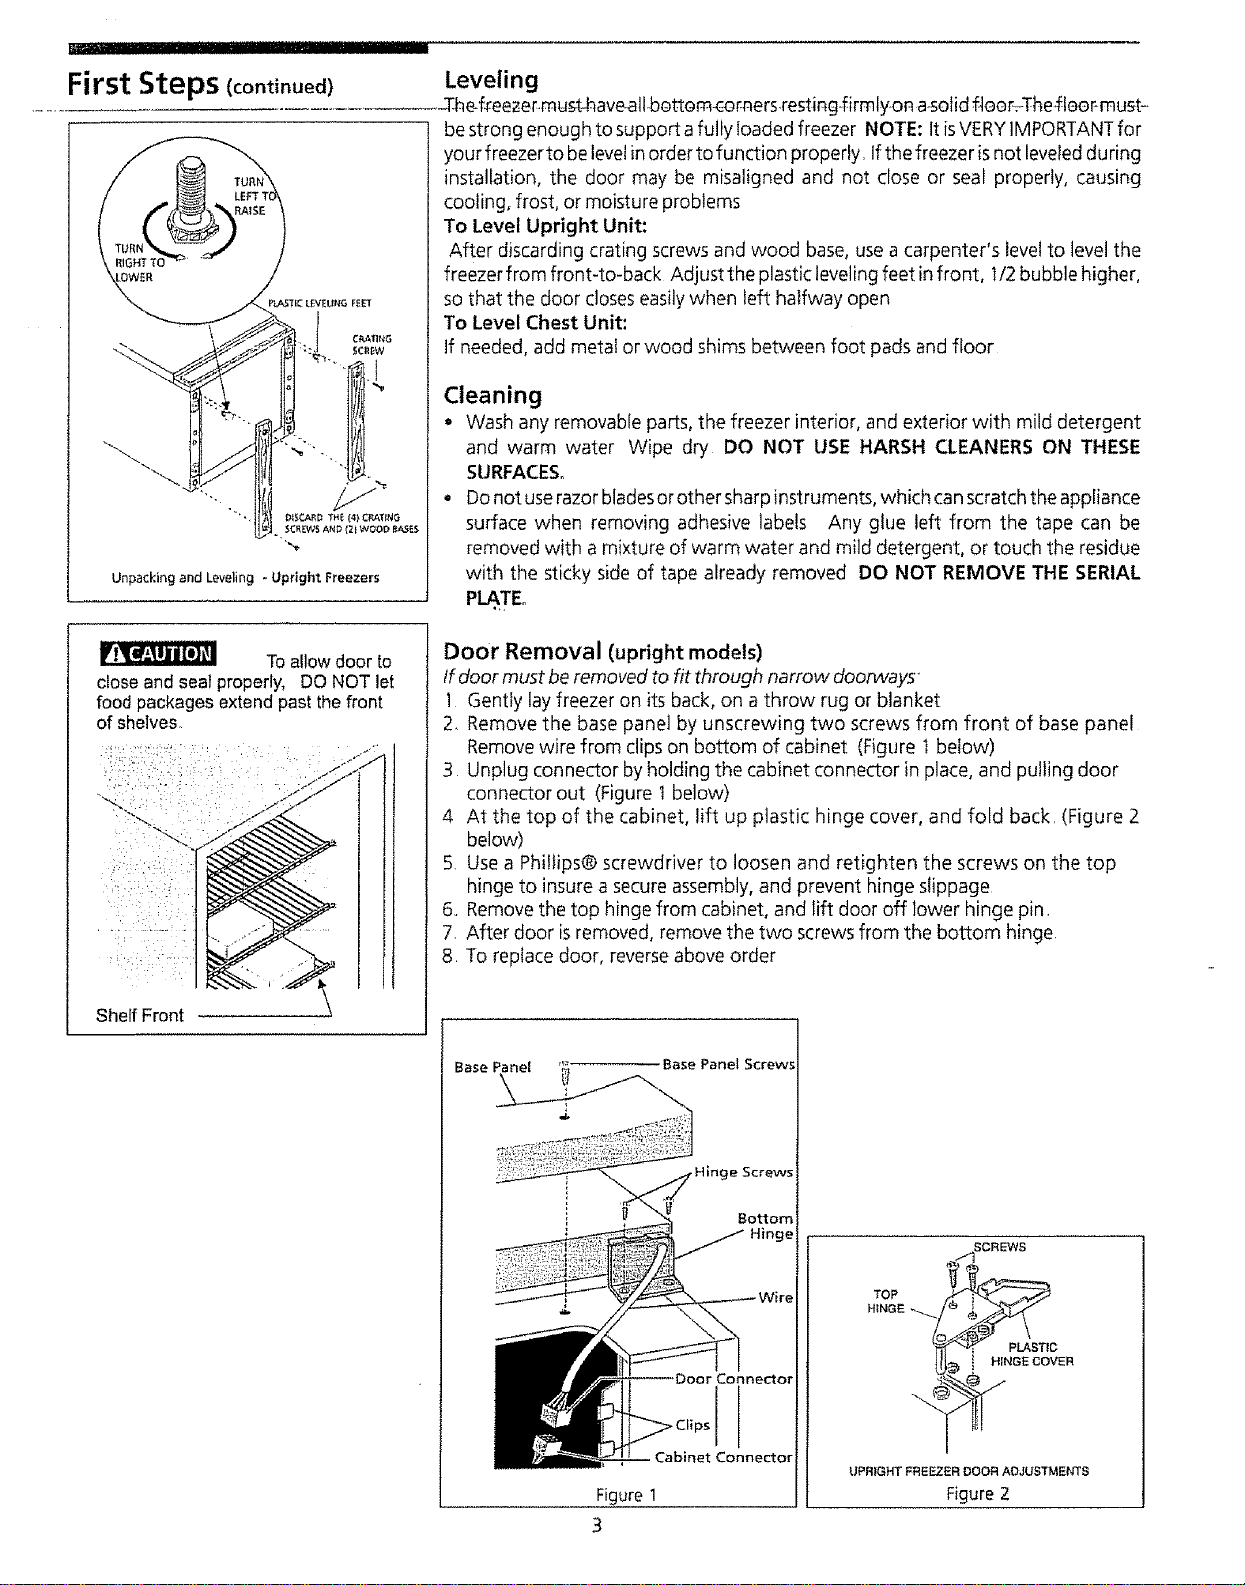
Leveling
-TJleof_eezer.mustJqave-all-bot_em_or.ners.resting-firmlyona-solidf4eor=The_fleor-mus-t-
be strong enough to support a fully loaded freezer NOTE: It isVERYiMPORTANTfor
your freezer to be levelin order to function properly. If the freezer isnot leveledduring
installation, the door may be misaligned and not close or seal properly, causing
cooling, frost, or moisture problems
To Level Uptight Unit:
After discarding crating screws and wood base, use a carpenter's level to level the
freezerfrom front-to-back Adjusttheplasticleveling feet infront, 1/2bubble higher,
sothat the door closeseasily when left halfway open
To Level Chest Unit:
If needed, add metal or wood shims between foot pads and floor
Cleaning
• Wash any removable parts, the freezer interior,and exterior with mild detergent
and warm water Wipe dry DO NOT USE HARSH CLEANERS ON THESE
SURFACES,
• Donot userazor bladesor other sharpinstruments, which canscratch the appliance
surface when removing adhesive labels Any glue ]eft from the tape can be
removed with amixture of warm water and mild detergent, or touch the residue
with the sticky side of tape already removed DO NOT REMOVE THE SERIAL
P TEo
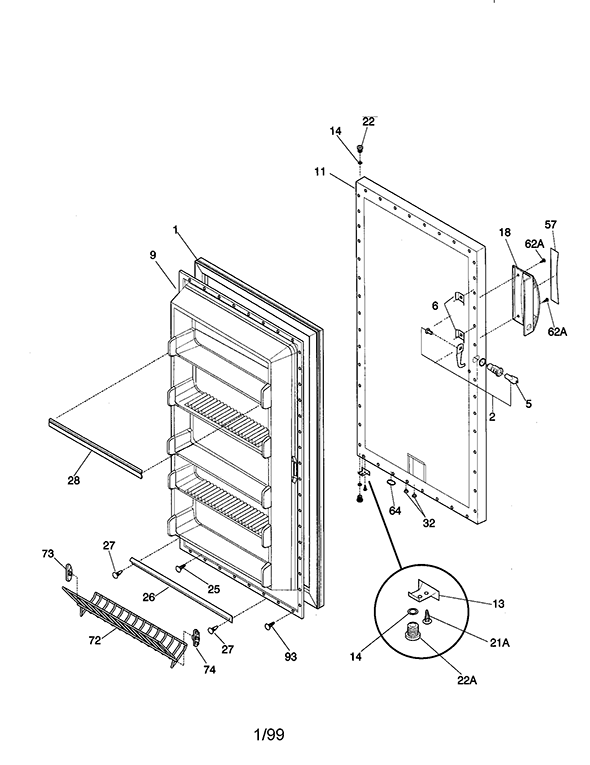
Door Removal (upright models)
If door must be removed to fit through narrow doorways"
1 Gentty layfreezer on its back, on a throw rug or blanket
2. Remove the base panel by unscrewing two screws from front of base panel
Remove wire from clips on bottom of cabinet (Figure t below)
3 Unplug connector by holding the cabinet connector in place, and pulling door
connector out (Figure I below)
4 At the top of the cabinet, lift up plastic hinge cover, and fold back, (Figure 2
below)
5, Use a Phillips@ screwdriver to loosen and retighten the screws on the top
hinge to insure a secure assembly, and prevent hinge slippage
6, Remove the top hinge from cabinet, and lift door off Dowerhinge pin,
7, After door is removed, remove the two screws from the bottom hinge.
8 To replace door, reverse above order
Base Panel '_ Base Panel Screws
SC£eW5
Fi ure 1
3
SCREWS
UPRIGHT FREEZER DOOR AOJUSTMENTS
Figure2
Loading ...
Loading ...
Loading ...