USE & CARE GUIDE FRONT LOAD DRYER for Electrolux EFME617STT0
Table of contents
Finding Information
Safety
Features
Operating Instructions
Care & Cleaning
Solutions to Common Inquiries
Warranty
Load the dryer and close the door.
Load items loosely. The average wet load will fi ll the drum 1/3 to 1/2 full. Items need room to tumble freely for even drying and less wrinkling.
If desired, place a dryer fabric softener sheet on top of the load at the beginning of the cycle.
To save energy and time and avoid uneven drying and wrinkling, do not overload the dryer.
When drying large items, dry only two or three items at a time. Fill out the load with small and medium-sized items.
For delicate or very small loads, add two or three larger items to improve tumbling action.
Care & Cleaning
Inside
Clean the lint filter after every load. Lint buildup on the filter restricts airflow, which causes longer drying times. The filter is located at the bottom of the door opening. Remove by pulling straight up. Remove the lint and replace the filter.
Occasionally a waxy build-up may form on the lint filter and/or moisture sensing bars from using dryer-added fabric softener sheets. To remove this build-up, wash them with warm, soapy water. Dry the filter thoroughly and replace it. Do not operate the dryer without the lint filter in place.
If the dryer drum becomes stained from noncolorfast fabrics, clean the drum with a damp cloth and a mild liquid household cleanser. Remove cleanser residue before drying the next load.
Every 18 months a qualified servicer should clean the dryer cabinet interior, lint screen housing and exhaust duct. These areas can collect lint and dust over time. An excessive amount of lint build-up could result in ineffi cient drying and possible fi re hazard.
Outside
Clean the cabinet with mild soap and water. Never use harsh, gritty or abrasive cleansers.
If the cabinet becomes stained, clean it with diluted chlorine bleach (1 part bleach to 8 parts water). Rinse several times with clear water.
Remove glue residue from tape or labels with a mixture of warm water and mild detergent. Or, touch residue with the sticky side of the tape or label.
When cleaning chrome parts, it is best to use only a damp cloth.
Before moving the dryer, place a strip of cardboard or thin fiberboard under the front leveling legs to prevent damage to the floor.
INSTALLATION INSTRUCTIONS FRONT LOAD DRYER for Electrolux EFME617STT0
Water connection
Cold water faucet MUST be installed within 42 inches (107 cm) of your dryer’s water inlet. The faucet MUST be 3/4 inch (1.9 cm) with threading for laundry hose connection. Water pressure MUST be between 20 and 120 psi. Your water department can advise you of your water pressure.
Turn off COLD water supply to washer,
Remove COLD inlet hose from COLD water supply and inspect for rubber washer. Replace washer if it is torn or worn out.
Momentarily turn on COLD supply and run some water into a bucket or container to clear any contaminants in the line.
Remove hose kit from dryer drum and inspect hose couplings for proper placement of rubber washers.
If your installation has room for the COLD water supply to accept the “Y” connector directly, thread the “Y” connector to the COLD water supply and snug it by hand; then tighten it another 2/3 turn with pliers.
If there is not room to install the “Y” connector directly, thread the short extension hose on to the COLD water supply and snug it by hand; then tighten it another 2/3 turn with pliers.
Thread the “Y” connector to the short extension hose and snug it by hand; then tighten it another 2/3 turn with pliers.
Connect the COLD inlet hose for the washer to the “Y” connector and snug it by hand; then tighten it another 2/3 turn with pliers.
Connect the straight end of the long hose from the kit to the other outlet on the “Y” connector and snug it by hand. Connect the hose’s 90° coupling to the brass water inlet on the back of the dryer and snug it by hand. Tighten each connection of the dryer inlet hose another 2/3 turn with pliers. 10. Turn on the water and check for leaks at all connections.
General installation
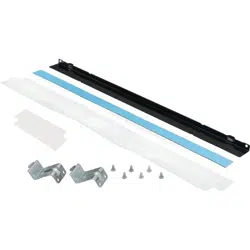
Connect the exhaust duct to the outside exhaust system. Use of a 4” (102 mm) clamp (item A) is recommended to connect the dryer to the exhaust vent system. Use metal foil tape to seal all other joints.
Use a carpenter’s level to level your dryer front-to-back and side-to-side.
Use adjustable pliers to adjust the leveling legs so the dryer is level front-to-rear and side-to-side, and stable corner-to-corner.
Press down on alternate corners and sides and feel for the slightest movement. Adjust the appropriate leg(s) so the dryer sits solidly on the floor on ALL four legs. Keep the leveling leg extension at a minimum for best performance of the dryer.
Plug the power cord into a grounded outlet.
Turn on the power at the circuit breaker/fuse box.
Read the Use & Care Guide provided with the dryer. It contains valuable and helpful information that will save you time and money.
If you have any questions during initial operation, please review the “Avoid Service Checklist” in your Use & Care Guide before calling for service.
Place these instructions in a location near the dryer for future reference.