Loading ...
Loading ...
Loading ...
7 8
setting up your oven
Remove the oven and all materials from the carton and oven
cavity. Your oven comes with the following accessories:
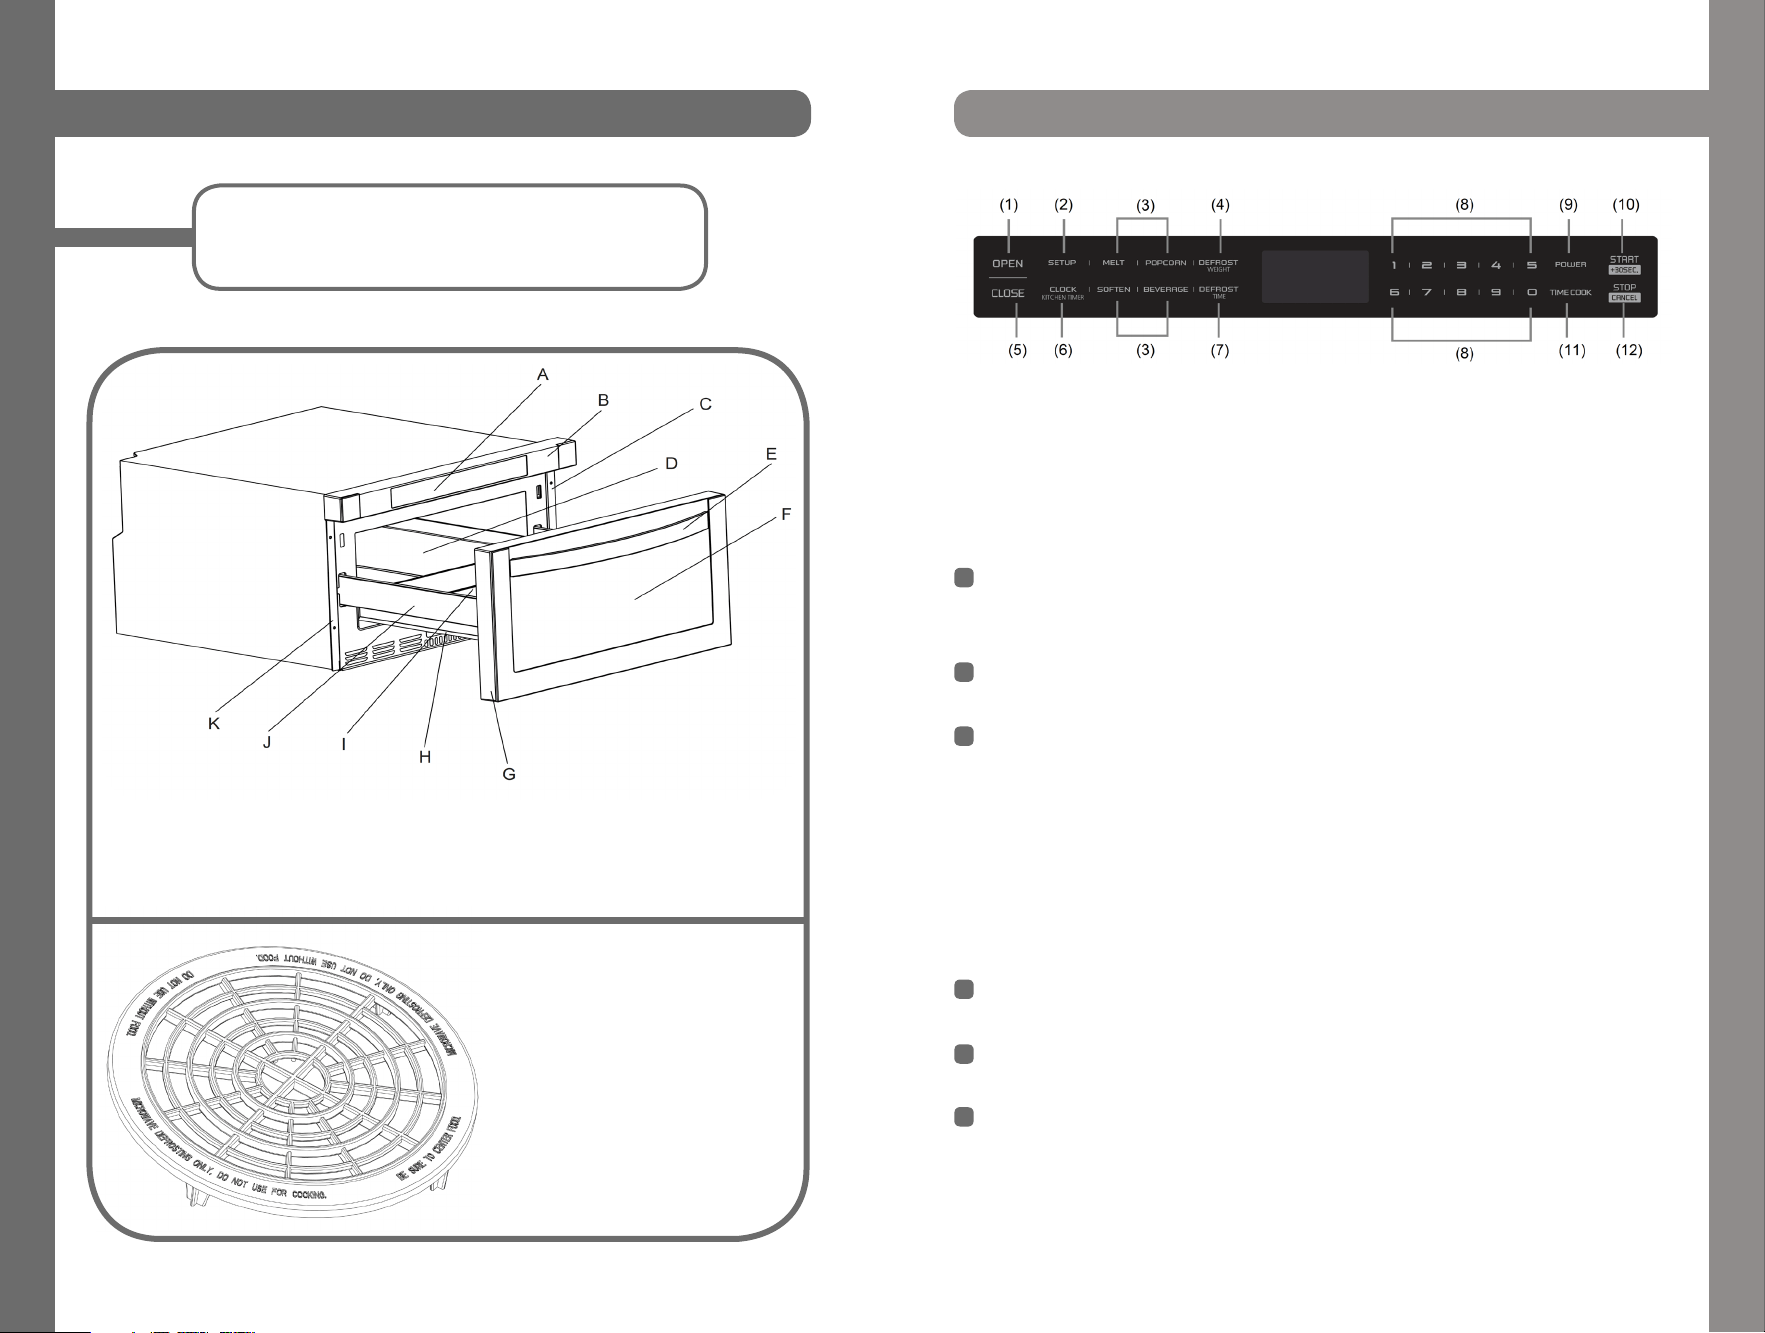
A: Control Patch B: Control Box C: Right Mounting Plate D: Cavity
E: Handle F: Windows G: Door Frame H: Automatic putter I:Drawer
J:Hinge Joint Board K:Left Mounting Plate
Note:
Defrosting Rack should only
be used in defrosting function
and not used for cooking. Do
not use without food.
operation
1) Open 2) Setup 3) Auto Menu 4) Defrost Weight 5) Close
6) Clock/Kitchen Timer 7) Defrost Time 8) Number Keys 9) Power 10)
Start/+30sec. 11 ) Time Cook 12) Stop/Cancel
When the microwave oven is plugged into an outlet, buzzer sounds once. Screen
displays “WELCOME”. Then the oven turns into waiting state. The screen displays
“00:00”.
In waiting state, the screen will display the current time if the clock has been
set. Otherwise, “00:00” will display.
Press “OPEN” button to open the drawer, and screen displays “OPEN”. The
screen will display “PLEASE CLOSE” when the drawer is fully opened.
Press “CLOSE” button to close the drawer, and the screen displays “CLOSE”.
The screen will display the current time or “00:00” when the drawer is fully
closed. If there are mistakes to open or close the drawer, buzzer will sound
five times, and the screen will display “OPEN OR CLOSE”.
Press “CLOCK/KITCHEN TIMER” button once. The first hour figure will flash and
other “0” will light.
Press the number buttons to enter the correct time. The input should be between
01:00-12:59.
Press “CLOCK/KITCHEN TIMER” to finish the setting. “:” will flash.
Note: In the process of clock setting, if the “STOP/CANCEL” button is pressed
or if there is no operation within 1 minute, the oven will go back to former setting
automatically.
Power on:
Clock Setting:
Loading ...
Loading ...
Loading ...