Loading ...
Loading ...
Loading ...
ASSEMBLINGUNITASABLOWER
BlowerTubeAssembly
WARNING: To prevent serious personal injury,
stop the engine and allow the impeller to stop
before attaching or removing tubes.
WARNING: To prevent serious personal injury
or damage to the unit, the blower tube must be
installed while operating this unit as a blower.
NOTE: If the unit was assembled as a vacuum unit, remove all
vacuum parts and store away in a secure place for
later use.
• Please note this unit comes with a high pressure concentrator
nozzle. This nozzle should be used when there is a need to
blow in a limited or concentrated area. In general uses, such
as leaf or grass blowing, the nozzle should not be used.
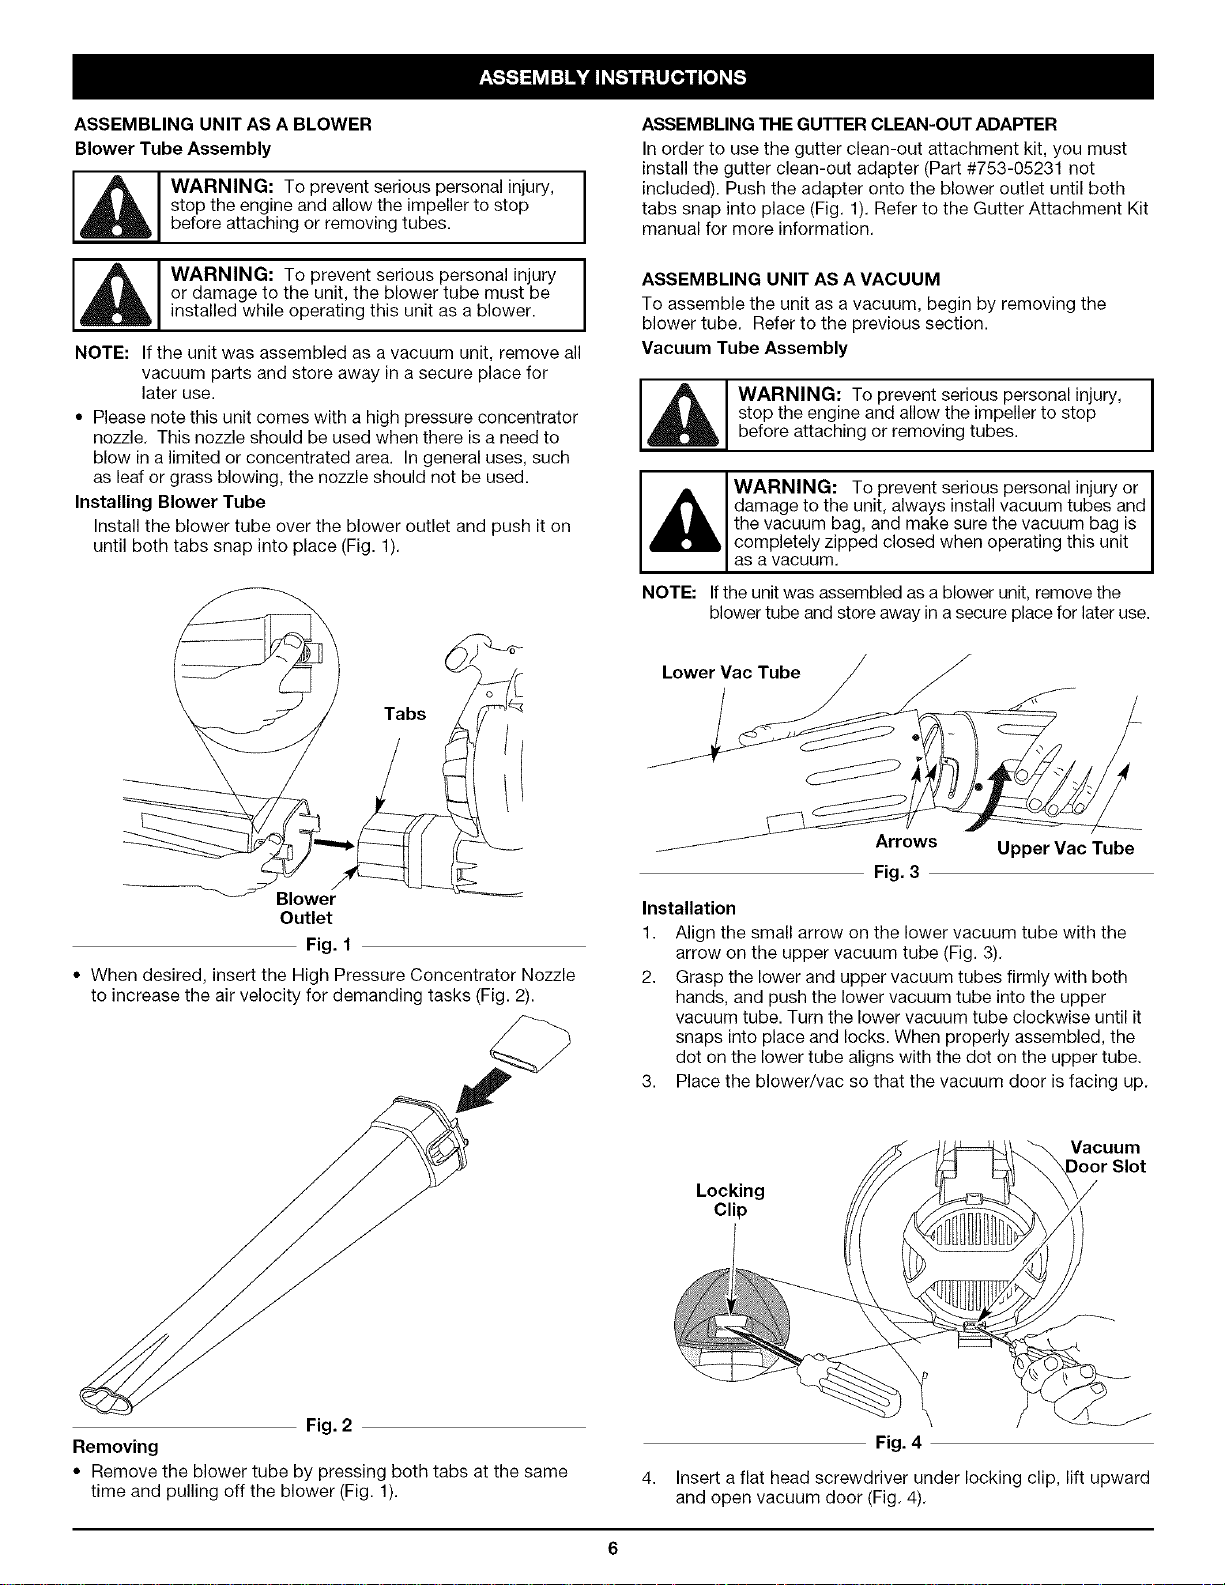
Installing Blower Tube
Install the blower tube over the blower outlet and push it on
until both tabs snap into place (Fig. 1).
Outlet
Fig. 1
• When desired, insert the High Pressure Concentrator Nozzle
to increase the air velocity for demanding tasks (Fig. 2).
ASSEMBLING THE GUTTER CLEAN-OUT ADAPTER
In order to use the gutter clean-out attachment kit, you must
install the gutter clean-out adapter (Part #753-05231 not
included). Push the adapter onto the blower outlet until both
tabs snap into place (Fig. 1). Refer to the Gutter Attachment Kit
manual for more information.
ASSEMBLING UNIT AS A VACUUM
To assemble the unit as a vacuum, begin by removing the
blower tube. Refer to the previous section.
Vacuum Tube Assembly
WARNING: To prevent serious personal injury, I
stop the engine and allow the impeller to stop
I
before attaching or removing tubes.
I
_ WARNING: To prevent serious personal injury or I
damage to the unit, always install vacuum tubes and I
the vacuum bag, and make sure the vacuum bag is
cO v2t zppedcosedwhenoperatngthsunt
NOTE: If the unit was assembled as a blower unit, remove the
blower tube and store away in a secure place for later use.
Lower Vac Tube
Arrows Upper Vac Tube
Fig. 3
Installation
1. Align the small arrow on the lower vacuum tube with the
arrow on the upper vacuum tube (Fig. 3).
2. Grasp the lower and upper vacuum tubes firmly with both
hands, and push the lower vacuum tube into the upper
vacuum tube. Turn the lower vacuum tube clockwise until it
snaps into place and locks. When properly assembled, the
dot on the lower tube aligns with the dot on the upper tube.
3. Place the blower/vac so that the vacuum door is facing up.
Locking
Clip
Vacuum
Fig. 2
Removing
• Remove the blower tube by pressing both tabs at the same
time and pulling off the blower (Fig. 1).
J
Fig. 4
Insert a flat head screwdriver under locking clip, lift upward
and open vacuum door (Fig. 4).
Loading ...
Loading ...
Loading ...