Loading ...
Loading ...
Loading ...
General Care &Cleaning
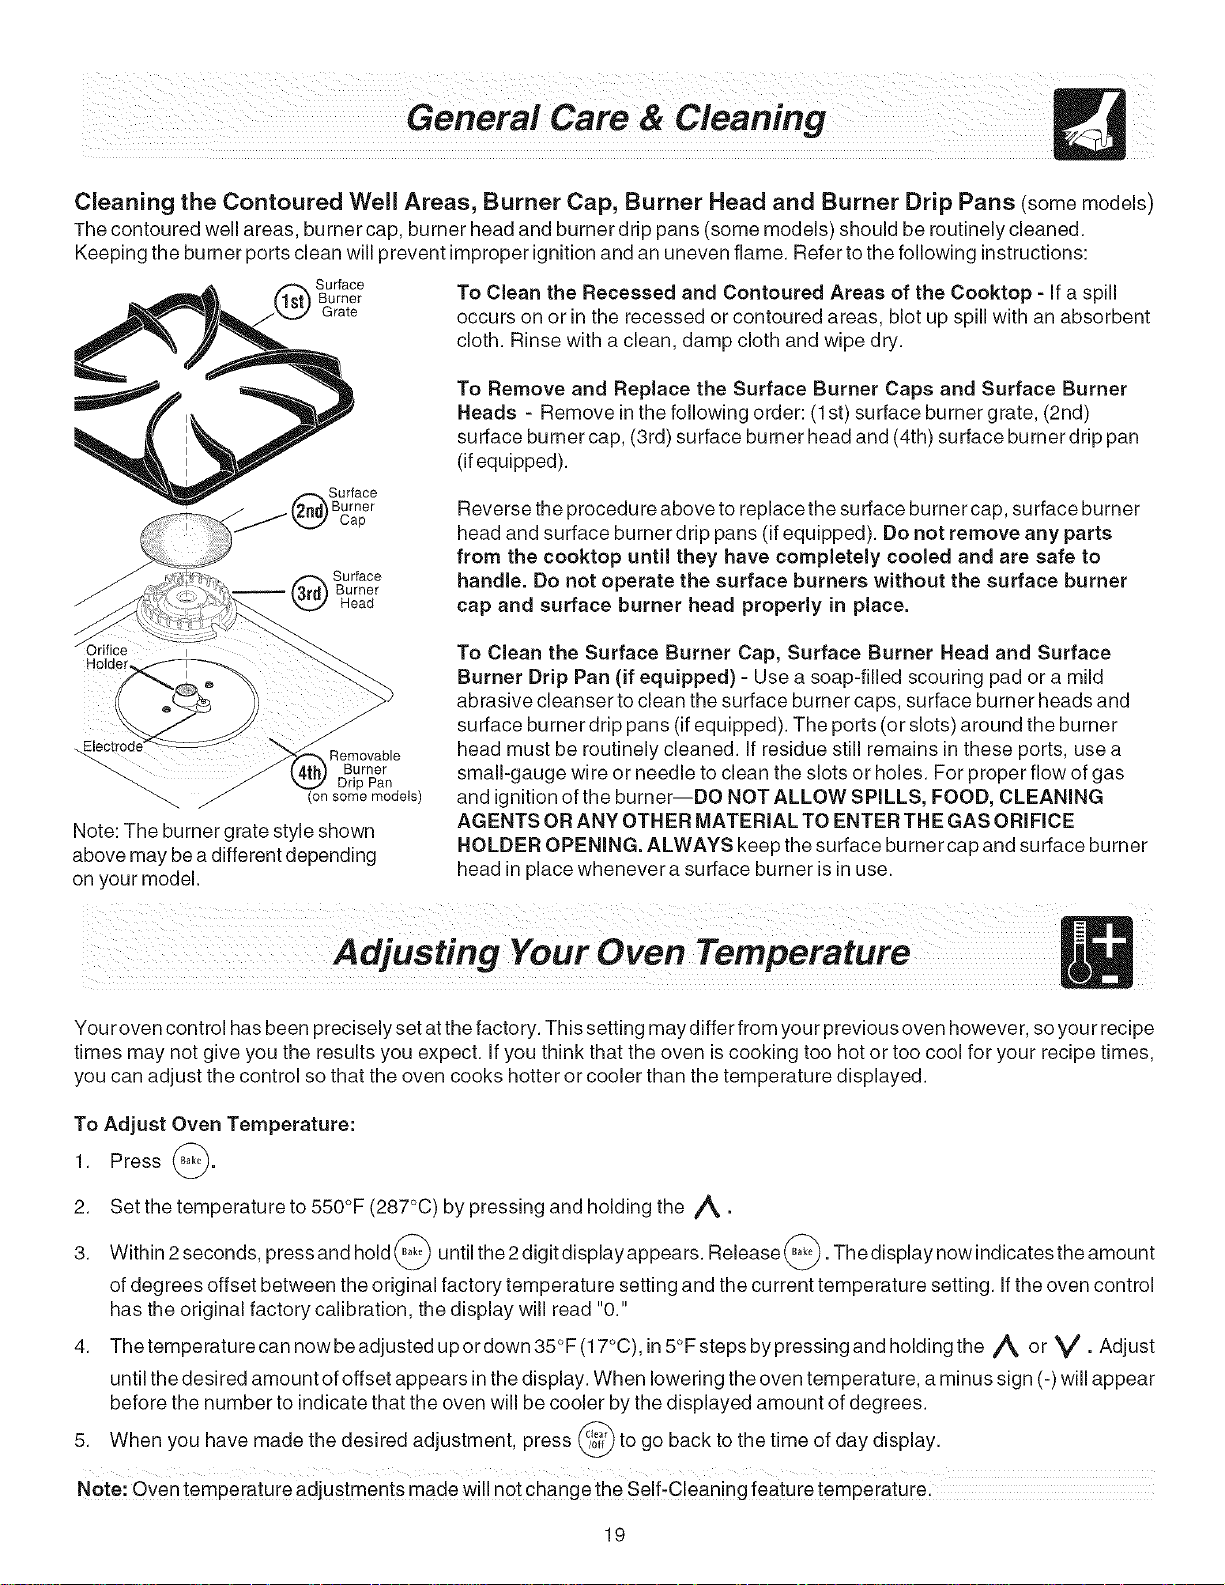
Cleaning the Contoured Well Areas, Burner Cap, Burner Head and Burner Drip Pans (some models)
The contoured well areas, burner cap, burner head and burner drip pans (some models) should be routinely cleaned.
Keeping the burner ports clean will prevent improper ignitionand an uneven flame. Refer to the following instructions:
Surface
Burner TO Clean the Recessed and Contoured Areas of the Cooktop - If a spill
Grate Occurs on or in the recessed or contoured areas, blot up spill with an absorbent
cloth. Rinse with a clean, damp cloth and wipe dry.
Surface
Burner
Cap
_ urface
Burner
Head
To Remove and Replace the Surface Burner Caps and Surface Burner
Heads - Remove in the following order: (1st) surface burner grate, (2nd)
surface burner cap, (3rd) surface burner head and (4th) surface burner drip pan
(if equipped).
Reverse the procedure above to replace the surface burner cap, surface burner
head and surface burner drip pans (if equipped). Do not remove any parts
from the cooktop until they have completely cooled and are safe to
handle. Do not operate the surface burners without the surface burner
cap and surface burner head properly in place.
Holder
Removable
Burner
Drip Pan
(on some models)
Note: The burner grate style shown
above may be a different depending
on your model.
To Clean the Surface Burner Cap, Surface Burner Head and Surface
Burner Drip Pan (if equipped) - Use a soap-filled scouring pad or a mild
abrasive cleanser to clean the surface burner caps, surface burner heads and
surface burner drip pans (if equipped). The ports (or slots) around the burner
head must be routinely cleaned. If residue still remains in these ports, use a
small-gauge wire or needle to clean the slots or holes. For proper flow of gas
and ignitionof the burner--DO NOT ALLOW SPILLS, FOOD, CLEANING
AGENTS OR ANY OTHER MATERIAL TO ENTER THE GAS ORIFICE
HOLDER OPENING. ALWAYS keep the surface burner cap and surface burner
head in place whenever a surface burner isin use.
Adjusting ! :,, "t,!
You roven control has been precisely set at the factory. This setting may differ from your previous oven however, so you r recipe
times may not give you the results you expect. If you think that the oven is cooking too hot or too cool for your recipe times,
you can adjust the control so that the oven cooks hotter or cooler than the temperature displayed.
To Adjust Oven Temperature:
1. Press _.
2. Set the temperature to 550°F (287°C) by pressing and holding the i_k.
3. Within 2 seconds, press and hold (_ until the 2digit display appears. Release _. The display now indicates the amount
of degrees offset between the original factory temperature setting and the current temperature setting. If the oven control
has the original factory calibration, the display will read "0."
4. The temperature can now be adjusted up or down 35°F (17°C), in 5°F steps by pressing and holding the A or V. Adjust
until the desired amount of offset appears in the display. When lowering the oven temperature, a minus sign (-) will appear
before the number to indicate that the oven will be cooler by the displayed amount of degrees.
5. When you have made the desired adjustment, press @ to go back to the time of day display.
Note: Oven temperature adjustments made wil! not change the Se!f-C!eaning feature temperature,
19
Loading ...
Loading ...
Loading ...