Loading ...
Loading ...
Loading ...
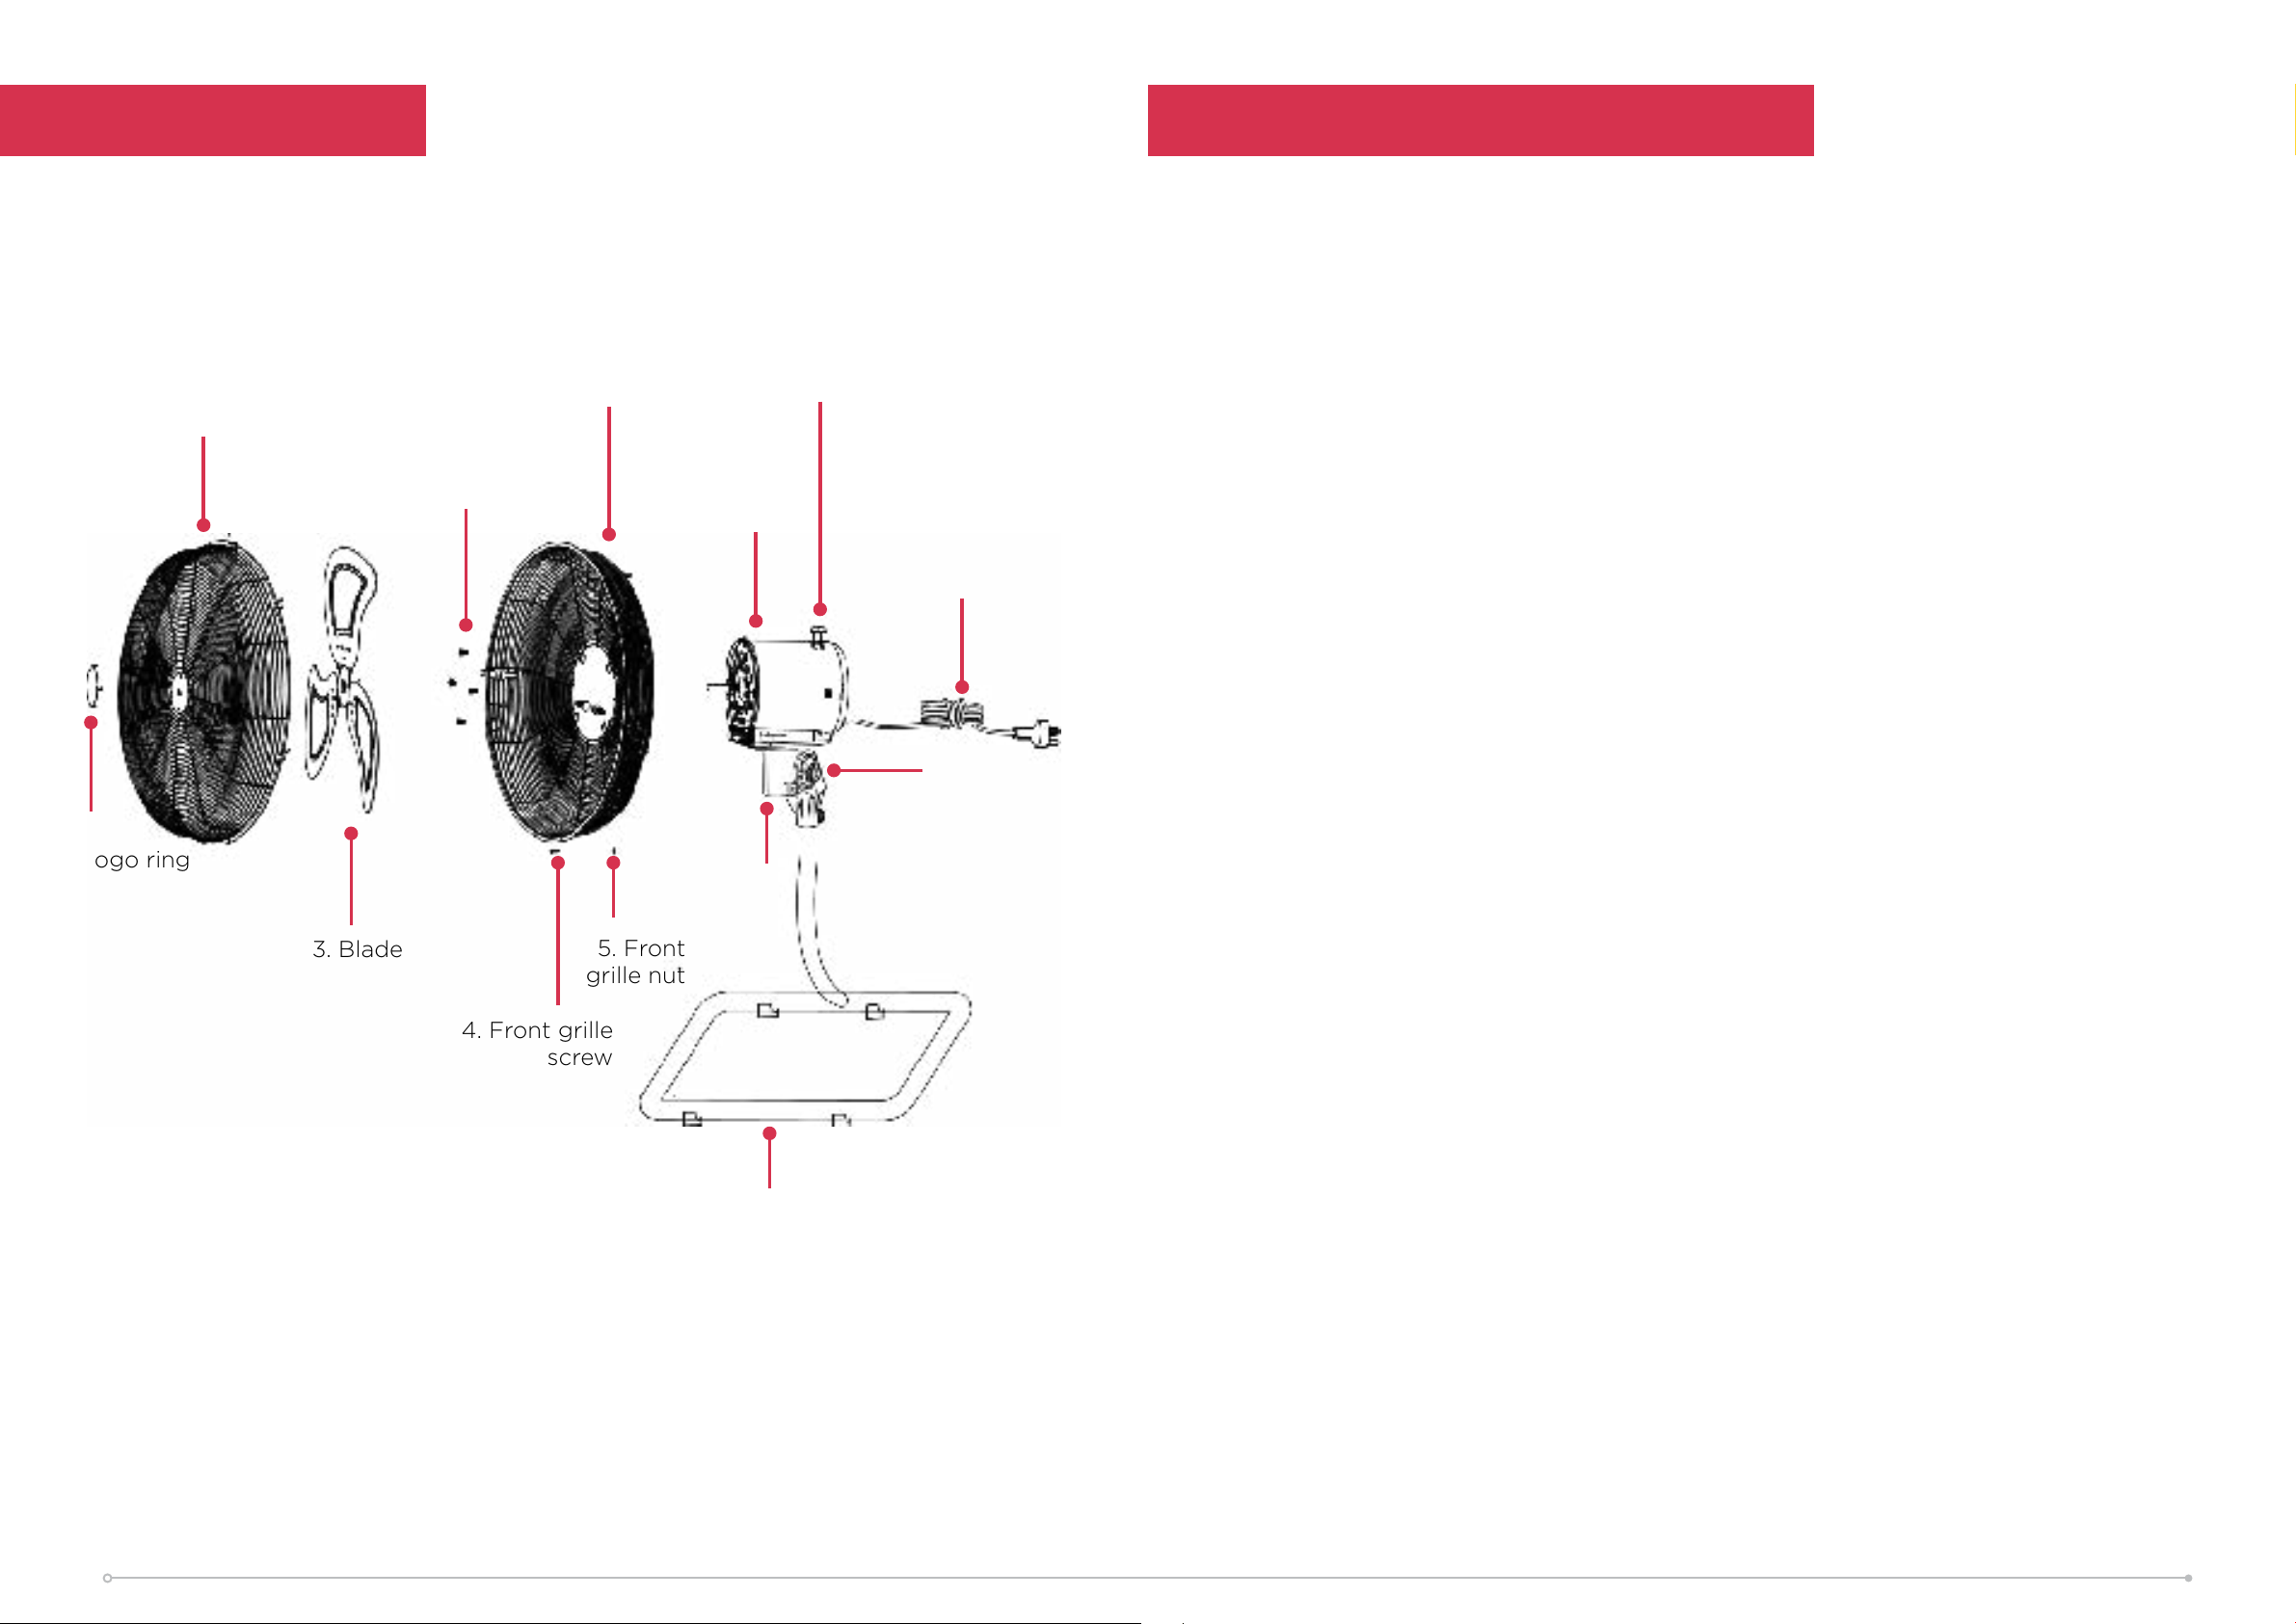
Parts Assembly
This fan has been partially assembled to reduce wastage of packaging material,
paper cartons and weight. To assemble the fan grilles, blades and base, please follow
the instructions below:
1. Remove the protective sleeve (if any) from the motor shaft (8).
2. Remove the four rear guard retaining screws (6) from the motor housing (8).
3. Using a Phillips head screwdriver (not supplied), attach the rear grille (7) to the
motor housing (8) using the four screws (6), you just removed.
Ensure the handle is at the top.
4. Place the fan blade (3) over the motor shaft (8) so that the blade retaining screw
on the fan blade shaft sits behind the blade. Tighten the screw securely against
the flat part of the motor shaft (8).
5. Remove the front grille rim screw (4) and nut (5) from the front grille (2) and
open the clips around the outside edge of the front grille (2), turning them
outwards.
6. Hang the front grille (2) by its hook over the top of the rear grille (7), making sure
the holes for the front grille rim screw (4) and nut (5) are aligned. Bring the front
grille (2) down to meet the rear grille (7) and push the clips inwards until the
front grille (2) is fastened to the rear grille (7). Finally fit the front grille rim screw
(4) and nut (5) through the holes in the bottom edge of the guard and tighten
with a small Phillips head screwdriver (not supplied).
7. Place the stand base (13) on the floor in front of you with the long part of the
stand tube (13) at the front so that the end of the tube stand points to the back.
8. Take the fan head assembly (with the front towards you) and push the opening of
the fan neck firmly onto the top of the stand base (13) as far as it will go.
9. Tighten the lock nut (12) to secure the parts together.
CAUTION: If you install the fan head assembly the wrong way onto the stand tube,
the fan could turn over when tilting the fan head.
1. Logo ring
2. Front grille
3. Blade
4. Front grille
screw
5. Front
grille nut
6. Motor housing
screws
7. Rear grille
8. Motor
9. Oscillation
knob
10. Power
cord
12. Lock nut
11. Neck
13. Stand
7
6
Loading ...
Loading ...