Loading ...
Loading ...
Loading ...
Daily
Regular wiping down directly after use prevents dirt from burning
on. Clean the appliance with water and a detergent or all purpose
cleaner.
Avoid using too much water to prevent it entering the burner or
ventilation openings.
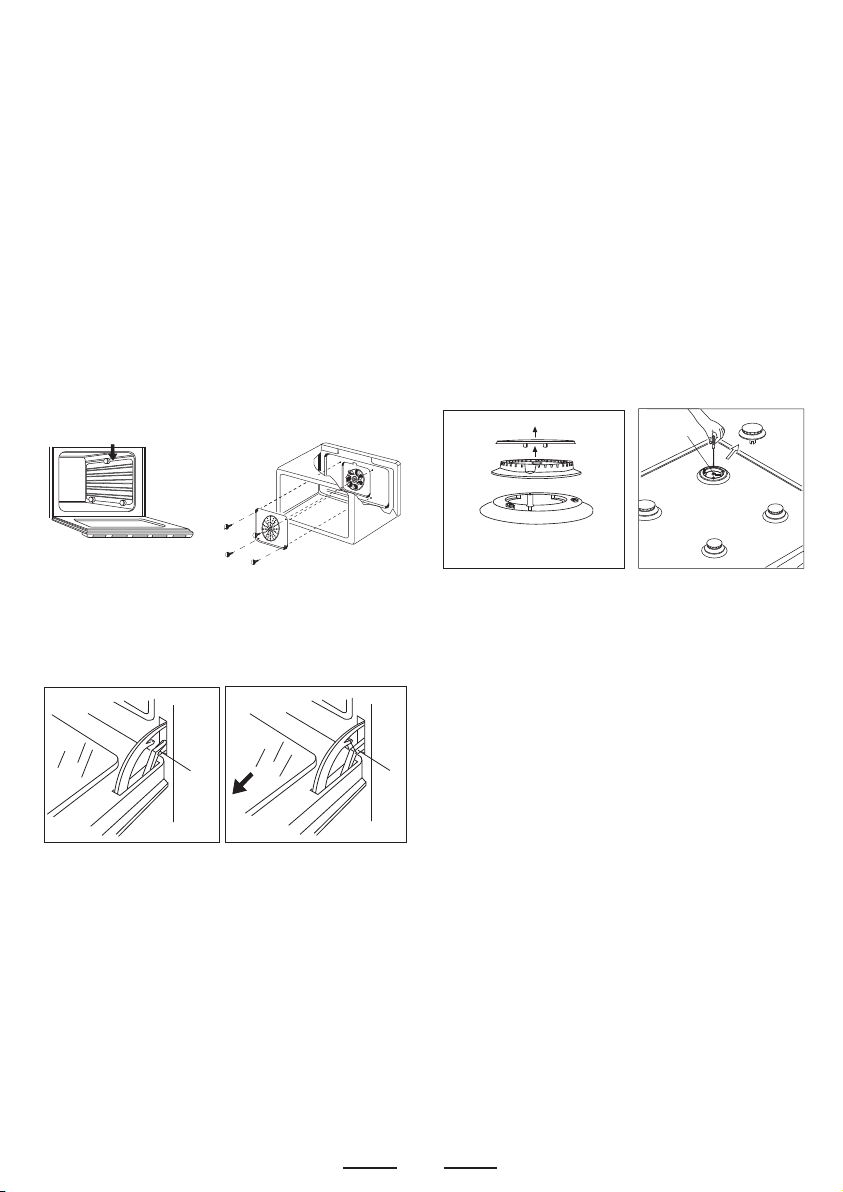
Interior: the oven shelf carriers and the back fan cover can be
removed for easier cleaning. To do this, remove all the shelves
and spring off the side carriers by applying pressure downwards
to unhook the top. The back can now be removed by unscrewing
the screw at each side. Replace in a similar manner. (Fig. Q-R)
Oven accessories (shelves, trays etc) should be washed in mild
detergent solution and should not be treated with abrasives. The
oven interior panels should be cleaned with mild detergent solution,
mild cream cleaners or a moist soap pad.
IMPORTANT
Do not use excessive water when cleaning the oven and avoid
water passing through the fan grill or ducts in the oven back .
Avoid letting grease deposit collect around the upper heating
element: it will cause smoking and may start a fire.
Fig. Q Fig. R
OVEN DOOR REMOVAL AND REFITTING
Open the door fully and tur
n the two hinge disks clockwise (fig.S).
Reclose to about 45° and pull gently (fig. T).
To reassemble, keep the door at 45° and insert the arms of the
hinge in the slots on the front of the oven, then turn the two hinge
disks anticlockwise.
WARNINGS
Before performing any repair or operation, switch the appliance
off and close the gas tap.
The manufacturer declines all responsibility for any damage to
persons, animals or things caused by failure to observe the rules
indicated above. In case it is necessary to repair or replace the
inside components, act as follows:
WARNINGS
Isolate the cooker from the electricity supply before attempting to
replace the oven lamp.
The oven lamp used is of a special type withstanding high
temperatures. To replace it, act as follows: disassemble the
protecting glass (A) and replace the burnt lamp with one of the
same type. Reassemble the protecting glass.
DISASSEMBLE OF WORK-TOP
In case it is necessary to repair or replace the inside components,
act as follows:
Remove the grids, remove burners and flame-spreaders (see
fig. 13), unscrew the visible screws “V” placed on the work-top
(see fig. 14). Disassemble the work-top by unscrewing the rear
screws “A” (see fig. 15A or 15 B according to the models). In this
way it is possible to lift the work-top and to reach the inside
components.
Fig. S Fig. T
Install shelves by locating them in the horizontal guide rails on
the oven walls.
The raised portion of the shelf is to be facing the rear wall of the
oven.
12
Fig. 13
Fig. 14
V
Loading ...
Loading ...
Loading ...