Loading ...
Loading ...
6
The appliance operates at high power to heat the room
rapidly.
Please note: Room temperature can be displayed in either
°C or °F. To change the unit of measurement for the tempe-
rature, press the + button for approx. 10 seconds, then re-
lease.
5. “ECO plus” function
The “ECO plus” function is available in Heating 1, 2 and 3 mo-
des only. To activate the function, press the “ECO plus” button
(D). When this function is active the appliance automatically
sets the most appropriate power level to guarantee optimum
comfort while reducing energy consumption. While the “ECO
plus” function is active, the appliance may switch automati-
cally to a lower heating power than the one displayed.
This may happen a number of times in an hour.
6. Swivel button
To distribute the air ow over a wider surface, press the swivel
button (F) . The appliance swivels to the right and left.
To stop the appliance in the desired position, simply press the
swivel button (F) again.
7. Turn the appliance o
To turn the appliance o, press the
ON/OFF
button (A).
The display may show a countdown for about 6 seconds.
Digital 24 h timer (selection from 0.5 hrs to 24
hrs)
This function can be activated from any operating mode.
Auto-start: with the appliance in
ON/OFF,
press the timer
button (E) . The symbol is displayed together with
the time remaining before the appliance comes on. To adjust
the timer, use the adjustment buttons + and - (B), then wait
a few seconds for the setting to be stored. The stand-by light
(H) is displayed together with the symbol, indicating that
the timer has been set. When the programmed time is rea-
ched, the appliance comes on with the settings used during
the previous period of operation.
Auto-o: with the appliance on, press the timer button
(E). The symbol is displayed together with the time remai-
ning before the appliance goes o.
To set the timer, use the adjustment buttons + and - (B), then
wait a few seconds for the setting to be stored.
The current settings are displayed again, together with the
symbol indicating that the timer has been set.
When the programmed time is reached, the appliance goes o
automatically.
To go back to operation without the timer, press the timer
button (E) twice.
The timer symbol
disappears from the display.
Using the remote control
The functions on the remote control are the same as those on
the appliance control panel. For a description of the functions,
see the “Operation and use” section on the previous page.
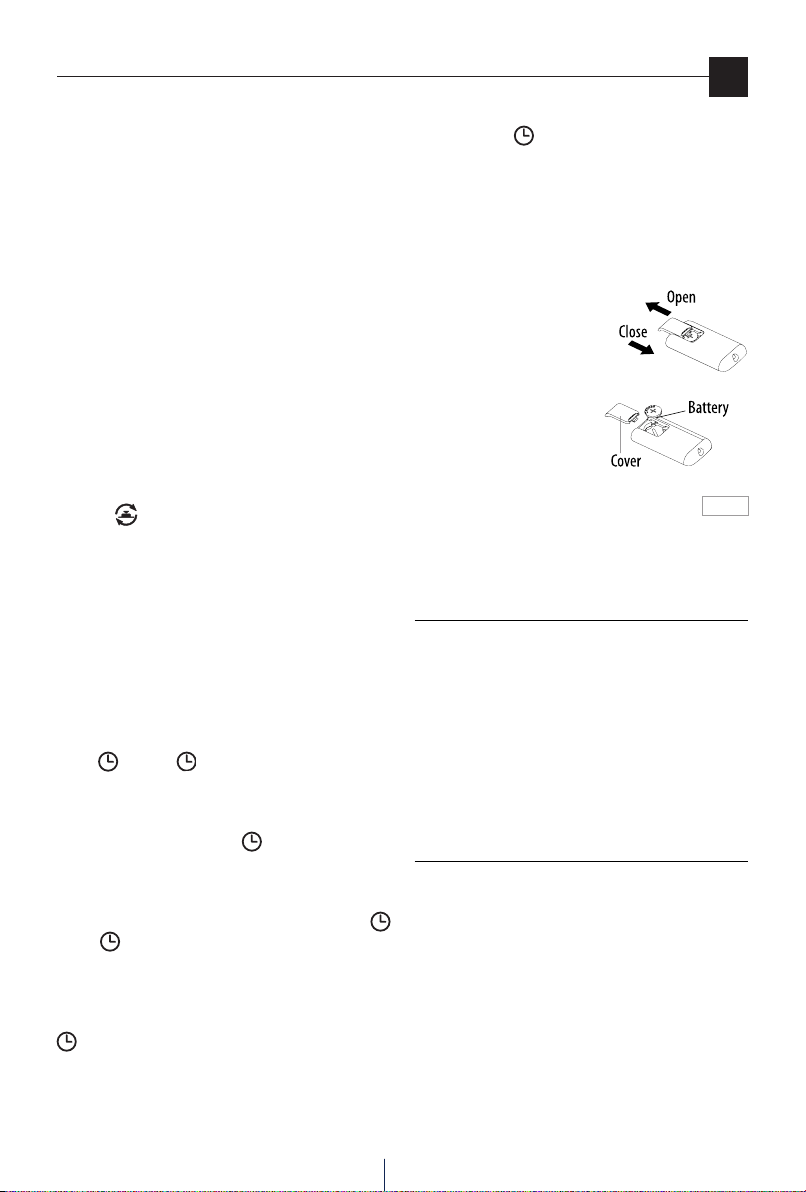
Installing or replacing the batteries
The remote control is powered
by a CR2032 lithium battery.
To operate the remote control,
pull and remove the plastic
strip under the battery cover.
To replace the batteries, remo-
ve the battery cover by sliding
it as shown in the gure.
When replacing the batteries,
make sure you respect the po-
larity (see gure 2).
Replace the cover as shown in the gure.
Old batteries are harmful to the environment and must be
removed and disposed of in compliance with current legi-
slation.
MAINTENANCE
- Always unplug from the outlet before cleaning.
- During the season when the appliance is in use, clean
the air intake and outlet grilles regularly using a vacuum
cleaner.
- To clean the lter, remove the rear grille by pulling it
outwards (g. 1). Remove the dust lter that retains
impurities in the air drawn in from the room, blow on it
lightly then put it back in the appliance.
- Never use abrasive powders or solvents to clean the ap-
pliance.
SAFETY FUNCTIONS
- Safety device: the appliance is tted with a safety
device that switches it o in the event of accidental
overheating (e.g. obstruction of air intake and outlet
grilles, motor turning slowly or not at all). To reset, un-
plug the appliance from the outlet for a few minutes,
remove the cause of overheating, then plug in again.
- Tip-over safety device: a tip-over safety device turns
the appliance o if it falls over or is positioned inappro-
priately in such a way as to jeopardize safety. The ap-
pliance emits a beep and a dot ashes on the display.
The appliance resumes operation a few seconds after
being placed in an upright position again.
en
Maintenance/Safety functions
Fig. 2
Loading ...
Loading ...