Loading ...
Loading ...
Loading ...
_i_ _ cabinet shouM be i_tall_ wifll, a very slight ti_t
(a_ut 1/2"),_wr_ard toward the outside
(See Fig_5),
Adiust the, bolt a_ the nat of Sill Sup_rt _) for
bagi_cing t_ c.3bi_t,
A_,a,ctlthe cabinet to the window sty! _ driving
"_hi8_rews __}(Ty_ B: Leith 16mm (5,/8inch),
and bellow,) through the front a_Je, into win_w
stool
Pa!! each Frame Curtain @ Mly to each window
_sh track, and repeat _ep 2
A_ach each Frame Cfu_ain Ot_e win:_w sash using
screws O (Type C) (See Fig 6)
Screw(Type B)@
Front Angle
Screw{Type B}_
Sill Suppo_
Siil Suppo_Q
Sash track
Fig. 5
CAU_N: Do n_t dril! a h_ in the _ttom pan_
The unit is des_ned to operate with
ap_ximately !/Z' ef water in bottom pan.
There is no n_ to add water ff the _'n is dry.
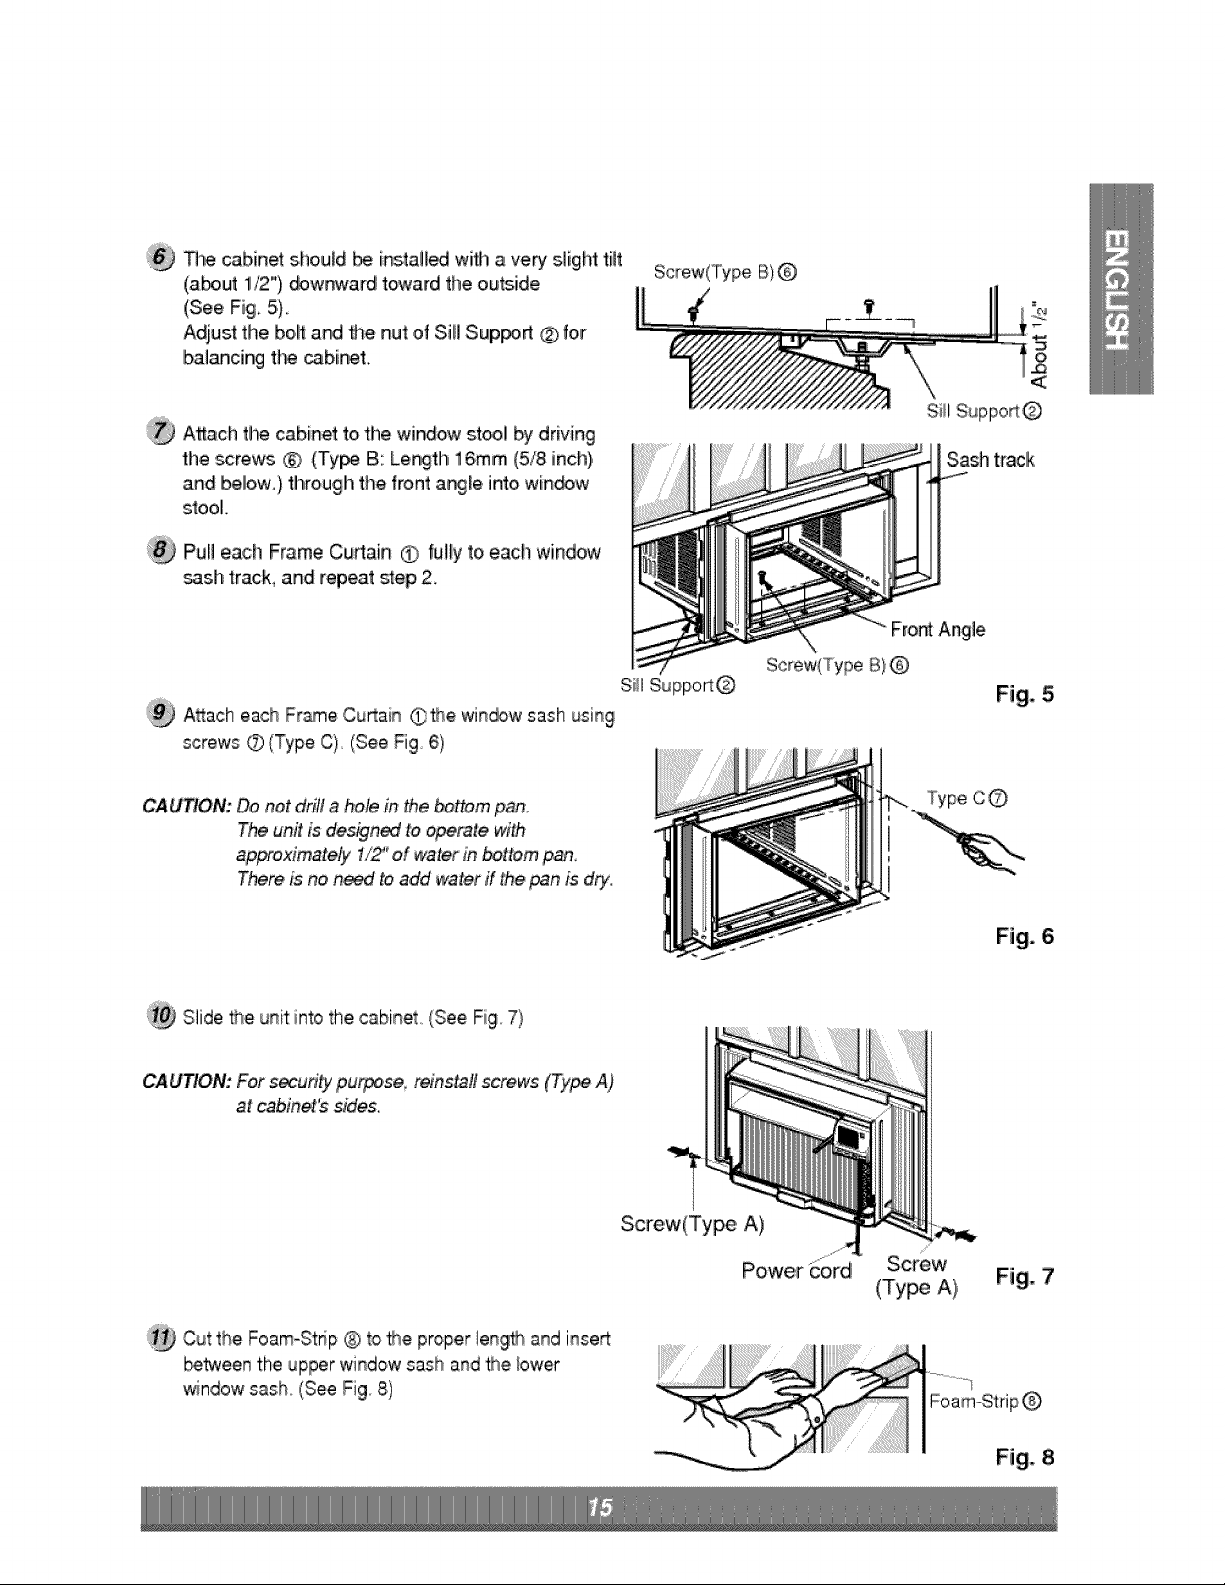
Slide the unit into the cabitqe,t,,{See Fig 7}
CAUTION: For secu#ty pui_t*cjise, reinstall screws (Type A)
,atcabin_'s sides.
Cut the Foam-Stnp ® to _e proper leL_gthand inset:
between the,upper window sash and the lower
window sash,,(See Fig 8)
Screw(Type A)
/,
Screw
(Type A),
Fig. 7
Fig. 8
Loading ...
Loading ...
Loading ...