Loading ...
Loading ...
Loading ...
CUSTOMERRESPONSIBILITIES
CARE & MAINTENANCE TASK WHEN TO PERFORM
Check for Loose fasteners and parts Before each use
Check for damaged or worn parts Before each use
Clean unit and labels After each use
GENERAL RECOMMENDATIONS
The warranty on this unit does not cover
items that have been subjected to oper-
ator abuse or negligence. To receive full
value from the warranty, the operator
must maintain unit as instructed in this
manual. Various adjustments will need
to be made periodically to properly
maintain your unit.
CHECK FOR LOOSE
FASTENERS AND PARTS
• Blade
• Blade guard
• Housing Screws
• Handle Screws
• Wheels
CHECK FOR DAMAGED OR
WORN PARTS
Refer replacement of damaged/worn
parts to your Sears Service Center.
• Trigger Switch - Ensure trigger
switch functions properly by releas-
ing the switch. Make sure motor
stops and blade stops turning; then
restart motor and continue.
• Blade Guard - Discontinue use of
unit if blade guard is damaged.
CLEAN UNIT & LABELS
• Clean the unit using a damp ctoth
with a mild detergent.
• Wipe off unit with a clean dry cloth.
BLADE MAINTENANCE
WARNING: The blade will spin
momentarily after the motor stops.
Make sure blade has stopped turning
and disconnect unit from the power
source before performing work on the
blade.
CAUTION: Wear protective gloves
when handling or performing mainte-
nance on blade to help avoid injury.
• Use the proper replacement btade.
Contact your Sears Service Center
or store for replacement blade
#71-85717.
• The blade is reversible. When the
cutting edge on one side becomes
worn, turn the blade over.
• Check blade for flatness periodically.
Lay the blade on a fiat surface and
inspect the blade for flatness. Throw
away abtade that is not fiat.
WARNING: Always replace a
blade that is bent, warped, cracked,
broken, or damaged in any other way.
Never attempt to straighten and reuse
a damaged btade. Use onIy the speci-
fied replacement blade.
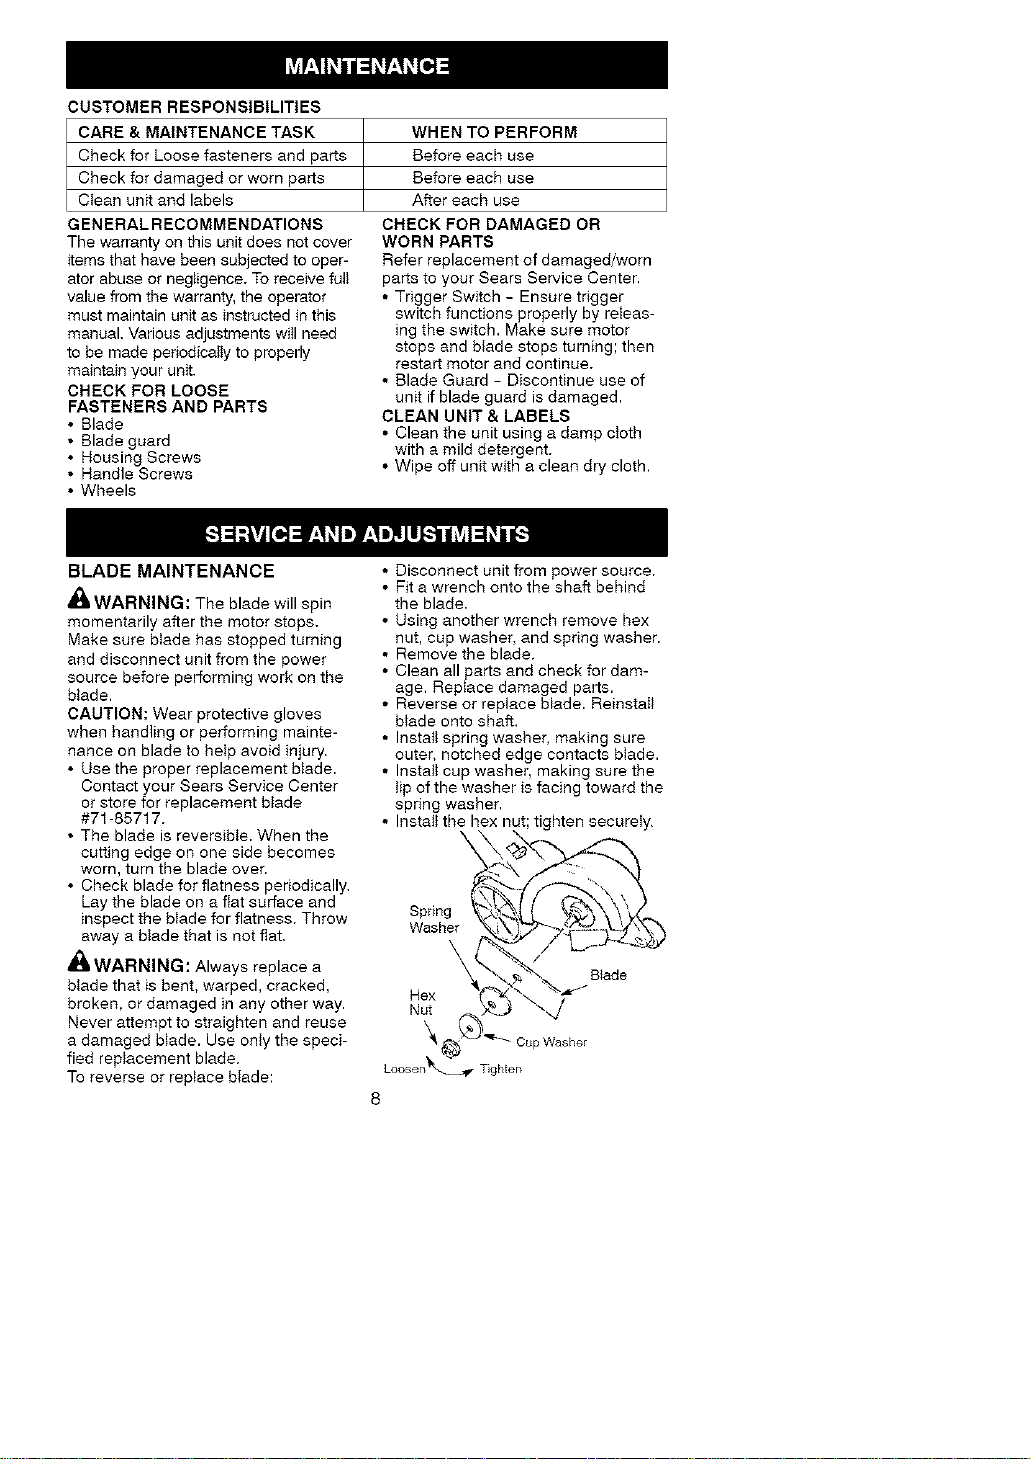
To reverse or replace blade:
• Disconnect unit from power source.
• Fit a wrench onto the shaft behind
the blade,
• Using another wrench remove hex
nut, cup washer, and spring washer.
• Remove the blade.
• Clean all parts and check for dam-
age. Replace damaged parts.
• Reverse or replace blade. ReinstaIl
blade onto shaft.
• Install spring washer, making sure
outer, notched edge contacts bIade.
• Install cup washer, making sure the
tip of the washer is facing toward the
spring washer.
• Install the hex nut; tighten securely.
\
Spring
Washer
B_ade
Hex
Nut
_ Cup Washer
Loose n_,_ T ghten
8
Loading ...