www.braun.com
Type 5791
Series 9
9
9299s
9293s
9260s
9242s
9240s
9297cc
9296cc
9295cc
9292cc
9291cc
9290cc
9280cc
wet&dry
5791
90778995/I-16
90778995_Series_9-2_all_w+d_CN_KR_ANZ_S1.indd 190778995_Series_9-2_all_w+d_CN_KR_ANZ_S1.indd 1 25.01.16 12:0525.01.16 12:05
Stapled booklet, 120 x 170 mm, 40 pages (incl. 8 pages cover), 2/2c = cyan + black
CSS APPROVED Effective Date 9Feb2016 GMT - Printed 06Apr2016 Page 1 of 40
6
17
English 26
Braun GmbH
Frankfurter Straße 145
61476 Kronberg/Germany
www.braun.com
www.service.braun.com
China/Korea/UK
90778995_Series_9-2_all_w+d_CN_KR_ANZ_S2.indd 190778995_Series_9-2_all_w+d_CN_KR_ANZ_S2.indd 1 25.01.16 12:0625.01.16 12:06
CSS APPROVED Effective Date 9Feb2016 GMT - Printed 06Apr2016 Page 2 of 40
Ser
i
es 9
Seri
es 9
S
e
r
ies
9
Series 9
11
1
2
3
8
9
7
4
5
13
16
15
14
17
12
10
10a
9297cc, 9296cc, 9295cc, 9292cc, 9291cc, 9290cc, 9280cc
9280cc
9242s
9240s
6
15a
15b
15c
Series 9
Series 9
9299s
9297cc
9296cc
9295cc
9293s
9292cc
9291cc
9290cc
9260s
9299s
9293s
9260s
9242s
9240s
3
90778995_Series_9-2_all_w+d_CN_KR_ANZ_S3.indd 190778995_Series_9-2_all_w+d_CN_KR_ANZ_S3.indd 1 04.02.16 11:5504.02.16 11:55
CSS APPROVED Effective Date 9Feb2016 GMT - Printed 06Apr2016 Page 3 of 40
2
1
S
eries 9
Se
ri
e
s
9
Series 7
Series 7
20°
10°
0°
10°
20°
10°
0°
10°
20°
90°
C
B
A
4
90778995_Series_9-2_all_w+d_CN_KR_ANZ_S4.indd 190778995_Series_9-2_all_w+d_CN_KR_ANZ_S4.indd 1 25.01.16 12:0725.01.16 12:07
CSS APPROVED Effective Date 9Feb2016 GMT - Printed 06Apr2016 Page 4 of 40

2
1
S
e
r
ie
s 7
S
e
r
ie
s 7
Seri
e
s
7
Se
ries
7
2
1
D
E
F
5
90778995_Series_9-2_all_w+d_CN_KR_ANZ_S5.indd 190778995_Series_9-2_all_w+d_CN_KR_ANZ_S5.indd 1 25.01.16 12:0825.01.16 12:08
CSS APPROVED Effective Date 9Feb2016 GMT - Printed 06Apr2016 Page 5 of 40

6
90778995_Series_9-2_all_w+d_CN_KR_ANZ_S6-40.indd 690778995_Series_9-2_all_w+d_CN_KR_ANZ_S6-40.indd 6 26.01.16 08:2726.01.16 08:27
CSS APPROVED Effective Date 9Feb2016 GMT - Printed 06Apr2016 Page 6 of 40
7
90778995_Series_9-2_all_w+d_CN_KR_ANZ_S6-40.indd 790778995_Series_9-2_all_w+d_CN_KR_ANZ_S6-40.indd 7 26.01.16 08:2726.01.16 08:27
CSS APPROVED Effective Date 9Feb2016 GMT - Printed 06Apr2016 Page 7 of 40
8
A
90778995_Series_9-2_all_w+d_CN_KR_ANZ_S6-40.indd 890778995_Series_9-2_all_w+d_CN_KR_ANZ_S6-40.indd 8 26.01.16 08:2726.01.16 08:27
CSS APPROVED Effective Date 9Feb2016 GMT - Printed 06Apr2016 Page 8 of 40
9
90778995_Series_9-2_all_w+d_CN_KR_ANZ_S6-40.indd 990778995_Series_9-2_all_w+d_CN_KR_ANZ_S6-40.indd 9 26.01.16 08:2726.01.16 08:27
CSS APPROVED Effective Date 9Feb2016 GMT - Printed 06Apr2016 Page 9 of 40

10
90778995_Series_9-2_all_w+d_CN_KR_ANZ_S6-40.indd 1090778995_Series_9-2_all_w+d_CN_KR_ANZ_S6-40.indd 10 26.01.16 08:2726.01.16 08:27
CSS APPROVED Effective Date 9Feb2016 GMT - Printed 06Apr2016 Page 10 of 40
11
90778995_Series_9-2_all_w+d_CN_KR_ANZ_S6-40.indd 1190778995_Series_9-2_all_w+d_CN_KR_ANZ_S6-40.indd 11 26.01.16 08:2726.01.16 08:27
CSS APPROVED Effective Date 9Feb2016 GMT - Printed 06Apr2016 Page 11 of 40
12
S
e
ri
e
s 5
Seri
e
s 5
Series 5
1
1
2
Li- Ion
90778995_Series_9-2_all_w+d_CN_KR_ANZ_S6-40.indd 1290778995_Series_9-2_all_w+d_CN_KR_ANZ_S6-40.indd 12 26.01.16 08:2726.01.16 08:27
CSS APPROVED Effective Date 9Feb2016 GMT - Printed 06Apr2016 Page 12 of 40
13
90778995_Series_9-2_all_w+d_CN_KR_ANZ_S6-40.indd 1390778995_Series_9-2_all_w+d_CN_KR_ANZ_S6-40.indd 13 26.01.16 08:2726.01.16 08:27
CSS APPROVED Effective Date 9Feb2016 GMT - Printed 06Apr2016 Page 13 of 40
14
90778995_Series_9-2_all_w+d_CN_KR_ANZ_S6-40.indd 1490778995_Series_9-2_all_w+d_CN_KR_ANZ_S6-40.indd 14 26.01.16 08:2726.01.16 08:27
CSS APPROVED Effective Date 9Feb2016 GMT - Printed 06Apr2016 Page 14 of 40
15
90778995_Series_9-2_all_w+d_CN_KR_ANZ_S6-40.indd 1590778995_Series_9-2_all_w+d_CN_KR_ANZ_S6-40.indd 15 26.01.16 08:2726.01.16 08:27
CSS APPROVED Effective Date 9Feb2016 GMT - Printed 06Apr2016 Page 15 of 40
16
90778995_Series_9-2_all_w+d_CN_KR_ANZ_S6-40.indd 1690778995_Series_9-2_all_w+d_CN_KR_ANZ_S6-40.indd 16 26.01.16 08:2726.01.16 08:27
CSS APPROVED Effective Date 9Feb2016 GMT - Printed 06Apr2016 Page 16 of 40
17
90778995_Series_9-2_all_w+d_CN_KR_ANZ_S6-40.indd 1790778995_Series_9-2_all_w+d_CN_KR_ANZ_S6-40.indd 17 26.01.16 08:2726.01.16 08:27
CSS APPROVED Effective Date 9Feb2016 GMT - Printed 06Apr2016 Page 17 of 40
18
90778995_Series_9-2_all_w+d_CN_KR_ANZ_S6-40.indd 1890778995_Series_9-2_all_w+d_CN_KR_ANZ_S6-40.indd 18 26.01.16 08:2726.01.16 08:27
CSS APPROVED Effective Date 9Feb2016 GMT - Printed 06Apr2016 Page 18 of 40
19
90778995_Series_9-2_all_w+d_CN_KR_ANZ_S6-40.indd 1990778995_Series_9-2_all_w+d_CN_KR_ANZ_S6-40.indd 19 26.01.16 08:2726.01.16 08:27
CSS APPROVED Effective Date 9Feb2016 GMT - Printed 06Apr2016 Page 19 of 40
20
90778995_Series_9-2_all_w+d_CN_KR_ANZ_S6-40.indd 2090778995_Series_9-2_all_w+d_CN_KR_ANZ_S6-40.indd 20 26.01.16 08:2726.01.16 08:27
CSS APPROVED Effective Date 9Feb2016 GMT - Printed 06Apr2016 Page 20 of 40
21
90778995_Series_9-2_all_w+d_CN_KR_ANZ_S6-40.indd 2190778995_Series_9-2_all_w+d_CN_KR_ANZ_S6-40.indd 21 26.01.16 08:2726.01.16 08:27
CSS APPROVED Effective Date 9Feb2016 GMT - Printed 06Apr2016 Page 21 of 40
22
90778995_Series_9-2_all_w+d_CN_KR_ANZ_S6-40.indd 2290778995_Series_9-2_all_w+d_CN_KR_ANZ_S6-40.indd 22 26.01.16 08:2726.01.16 08:27
CSS APPROVED Effective Date 9Feb2016 GMT - Printed 06Apr2016 Page 22 of 40
23
90778995_Series_9-2_all_w+d_CN_KR_ANZ_S6-40.indd 2390778995_Series_9-2_all_w+d_CN_KR_ANZ_S6-40.indd 23 26.01.16 08:2726.01.16 08:27
CSS APPROVED Effective Date 9Feb2016 GMT - Printed 06Apr2016 Page 23 of 40
24
90778995_Series_9-2_all_w+d_CN_KR_ANZ_S6-40.indd 2490778995_Series_9-2_all_w+d_CN_KR_ANZ_S6-40.indd 24 26.01.16 08:2726.01.16 08:27
CSS APPROVED Effective Date 9Feb2016 GMT - Printed 06Apr2016 Page 24 of 40
25
90778995_Series_9-2_all_w+d_CN_KR_ANZ_S6-40.indd 2590778995_Series_9-2_all_w+d_CN_KR_ANZ_S6-40.indd 25 26.01.16 08:2726.01.16 08:27
CSS APPROVED Effective Date 9Feb2016 GMT - Printed 06Apr2016 Page 25 of 40
26
English
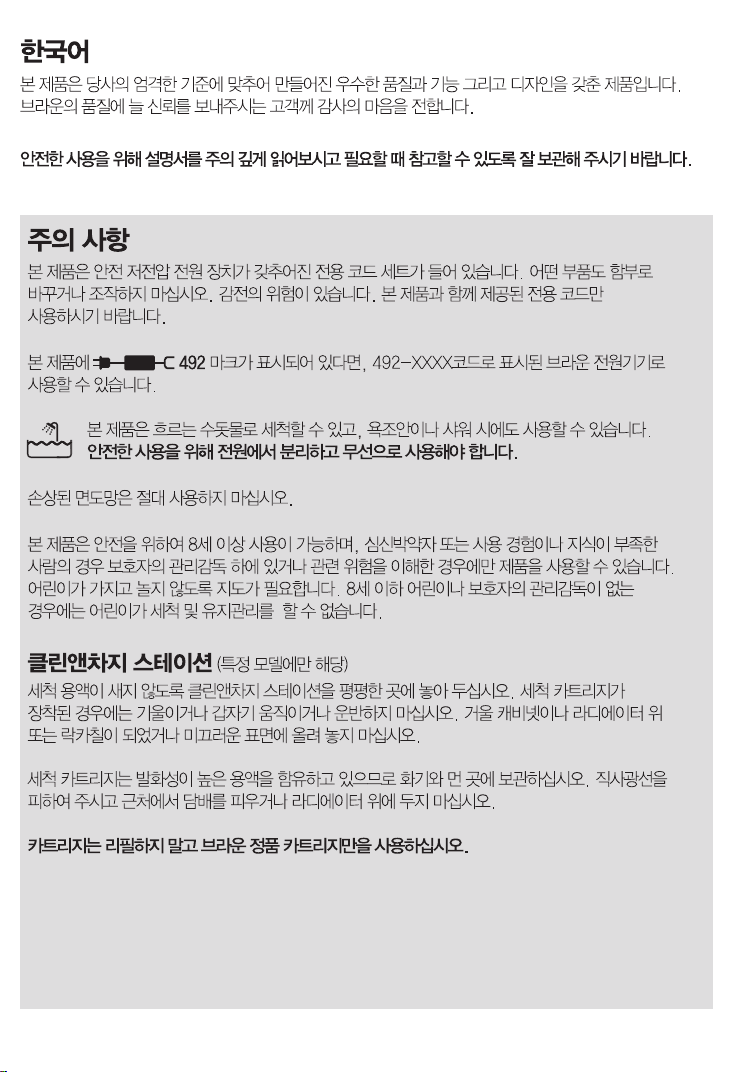
Our products are designed to meet the highest standards of quality, functionality
and design. Thank you for your trust in Braun’s quality, and we hope you enjoy your
new Braun shaver.
Read these instructions completely, they contain safety information.
Keep them for future reference.
Warning
Your appliance is provided with a special cord set, which has an
integrated Safety Extra Low Voltage power supply. Do not
exchange or tamper with any part of it, otherwise there is risk of
an electric shock. Only use the special cord set provided with your
appliance.
If the appliance is marked 492, you can use it with any
Braun power supply coded 492-XXXX.
This appliance is suitable for cleaning under running water
and use in a bathtub or shower. For safety reasons it can
only be operated cordless.
Do not shave with a damaged foil or cord.
This appliance can be used by children aged from 8 years and
above and persons with reduced physical, sensory or mental
capabilities or lack of experience and knowledge if they have been
given supervision or instruction concerning the safe use of the
appliance and understand the hazards involved. Children shall not
play with the appliance. Cleaning and user maintenance shall
not be made by children unless they are older than 8 years and
supervised.
Clean&Charge Station (not with all models)
To prevent the cleaning fluid from leaking, ensure that the
Clean&Charge Station is placed on a flat surface. When a cleaning
cartridge is installed, do not tip, move suddenly or transport the
station in any way as cleaning fluid might spill out of the cartridge.
Do not place the station inside a mirror cabinet, nor place it on a
polished or lacquered surface.
90778995_Series_9-2_all_w+d_CN_KR_ANZ_S6-40.indd 2690778995_Series_9-2_all_w+d_CN_KR_ANZ_S6-40.indd 26 26.01.16 08:2726.01.16 08:27
CSS APPROVED Effective Date 9Feb2016 GMT - Printed 06Apr2016 Page 26 of 40

27
The cleaning cartridge contains a highly flammable liquid so keep it
away from sources of ignition. Do not expose to direct sunlight
and cigarette smoking nor store it over a radiator.
Do not refill the cartridge and use only original Braun refill
cartridges.
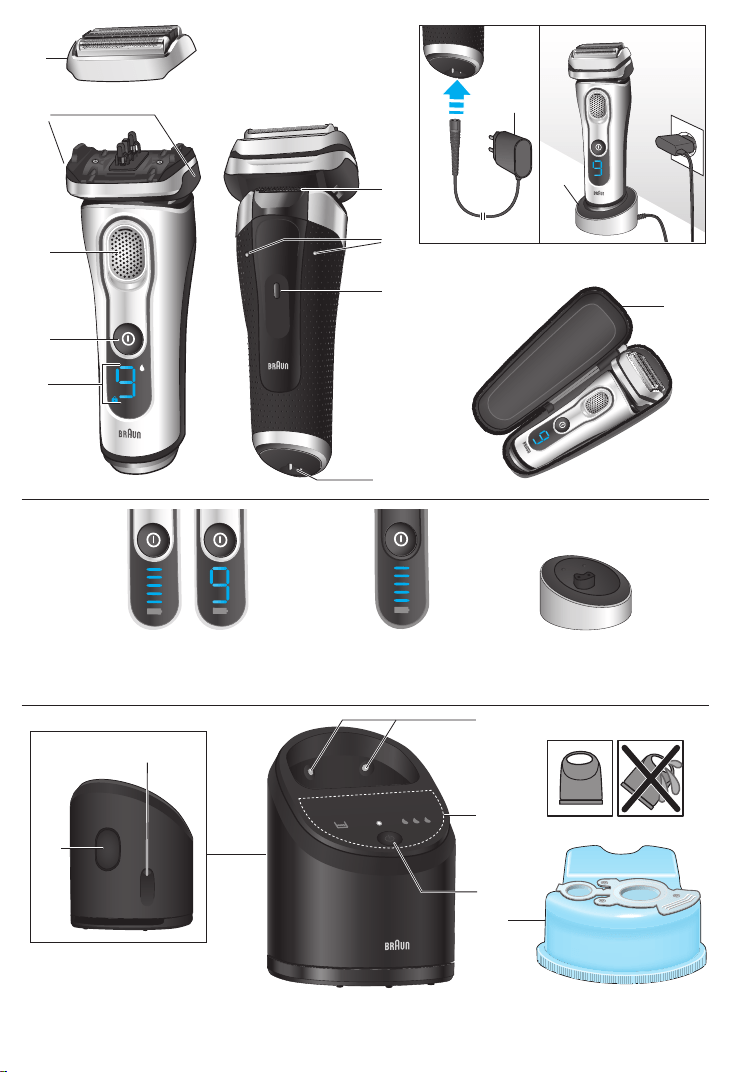
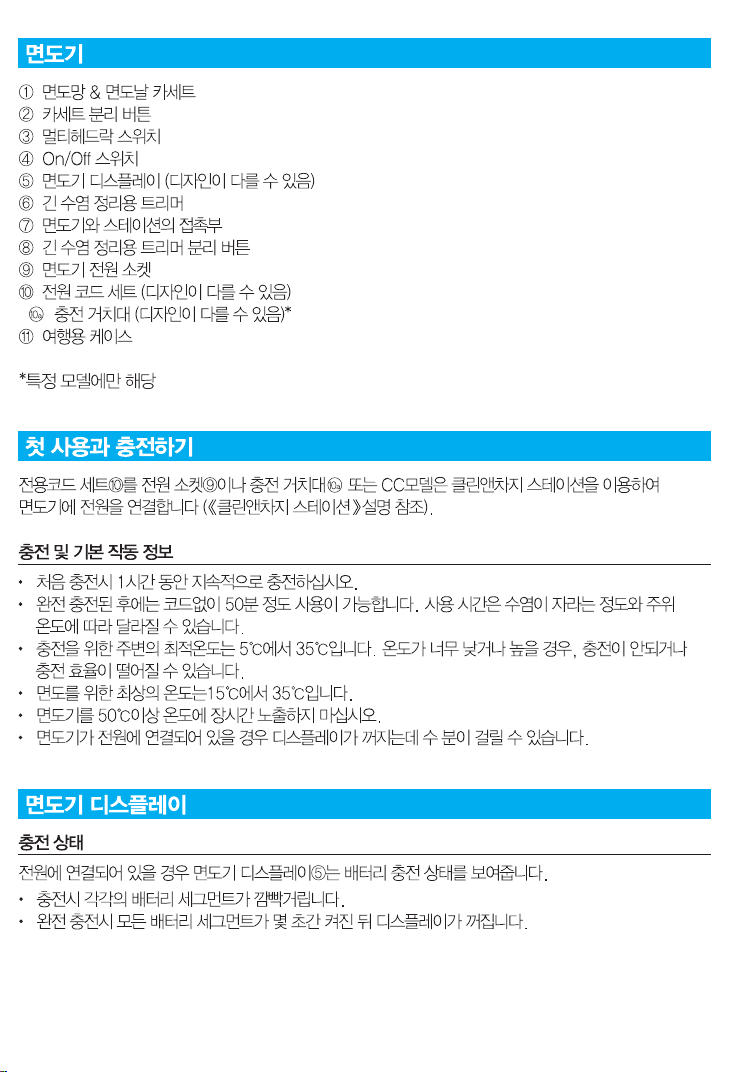
Shaver
1 Foil & Cutter cassette
2 Cassette release buttons
3 MultiHeadLock switch
4 On/off switch
5 Shaver display (design can differ)
6 Long hair trimmer
7 Shaver-to-station contacts
8 Release button for long hair trimmer
9 Shaver power socket
10 Special cord set (design can differ)
10a Charging stand (design can differ)*
11 Travel case
* not with all models
First use and Charging
Connect the shaver to an electrical outlet by snapping the special cord set (10) into
the power socket (9) / the charging stand (10a) or for cc models via the
Clean&Charge Station (see Chapter «Clean&Charge Station»).
Charging and basic operating information
• When charging for the first time, charge continuously for 1 hour.
• A full charge provides up to 50 minutes of cordless shaving time. This may vary
according to your beard growth and environmental temperature.
• Recommended ambient temperature for charging is 5 °C to 35 °C. The battery may
not charge properly or at all under extreme low or high temperatures.
• Recommended ambient temperature for shaving is 15 °C to 35 °C.
• Do not expose the appliance to temperatures higher than 50 °C for extended
periods of time.
• When the shaver is connected to an electrical outlet, it may take some minutes until
the display illuminates.
Shaver display
Charge status
The shaver display (5) shows the charge status of the battery when connected to an
electrical outlet:
90778995_Series_9-2_all_w+d_CN_KR_ANZ_S6-40.indd 2790778995_Series_9-2_all_w+d_CN_KR_ANZ_S6-40.indd 27 26.01.16 08:2726.01.16 08:27
CSS APPROVED Effective Date 9Feb2016 GMT - Printed 06Apr2016 Page 27 of 40
28
• During charging the respective battery segment will blink.
• When fully charged all battery segments will light up for a few seconds then the
display turns off.
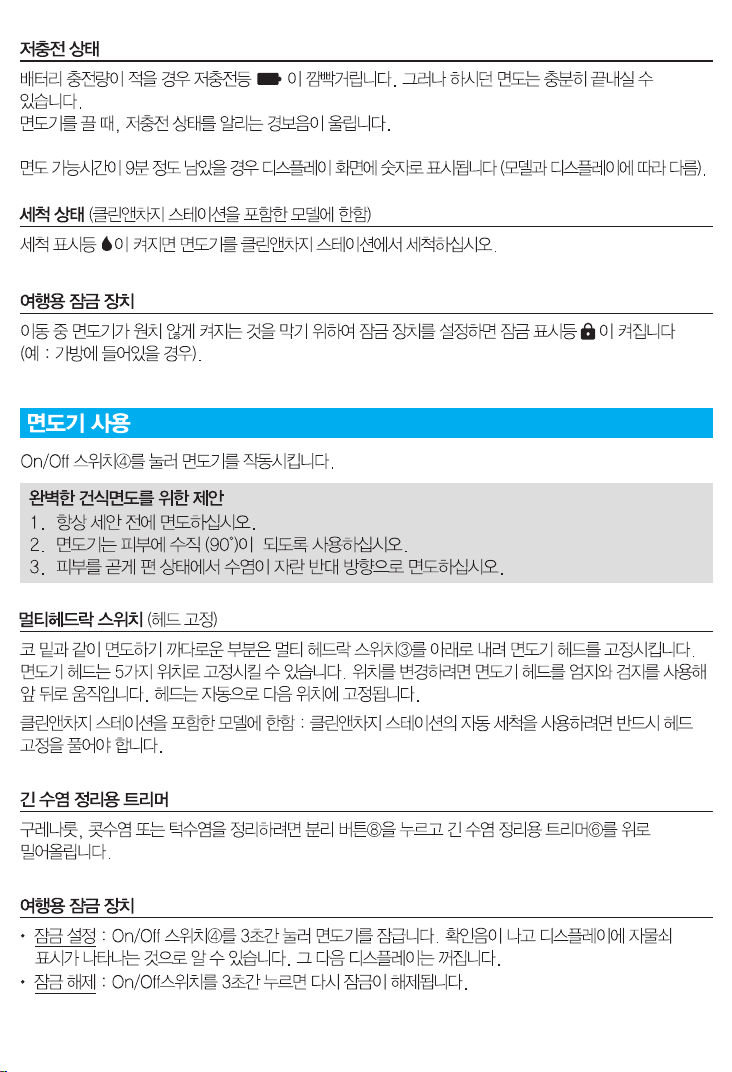
Low charge
The low-charge light
flashes red when the battery is running low. You should be
able to finish your shave. With switching off the shaver a beep sound reminds of the
low charge status.
The last 9 minutes of remaining shaving time are displayed in digits (depending on
your model / display).
Cleaning status (only models with Clean & Charge Station)
The cleaning indicator lights up when the shaver needs to be cleaned in the
Clean&Charge Station.
Travel lock
The lock symbol lights up when the shaver has been locked to avoid unintended
starting of the motor (e.g. for storing in a suitcase).
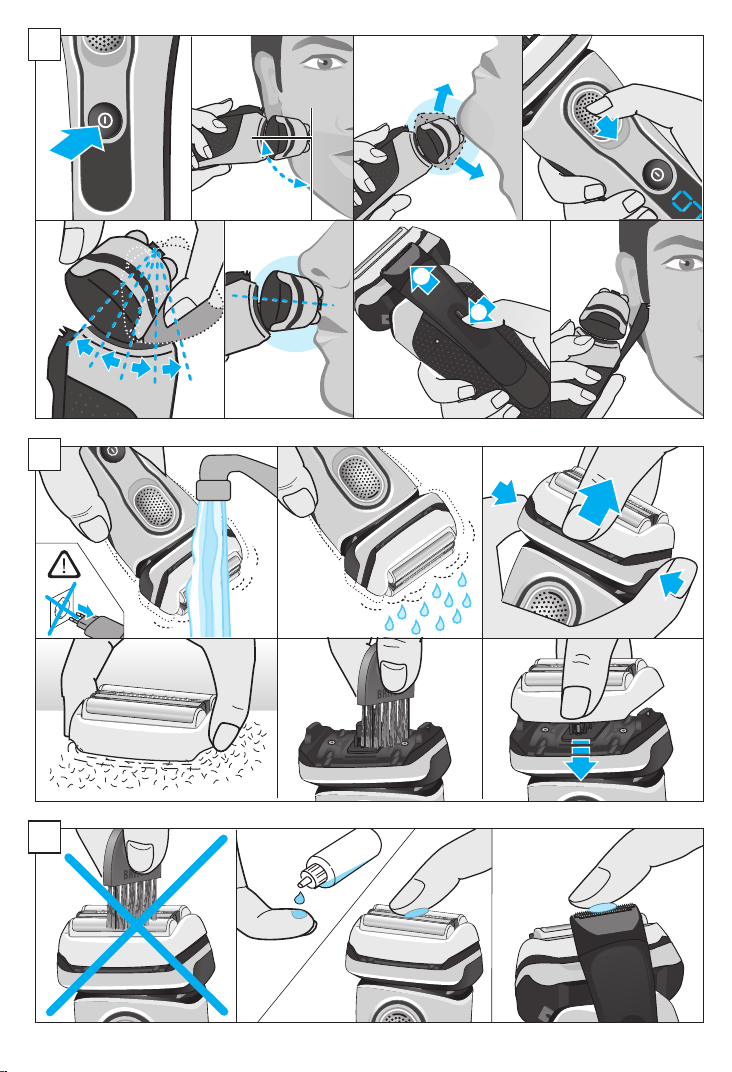
Using the shaver (see fig. A)
Press the on/off switch (4) to operate the shaver.
Tips for a perfect dry shave
1. Always shave before washing your face.
2. At all times, hold the shaver at the right angle (90°) to your skin.
3. Stretch your skin and shave against the direction of your beard growth.
MultiHeadLock switch (head lock)
To shave hard-to-reach areas (e.g. under the nose) slide the MultiHeadLock switch
(3) down to lock the shaver head. The shaver head can be locked in five positions.
To change position, move the shaver head with your thumb and forefinger back or
forth. It will automatically click into the next position.
Only models with Clean & Charge Station: For automatic cleaning in the Clean&Charge
Station the head lock should be released.
Long hair trimmer
To trim sideburns, moustache or beard press the release button (8) and slide the long
hair trimmer (6) upwards.
Travel lock
• Activation: By pressing the on/off switch (4) for 3 seconds the shaver is locked.
This is confirmed by a beep sound and the lock symbol in the display. Afterwards
the display turns off.
90778995_Series_9-2_all_w+d_CN_KR_ANZ_S6-40.indd 2890778995_Series_9-2_all_w+d_CN_KR_ANZ_S6-40.indd 28 26.01.16 08:2726.01.16 08:27
CSS APPROVED Effective Date 9Feb2016 GMT - Printed 06Apr2016 Page 28 of 40

29
• Deactivation: By pressing the on/off switch for 3 seconds the shaver is unlocked
again.
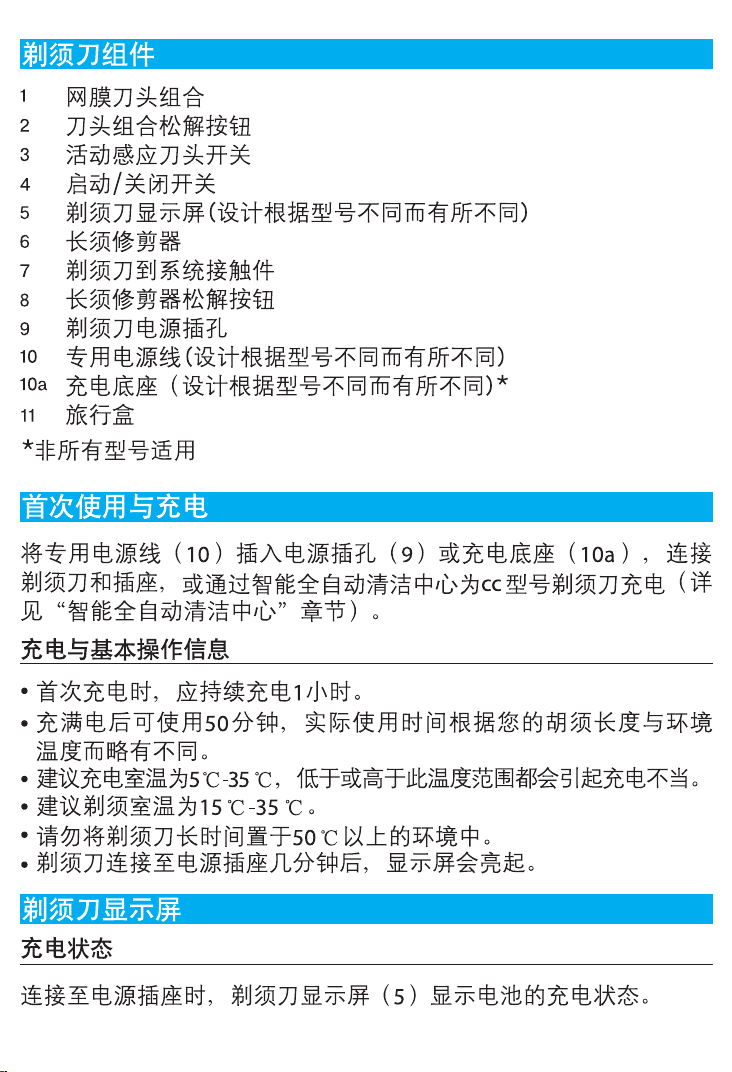
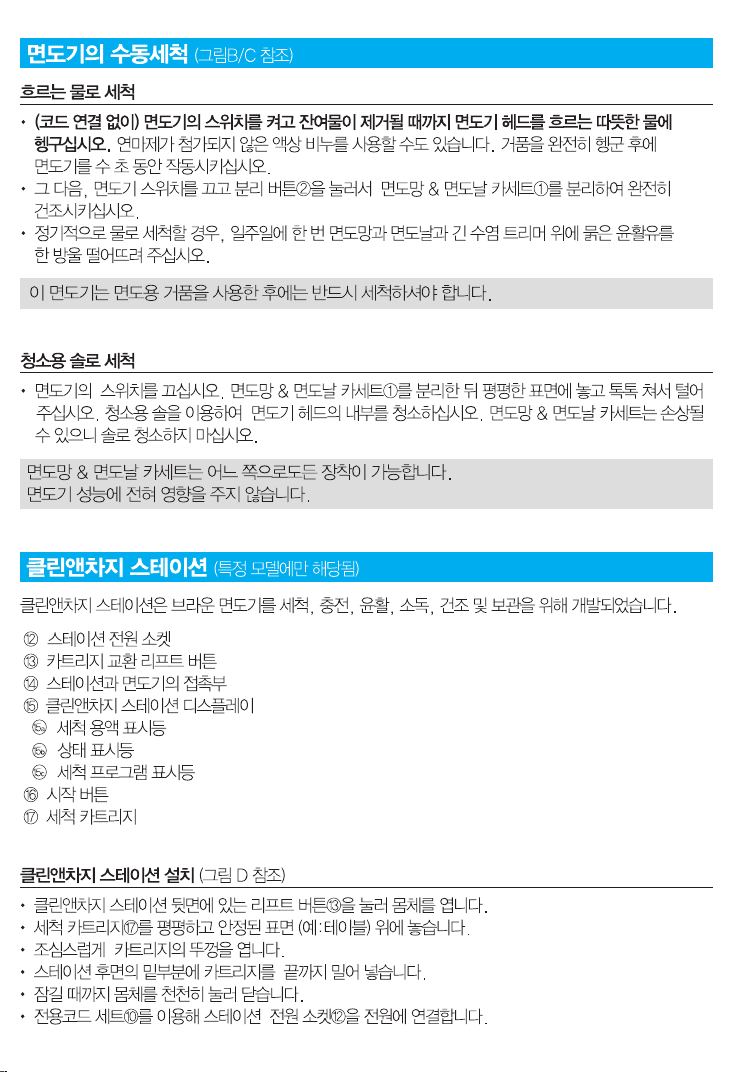
Manual cleaning of the shaver (see fig. B/C)
Cleaning under running water
• Switch on the shaver (cordless) and rinse the shaver head under hot running
water until all residues have been removed. You may use liquid soap without
abrasive substances. Rinse off all foam and let the shaver run for a few more
seconds.
• Next, switch off the shaver, press the release buttons (2) to remove the Foil & Cutter
cassette (1) and let it dry completely.
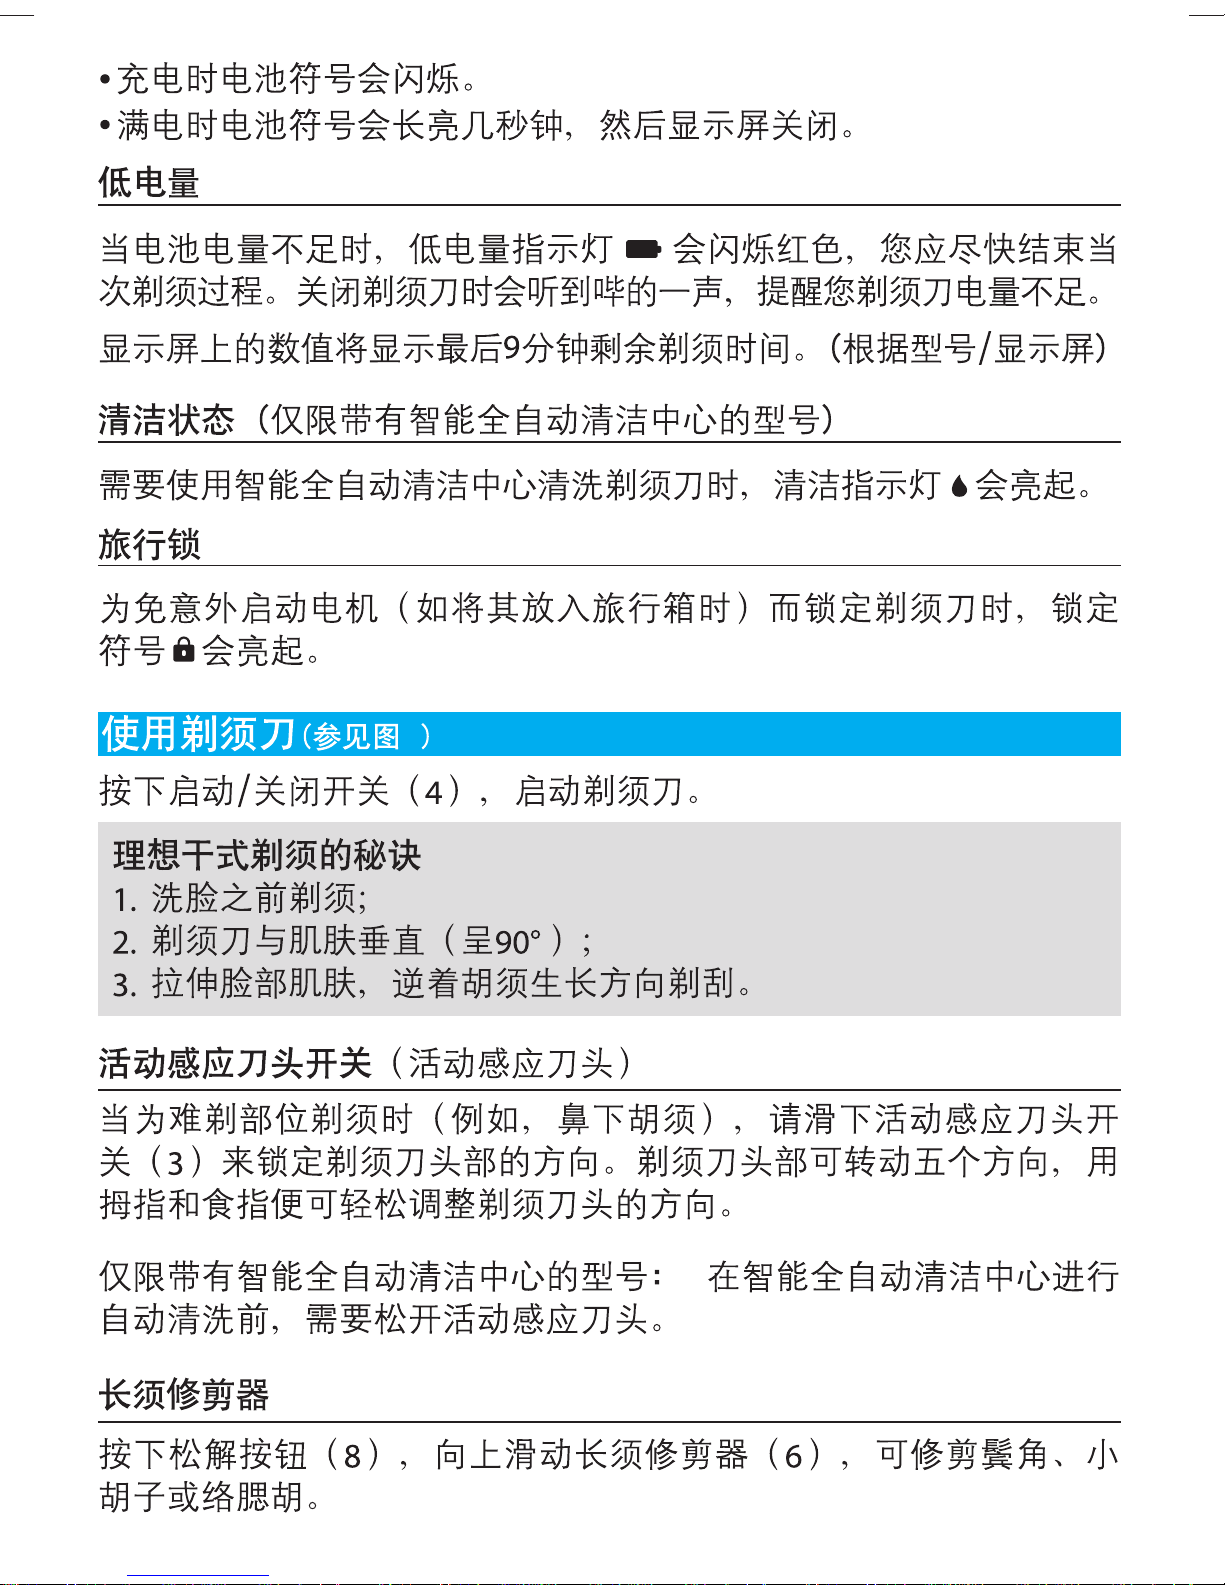
• If you regularly clean the shaver under water, then once a week apply a drop of light
machine oil (not included) on top of the Foil & Cutter cassette and the long hair
trimmer.
The shaver should be cleaned after each foam usage.
Cleaning with a brush
• Switch off the shaver. Remove the Foil & Cutter cassette (1) and tap it out on a flat
surface. Using the brush, clean the inner area of the pivoting head. Do not clean the
cassette with the brush as this may damage it!
The Foil & Cutter cassette can be attached either way. There is no impact on the
shaving performance.
Clean&Charge Station
(not with all models)
The Clean&Charge Station has been developed for cleaning, charging, lubricating,
disinfecting, drying and storing your Braun shaver.
12 Station power socket
13 Lift button for cartridge exchange
14 Station-to-shaver contacts
15 Clean&Charge Station display
15a Level indicator
15b Status light
15c
Cleaning program indicators
16 Start button
17 Cleaning cartridge
Installing the Clean&Charge Station (see fig. D)
• Press the lift button (13) at the rear side of the Clean&Charge Station to lift up the
housing.
• Hold the cleaning cartridge (17) down on a flat, stable surface (e.g. table).
• Carefully remove the lid from the cartridge.
• Slide the cartridge from the rear side into the base of the station until it snaps into
place.
90778995_Series_9-2_all_w+d_CN_KR_ANZ_S6-40.indd 2990778995_Series_9-2_all_w+d_CN_KR_ANZ_S6-40.indd 29 26.01.16 08:2726.01.16 08:27
CSS APPROVED Effective Date 9Feb2016 GMT - Printed 06Apr2016 Page 29 of 40

30
• Slowly close the housing by pushing it down until it locks.
• Connect the station to an electrical outlet by snapping the special cord set (10) into
the power socket (12).
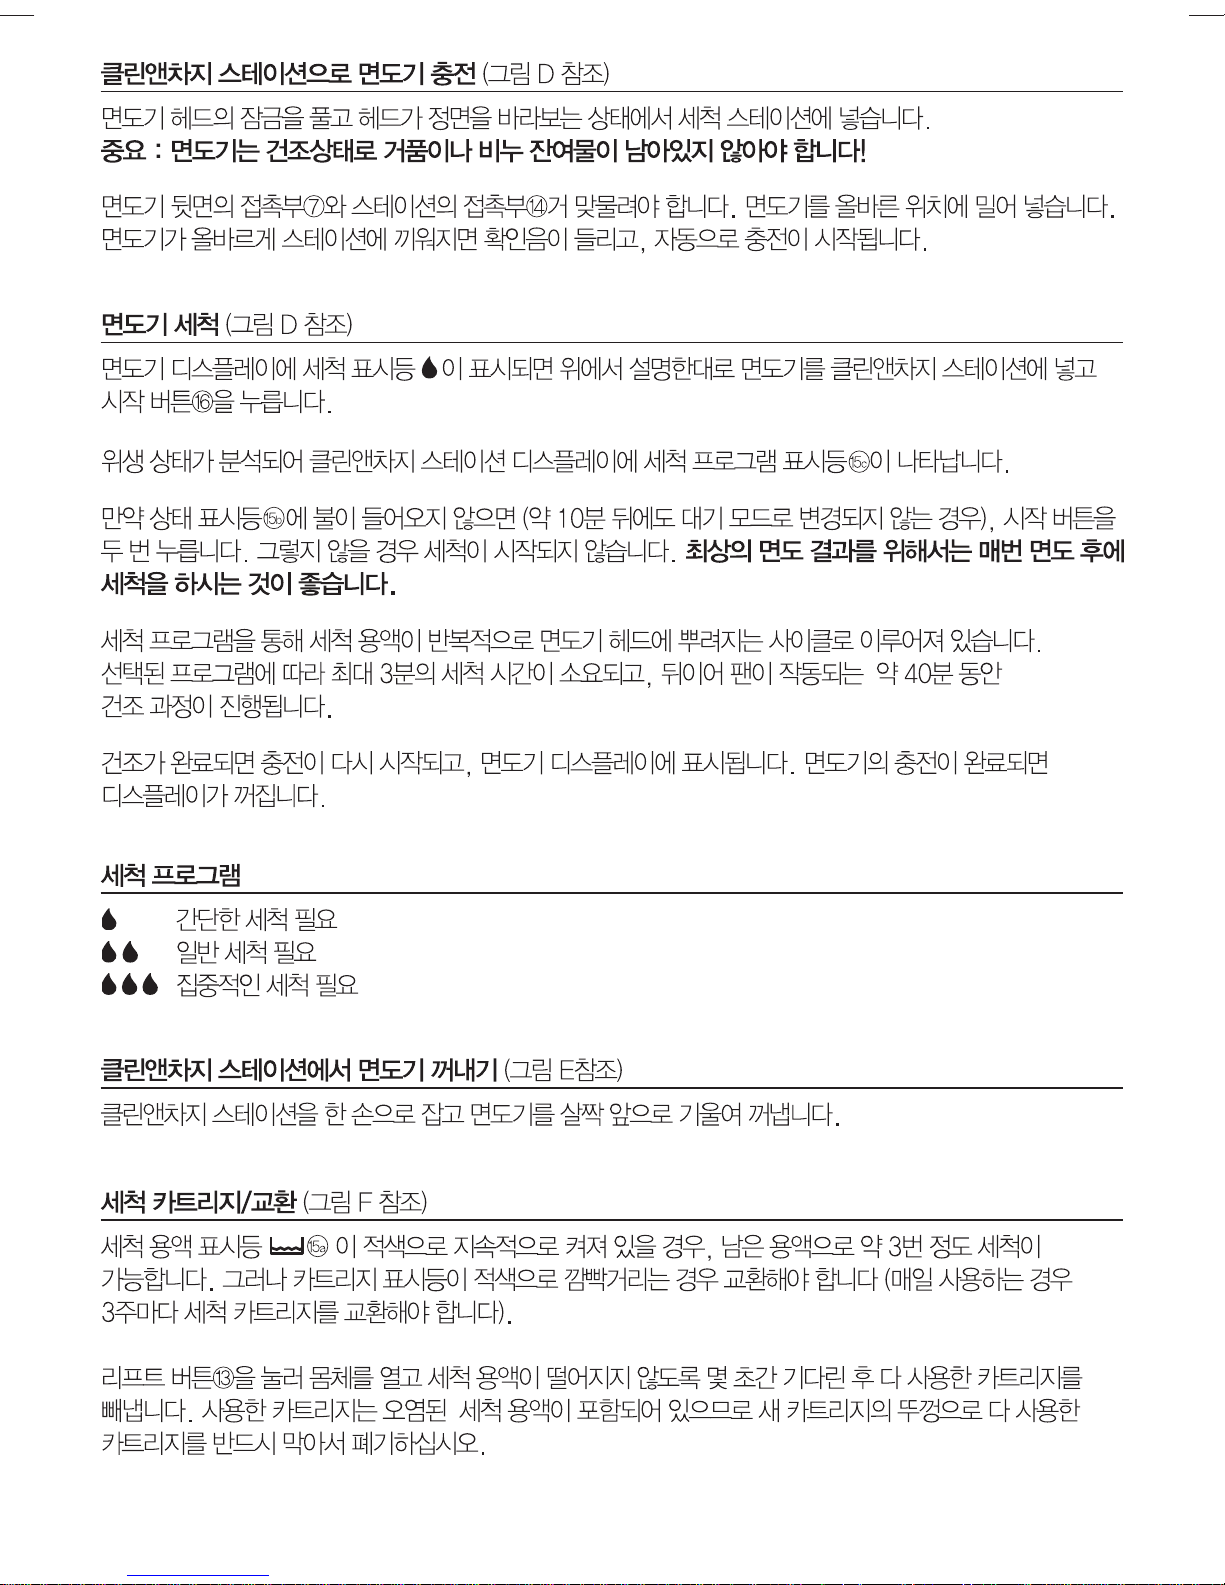
Charging the shaver in the Clean&Charge Station (see fig. D)
Insert the shaver head with the front showing and released head lock into the cleaning
station. Important: The shaver needs to be dry and free from any foam or soap
residue!
The contacts (7) on the back of the shaver need to align with the contacts (14) in the
station. Push the shaver in the correct position. A beep sound confirms that the shaver
sits properly in the station. Charging will start automatically.
Cleaning the shaver (see fig. D)
When the cleaning indicator
lights up in the shaver display, insert the shaver into the
Clean&Charge Station, as described above and press the start button (16).
The hygiene status will be analyzed and is shown by the cleaning program indicators
(15c) in the
Clean&Charge Station display.
If status light (15b) does not shine (Clean&Charge Station switches to stand-by after
ca. 10 minutes), press start button twice. Otherwise cleaning will not start. For best
shaving results, we recommend cleaning after each shave.
The cleaning process consists of several cycles, in which cleaning fluid is flushed
through the shaver head. Depending on the program selected, the cleaning time
takes up to 3 minutes, followed by an active drying phase of about 40 minutes, during
which a fan is running.
Afterwards charging will resume, which is indicated in the shaver display. When the
shaver is fully charged the display turns off.
Cleaning programs
short economical cleaning
normal level of cleaning
high intensive cleaning
Removing the shaver from the Clean&Charge Station (see fig. E)
Hold the Clean&Charge Station with one hand and tilt the shaver slightly to the front to
release it.
Cleaning Cartridge / Replacement (see fig. F)
When the level indicator
(15a) lights up permanently red, the remaining fluid in the
cartridge is sufficient for about 3 more cycles. When the level indicator blinks red, the
cartridge needs to be replaced (about every 3 weeks when used daily).
90778995_Series_9-2_all_w+d_CN_KR_ANZ_S6-40.indd 3090778995_Series_9-2_all_w+d_CN_KR_ANZ_S6-40.indd 30 26.01.16 08:2726.01.16 08:27
CSS APPROVED Effective Date 9Feb2016 GMT - Printed 06Apr2016 Page 30 of 40

31
After having pressed the lift button (13) to open the housing, wait for a few seconds
before removing the used cartridge to avoid any dripping. Before discarding the used
cartridge, make sure to close the openings using the lid of the new cartridge, since
the used cartridge will contain contaminated cleaning solution.
The hygienic cleaning cartridge contains alcohol or isopropanol (specification see
cartridge), which once opened will naturally evaporate slowly. Each cartridge, if not
used daily, should be replaced after approximately 8 weeks to ensure optimal
disinfection. The cleaning cartridge also contains lubricants for the shaving system,
which may leave residual marks on the outer foil frame and the cleaning chamber of
the Clean&Charge Station. These marks can be removed easily by wiping gently with
a damp cloth.
Accessories
Braun recommends changing your shaver’s Foil & Cutter cassette every 18 months to
maintain your shaver‘s maximum performance.
Available at your dealer or Braun Service Centres:
• Foil & Cutter cassette: 92S/92B
• Cleaning cartridge Clean&Charge Station: CCR
• Braun Shaver cleaner spray
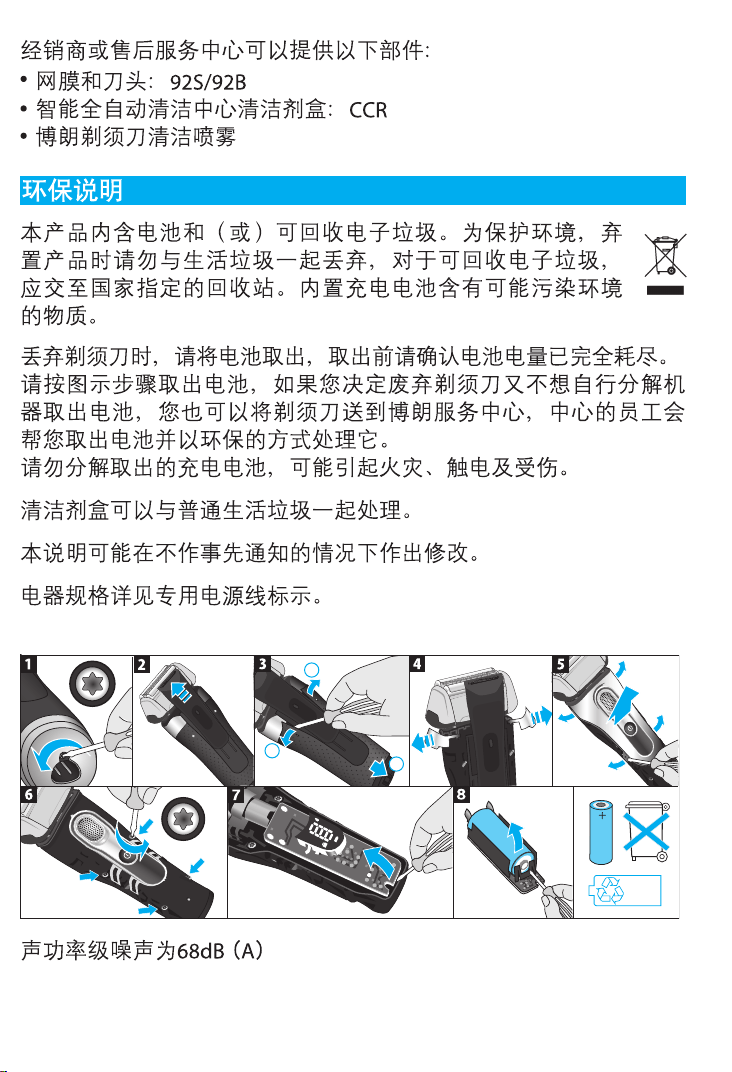
Environmental notice
Product contains batteries and/or recyclable electric waste. For environment
protection do not dispose of in household waste, but for recycling take to
electric waste collection points provided in your country.
The cleaning cartridge can be disposed of with regular household waste.
Subject to change without notice.
For electric specifications, see printing on the special cord set.
90778995_Series_9-2_all_w+d_CN_KR_ANZ_S6-40.indd 3190778995_Series_9-2_all_w+d_CN_KR_ANZ_S6-40.indd 31 26.01.16 08:2726.01.16 08:27
CSS APPROVED Effective Date 9Feb2016 GMT - Printed 06Apr2016 Page 31 of 40

32
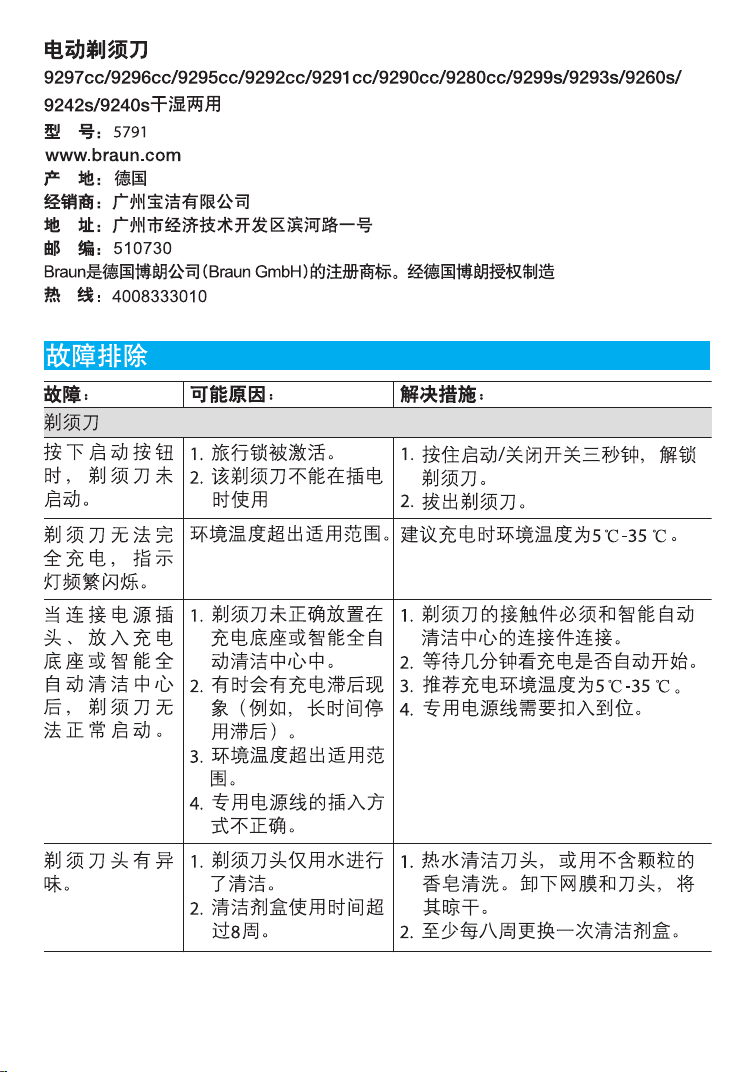
Trouble-Shooting
Problem: Possible reason: Remedy:
SHAVER
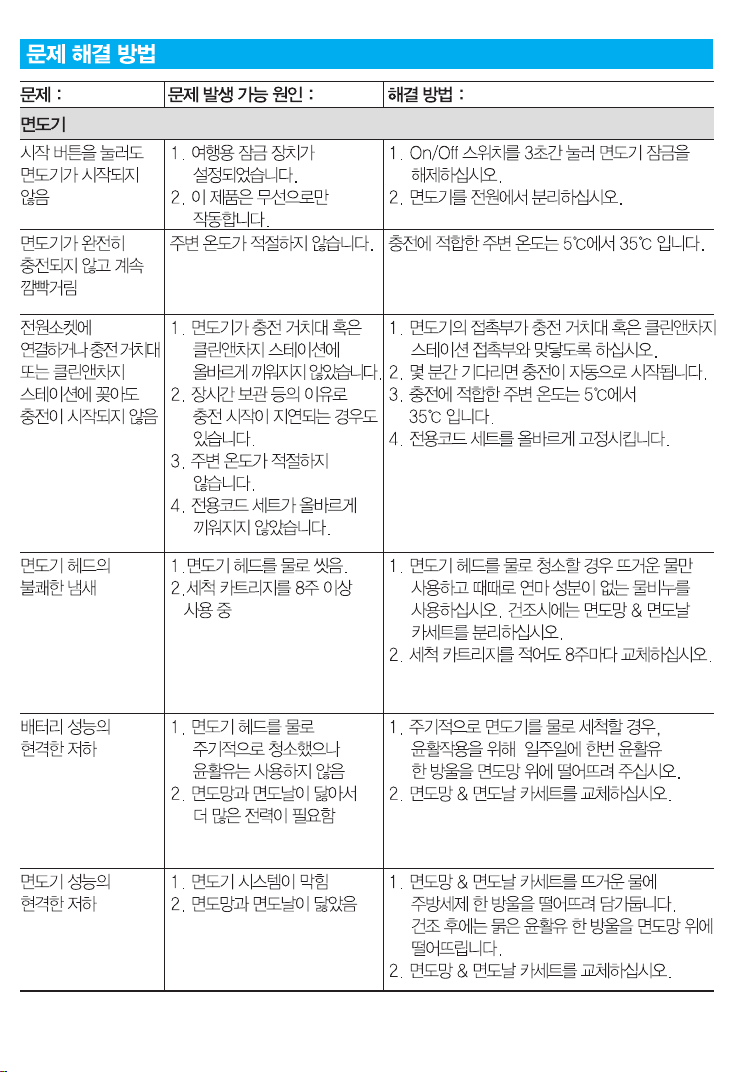
Shaver does not
start when
pressing the
start button.
1. Travel lock is activated.
2. This appliance can
only be operated
cordless.
1. Press the on/off switch for 3 seconds
to unlock the shaver.
2. Unplug the shaver.
Shaver does not
charge
completely and
keeps blinking.
Ambient temperature is
out of valid range.
Recommended ambient temperature
for charging is 5 °C to 35 °C.
Charging does
not start when
connected to
power socket or
put in charging
stand /
Clean&Charge
Station.
1. Shaver is not placed
properly in the
charging stand /
Clean&Charge Station.
2. Sometimes charging
could start delayed
(e.g. after long
storage).
3. Ambient temperature
is out of valid range.
4. Special cord set is not
plugged in properly.
1. Contacts of shaver need to align with
contacts in the Clean&Charge
Station.
2. Wait a few minutes, if charging will
start automatically.
3. Recommended ambient temperature
for charging is 5 °C to 35 °C.
4. Special cord set needs to snap into
place.
Unpleasant smell
from the shaver
head.
1. Shaver head is
cleaned with water.
2. Cleaning cartridge is in
use for more than 8
weeks.
1. When cleaning the shaver head with
water only use hot water and from
time to time some liquid soap
(without abrasive substances).
Remove Foil & Cutter cassette to let
it dry.
2. Change cleaning cartridge at least
every 8 weeks.
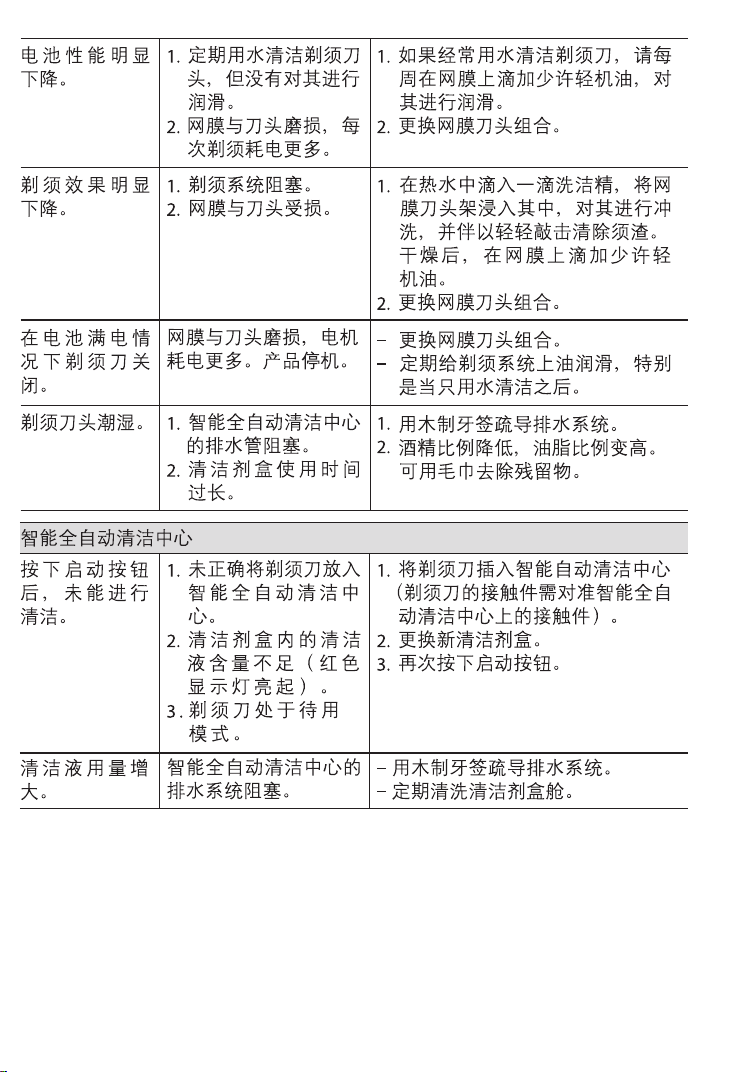
Battery
performance
dropped
significantly.
1. Shaver head is
regularly cleaned
with water but not
lubricated.
2. Foil and cutter are
worn which requires
more power for each
shave.
1. If the shaver is regularly cleaned with
water, apply a drop of light machine
oil on top of the foil once a week for
lubrication.
2. Replace Foil & Cutter cassette.
Shaving
performance
dropped
significantly.
1. Shaving system is
clogged.
2. Foil and cutter are
worn.
1. Soak the Foil & Cutter cassette in hot
water with a drop of dish liquid.
Afterwards rinse it properly and tap it
out. Once dry apply a drop of light
machine oil on the foil.
2. Replace Foil & Cutter cassette.
90778995_Series_9-2_all_w+d_CN_KR_ANZ_S6-40.indd 3290778995_Series_9-2_all_w+d_CN_KR_ANZ_S6-40.indd 32 26.01.16 08:2726.01.16 08:27
CSS APPROVED Effective Date 9Feb2016 GMT - Printed 06Apr2016 Page 32 of 40

33
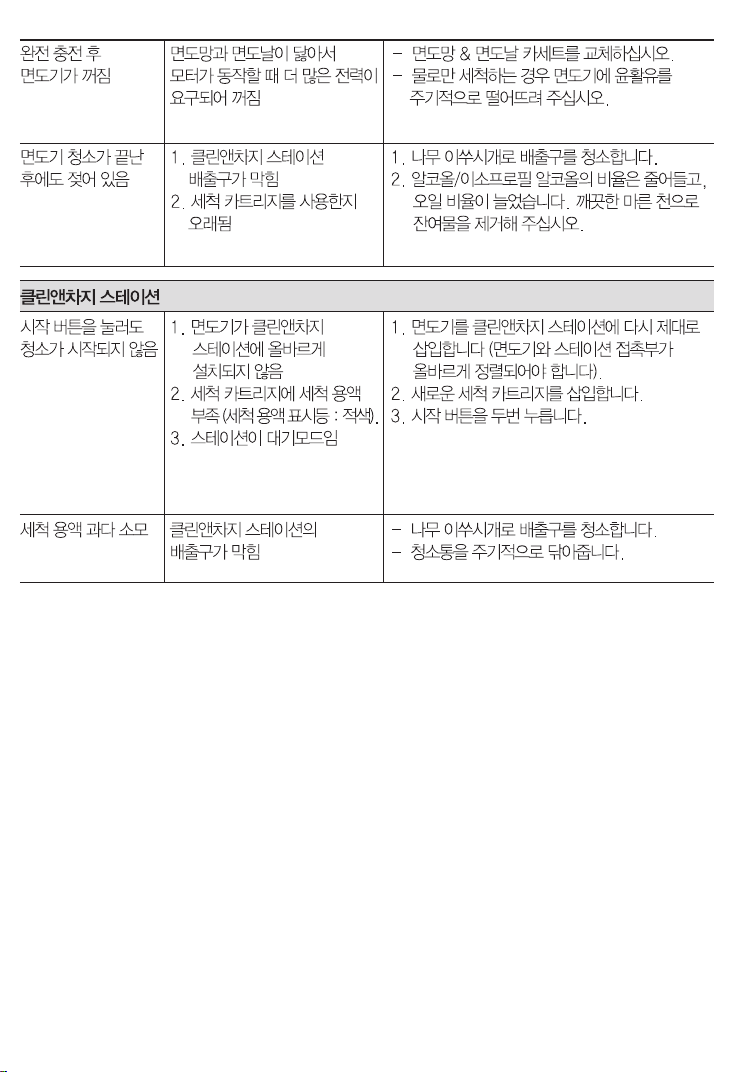
Shaver turns off
with fully
charged battery.
Foil and cutter are worn
which requires more
power than the motor
can deliver. The
appliance turns off.
– Replace Foil & Cutter cassette.
– Regularly oil the shaving system,
especially when cleaning with water
only.
Shaver head is
damp.
1. Drain of the
Clean&Charge Station
is clogged.
2. Cleaning cartridge has
been used for quite a
while.
1. Clean the drain with a wooden
toothpick.
2. The alcohol/isopropanol proportion
has decreased while the oil
proportion has increased. Remove
residue with a cloth.
CLEAN&CHARGE STATION
Cleaning does
not start when
pressing the
start button.
1. Shaver is not placed
properly in the
Clean&Charge Station.
2. Cleaning cartridge
does not contain
enough cleaning fluid
(level indicator blinks
red).
3. Appliance is in stand-by
mode.
1. Insert shaver into the Clean&Charge
Station (contacts of the shaver need
to align with contacts in the station).
2. Insert new cleaning cartridge.
3. Press start button again.
Increased
consumption of
cleaning fluid.
Drain of the
Clean&Charge Station is
clogged.
– Clean the drain with a wooden
toothpick.
– Regularly wipe the tub clean.
90778995_Series_9-2_all_w+d_CN_KR_ANZ_S6-40.indd 3390778995_Series_9-2_all_w+d_CN_KR_ANZ_S6-40.indd 33 26.01.16 08:2726.01.16 08:27
CSS APPROVED Effective Date 9Feb2016 GMT - Printed 06Apr2016 Page 33 of 40

34
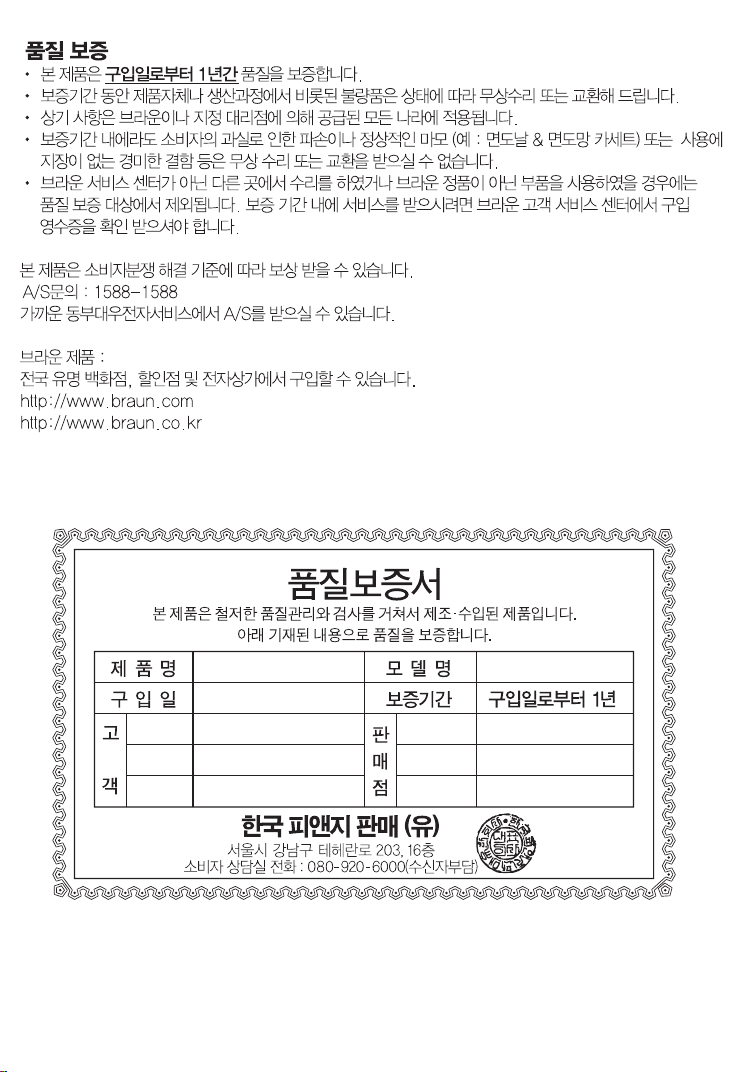
Guarantee
We grant a 2 year guarantee on the product commencing on the date of purchase.
Within the guarantee period we will eliminate any defects in the appliance resulting
from faults in materials or workmanship, free of charge either by repairing or replacing
the complete appliance at our discretion.
This guarantee extends to every country where this appliance is supplied by Braun or
its appointed distributor.
This guarantee does not cover: damage due to improper use, normal wear or use as
well as defects that have a negligible effect on the value or operation of the appliance.
The guarantee becomes void if repairs are undertaken by unauthorised persons and if
original Braun parts are not used.
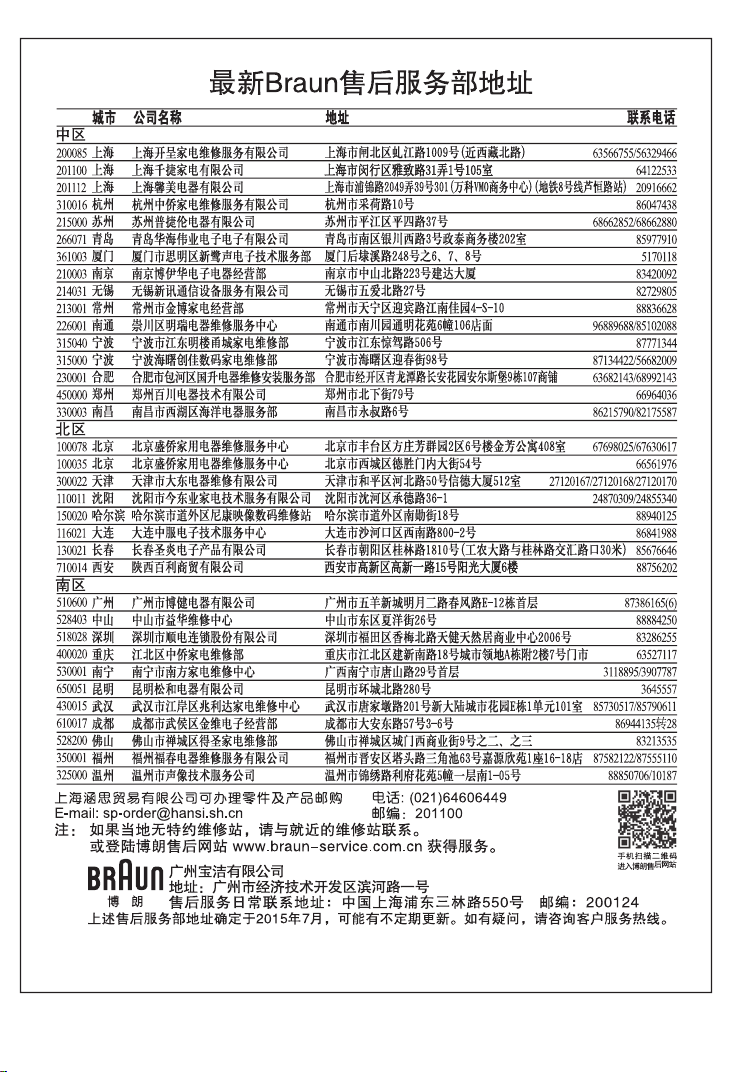
To obtain service within the guarantee period, hand in or send the complete appliance
with your sales receipt to an authorised Braun Customer Service Centre (address
information available online at www.service.braun.com).
For UK only:
This guarantee in no way affects your rights under statutory law.
For Australia & New Zealand only:
Warranty
In Australia, our goods come with guarantees that cannot be excluded under
the Australian Consumer Law. You are entitled to a replacement or refund for
a major failure and for compensation for any other reasonably foreseeable
loss or damage. You are also entitled to have the goods repaired or replaced
if the goods fail to be of acceptable quality and the failure does not amount to
a major failure.
The benefits given by this warranty are in addition to other rights and remedies
of the consumer law.
For Claims in Australia please contact:
Procter & Gamble Australia Pty Ltd
1 Innovation Road, Macquarie Park
NSW 2113
Telephone: +612 8864 5000
Facsimile: +612 8864 5574
Email: [email protected]
For claims in New Zealand please contact:
Procter & Gamble Distributing New Zealand Limited
Unit 3, Building I, 5 Orbit Drive
Rosedale, North Shore City 0632
Auckland, New Zealand
Telephone: +649 477 6400
Facsimile: +649 477 6399
Email: [email protected]
Our Warranty
This appliance is also covered by a 24 Month Replacement Warranty commencing on
the date of purchase (Our Warranty).
90778995_Series_9-2_all_w+d_CN_KR_ANZ_S6-40.indd 3490778995_Series_9-2_all_w+d_CN_KR_ANZ_S6-40.indd 34 26.01.16 08:2726.01.16 08:27
CSS APPROVED Effective Date 9Feb2016 GMT - Printed 06Apr2016 Page 34 of 40

35
Our Warranty applies in all States and Territories of Australia and in
New Zealand and is in addition to any mandatory statutory obligations
imposed on Procter & Gamble Australia Pty. Ltd., its distributors and its
manufacturer. Our Warranty does not purport to exclude, restrict or modify
any such mandatory statutory obligations.
Our Warranty only covers defects in the appliance resulting from faults in workmanship
or materials. Therefore, if your appliance becomes faulty as a result of faults in
workmanship or materials, it will be exchanged by your retailer, on presentation of
proof of purchase.
Our Warranty only applies to domestic or household use of this appliance and the
warranty will only apply if the correct operating instructions included with this product
have been followed. For any appliance replaced under this warranty, Our Warranty
ends on the expiry of the warranty period that applied to the original appliance.
Our Warranty does not cover:
A. Damage arising from improper use or operation on incorrect voltages.
B. Breakages to shaver foils, glass jars, etc.
C. Normal wear due to moving parts.
D. Repairs undertaken by unauthorised service personnel or use of non genuine
parts.
E. Appliances that are outside the warranty period or are not faulty.
This appliance is not intended for use by young children or infirm persons without
supervision. Young children should be supervised to ensure that they do not play with
the appliance.
If the appliance is powered by a cord extension set or electrical portable outlet device
these should be positioned so they are not subject to splashing or ingress of moisture.
To the extent permitted by the laws of the Commonwealth of Australia and New
Zealand and applicable laws of a State or Territory of Australia, and without affecting
any mandatory statutory obligations imposed by law, Our Warranty is given in
exchange for any other rights you may have against Procter & Gamble Australia Pty.
Ltd. or its distributors or manufacturer, whether at law, in tort (including negligence),
in equity or under statute.
Please retain proof of purchase of this appliance. If you have any questions in relation
to Our Warranty, please call our Consumer Service line (see below for numbers).
If you intend to make a claim please telephone our Customer Service line on the
numbers set out below to obtain information about your claim and any costs
associated with claiming under Our Warranty. You will bear the cost of returning your
product to us.
Repairs and service
If you are sending your appliance for repair under Our Warranty, please pack the
appliance adequately and send it to your nearest Service Agent, at your expense.
For service or replacement parts refer to the authorised Service Agents listed
overleaf. Local Service Agents may change from time to time – in that event please
contact the Consumer Service free call number below for updated local service agent
details.
90778995_Series_9-2_all_w+d_CN_KR_ANZ_S6-40.indd 3590778995_Series_9-2_all_w+d_CN_KR_ANZ_S6-40.indd 35 26.01.16 08:2726.01.16 08:27
CSS APPROVED Effective Date 9Feb2016 GMT - Printed 06Apr2016 Page 35 of 40

36
Australian Consumer Service (free call): 1 800 641 820
New Zealand Consumer Service (free call): 0 800 108 909
Australian & New Zealand Service Agents
VICTORIA & TASMANIA
Statewide Services Pty Ltd trading
as J A Appliances
17-19 Hossack Avenue
Coburg North, VIC 3058
Tel. (03) 8371 9100
Fax. (03) 9355 8644
Email: jaappliances@statewideservices.
com.au
QUEENSLAND
Walters Import trading as Brisbane
Appliance Service Centre
449 Beaudesert Road
Moorooka QLD 4105
Tel. (07) 3277 0360
Fax. (07) 3274 2909
Email: [email protected]
WESTERN AUSTRALIA
Mark 1 Appliances
Unit 1, 46 Abernethy Road
Belmont, WA 6104
Tel. (08) 9475 0911
Fax. (08) 9475 0922
Email: [email protected]
NEW SOUTH WALES & ACT
Faulder Appliance Services Pty Ltd
Shop 4,
9 Evans Road,
Rooty Hill, NSW 2766
Tel. (02) 9625 3064
Fax. (02) 9625 3037
Email: fas1[email protected]
SOUTH AUSTRALIA & NT
Adelaide Service Centre
Shop B2,
Parkholme Shopping Centre
319 Oaklands Road, Parkholme
Adelaide, SA 5043
Tel. (08) 8357 5800
Fax. (08) 8357 5833
Email: [email protected]
NEW ZEALAND
Key Service Ltd
7D Echelon Place East Tamaki
Manukau City
Auckland
New Zealand
(PO Box 38569, Howick, Auckland,
New Zealand)
Tel. (09) 916 0960
Fax. (09) 916 0970
Email: [email protected]
90778995_Series_9-2_all_w+d_CN_KR_ANZ_S6-40.indd 3690778995_Series_9-2_all_w+d_CN_KR_ANZ_S6-40.indd 36 26.01.16 08:2726.01.16 08:27
CSS APPROVED Effective Date 9Feb2016 GMT - Printed 06Apr2016 Page 36 of 40