Loading ...
Loading ...
Loading ...
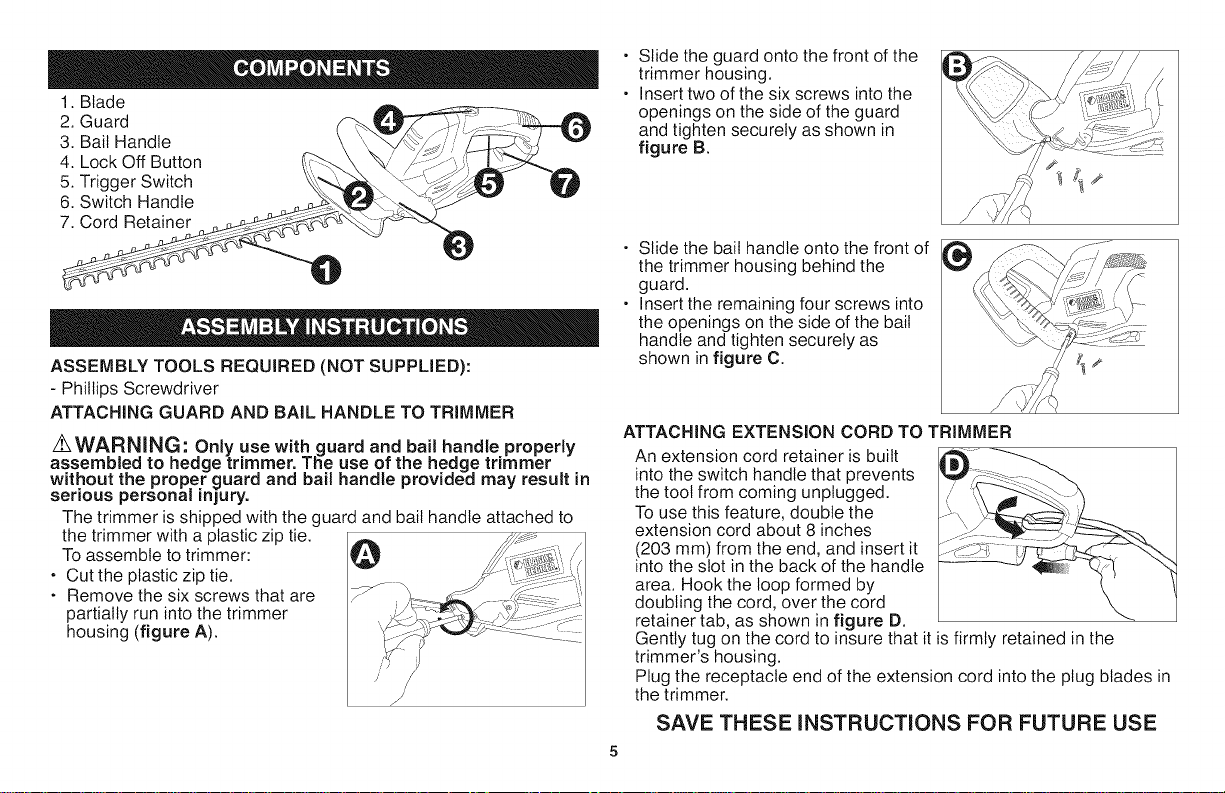
1. Blade
2. Guard
3. Bail Handle
4. Lock Off Button
5. Trigger Switch
6. Switch Handle
7. Cord Retainer
ASSEMBLY TOOLS REQUIRED (NOT SUPPLIED):
- Phillips Screwdriver
ATTACHING GUARD AND BAIL HANDLE TO TRIMMER
Z_WARNING: Only use with guard and bail handle properly
assembled to hedge trimmer. The use of the hedge trimmer
without the proper guard and bail handle provided may result in
serious personal injury.
The trimmer is shipped with the guard and bail handle attached to
the trimmer with a plastic zip tie. [a-=
To assemble to trimmer:
• Cut the plastic zip tie.
• Remove the six screws that are
partially run into the trimmer
housing (figure A) ....
• Slide the guard onto the front of the
trimmer housing.
• Insert two of the six screws into the
openings on the side of the guard
and tighten securely as shown in
figure B.
• Slide the bait handle onto the front of
the trimmer housing behind the
guard.
• Insert the remaining four screws into
the openings on the side of the bait
handle and tighten securely as
shown in figure C.
®
ATTACHING EXTENSION CORD TO TRIMMER
An extension cord retainer is built
into the switch handle that prevents
the tool from coming unplugged.
To use this feature, double the
extension cord about 8 inches
(203 mm) from the end, and insert it
into the slot in the back of the handle
area. Hook the loop formed by
doubling the cord, over the cord
retainer tab, as shown in figure D.
Gently tug on the cord to insure that it is firmly retained in the
trimmer's housing.
Plug the receptacle end of the extension cord into the plug blades in
the trimmer.
SAVE THESE INSTRUCTIONS FOR FUTURE USE
Loading ...
Loading ...
Loading ...