Loading ...
Loading ...
Loading ...
Care and Maintenance English | 37 |
To Set Self-Clean
1. Select SPEED CLEAN using the Mode Selector Knob.
2. Set Temperature Selector Knob to CLEAN.
– Oven door locks and the cooling blower turns on.
– OVEN ON, PREHEATING and CLEANING lights
turn on.
– When the oven reaches maximum self-clean
temperature, the PREHEATING light turns off.
NOTE:
The door closing process takes approximately 20
seconds to complete, at which time the door becomes
locked. Check to make certain the door is locked.
At the End of the Clean Cycle
The Speed Clean cycle takes 2 hours to complete. The
OVEN ON light and the CLEANING light turn off when the
cycle is finished. Do not turn either of the oven temperature
knobs to the OFF position until the automatic lock cycles to
the open position.
1. Select OFF using the Mode Selector Knob.
– The door latch will open automatically when the
oven is below 500°F (260°C) and the automatic
Door Lock completes its 60 second cycle to the
open position.
– The cooling blower turns off when the oven
temperature drops to 200°F (93°C).
2. Turn the oven temperature knob to OFF position.
NOTES:
• The self-clean operation can be canceled up to two
times after cycle initiation. Cancellation must occur
within 5 minutes of cycle start. If after the second
cancellation, the self-clean function is terminated
again, the self-clean function will be prevented for a
period of 24 hours. All other modes will retain their
original functions.
• If the user tries to enable a self-clean function in an
oven where the self-clean function has been restricted,
the oven lights will blink on and off in 2-second
intervals to indicate to the user that the function is not
available. User must turn the knobs to OFF to cease
the blinking lights.
Range Cleaning Tips
• The porcelain enamel finish is acid resistant, but not
acid proof. Acidic foods, such as citrus juices,
tomatoes, rhubarb, vinegar, alcohol or milk, should be
wiped up and not allowed to bake onto the porcelain
during the next use.
• The heating elements in the oven do not require
cleaning. The elements burn themselves clean when
the oven is in use.
When cleaning this range:
• Use the mildest cleaning procedure that will do the job
efficiently and effectively. Some cleaners of the same
type are harsher than others. Try on a small
inconspicuous area first.
• Always rub metal finishes in the direction of the polish
lines for maximum effectiveness and to avoid marring
the surface.
• Use only clean soft cloths, sponges, paper towels,
fibrous brushes, plastic, non-metal or steel wool soap
pads for cleaning and scouring, as recommended on
the chart.
• Most exterior parts of this appliance can be cleaned
with hot sudsy water (except the various items
specifically identified otherwise). When rinsing is
required, rinse thoroughly.
• Always wipe dry immediately to avoid water marks.
• DO NOT USE CHLORINE BASED CLEANERS.
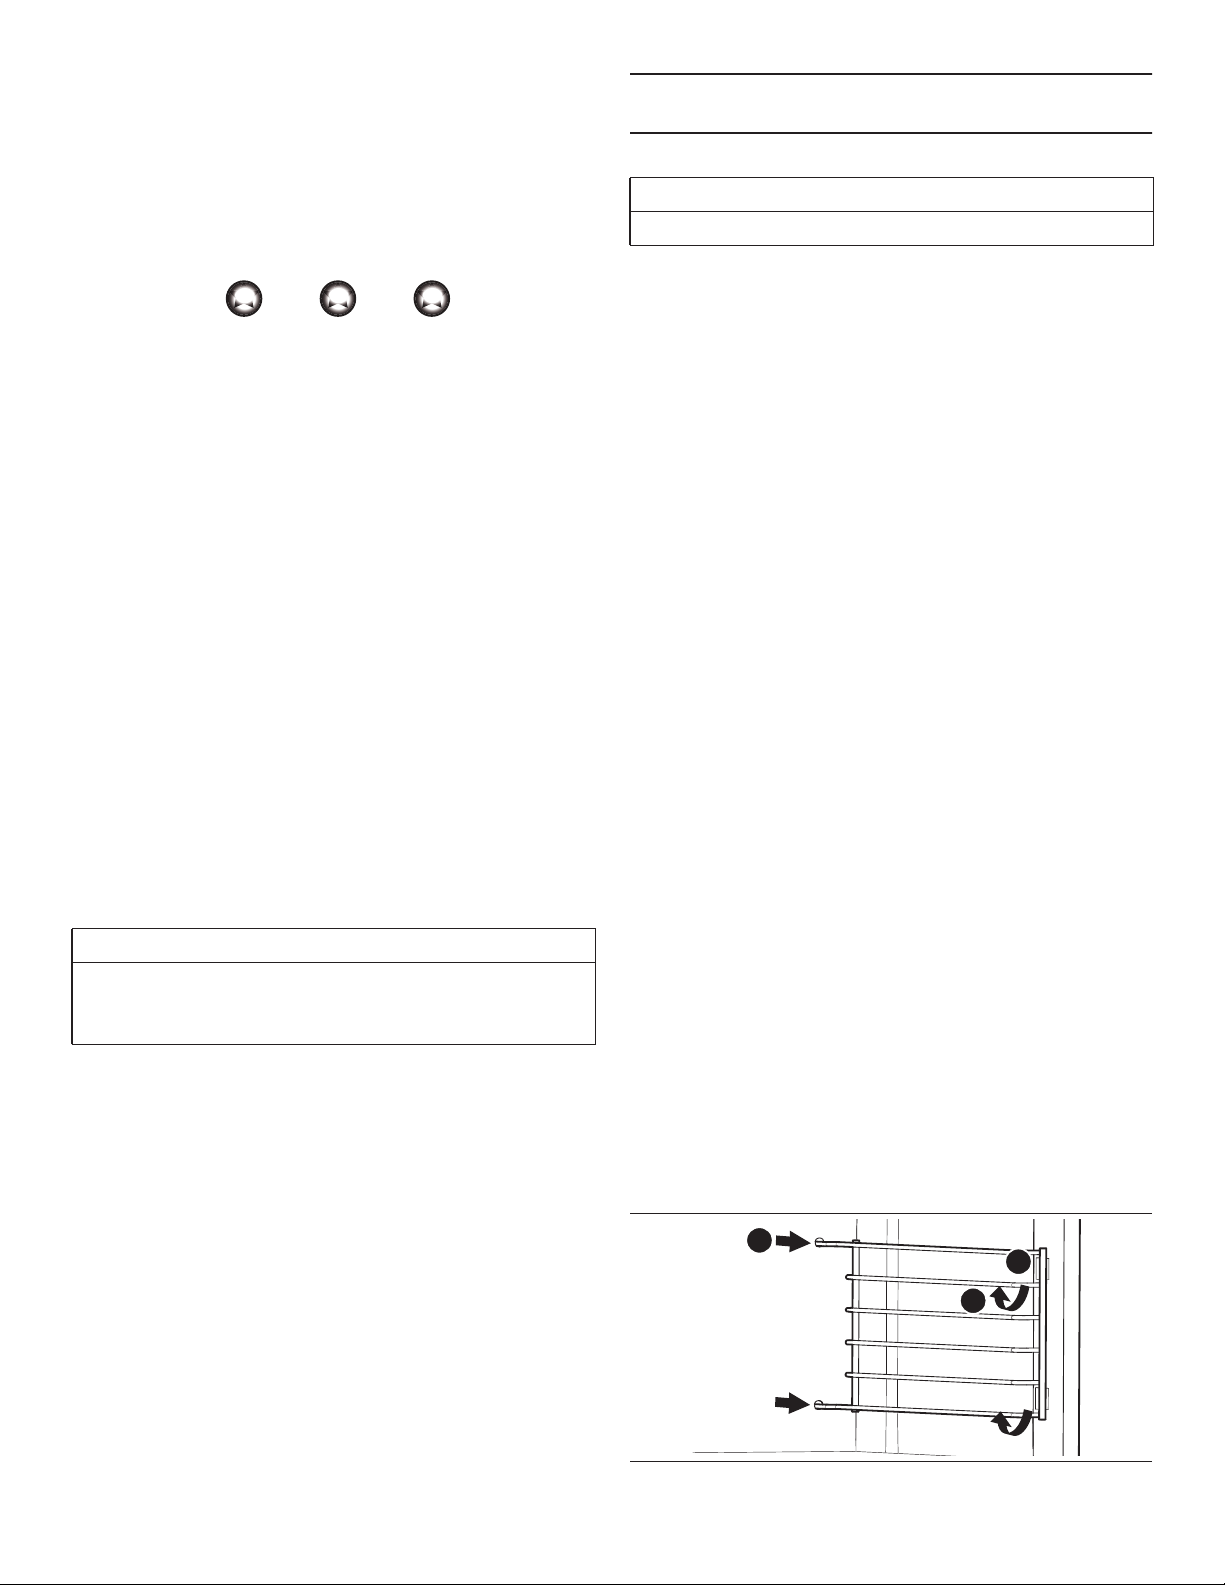
Rack guide removal for cleaning (gas models only)
1. Lift the front of rack guide to clear the heads of the two
shoulder bolts at the front of the oven cavity.
2. Remove the front portion of the rack guide by pulling
the guide's key slots over the shoulder bolts.
3. Pull the two rails out of the holes in the back of the
oven cavity.
The rack guides are designed to fit either
side of the oven cavity.
CAUTION
The interior of the oven will still be at baking temperatures
when the automatic lock cycles to its open position and
the oven door can be opened.
OVEN ON PREHEATING
CLEANING
CAUTION
Avoid cleaning any part of the range while it is hot.
Figure 33: Oven Rack Guide Removal
2
1
3
Loading ...
Loading ...
Loading ...