Loading ...
Loading ...
Loading ...
17
Preheat each and every time.
If the cooking grates aren’t hot enough, food will stick, and you will likely never
have a chance of searing properly or developing those handsome grill marks. Even
if a recipe calls for medium or low heat, always preheat the grill on the highest
setting first. Open the lid, turn up the heat, close the lid, and then let the cooking
grate heat up for 15 minutes on high.
Don't grill on dirty grates.
Tossing food onto the cooking grates before they have been cleaned is never a
good idea. Leftover “stu” on the grates acts like glue, binding it to the grates and
your new food. To avoid tasting last night’s dinner on today’s lunch, make sure
you are grilling on a clean cooking grate. Once the grates are preheated, use a
stainless steel bristle grill brush to make a clean, smooth surface.
Be present in the process.
Before firing up your grill, make sure that everything you need is within arm’s
reach. Don’t forget your essential grilling tools, already oiled and seasoned food,
glazes or sauces, and clean cooking platters for cooked food. Having to run back
to your kitchen not only means missing out on the fun, but could also result in
burning your food. French chefs call this “mise en place” (meaning, “put in place”).
We call it “being present”.
Create a little elbow room.
Packing too much food onto the cooking grates restricts your flexibility. Leave at
least one-quarter of the cooking grates clear, with plenty of space between each
food item, in order to get your tongs in there and easily move the food around.
Sometimes grilling involves split-second decisions and the ability to jockey food
from one area to another. Sogive yourself enough room to operate.
Try not to peek.
The lid on your grill is for more than just keeping the rain out. Most importantly, it’s
for preventing too much air from getting in, and too much heat and smoke from
getting out. When the lid is closed, the cooking grates are hotter, the grilling times
are faster, the smoky tastes are stronger, and the flare-ups are fewer. So put a lid
on it!
Only flip once.
What’s better than a juicy steak with a deep sear and plenty of beautifully
caramelized bits? The key to accomplishing these results is to keep your food
in place. Sometimes we have the tendency to flip our food before it reaches the
desirable level of color and flavor. In nearly all cases, you should turn food just
once. If fiddling with it more than that, you are probably also opening the lid too
much, which causes its own set of problems. So step back and trust the grill.
Know when to tame the flame.
When grilling, sometimes the most important thing to know is when to stop. The
most reliable way to test doneness of your food is to invest in an instant-read
thermometer. This slim little gem will help you pinpoint that critical moment when
your food is at its best.
Don’t be afraid to experiment.
Back in the 1950s, grilling meant one thing: meat (and only meat) charred over
open flames. The modern day backyard chef doesn’t need a kitchen in order to
prepare a full course meal. Use your grill to make char-grilled appetizers, sides,
and even desserts. Register your grill to receive special content that will inspire
you along the way. We’d love to join you on your grilling adventures.
Tips and Hints
GrillingDo’s andDon’ts
Discover What's Possible
WEBER CRAFTED Outdoor Kitchen Collection Ready
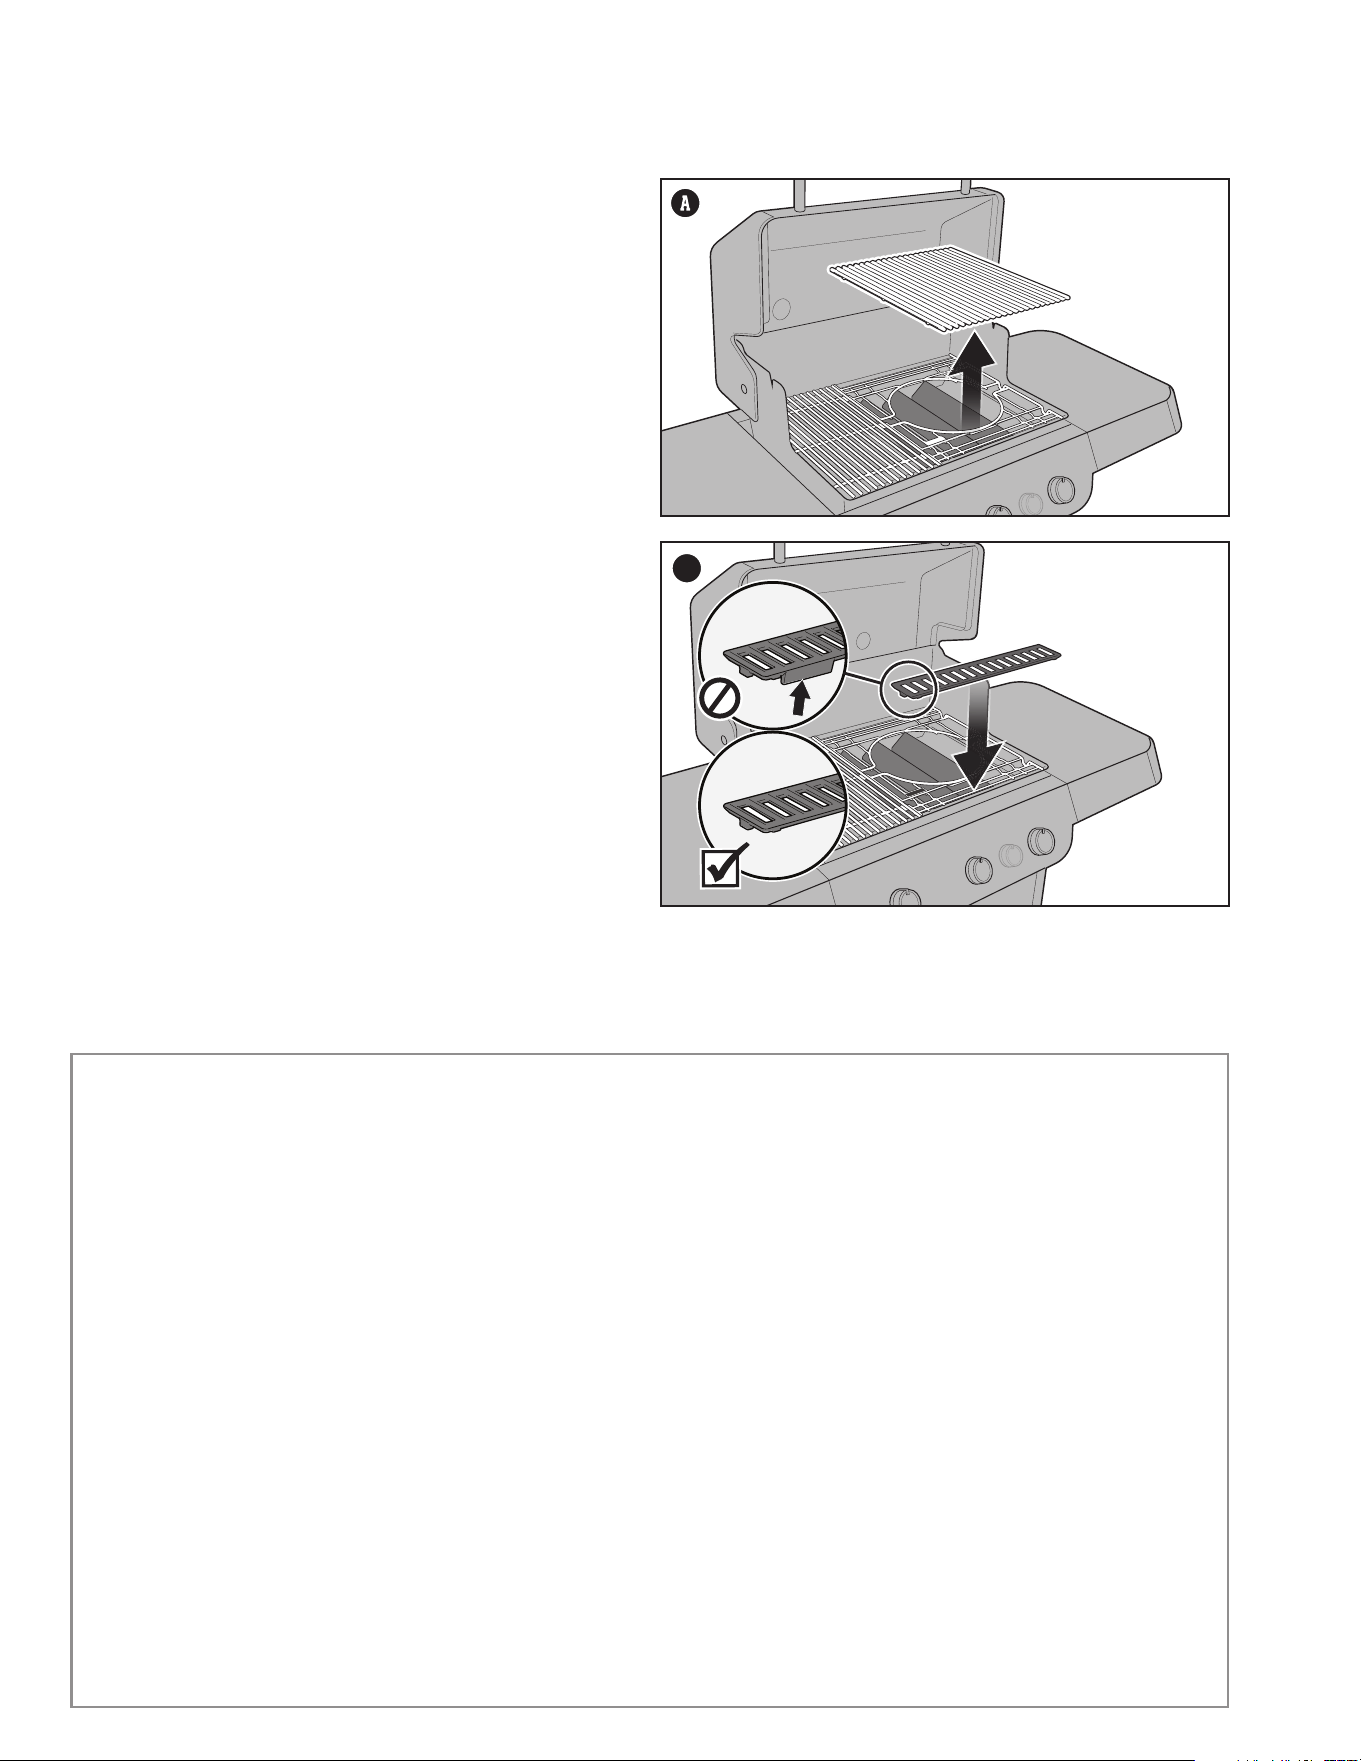
This feature is only available on select models.
Some models are Outdoor Kitchen Collection Ready with the included Grates and
Frame. Remove the right-hand cooking grate. Place the Frame on the right-hand side
of the cookbox for the widest range of heat control (A).
The Spacer included with your grill is used only when cooking with the WEBER
CRAFTED Outdoor Kitchen Collection (B).
Look for these and other accessories on weber.com.
B
Loading ...
Loading ...
Loading ...