Loading ...
Loading ...
Loading ...
–6–
ENGLISH ESPAÑOL FRANÇAIS
DOOR REVERSAL
This refrigerator has been built with the door hinges on the right.
It is recommended to contact a qualified technician to reverse the
door. Do not reverse the door unless you feel you are qualified to
do so.
CAUTION:
To avoid injury to yourself and/or property, a second person
should assist you during the door reversal process.
• Ensure the appliance is unplugged and empty.
• Do not lay the refrigerator on its back or tilt it more than
45° when reversing the door, as this damages the cooling
system.
• Make sure to have a second person available, and a strong,
solid surface/wall against which to lean the appliance so
that it does not slip. This will be necessary when taking o
the door.
WARNING: As stated above, ensure that the refrigerator is powered
o and unplugged before reversing the door.
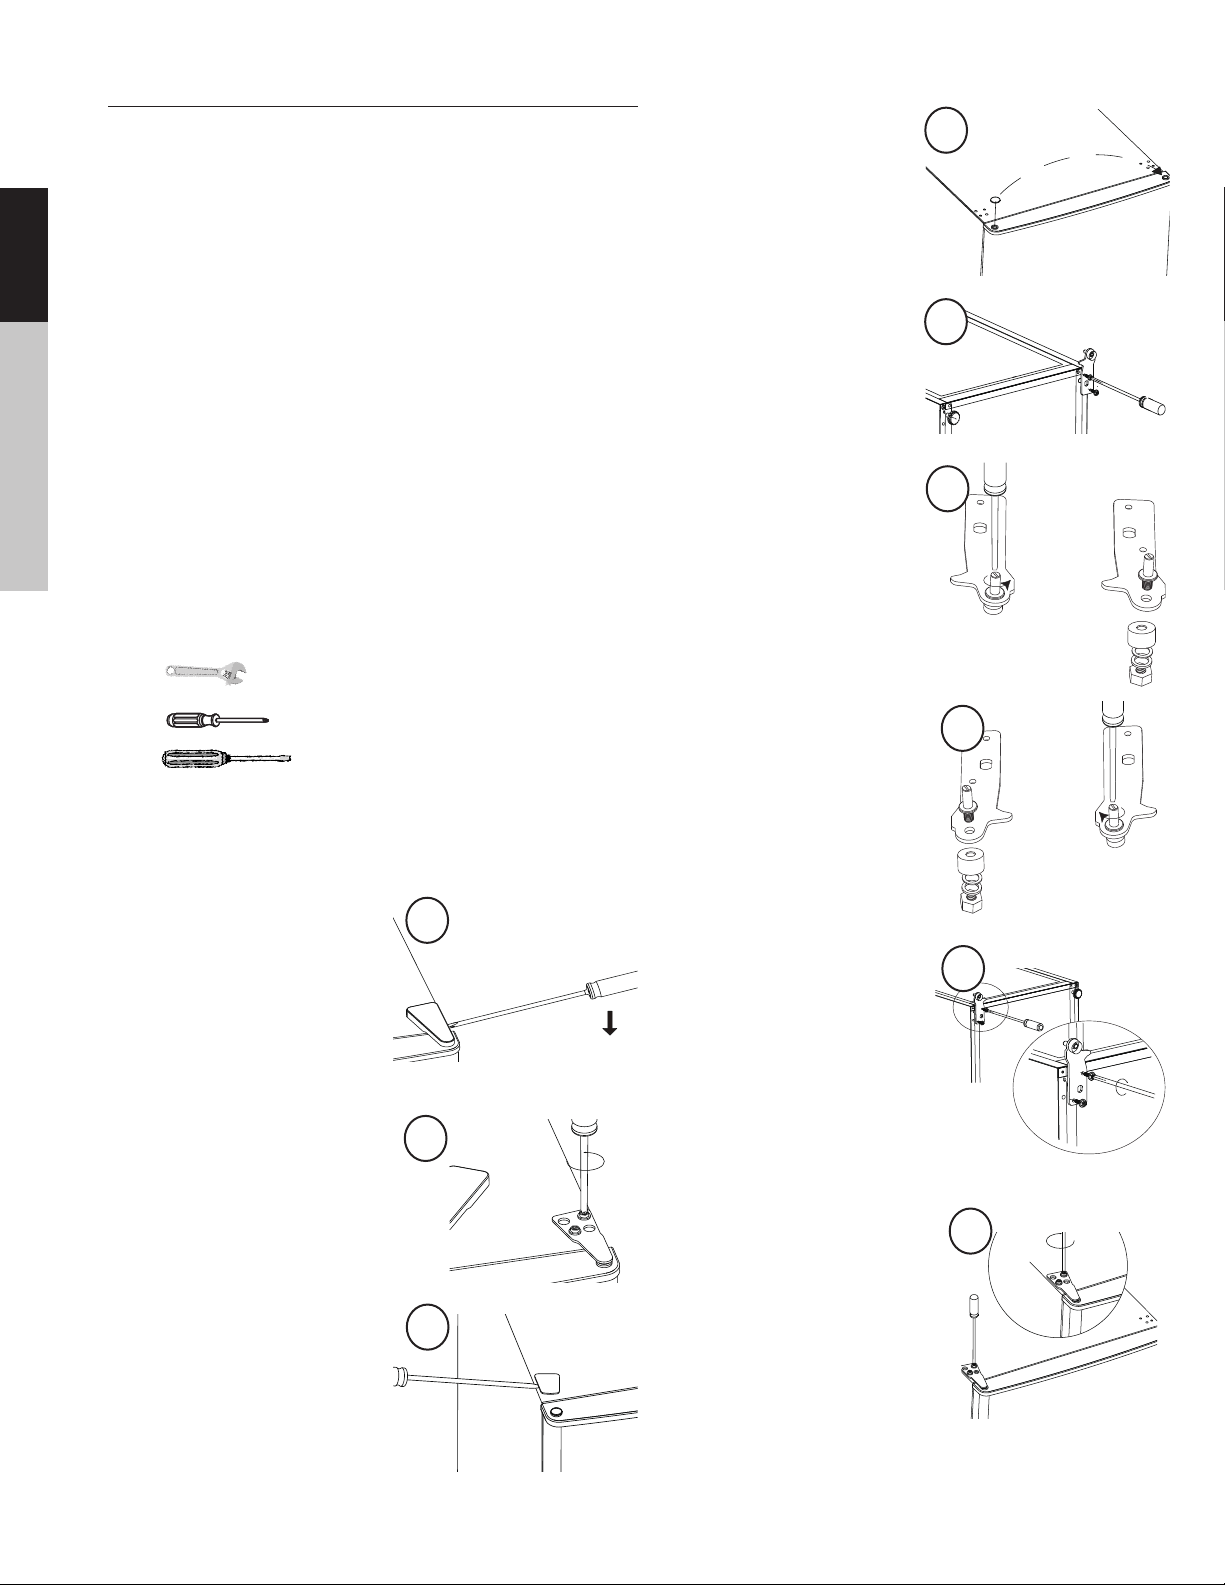
TOOLS REQUIRED:
• Hexagonal Spanner
• Phillips style screwdriver
• Flathead screwdriver
To reverse the side on which the door opens, follow these instruc-
tions:
1. Tilt the unit slightly toward
the rear and prop it secure-
ly.
2. Adjust the two leveling feet
to their highest position.
3. Remove the top right hinge
cover.
4. Unscrew the screws, then
remove the top hinge bracket.
5. Remove the top le screw
cover using a flathead
screwdriver.
6. Move the hole cover from
the le side to the right side.
7. Li the door up and detach
it from the unit. Place it on
a padded surface to prevent
any scratching.
8. Remove the screws and bot-
tom hinge. Then, remove
the adjustable feet from
each side.
9. Unscrew and remove the
bottom hinge pin.
10. Turn the bracket over and put
the hinge pin back in.
11. With the hinge pin back in the
bracket, screw the bottom
bracket back into the le side.
12. Replace the adjustable feet.
13. Place the door back onto the
unit. Ensure that the door is
aligned both horizontally and
vertically so that the seal closes
properly on all sides. When the
seal is good, replace and tighten
the top hinge. Use a spanner to
tighten if necessary.
Screw
Unscrew
3
4
5
13
10
9
8
6
11
Loading ...
Loading ...
Loading ...