Loading ...
Loading ...
Loading ...
www.kingsbottle.com! 5
PART III" INSTALLATION INSTRUCTIONS
INSTALLATION
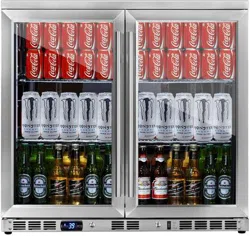
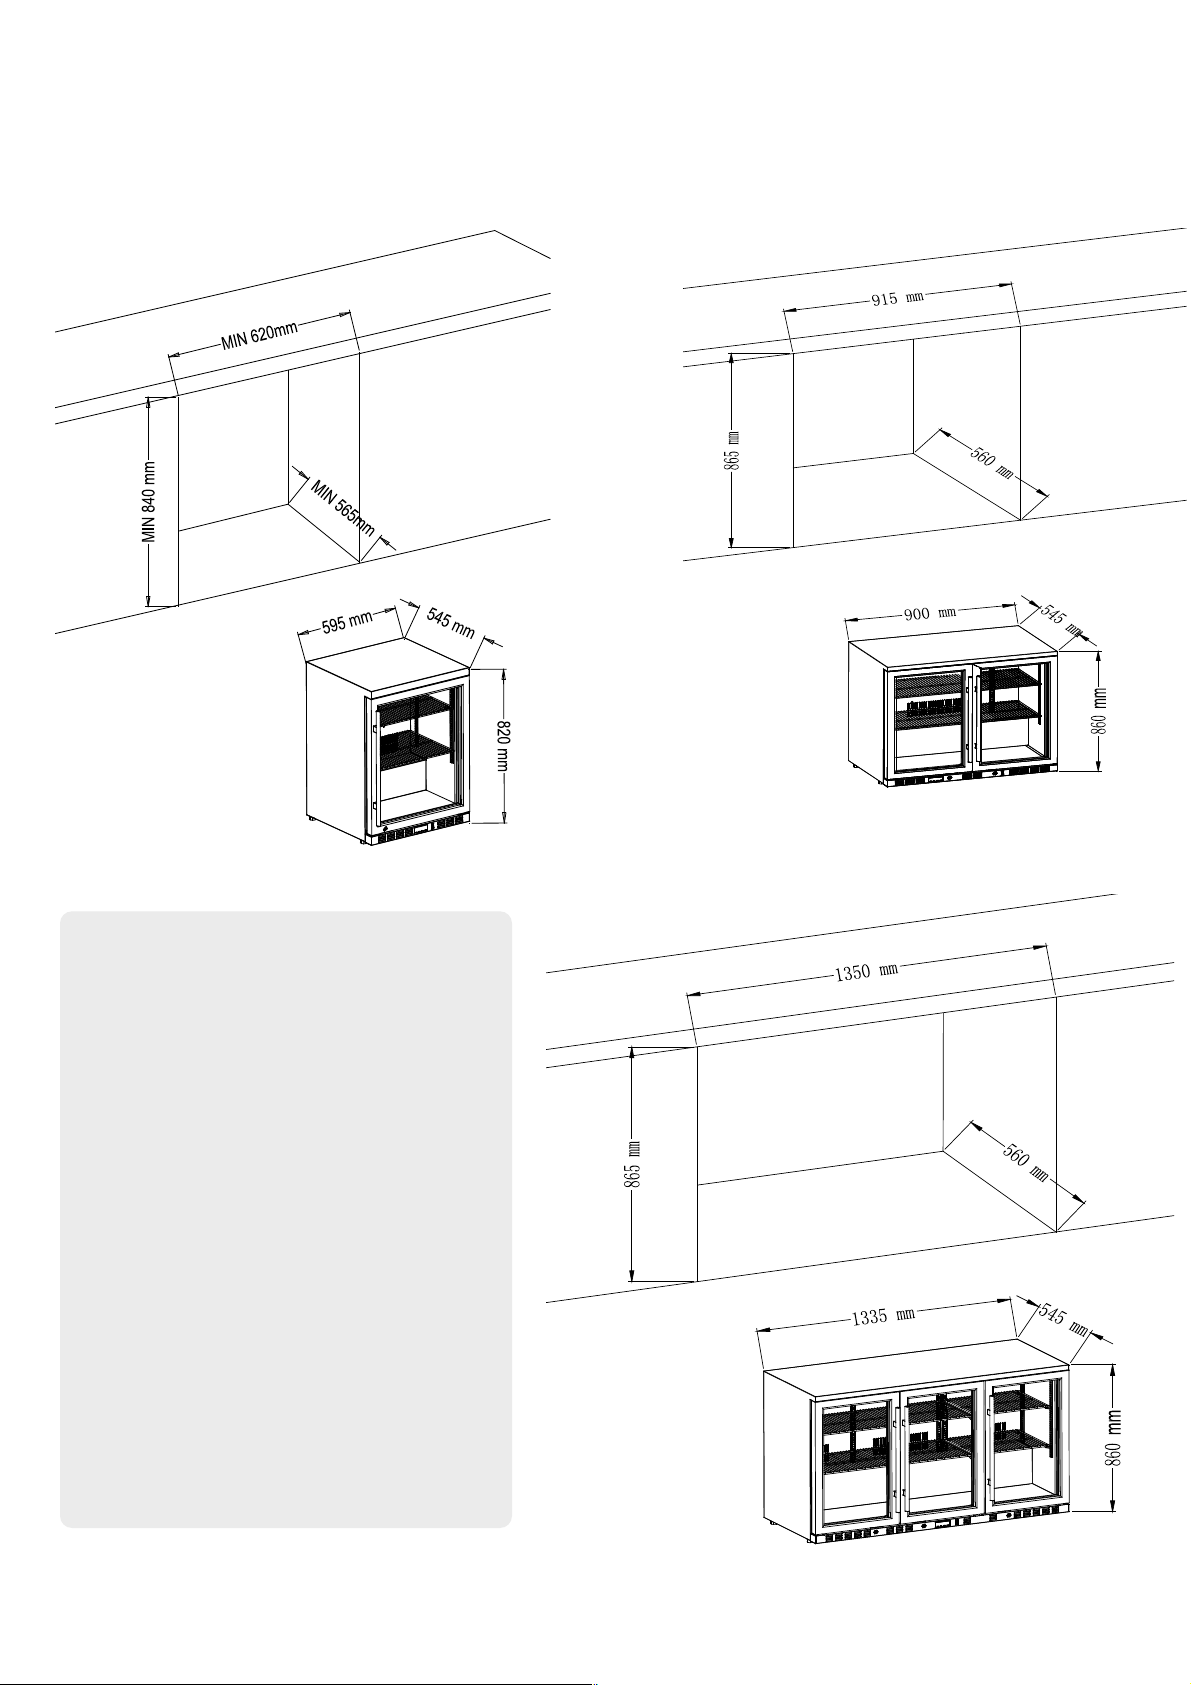
Installing Unit Into Under Counter
✦
The unit is designed to be fully built Into
cabinets.
✦ If the unit is on hardwood floor, we recommend
a rubber mat under the unit and some
polystyrene or sound proofing material on rear
wall of the opening to help deaden the noise.
✦ Leave at least a 0.40-0.6” (10-15 mm) shadow
line around the unit and 2” (50mm) minimum at
rear to allow for the door swings and electrical
plug.
✦ Place the unit out of sunlight, direct weather and
away from heating appliances.
✦
Make sure that installation allows for the unit to
be removed, if required, as the condenser will
need periodic cleaning and to allow for servicing
if necessary.
4
2-IMPORTANT SAFETY INSTRUCTIONS
WARNING
To reduce the risk of fire, electrical shock, or injury when
using your appliance, follow these basic precautions:
Read all instructions before using the bar fridge
Do not attempt to touch any working or electrical parts during operation, apart from main control panel.
Never allow children to operate, play with, or crawl inside the appliance.
Never clean appliance parts with flammable fluids.
Don’t clean S/Steel parts with any citrus style cleaners, special SS cleaner or hot water is best
Do not store or use gasoline or any other flammable vapors in the vicinity or any other appliance. The fumes
can create a fire hazard or explosion.
-Save these instructions-
3-INSTALLATION INSTRUCTIONS
Installation diagram for the built-in models
Installing unit into cavity
*Unit is designed to be Fully Built Into cavity, no ventilation
is required.
*If units on hardwood floor we recommend a rubber mat
under unit and some polystyrene or sound proofing material
on rear cavity wall to help a little deaden noise.
*Leave at least a 10-15mm ‘shadow line’ around unit and
50mm at rear minimum to allow for door swings and
electrical plug.
*Just use common sense, place out of sunlight, direct
weather and away from heating appliances.
*Make sure that installation allows for unit to be removed if
required, as condenser will need periodic cleaning and also
to allow for servicing in the event of break down.
24.43”
33.13”
22.26”
23.44”
21.47”
32.31”
36.05”
34.08”
22.06”
35.46”
21.47”
33.88”
4
2-IMPORTANT SAFETY INSTRUCTIONS
WARNING
To reduce the risk of fire, electrical shock, or injury when
using your appliance, follow these basic precautions:
Read all instructions before using the bar fridge
Do not attempt to touch any working or electrical parts during operation, apart from main control panel.
Never allow children to operate, play with, or crawl inside the appliance.
Never clean appliance parts with flammable fluids.
Don’t clean S/Steel parts with any citrus style cleaners, special SS cleaner or hot water is best
Do not store or use gasoline or any other flammable vapors in the vicinity or any other appliance. The fumes
can create a fire hazard or explosion.
-Save these instructions-
3-INSTALLATION INSTRUCTIONS
Installation diagram for the built-in models
Installing unit into cavity
*Unit is designed to be Fully Built Into cavity, no ventilation
is required.
*If units on hardwood floor we recommend a rubber mat
under unit and some polystyrene or sound proofing material
on rear cavity wall to help a little deaden noise.
*Leave at least a 10-15mm ‘shadow line’ around unit and
50mm at rear minimum to allow for door swings and
electrical plug.
*Just use common sense, place out of sunlight, direct
weather and away from heating appliances.
*Make sure that installation allows for unit to be removed if
required, as condenser will need periodic cleaning and also
to allow for servicing in the event of break down.
34.08”
22.06”
53.19”
52.60”
21.47”
33.88”
KBU55
KBU56
KBU328
Loading ...
Loading ...
Loading ...