Loading ...
Loading ...
Loading ...
5
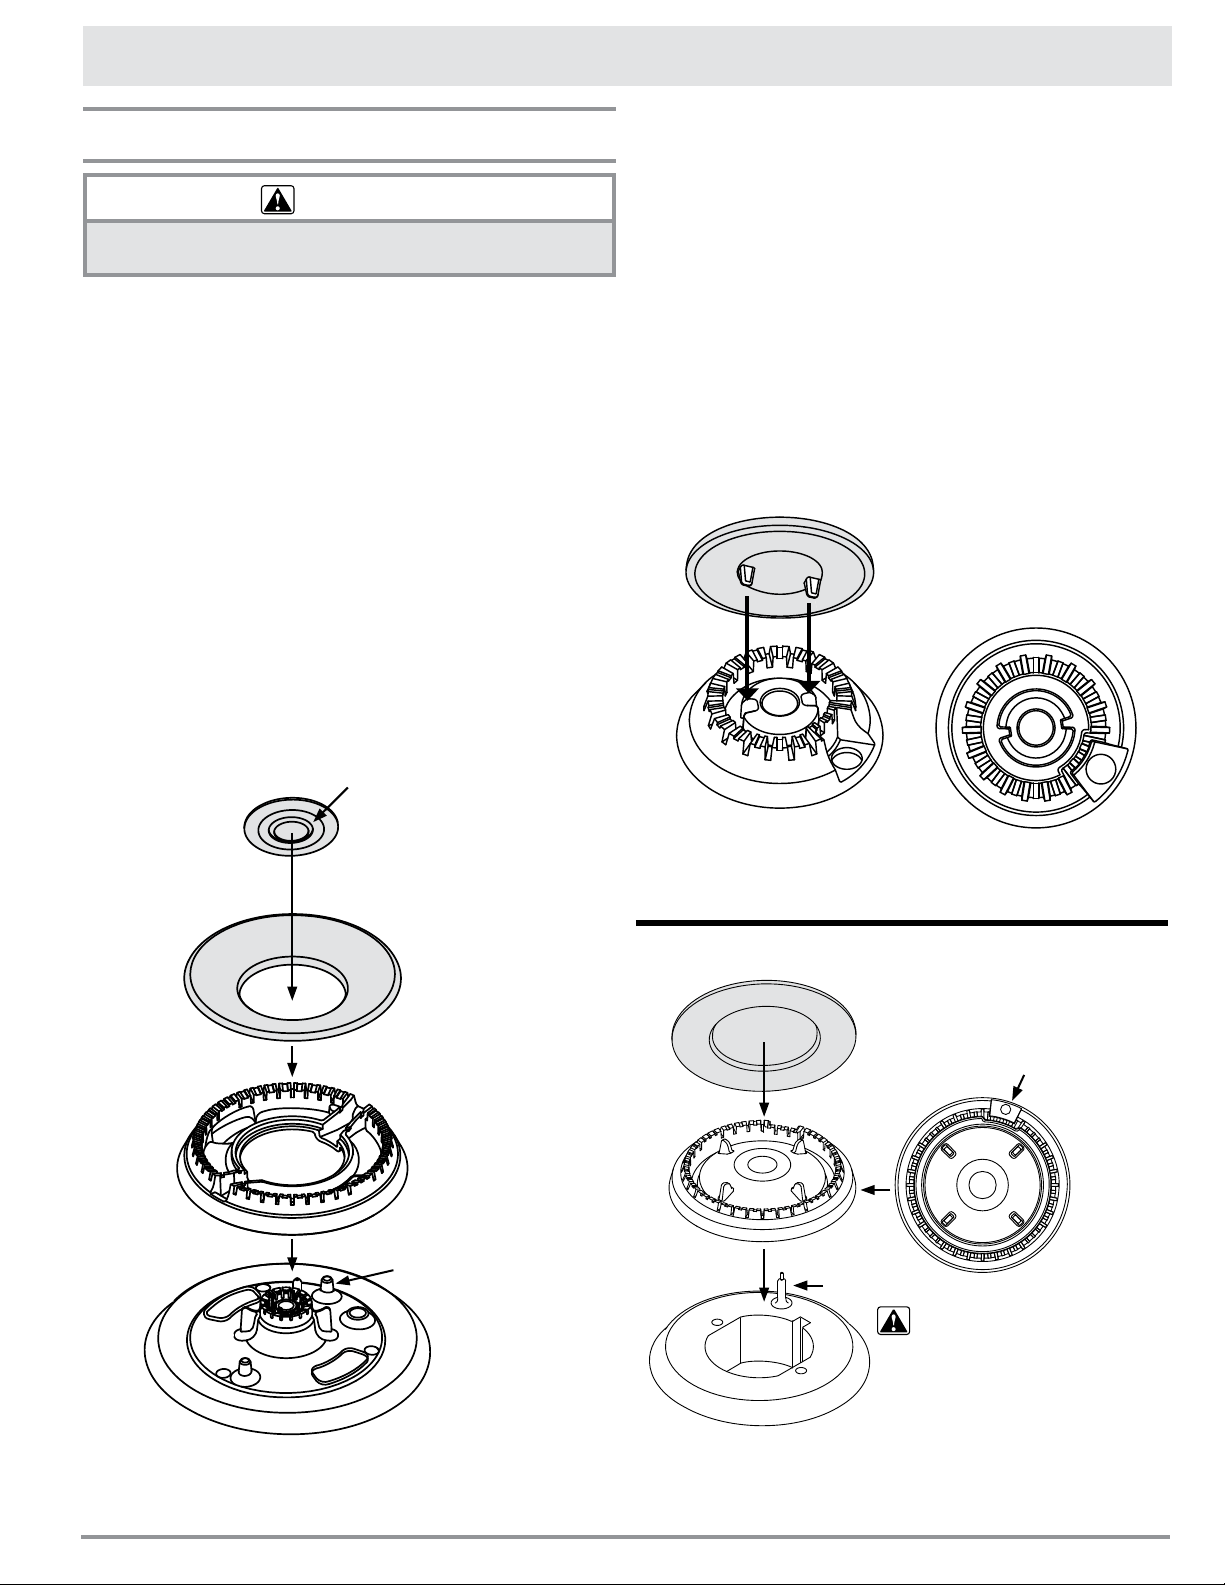
Standard Burner
Be sure to match the correct sizes of components
with each other.
1. Place the burner rings on the burner bases.
Match the correct sizes of heads to bases.
2. Line up the hole on the bottom of each burner
ring with the ignitor on its matching base.
3. Then, put the burner ring on the base. Slightly
twist the ring to make sure it is properly seated.
4. Lay the cap over the burner ring. Make sure the
cap covers the ridge on the burner below.
• RNCT305G models have the below burner ring
and burner cap style on the left rear burner.
Setting Up Your Cooktop
Burner and Grate Assembly
WARNING
Assemble the burners and grates only when the cooktop
is cool.
SimmerSear™ Burner
Be sure to match the correct sizes of components
with each other.
1. Place the SimmerSear™ burner ring on the
SimerSear™ burner base (located on the center
of the cooktop).
2. Line up the gaps in the burner ring with the pins
on the burner base.
3. Seat the outer SimmerSear™ burner cap on the
burner ring. Make sure it is centered and fully
seated.
4. Place the inner SimmerSear™ burner cap in the
center of the burner base. Seat the cap on the
pins in the center of the burner base.
SimmerSear™ Burner Assembly
(Center Burner)
Inner burner cap
Outer burner cap
Burner ring
Pin on
burner base
Ridge on bottom
Igniter hole
Burner ring
(top view)
Igniter
Burner base
CAUTION: Top of
igniter is sharp!
Standard Burner Assembly
Burner cap
Burner ring
Burner ring
(top view)
Burner cap
Standard Burner Assembly
(Left Rear Burner on model RNCT305G)
Loading ...
Loading ...
Loading ...