Owner’s Manual
Model 38051 / 38151 / 38052 / 38152
Questions or Concerns?
Toll Free: 1-877-689-2838 • help@nuwavenow.com
(Mon-Fri 7:30am-4:30pm CST)
Engineered by
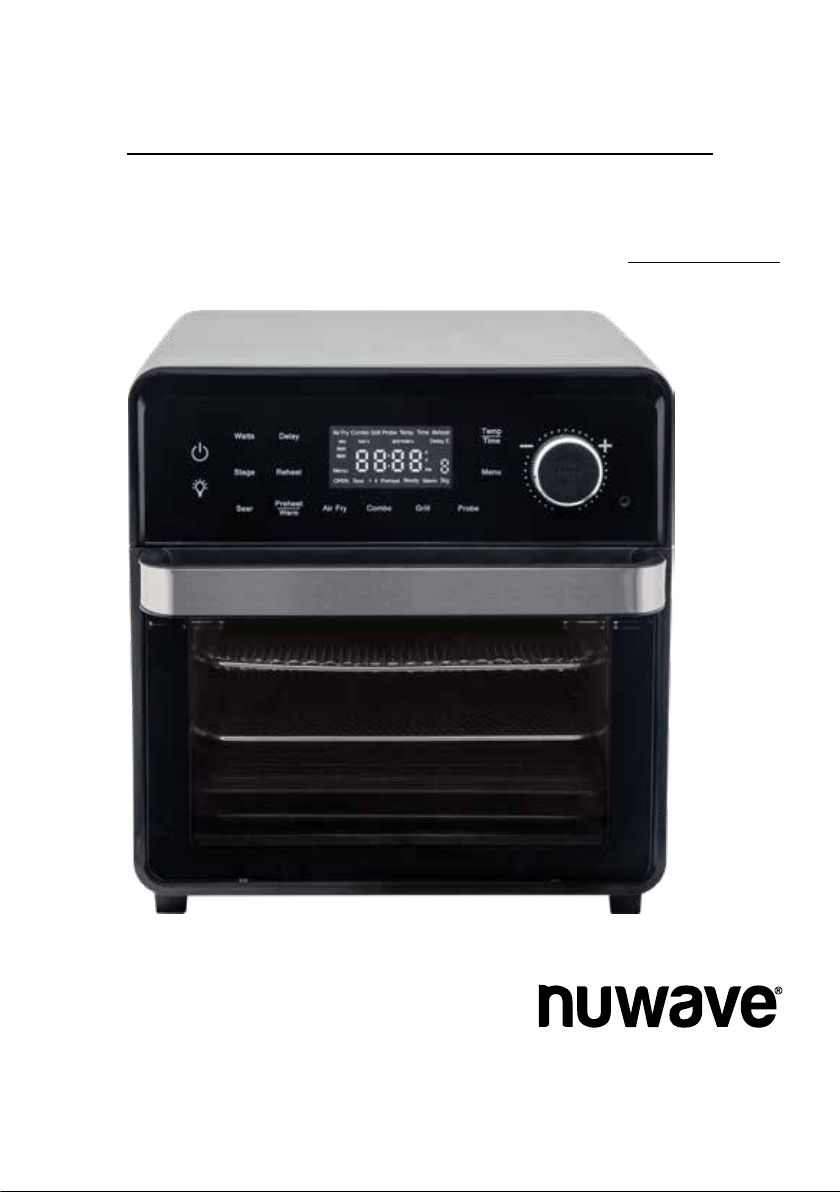
PRO-SMART™ GRILL
TODD ENGLISH

2 | nuwavenow.com
PRODUCT REGISTRATION
Thank you for purchasing the Todd English Pro-Smart Grill
and welcome to the Todd English Cooking Family!
Congratulations on your Todd English Pro-
Smart Grill! I am incredibly excited for you to
join me as we explore healthy home cooking
with your new Pro-Smart Grill, which was
engineered by the great folks at NuWave,
LLC.
They say it’s the journey that counts.
You can believe it. Cooking can take you
around the corner or around the world,
and so, to ensure that you get the most
out of that journey, your Pro-Smart Grill
comes with detailed instructions here in
this manual so you know everything you
need to know to use and care for your
equipment, a handy Quick Start Guide to
get you cooking right away, and a Recipe
Book loaded with delicious recipes that are
already programmed into your Pro-Smart
Grill!
My friends at NuWave and I want every step
of your Pro-Smart Grill experience to be as
easy and rewarding as possible.
Chef Todd English
REGISTER YOUR PURCHASE
1. Visit
nuwavenow.com/QR
2. Scan the QR code using your
mobile device.
3. Fill in the information requested on the
website.
RECORD THIS INFORMATION
Model Number: _________________
Serial Number: __________________
Date of Purchase ________________
(Keep receipt)
Store of Purchase _______________
TECHNICAL SPECIFICATIONS
Voltage: 120V, 60Hz
Wattage: 1800 watts
TIP: You can locate the model and serial
numbers, as well as the QR code, on the
label on the back of the unit.
Connect with Us!
#nuwavenow
Visit
nuwavenow.com
to see other
great products and accessories.
WELCOME
REGISTER
NOW!
CUSTOMER SERVICE
Phone: 1-877-689-2838
(Mon - Fri 7:30am - 4:30pm)
Email:
help@nuwavenow.com

nuwavenow.com | 3
TABLE OF CONTENTS
Meet Todd English
Todd English began his cooking career
at the young age of 15 when he rst
entered the doors of a professional
kitchen. At 20, he attended the Culinary
Institute of America and graduated in
1982 with honors. He continued to hone
his craft with Jean Jacques Rachou at
New York’s La Cote Basque and then
relocated to Italy where he apprenticed
at the well-established Dal Pescatore
in Canneto sull’Oglio and Paracucchi in
Locanda dell’Angelo.
It was in Italy that Todd, drawing from
his Italian heritage, developed his
unique style and approach to cooking.
English returned to the United States at
25 and was asked to be the Executive
Chef of the award-winning Northern Ital-
ian restaurant Michela’s in Cambridge,
Massachusetts. He served there as an
executive chef for three years, garnering
high praise from both the press and the
public.
In the spring of 1991, English caught
the culinary world’s eye when the
James Beard Foundation named him
their National Rising Star Chef. English
followed through on that promise, as the
James Beard Foundation subsequently
named him Best Chef in the Northeast
in 1994. Nation’s Restaurant News
named English one of their Top 50 Tas-
temakers in 1999. In 2001, English was
awarded Bon Appetit’s Restaurateur of
the Year award and was named one of
People Magazine’s 50 Most Beautiful
People. Todd also has been named to
the James Beard Foundation’s Who’s
Who in Food and Beverage in America.
Safeguards & Information ..................4-6
Power-Supply Cords................................ 6
Parts & Accessories................................. 7
Assembly Guide .................................8-9
Before First Use....................................... 8
Accessories ............................................. 8
Shelf Positions ......................................... 9
Getting Started ....................................10-15
Control Panel ........................................... 10
Helpful Hints ............................................ 10
Audio Alerts ............................................. 11
Primary Controls ...................................... 11
Advanced Key Functions ......................... 13
Two-Button Functions .............................. 13
Press & Hold Functions ........................... 13
Cooking Sequence .................................. 14
Selectable Cooking Times ....................... 14
Adjusting Temp & Time Formats .............. 15
Basic Functions ..................................16-26
START/PAUSE Dial ................................. 16
Temp/Time ............................................... 16
Preheat/Warm ......................................... 16
Reheat ..................................................... 18
Delay ....................................................... 18
Air Fry ...................................................... 19
Grill .......................................................... 19
Combo ..................................................... 19
The Probe Function ................................. 20
Menu........................................................ 22
Light ......................................................... 25
Clock........................................................ 25
Lock ......................................................... 26
Watts ....................................................... 26
Advanced Funtions ............................27-28
Stage ....................................................... 27
Sear ......................................................... 27
Crispy Finish ............................................ 28
Slow Cook ............................................... 28
Care & Maintenance ...........................29-31
Troubleshooting Guide ............................ 29
Cleaning .................................................. 31
Storage .................................................... 31
Replacing the Lightbulb ........................... 31
Limited Warranty ..................................... 32
Replacement Parts .................................. 34
Notes ....................................................... 35
Para la versión en español de este manual, visita www.nuwavenow.com

4 | nuwavenow.com
READ ALL INSTRUCTIONS and WARNINGS The failure to follow any of the important
safeguards, warnings, or instructions for safe use is a misuse of the Todd English
Pro-Smart Grill that can void your warranty and create the risk of serious injury. Only
use the appliance as intended and for no other use, and always follow the basic safety
precautions.
1. Read all instructions.
2. Ensure the Pro-Smart Grill and all parts are clean and dry before each use.
3. Do not touch hot surfaces. The appliance’s surfaces may be hot during and after
use. Use handles.
4. Discard the protective plastic covering the power plug before use.
5. Do not let the electrical cord touch hot surfaces or hang over any edge.
6. Do not immerse cord, plug, or appliance in water or other liquid.
7. Close supervision is necessary when any appliance is used near children. This ap-
pliance is not intended for use by persons with reduced physical, sensory or mental
capabilities, children, or persons with a lack of experience or knowledge, unless su-
pervised or instructed in the use of the appliance by one responsible for their safety.
8. Do not operate if the Pro-Smart Grill or cord malfunctions or has been damaged in
any way. Return the unit to the nearest authorized service facility for examination,
repair, or adjustment.
9. Use only on a clean, stable, dry, and level surface.
10. Do not use accessories or attachments not recommended by the
manufacturer.
11. DO NOT USE OUTDOORS. FOR INDOOR USE ONLY.
12. Do not place on or near a hot gas or electric burner, or in a heated oven.
13. Unplug the appliance when not in use and allow the appliance to cool completely
before cleaning or removing/replacing parts.
14. Do not cover or block the intake air vents located in the back and sides of the Pro-
Smart Grill, as doing so can prevent proper ventilation. There should be at least 5
inches of free space behind, to the sides of, and on top of the Pro-Smart Grill.
15. Use aluminum foil to wrap foods that produce oil or juice when operating and attach
the Grill or use the Baking and Drip Pan to catch drippings and prevent re.
16. To prevent re, do not allow any foil to touch the heating elements.
17. Do not alter or modify any part of the Pro-Smart Grill or use attachments
or accessories not recommended by the manufacturer.
18. It is normal for some smoke to escape the Pro-Smart Grill when heating for the rst
time.
19. If excess smoke is escaping from the air vent during operation, unplug the Pro-
Smart Grill immediately and contact NuWave Customer Service at 1-877-689-2838
or email
help@nuwavenow.com
SAFEGUARDS & INFORMATION
ALWAYS KEEP THIS MANUAL HANDY FOR FUTURE REFERENCE.

nuwavenow.com | 5
20. During use, steam may be released from the air outlet vents. Keep your hands and
face away from these vents. Be careful of hot steam escaping when opening the Pro-
Smart Grill.
21. Avoid placing your face near the glass door during use.
22. Never touch the insides of the Pro-Smart Grill while it is operating.
23. Use extreme caution when moving an appliance containing hot oil or other hot liquids.
24. Never leave the Pro-Smart Grill unattended during use.
25. Do not disassemble the Pro-Smart Grill.
26. Allow the Pro-Smart Grill to cool before putting in or pulling out items or before clean-
ing.
27. Keep this manual handy for future reference.
28. Always make sure your ngers are clean and dry when pressing the
buttons.
Toaster Oven Warnings (UL Standard 1026, Section 71.7):
1. Oversize foods or metal utensils must not be inserted in a toaster oven as they may
create a re or risk of electric shock.
2. A re may occur if the toaster-oven is covered or touching ammable material, includ-
ing curtains, draperies, walls, and the like, when in operation. Do not store any item
on top of the appliance when in operation.
3. Do not clean with metal scouring pads. Pieces can break off the pad and touch electri-
cal parts creating a risk of electric shock.
4. Extreme caution should be exercised when using containers constructed of materials
other than metal or glass.
5. Do not store any materials, other than the manufacturers recommended accessories,
in this oven when not in use.
6. Do not place any of the following materials in the oven: paper, cardboard, plastic,
cloth, wood, ammable materials, sealed containers, and the like.
7. Do not cover the crumb tray or any part of the oven with metal foil. This will cause
overheating of the oven.
8. Turn off the oven by pressing the Power Icon before unplugging the unit from the wall
socket.
Question about your Pro-Smart Grill?
Contact our friendly customer service staff from 7:30am to 4:30pm, Monday ‒ Friday
at 877-689-2838 or reach us via email anytime at
help@nuwavenow.com
SAFEGUARDS & INFORMATION
ALWAYS KEEP THIS MANUAL HANDY FOR FUTURE REFERENCE.

6 | nuwavenow.com
A short power-supply cord (or detachable power-supply cord) is provided to reduce
the risk of becoming entangled in, or tripping over, a longer cord. Longer detachable
power-supply cords or extension cords are available and may be used if care is
exercised in their use. If a longer detachable power-supply cord or extension cord is
used:
1. The marked electrical rating of the extension cord should be at least as great as the
electrical rating of the appliance.
2. The longer cord should be arranged so that it will not drape over any countertop or
tabletop where it could be pulled on or tripped over unintentionally.
3. The Pro-Smart Grill should be operated on a separate electrical outlet from other
operating appliances due to wattage limitations.
4. This appliance is of the 3-pin grounded type, so the cord set or extension cord
should also be a grounding type 3-wire cord.
SAVE THESE INSTRUCTIONS: Read and understand the entire manual before using
the Pro-Smart Grill.
Power-Supply Cords
WARNING
To reduce the risk of electric shock, do not perform any servicing other
than that which is contained in these instructions.
To disconnect the Pro-Smart Grill, turn it off by pressing the Power Icon and
then remove the plug from the wall outlet.
NEVER use the Pro-Smart Grill with loose, damaged, or missing parts.
While cooking, ALWAYS use oven mitts and allow accessories to cool before
washing.
Over the lifetime of your Todd English Pro-Smart Grill, you may nd yourself needing a new
part or accessory, and if you do, NuWave has you covered.
Ordering new parts and accessories is quick and easy. Simply take down the name and
number for the part you want, then contact Customer Service. You can do that by:
Phone at 877-689-2838 (M‒F, 7:30am‒4:30pm), or
Email at
help@nuwavenow.com
You can also order directly online. Just visit
www.nuwavenow.com
ORDERING PARTS
SAFEGUARDS & INFORMATION

nuwavenow.com | 7
Wire Rack
Part #: BGA5
Plug-in Grill
Part #: BGA2
Rubber Gasket
Part #: BGP4
Side Rubber Gasket
Part #: BGP5
Air Fry Basket
Part #: BGA4
Temperature Probe
Part #: BGP3
Stainless-Steel
Part #: BGA1
Black
Part #: BGA6
Light Bulb
Part #: BGP1
Light Bulb Cover
Part #: BGP2
Baking and Drip Pan
Part #: BGA3
PARTS & ACCESSORIES
Power Base

8 | nuwavenow.com
1. Remove and discard any packaging material from the unit.
2. Remove all accessories from their packaging and wash them in warm, soapy water
or in the dishwasher, top rack only, except for the Probe. NEVER submerge the
main unit in water.
While most of the accessories are dishwasher-safe, the Probe is not. Hand washing is,
therefore, highly recommended. Frequent dishwasher cleaning may lead to premature
wear.
Accessories
Plug-in Grill
For grilling steaks and roasting vegetables.
Plugs into the Pro-Smart Grill from Posi-
tion 1, making it self-heating.
Air Fry Basket
1-inch depth is perfect for making crispy
chicken, fries, and more.
Baking and Drip Tray
Ideal for baking, roasting, and as a drip
pan when air frying, protecting the bottom
from dripping oils and fats.
Wire Rack
Can be used to hold cooking or baking
pans, or simply place your food directly on
the rack.
Temperature Probe
Eliminates the guesswork of cooking.
Consult the temperature guide in the
Probe section for more information.
ASSEMBLY GUIDE
Before First Use

nuwavenow.com | 9
Shelf Positions and Grill Power
1
2
3
Position 3
Position 2
Position 1
The Todd English Pro-Smart Grill has 3 rack positions, with Position 1 at the bottom and
Position 3 at the top, where most of your accessories can slide into the unit.
Grill Power
Connector
Position 1 is also the level where the power coupling for the Grill is located at the back of
the unit chamber. With the Grill’s plug facing into the unit, slide the Grill into Position 1,
pushing until the power connection engages.
Grill Plug
POWERPORT™
ASSEMBLY GUIDE

10 | nuwavenow.com
The easy-to-use functionality of the Todd English Pro-Smart Grill is divided into Basic
and Advanced functions, with the Basic offering the full cooking functionality of the unit
and the Advanced giving you control over fan and heat strength and allowing you to
program different cooking stages, features you will primarily use to create your own
cooking Presets.
Control Panel
Power:
Turns the unit on.
Light:
Press Light to turn
the interior lamp on
and off.
Sear:
Choose between
3 Sear settings.
Stage:
Program up to 5
cooking stages.
Reheat:
Warms-up
leftovers
Temp/Time:
Adjusts the cooking
temperature and time.
Probe:
Cooks by the food’s
internal temperature.
Menu:
Select up to 100
Presets and save
up to 50 of your
own.
Watts:
Adjusts the wattage
used by the unit.
Delay:
Begin or end
the cooking
cycle when
you want.
Preheat:
Preheats the unit
for better results.
Warm:
Keeps food warm
until you’re ready
to serve.
START/PAUSE:
Turning it adjusts the
cooking temperature
and time, scrolls through
Presets. Pressing it
starts the cooking cycle
or pauses it.
Air Fry:
Enables the unit’s
Air Fry function
using top heat
only.
Grill:
Enables the unit’s
Grill function.
Combo:
Enables the unit’s top and grill
heat, letting both be used at the
same time.
Helpful Hints
1. To add more time during current cooking cycle, turn the START/PAUSE dial
clockwise while the cooking time is displayed. Monitor your food to ensure it
doesn’t overcook.
2. Some moisture may appear on the door during certain cooking cycles. This is
normal and no cause for worry.
3. When air-frying, food can be lightly coated with oil beforehand to boost crispiness
and browning.
GETTING STARTED

nuwavenow.com | 11
Key(s) Function
Turns the Pro-Smart Grill On or Off.
START/PAUSE
Press to start or pause cooking and turn to adjust settings or when
adjusting temperature, time, and selecting Presets.
Temp/Time
Press Temp/Time to show the current cooking temperature and time.
Turn the START/PAUSE dial to make any adjustments. (Temperature
in 5°F/1°C degree increments, time in 1-minute increments).
Menu
Menu gives access to the unit’s Cooking Presets; preprogrammed
sequences tailored to different foods. There are 100 NuWave Menu
Presets and 50 user Presets. Press Menu, then turn the START/PAUSE
dial to select your Preset number.
Preheat/Warm
The unit automatically preheats to the set cooking temperature. It will then
beep twice and go into a 10-second countdown. allowing you to insert
your food and begin cooking. If no food is inserted, the unit will beep once
and begin cooking regardless. To cancel Preheat press Preheat/Warm.
To turn off automatic Preheat, press Menu + Preheat. To reactivate it,
press Menu + Preheat again.
For Warm, press and hold Preheat/Warm. The default is 140°F with
a range of 140°F–200°F for up to 3 hours. To deactivate Warm, press
and hold Preheat/Warm.
Reheat
Press Reheat and then START/PAUSE (or press and hold Reheat) to
warm your leftovers. The Reheat function is automatic, defaulting to
350°F for 4 minutes. Temperature and time are adjustable.
Set Clock
Press Preheat + Temp/Time, turn the START/PAUSE dial to set the
time, then wait 3 seconds for the blinking to stop. Remember that the
Clock MUST be set to use the Delay function.
In addition to functions and settings, the Pro-Smart Grill will also give you audio alerts
(beeping) and, in the 100 Presets, visual reminders for any actions you need to perform
to advance the cooking process. They are:
FLIP Turn the food over to cook the other side.
-CO- Carryover cooking is taking place.
ROLL Rotate the food onto its side.
BRUSH Brush on the required oil or sauce so the food is seasoned.
STIR Stir up the mixture you are cooking.
TURN Halfway through cooking, turn the pan 180°
SHAKE Shake the air frying ingredients so they cook evenly.
Primary Controls
GETTING STARTED

12 | nuwavenow.com
Mute/Unmute
Mute/unmute most of the alert sounds (beeping) by pressing Stage +
Sear. Alerts during the cooking process itself will still sound.
Delay
To Delay The Cooking Time
Set the cooking temperature and time as needed, then Press Delay, the
current time will display. Set the start time to begin the cooking. Press the
START/PAUSE to begin the countdown.
To End Cooking at a Specific Time
Set the cooking temperature and time as needed. Then press and hold Delay
until “Delay E” and the current time are displayed. Set the time for the cooking
to be completed. Be sure the amount of cook time is not greater than the end
time of the cooking, from start to finish. Press START/PAUSE to begin the
countdown.
• The Clock MUST be set for Delay to work.
• The temperature and time can also be adjusted after pressing Delay/
Delay E.
• Probe cannot be used with Delay/Delay E.
Air Fry
Air Fry cooks with the top heater only, defaulting to 350°F for 15 minutes. Press
Air Fry, adjust the time and temperature if desired, and press START/PAUSE
to begin cooking.
Grill
Press Grill to activate, default is 450°F for 15 minutes, bottom heat only.
Connect the plug-in Grill by sliding it fully into position 1. The unit will beep
twice when the Grill is properly connected, and once when it is removed.
Combo
Allows both top and Grill heat to be used at the same time. Press Combo, the
defaults are 30% top and 70% bottom. The heat is adjustable by 5% increments,
adjusting the Grill heater only. The heat will adjust to always equal 100% overall.
Ex: Top 50% and Grill 50%.
Probe
Press and hold Probe until the Probe’s default status of “OFF” appears.
Press and hold Probe again to activate the Probe and recall the Probe
default temperature of 165°F. The Probe temperature can be adjusted from
50°F–212°F or turned back to the OFF status. The Probe also allows you
to use the carryover cooking technique that allows meats to reach their final
internal temperature while resting. See page 32 for more information.
To adjust the Probe temperature, turn the START/PAUSE dial (adjustable in 1
degree increments).
To view the Probe temperature while cooking, press Probe.
Insert the Probe wire on the side of the unit as shown on the image.
Carryover
Cooking
Carryover Cooking allows you to remove your meat from the unit before reaching
the Probe target temperature, letting it finish cooking while resting. Press Probe
+ Stage, the unit will beep twice and “10°F” will display. Adjust this up to 30°F in
1-degree increments. When the Probe target temperature is reached, the unit will
beep 3 times and display “END”.
Press to turn on the lamp inside the unit and press it again to turn the lamp
off.
Lock
To lock/unlock the keys, press Menu + Stage. “LOC” will appear. When
locked, only the Light and Power buttons will function.
GETTING STARTED

nuwavenow.com | 13
KEY
FUNCTION
Stage
In stage cooking, the main cooking settings are Stage 1, which defaults
to 350°F for 15 minutes. Sear and Preheat are no longer stages. Press
Stage once to enter Stage 1 and set the cooking temperature and time.
To add another stage, press Stage again. The unit is now in Stage 2,
which defaults to 350°F for 0 minutes (as do Stages 3–5). Input the
cooking settings, and press Stage for the next stage, up to five stages.
Sear
Pressing Sear adds the Sear function to the cooking cycle. Press
once for Sear 1, to apply before the main cooking cycle. Press twice
for Sear 1 & 2, to apply before and after the cooking cycle. Press
Sear three times for Sear 2, which is applied after the cooking cycle.
Sear defaults to 450°F for 5 minutes. The temperature is adjustable
from 50°F–450°F, and the time is adjustable up to 1-30 minutes.
To just Sear, press and hold Sear and the unit will begin to sear at
450°F for 5 minutes. You can adjust the Sear temperature and time.
Slow Cook
The Slow Cook function requires the Probe. Press Menu + Probe.
The unit will beep twice and activate the Slow Cook function. The
Slow Cook Probe target temperature defaults to 165°F, and the Slow
Cook cooking temperature to 190°F. The Probe temperature range
is 50°F to 212°F and the cooking temperature range is 175°F to
235°F.
Advanced Key Functions
2-Button Combination Functions
FUNCTION COMBINATION
Turns Automatic Preheat ON or OFF Menu + Preheat
Mutes or Unmutes Button's Beep Stage + Sear
Clock Set Mode Preheat + Temp
Crispy Finish Menu + Sear
Carryover Cooking Mode Probe + Stage
Slow Cook Mode Menu + Probe
Change to Hour/Minute Menu + Temp/Time
Change to Months/Days Stage + Temp/Time
Lock the Control Panel Buttons Menu + Stage
Press and Hold Button Functions
FUNCTION BUTTON
Independent Sear Press and hold Sear
Change Default Temperature Press and hold START/PAUSE. Will beep twice.
Change Default Time Press and hold START/PAUSE. Will beep twice.
Change Fahrenheit to Celsius Press and hold Temp/Time
View Target Probe Temperature Press and hold Probe
GETTING STARTED

14 | nuwavenow.com
Selectable Cooking Times
To protect the machine against overheating, there is a maximum selectable cooking
time (in hours and minutes), which differs depending on the function or the selected
cooking temperature
Function Cooking Temp. Cooking Times
Delay 350°F 00:00–24:00
Preheat 350°F 00:00*
Sear 1 450°F 00:05–00:30
Stage 1–5 350°F 00:15–00:00*
Sear 2 450°F 00:05–00:30
Warm 140°F 01:00–03:00
Air Fry 350°F 00:15–01:00
Grill 500°F 00:15–00:30
Reheat 350°F 00:04–01:00
Combo 450°F 00:15–00:00*
Probe 165°F --
*Cooking times are tied to the selected cooking temperatures.
--No cooking times needed as this cooks to a set Probe temperature.
Cooking Sequence
Regardless of the input order, the cooking functions of the Pro-Smart Grill will ALWAYS
follow this sequence:
1. Delay
2. Preheat
3. Sear 1
4. Stage 1–5
5. Sear 2
6. Warm
Cooking Temperatures Selectable Cooking Times
50°F–275°F 00:00–99:59
280°F–345°F 00:00–24:00
350°F–450°F 00:00–01:00
455°F–500°F 00:00–00:30
Cooking Times Based on Cooking Function
Cooking Times Based on Cooking Temperature
GETTING STARTED

nuwavenow.com | 15
Adjusting the Cooking
Temperature Format
While degrees Fahrenheit is the default,
you can switch to degrees Celsius. When
the display shows “Temp” and the cooking
temperature, press and hold Temp/Time for
4 seconds until the unit beeps twice and you
see the Celsius temperature and a “C” after
the numbers. Follow the same procedure to
switch back to Fahrenheit.
Note
• The temperature will change with the
change of temperature format.
• The temperature format switch cannot
be done while cooking.
• Temperature Format switch can only
be done when “Temp” shows in the
display.
• If the user switches temperature
formats, the unit will stay in that new
format until it is changed back, even if it
is unplugged.
Adjusting the Cooking
Time Format
The default time format is hours and
minutes (HH:MM). This, however, can be
changed to minutes and seconds (MM:SS),
month and day (MM:DD), and day and hour
(DD:HH).
• Minutes and Seconds. Press and hold
Temp/Time for 4 seconds. You will see
the time format change from HH:MM
to MM:SS. In the MM:SS time format,
the time increment/decrement is 15
seconds. The maximum time setting
in mm:ss format is 99 minutes: 59
seconds.
• Month and Day. Press Temp/Time
+ Stage. You will see the time format
change from HH:MM to MM.DD and
the display will show 00.00 and “dA” to
indicate the unit is now in MM.DD. Note
that only the lower dot is between the
numbers. the unit will also beep twice to
alert you of the change. To switch back,
press Temp/Time + Stage together
again, or press and hold Temp/
Time and it will go back to hh:mm
format. The maximum time setting in
month:day format is 99 months: 99
days.
• Day and Hour. Press Menu + Temp/
Time and the time format will change
to DD.HH. The display will show 00.00
and “Hr” to indicate the unit is now in
DD.HH, Note that the dot between the
two numbers is now at the top. The unit
will also beep twice to alert you of the
change. To switch back, press Menu
+ Temp/Time together again, or press
and hold Temp/Time and it will go back
to hh:mm format.The maximum time
setting in day:hour format is 99 days:99
hours.
Note
• The cooking time will change when the
time format changes.
• If the new format is greater than time
allowed, the unit will show “Ready”,
then it will count down, and then show
“END”.
• Once changed, the new time format will
remain until it is changed again, even if
the unit is unplugged.
• When the time format is changed to
Month and Day, the colon between the
numbers will change to a period. When
the format is Day and Hour, the colon
will change to a dot in the middle of the
two numbers.
GETTING STARTED

16 | nuwavenow.com
Chef Todd English whipping up something
healthy and delicious!
With the basic functions and features that
follow, you can meet nearly any cooking
task head-on. To begin, press to turn
the Pro-Smart Grill on, off, and to stop the
cooking process.
START/PAUSE Dial
Turn the START/PAUSE dial to make
adjustments to cooking time or temperature,
or to select a cooking Preset, then press
START/PAUSE to begin cooking. Press it
again to pause cooking.
Temp/Time
Pressing Temp/Time toggles between the
cooking temperature and the cooking time,
allowing you to adjust them as needed
with the START/PAUSE dial.
Adjusting the Cooking Temperature
• When “Temp” and the cooking
temperature are displayed, you may
make your adjustments by turning the
START/PAUSE dial.
• “Temp” will appear on the display
whenever the temperature is on
display.
• The default cooking temperature is
350°F.
• The default cooking temperature
format is degrees Fahrenheit.
• All cooking temperature adjustments
are in 5°F increments, and Probe
temperature adjustments are in 1°F
increments.
Adjusting the Cooking Time
• Press Temp/Time and the cooking
time will be displayed along with
“Time”. When “Time” appears on the
display, you can adjust the cooking
time by turning the START/PAUSE
dial.
• The default cooking time is 15
minutes.
• All cooking time adjustments are in
1-minute increments.
• The default cooking time format is
hours–minutes (hh:mm).
Notes
The cooking temperature and time can be
adjusted both before and while cooking.
Preheat/Warm
Preheating is vital to many types of
cooking, such as baking, as it creates the
right atmosphere for the ingre dients to
cook. This unit preheats automatically with
certain functions or Presets, displaying
“Preheat” on the LED screen. It brings the
unit to the set cooking temperature, beeps
twice, and starts a 10-second countdown
so you can insert your food and start the
cooking cycle. If no food is inserted, after
the countdown the unit will beep once and
begin to cook. With NuWave, however,
BASIC FUNCTIONS

nuwavenow.com | 17
you’re always in control, so Preheat
can be deactivated or activated at your
convenience.
Adding or Removing Preheat
To turn the Preheat function off or on for a
given cooking function or Preset:
• To turn it off, press Preheat/Warm. The
unit will beep once and “Preheat” will
no longer be visible on the LED display.
• To turn it on, press Preheat/Warm. The
unit will beep twice and “Preheat” will
be visible on the LED display.
Automatic Preheat
Turn the Automatic Preheat feature off or on
as follows:
• To turn it off, simultaneously press
Menu + Preheat. The unit will beep
twice and the functions and Presets
that once had it will no longer preheat
automatically.
• To turn it on, simultaneously press
Menu + Preheat. The unit will beep
twice and the functions and Presets
that had it will once again preheat
automatically.
Note
• In order to avoid under-cooking your
food, when you turn off Preheat, you
should add several minutes to the
cooking time to compensate.
• Preheat times can vary up to 10
minutes or more.
Using Preheat
When the LED display shows “Preheat”,
“Temp”, and the cooking temperature:
1. Adjust the preheat/cooking temperature
with the START/PAUSE dial. The
preheat and cooking temperatures will
always be the same.
2. Press Temp/Time and adjust the
cooking time with the START/PAUSE
dial.
3. Once the adjustments are made,
press START/PAUSE.
• The unit will begin preheating to
the set temperature.
• The temperature will flash while
unit is preheating.
When the unit reaches the set cooking
temperature, the LED display will show
“Ready”, “Temp” and the unit will beep
twice and start the 10-second countdown.
• During the countdown,
temperature & time can be
adjusted by pressing Temp/Time
and using the START/PAUSE
dial.
• Place food in the unit and close the
door to begin cooking.
When finished, the LED display will show
“End” and the unit will beep three times.
While preheating, cook time for the
following stage can be adjusted.
1. Press Temp/Time and the display the
cook time for the following stage.
2. The “:” will stay solid as the following
cook time is not counting down, but
“Preheat” will flash to indicate that it’s
now preheating.
• Preheat can be added or removed
by pressing Preheat/Warm.
• The automatic Preheat feature
may be disabled by pressing
Menu + Preheat/Warm at
the same time. It may also be
reactivated the same way.
BASIC FUNCTIONS

18 | nuwavenow.com
Warm
Press and hold Preheat/Warm to activate
the Warm function. The display will show
“140°F”, “Warm”, and “Temp”. Press
and hold Preheat/Warm to cancel it. The
defaults are 140°F for 1 hour.
1. Adjust the Warm temperature by
turning the START/PAUSE dial. The
selectable temperature range is
140°F–200°F.
2. Adjust the Warm time by pressing
Temp/Time then turn the START/
PAUSE dial to select a warm time up
to 3 hours. Press START/PAUSE. The
unit will preheat (if selected) and then
cook at the set temperature and time.
It will then keep warm according to the
set Warm temperature and time.
Reheat
Reheat warms your leftovers through,
restoring flavor and texture. Pressing
Reheat and then START/PAUSE, or
pressing and holding Reheat starts this
function. Reheat defaults to 350°F for 4
minutes but has a selectable temperature
range of 50°F to 450°F and a time range up
to 1 hour.
You should always reheat food until it is
steaming hot throughout to prevent risk of
infection caused by bacteria breeding in the
40°F to 140°F temperature zone. Always
serve heated food immediately. See the
Selectable Cooking Times table on page 19
for more information.
Notes
• The maximum reheat time is tied to the
selected reheat temperature.
Delay/Delay End
Pressing Delay lets you start or end the
cooking process at a time convenient for
you. However, you have to have the Clock
properly set (see page 25).
Delay Start (Cooking will begin at a given
time)
1. Set up the Pro-Smart Grill to cook
according to your recipe.
2. Press Delay. The display will show the
current clock time and “Delay”.
3. Adjust to the desired cooking start time
(up to 24 hours) by turning the START/
PAUSE dial.
4. Press START/PAUSE. While the unit is
waiting, “Delay” will flash in the display.
At this time, to adjust the delay time,
press Delay. “Delay” will stop flashing
and the delay time will be displayed.
It may now be adjusted by turning the
START/PAUSE dial. To cancel Delay
and start cooking at once, press Delay
again.
5. After the delay time has elapsed, the
unit will begin the cooking cycle.
Delay End (Cooking will end at a given
time)
1. Select the function or Preset to be used
and make any needed adjustments to
the temperature and time.
2. Press and hold Delay until “Delay E”
appears. The display will show the
current clock time and “Delay E” will
be flashing.
3. Set the clock to the time you’d like
cooking to stop (up to 24 hours)
by
turning the START/PAUSE dial. Be
sure the set cook time does not exceed
the set end time
4. The cooking process will finish at the
selected end time. The unit will then
beep 3 times and display “END”.
BASIC FUNCTIONS

nuwavenow.com | 19
Notes
• While in Delay End mode, change the
end time by pressing and holding Delay
and making your adjustment by turning
the START/PAUSE dial.
• Delay mode can be canceled at
anytime by pressing and holding Delay.
Repeat to resume.
• After the delay time has elapsed, the
unit will go into the cooking cycle.
• Delay cannot be used with the Probe.
Air Fry
The unit defaults to 350°F for 15 minutes.
Press Air Fry to cook with super-heated
cyclonic air for great, crispy results. The
display will show “Air Fry”, “350°F”,
“Preheat” and “Temp”.
1. Press START/PAUSE. “Preheat” will
begin flashing.
2. After Preheat is done, the unit will
beep twice, display “Ready”, and a
10-second count down will begin to
give you a chance to place your food.
Closing the door will begin the cooking
process. If no food is placed by the end
of the countdown, the unit will beep
once and begin to cook.
3. Once the unit is finished cooking, the
display will show “END” and the unit
will beep three times.
Grill
Pressing Grill activates the Grill function,
allowing you to cook with the powered
Grill only. The Grill defaults to 450°F for 15
minutes, has a selectable 50°F to 500°F
temperature range and a time range up to
30 minutes.
1. Place the grill into the Pro-Smart Grill,
engaging the connector to the plug at
the back of position 1.
2. Press Grill, you will see “Grill” in
the display, the defaults 450°F for
15 minutes and also “Temp”, and
“Preheat”.
3. Make any needed adjustments to the
Temperature and Time, then press
START/PAUSE. The preheat will
begin. Preheat is necessary for best
results.
4. Once the Grill is preheated, a
10-second countdown will begin so
you may place the food in the Pro-
Smart Grill. After the countdown, the
cooking cycle will begin, whether the
food is placed or not.
5. Place the food on the Grill and shut the
door for the cooking to begin. When
done, the unit will beep 3 times and
display “END”.
Notes
• The Grill time is tied to the selected
Grill temperature (see page 21).
• The Grill is fully engaged when the
unit beeps twice. It will beep once
when the Grill is removed.
Combo
1. Press Combo. The display will show
“COMBO”, “Top 30%”, “Bottom
70%” and “Preheat”. Can adjust the
amount of heat for each by turning the
START/PAUSE dial.
2. Adjustments to the temperature and
time can be made by turning the
START/PAUSE dial. To begin cooking,
press START/PAUSE and the preheat
will begin.
3. Once preheated, the unit will beep
twice, “Ready” will display and the
10-second countdown will begin.
4. During countdown, place the food in
the Pro-Smart Grill, shut the door, and
the cooking cycle will begin.
BASIC FUNCTIONS

20 | nuwavenow.com
Notes
• Turn the START/PAUSE dial to
adjust the percentage of Top and
Bottom heat. Both will adjust at the
same time equaling 100%. When
the dial is turned completely left,
the bottom is 100% and top is 0%.
When the dial is turned completely
right, the Top is 100% and the
bottom 0%.
• The preheat can be cancelled at
any time.
Probe
The Probe allows you to cook according
to the internal temperature of your food,
ensuring that it is done to perfection. The
Probe defaults to OFF.
• The Probe temperature is adjustable in
1F increments.
• The Probe Temperature Reading
Range 32°F–400°F.
• The Probe Target Temperature Setting
Range is OFF, 50°F–212°F.
Using the Probe
1. Connect the Probe to the probe jack,
then insert the Probe into the center of
the food.
2. Press Probe. The screen will display
“Probe” and the current Probe
temperature.
3. Press and hold Probe and the display
will show “Probe”, “Temp”, and
“OFF” (Probe default). Press and hold
Probe again to set it to 165°F.
4. Turn the START/PAUSE dial to adjust
the Probe target temperature if needed.
5. Press START/PAUSE. The unit will
start to cook to the set Probe target
temperature.
• While cooking, press Probe and
the unit will display the current
Probe temperature and “Probe”.
• Press Temp/Time and it will display
the set temperature and “Probe”.
• If the Probe is turned off, the unit
will default to remaining cook time
and set temperature.
• Press and hold Probe to display
the Probe target temperature,
which can then be adjusted by
turning the START/PAUSE dial.
• Once the temperature is adjusted,
it will remain on display.
6. When the internal temperature of the
food reaches 10°F under the Probe
target temperature, the unit will alert
with 3 sets of short beeping sounds.
This carryover cooking alert will happen
every time the Probe is in use (see
Carryover Cooking below).
Notes
• If the cooking time is finished but the
Probe target temperature is not yet
reached, cooking will continue until it is.
• If cooking began without the Probe, but
the Probe is added during the cooking
cycle, press Probe to see the current
Probe temperature. To adjust the Probe
target temperature, press and hold
Probe and use the START/PAUSE dial
to adjust the Probe target temperature.
• When stage cooking, each stage can
have different Probe target temperature
and cook temperature. The unit shall
cook each stage until the Probe target
temperature for that stage is achieved
and then move on to the next stage.
• Once the final Probe target temperature
is reached, the cooking cycle will finish,
and the unit will beep three times
(2 short, 1 long) regardless of the
BASIC FUNCTIONS

nuwavenow.com | 21
remaining cook time.
• If the Probe is unplugged, the Probe
function will be canceled.
• If the Probe is unplugged while
cooking, then plugged back in, the unit
will return to the programmed Probe
function.
• While in Review mode, to add the
Probe to a given cooking stage, press
and hold Probe. This will add the
Probe function to this stage, defaulting
to “OFF”. At this time, turn the
START/PAUSE dial to the right and it
will display “50°F” again (the Probe
function is engaged again). If the
current stage has no Probe function,
the unit will display “OFF”.
Carryover Cooking
After setting the Probe target temperature,
you can stop cooking at the set Carryover
target temperature (10°F–30°F below the
Probe target temperature). While resting,
the internal temperature will continue
to rise until it reaches the Probe target
temperature.
1. Press and hold Probe until the screen
shows “OFF” then press and hold
Probe again will show “165°F”,
“Probe”, and “Temp”. You can adjust
the Probe target temperature.
2. Press Probe + Stage. The unit will
beep twice and display “10°F”,
“Temp”.
3. Adjust this number as needed up to 30°F
turning the START/PAUSE dial, then
press START/PAUSE to begin cooking.
4. Once the Carryover temperature is
reached, -CO- will flash, and the unit
will beep 3 sets of double beeps.
5. When the Probe target temperature is
reached the unit will beep 3 times and
“END” will display.
Notes
• If the probe temperature is not achieved
the unit will revert to the last cooking
temperature and continue to cook at
that temperature until the adjusted
Probe Temperature is reached.
• Press Probe + Stage and the unit will
display the set carryover temperature,
can also be adjusted at any time
• Press and hold Probe to display the
Probe target temperature, which you
can then adjust. Once the Probe target
temperature is adjusted, the target
temperature for main cooking will be
adjusted accordingly, automatically.
Correct placement
of the Probe cable.
Avoid touching bone
when inserting the
Probe. When air frying,
make sure to insert the
Probe directly into the
center (from the side)
of any meat you plan to
ip. Avoid inserting the
Probe at an angle.
Probe and Probe Cable Placement
BASIC FUNCTIONS

22 | nuwavenow.com
Probe Temperature Guide
Meats Temp. Rare
Med
Rare
Med
Med
Well
Well
Chicken, breast
Turkey, breast
Duck, breast
360°F
°
165°F
Chicken, whole
Turkey, whole
Duck, whole
360°F 165°F
Chicken, thigh
Turkey, thigh
Duck, thigh
360°F 165°F
Steak, 1-inch thick*
450°F 125°F 130°F 135°F 145°F 165°F
Burgers, ½ lb.*
450°F 125°F 130°F 135°F 145°F 165°F
Roast Beef (bone-in)*
Roast Beef (boneless)*
350°F 125°F 130°F 135°F 145°F 165°F
Lamb (bone-in)*
Lamb (boneless) *
350°F 125°F 135°F 145°F 150°F 160°F
Pork (bone-in)*
Pork (boneless)*
350°F 145°F 150°F 165°F
Salmon, Tuna, Halibut, Swordfish*
450°F 145°F 150°F 160°F
Fish Steaks, 1-inch thick*
450°F 145°F 150°F 160°F
Sausage
450°F 160°F
Times may vary. Consuming raw or undercooked meats, poultry, or seafood may increase your
risk of food borne illness.
*To reduce the risk, cook your food to USDA-safe Temperatures.
Menu
The Menu button represents Memory Entry
(the storage of frequently used cooking
Presets, and Memory Recall (the retrieval
of these Presets). They can eliminate the
guesswork of cooking as everything is
preprogrammed for you and add a new level
of convenience.
There are two types of Presets:
• NuWave Presets. These Presets were
programmed by NuWave and go along
with the recipes that NuWave has
developed. In the Menu, they appear
in numbers 1–100. The user cannot
permanently change these Presets, nor
can they be overwritten.
• User-Defined Presets. These are the
Presets that you can create, either
from scratch or based on an existing
Preset, such as one of the NuWave
Presets. You can create and save 50 of
these in numbers 101–150. They are
changeable and can be overwritten.
BASIC FUNCTIONS

nuwavenow.com | 23
Probe Errors
Error Cause
Prb1
1. If the Probe is unplugged while the user pushes the Probe button, it will show
“Prb1” on the screen and beep three times.
2. Under setting mode, if the user presses Probe while the Probe is unplugged,
the screen will show “Prb1”; after that, the user can still push other buttons
(like Temp, Time, Sear, etc.) to input other functions, but the Probe will not be
activated.
3. Under cooking mode, if the Probe is unplugged and the user presses Probe,
the screen will show “Prb1”; after that, the unit will keep cooking with the set
time, but the Probe will not be activated.
4. At any time, unplugging the Probe will cancel the Probe function. When the
Probe is unplugged, it will display “Prb1”, and “Probe” on the panel will no
longer be lit. Plug the Probe in again and it will restart the Probe, function
automatically.
Prb2
If the set cooking temperature is lower than the Probe target temperature when the
user presses START/PAUSE, it will display a “Prb2” error message, beep three
times, and will not start cooking.
To avoid an unsafe situation with the Probe shunted outside of the cavity, even
though the unit started working with the Probe activated, the unit will shut off if the
target cooking temperature is more than 250°F and the Probe sensing temperature
does not increase more than 5°F during rst 60 minutes cooking.
Prb3
The Probe has short circuited. Contact Customer Service 1-877-689-2838 or email
help@nuwavenow.com
Prb4
If the cooking temperature is less than 250°F and the Probe sensing temperature
does not increase more than 5°F during rst 120 minutes cooking, the unit will shut
off and display a “Prb4” error notice to the user.
Prb5
Attempting to use the Probe with the Delay End function will cause the unit to stop
and display a “Prb5” error notice to the user.
Recalling and Using a NuWave Preset
1. Press Menu. The LED display shows
“Menu 1”. This allows access to Menu
numbers 1–100. For Menu numbers
101–150, press Menu again.
2. Use the START/PAUSE dial to locate
the number for the Preset you want.
3. Press START/PAUSE to begin cook
according to that Preset.
Programming Your Own Preset
1. Set the cooking temperature and time,
and the necessary cooking functions
(Preheat, Sear, Warm, etc.).
2. Press Menu. The display will show
“Menu 1”. Press Menu again. Now it
displays “Menu 101”.
3. Turn the START/PAUSE dial to choose
the number (from 101–150) to which
you will save your new Preset.
4. Press and hold Menu until the unit
beeps twice and displays “SAVE”. Now
your Preset is saved.
5. Press START/PAUSE and the unit will
begin cooking.
You will be able to recall this Preset as long
as you don’t overwrite it by saving a new
Preset to the same number.
BASIC FUNCTIONS

24 | nuwavenow.com
Saving a Preset After Cooking
Once the cooking has completed, “END”
will be displayed. Then do the following;
1. Press Menu twice so the screen
shows “Menu 101”.
2. Turn the START/PAUSE dial to
choose the number (from 101–150) to
which you will save your new Preset.
3. Press and hold Menu until the until
the unit beeps twice and displays
“Menu” and the chosen number.
“SAVE” will be displayed. Your Preset
is now saved.
You will be able to recall this Preset as
long as you don’t overwrite it by saving a
new Preset to the same number.
Saving a Preset While Cooking
The cooking parameters and functions
have already been set up and the cooking
process is currently underway.
1. Press Menu twice so the screen
shows “Menu 101”.
2. Turn the START/PAUSE dial to
choose the number (from 101–150) to
which you will save your new Preset.
3. Press and hold Menu until the unit
beeps twice and displays “SAVE”.
Now your Preset is saved.
You will be able to recall this Preset as
long as you don’t overwrite it by saving a
new Preset to the same number.
Memory Recall
1. Press Menu. LED display shows “1”
and “Menu”.
2. Turn the START/PAUSE dial to
choose the Preset to recall.
3. Press START/PAUSE once the
desired Menu number is displayed.
The unit will cook according to that
selected Preset.
Notes
While “Menu” and the Menu number
are displayed, pressing Menu will toggle
between Menu numbers 1 and 101.
Memory Recall with Preheat
and/or Warm
1. Press Menu. The LED display will show
“Menu” and “1”.
2. Select the Menu number for the Preset
you want to use by turning the START/
PAUSE dial. Pressing Menu will toggle
between Menu numbers 1 and 101.
3. Once the Menu number is chosen make
any time or temperature adjustments,
press Preheat/Warm and then START/
PAUSE. The unit will cook according to
the Preset with Preheat. To add Warm,
simply press and hold Preheat/Warm
and then press START/PAUSE.
Review Function
The Pro-Smart Grill allows you to review
and change settings before and during the
cooking cycle.
Before Cooking
1. Press Menu. Use the START/PAUSE
dial to select the Menu number for the
Preset you want to review.
2. Press Stage to review the steps and
functions on the selected Preset. Use
Temp/Time, or the START/PAUSE dial
to make adjustments.
While Cooking
1. Press Menu once to see the
current Preset. The LED will
display “Menu” and the currently
running Menu number.
2. Pressing Temp/Time will allow you
to use the START/PAUSE dial to
adjust temperature and time.
BASIC FUNCTIONS

nuwavenow.com | 25
3. Press any other key to return to
the cooking screen.
4. Press Stage to review the next
cooking phases if needed.
Notes
• To insert a new stage while cooking,
press and hold Stage until the unit
beeps twice.
• You need multiple stages to enter
Review mode using Stage.
• If, while reviewing a Preset’s settings,
the unit goes to the next stage, the
settings for that next stage will be
displayed.
• While in Review mode, to add the
Probe function to a given stage, press
and hold Probe.
Edit and Save a Preset
Presets can be edited and saved before,
during, and after cooking.
Before Cooking
1. Press Menu. “Menu 1” will be
displayed.
2. Pick the Menu number to edit with
the START/PAUSE dial.
3. Press Stage or Temp/Time to
review. Adjust with the START/
PAUSE dial as needed.
4. Once all adjustments are made,
press Menu and turn the START/
PAUSE dial to choose the new
Menu number.
5. Press and hold Menu until the
unit beeps twice and “SAVE” is
displayed to store the new Preset.
While Cooking
1. Recall the Menu number you wish
to edit.
2. Press Stage repeatedly to find
the function to edit, then set the
cooking temperature with the
START/PAUSE dial.
3. Press Temp/Time then turn the
START/PAUSE dial to set the
cooking time.
4. Press Stage. Repeat steps 2 & 3 to
adjust more functions.
5. When ready, press Menu and
pick a new Menu number with the
START/PAUSE dial.
6. Press and hold Menu until the
unit beeps twice and “SAVE” is
displayed to store your new Preset.
Light
• Press the button to turn the interior
lamp on or off.
• The Light default will always be OFF.
Notes
• Turning off the unit will also turn off the
lamp.
• When the cooking cycle ends, the lamp
will turn off.
• While cooking, the lamp is off and
cooking will pause when the door is
opened. If it’s on, but the door is open
over 5 minutes, the lamp will turn off but
the unit will still be paused.
Clock
1. Press Preheat + Temp/Time. The
display will show “12:00” and “:”
will flash. If the clock was previously
set up, it will show the current time.
BASIC FUNCTIONS

26 | nuwavenow.com
2. Turn the START/PAUSE dial to set the
clock. It will display “PM” indicating the
clock time is in the afternoon.
3. If the unit is plugged in, press Preheat
+ Temp/Time to display or dismiss the
clock. Adjust it with the START/PAUSE
dial.
4. Wait 3 seconds and the new clock time
will lock in.
Lock
Lock is used to disable the control panel.
While in Lock mode, the unit’s buttons will
not respond to any action until the panel is
unlocked.
• To lock or unlock unit functions, press
Menu + Stage. The unit will beep twice
and display “LOC” when the panel is
locked.
• Only Light, Power, and Menu + Stage
work while the unit is locked.
Watts
The Watts function is used to adjust the
electrical power needs of the Pro-Smart
Grill, allowing it to be used nearly anywhere.
There are 3 wattage selections: 700, 1,500,
and the default 1,800 watts.
• Press Watts once. The wattage
displayed turns to “700”.
• Press Watts twice. The wattage
displayed turns to “1500”.
• Press Watts a third time. The wattage
returns to “1800”.
Mute/Unmute
Mute and unmute the alert sounds by
pressing Stage+Sear.
Question about your
Pro-Smart Grill?
Contact our friendly customer service staff from 7:30am to 4:30pm, Monday ‒ Friday at
877-689-2838 or reach us by email at
help@nuwavenow.com
BASIC FUNCTIONS

nuwavenow.com | 27
Stage
Stage cooking allows you to alter the
temperature for different lengths of time
throughout the cooking process, giving
you greater control over the nal results.
You can program up to 5 of these cooking
stages, adding Preheat, Sear, Warm.
Delay, and Delay E as needed. Please
note that none of these functions can be
used independently as one of the stages.
To use the Stage function:
1. Press Stage for Stage 1. The default
is 350°F for 15 minutes. Make any
adjustments to the temperature and
time.
2. Press Stage again for Stage 2. The
default for Stages 2–5 is 350°F and
00:00 minutes. Adjust the temperature
and time.
3. Repeat until all Stages have been
entered, then press START/PAUSE to
begin cooking. When nished, the unit
will beep 3 times and display “End”.
4. If using the Probe, press Stage for
Stage 1. then press and hold Probe
and “OFF” will be displayed. Press
and hold Probe again for the default
Probe target temperature of 165°F.
Adjust this as needed.
5. Press Stage for Stage 2 and “OFF”
will appear. Press and hold Probe,
and 165°F will appear. Adjust the
temperature as needed.
6. Repeat for Stages 3–5* as needed.
7. Press START/PAUSE to begin
cooking. When nished, the unit will
beep 3 times and display “End”.
Notes
• Once the nal target probe
temperature is achieved, the cooking
will be nished, regardless of the
remaining stages.
• When using the Probe, press Temp/
Time for time, 00:00 will ash then
“on:” will appear.
Sear
The Sear function uses the top & bottom
heaters to seal in avor and juices. You
can sear your meat before, after, or both
before and after, the regular cooking
stages. Sear temperatures and times can
be adjusted prior and during the searing
process.
• Default Sear Settings: 450°F, 5-minutes.
• Selectable Sear Temperature Range:
50°F–450°F.
• Selectable Sear Time Range:
0-minutes–30-minutes (00:00–00:30.)
Principle of Sear 1, Sear 1 & 2, Sear 2
• Sear 1: Is ALWAYS the function right
BEFORE the regular cooking stages.
• Sear 1 & 2: Is ALWAYS right BEFORE
and right AFTER the regular cooking
stages.
• Sear 2: Is ALWAYS right AFTER the
regular cooking stages.
Using Sear (1, 1 2, and 2)
Press Sear once for Sear 1, press it twice
for Sear 1 & 2, and three times for Sear 2.
1. Select the cooking function and make
any changes to the temperature and
time, if needed.
2. Press Sear until you reach the Sear
you need (1, 1 & 2, or 2).
3. Make any adjustments to the Sear
temperature and time.
The Todd English Pro-Smart Grill offers
advanced features for experienced
cooks trying to achieve very specific
results. These complex features are not
needed to achieve amazing results,
which even the most inexperienced cook
can realize with only the unit’s basic
cooking functions. Novice cooks should
not use the advanced features, and those
novices who try them out should do so
with great care.
ADVANCED FUNCTIONS

28 | nuwavenow.com
4. If preheating, the unit will preheat,
then it will begin the cooking cycle in
the following order:
• Delay/Delay E
• Preheat
• Sear 1
• Stages 1–5
• Sear 2
• Warm
5. When all adjustments have been
made, press START/PAUSE to begin
cooking. When the cooking cycle has
nished, the unit will beep 3 times and
display “END”.
Notes
• The cooking temperature and time
can be changed after Sear had been
pressed. Press Stage and then set
the cooking temperature and time.
• Preheat is at the discretion of the user.
• When using the Probe, once the
Probe target temperature is reached
the unit will beep 3 times and display
“END”, regardless of unused Stages
or Sear.
• To set the cooking time and
temperature after Sear has been set,
press and hold Stage. The screen will
show “Stag”. Even though the Pro-
Smart Grill is no longer in Sear mode,
it remembers that Sear has been set.
Sear as an Independent Function
Sear temperatures and times can be
adjusted prior to, and during, the searing
process.
1. Press and hold Sear.
• The unit will begin to sear at
450°F for 5 minutes (00:05).
• The user can then adjust the Sear
temperature and time.
2. The screen will show “Sear” (“1” and
“2” will not be lit).
3. The unit will sear at the set
temperature and time, and then beep
three times and display “END”.
Crispy Finish
Crispy Finish, which works exclusively with
the Probe, gives your food a deliciously
crispy texture by searing it right at the end
of the cooking cycle. Here’s how it works:
1. Set the Probe target temperature,
then press Menu + Sear.
2. Adjust to when the Crispy Finish sear
should begin. It defaults to 10°F, but
you can adjust it to start anywhere
from 1°F–30°F short of the Probe
target temperature.
3. Press START/PAUSE to begin. Once
the start temperature is reached, the
Pro-Smart Grill will beep and “Sear
2” will ash, raising the cooking
temperature to the default Sear
temperature.
4. Once the Probe target temperature
has been reached, the unit will beep 3
times and display “End”.
Slow Cook
The Slow Cook function cooks the food
at lower temperatures for long period of
time. The Slow Cook Function is engaged
once the Probe target temperature has
been reached. The default slow cooking
temperature is 190°F. and the Slow Cook
temperature range is 175°F–235°F. When
setting the Slow Cook temperature, the
temperature will automatically adjust 25°F
higher than the Probe target temperature.
1. Make any adjustments to the cooking
temperature.
2. Set the Probe target temperature.
3. Set the Slow Cook function by
pressing Menu + Probe. You will
hear 2 beeps. Now, you can set the
amount of time to slow cook. Press
START/PAUSE to begin cooking.
4. When cooking has finished, the unit
will beep 3 times and display “END”.
ADVANCED FUNCTIONS

nuwavenow.com | 29
Notes
• The Slow Cook temperature must be at least 10°F higher than the Probe internal
target temperature.
• The Slow Cook temperature will automatically adjust 25°F higher than the Probe target
temperature.
• If the user unplugs the Probe, the unit will cook at the set temperature until the time
has ended. If the user reconnects the Probe, once the unit verifies the temperature,
Slow Cook will resume.
• The Slow Cook function can only work with the Probe.
• IF THE TARGET TEMPERATURE IS NOT REACHED AFTER 6 HRS OF COOKING,
THE PRO-SMART GRILL WILL AUTOMATICALLY TURN OFF TO AVOID
CONTINUAL COOKING.
The Pro-Smart Grill is not turning on or working.
The Pro-Smart Grill is not plugged in, or you did not press either Power or START/PAUSE.
Ensure the unit is plugged into an appropriate grounded power socket and press , or
START/PAUSE as appropriate.
Fried ingredients are not completely cooked.
Too many ingredients were used, or either the cooking temperature is too low or the cooking time is
insufficient.
Remove some ingredients. Smaller batches air-fry more evenly. Increase the cooking temperature
and/or time.
Fried snacks are not crispy when they come out.
Use snacks designed to be baked in a traditional oven, or lightly brush some olive oil onto the snacks
beforehand for crispier results.
White smoke is coming out of the unit.
You are frying greasy foods, or there is greasy residue is present from previous use.
Hot grease can produce white smoke and the Air Fry Basket or Wire Rack might become hotter
than usual. This will not affect the final cooking result. Ensure the Air Fry Basket and Wire Rack are
properly cleaned after use.
Fresh French fries come out unevenly fried.
The potato sticks were not properly soaked, not fresh, or were the wrong type.
Soak the potato sticks in a bowl of water for at least 30 minutes, remove and dry them with paper
towels. Use fresh potatoes and make sure they stay firm during air-frying.
Fresh French fries are not crispy when they come out.
The crispiness of the fries depends on the amount of oil used and the water in the fries.
For crispy results, cut the potato sticks smaller and dry them properly before adding oil. You can add
slightly more oil to the potatoes for even crispier results.
If the Pro-Smart Grill needs to be replaced or returned to the manufacturer, contact Customer Service
at: 1-877-689-2838 (Monday–Friday, 7:30am–4:30pm) or [email protected].
Troubleshooting Guide
TROUBLESHOOTING GUIDE

30 | nuwavenow.com
CAUTION
Do not put the Probe in the dishwasher. Doing so can damage the
components. HAND WASH ONLY.
Error Message: Solution(s):
Prb1 The Probe is not connected. Plug the Probe into the Probe Jack.
Prb2
The Probe target internal temperature is set higher than set cooking
temperature.
Prb3
A Probe short circuit has taken place.
Contact Customer Service.
Prb4
The Probe sensor is not detecting any temperature increase. Ensure the
Probe is inserted into the food and the food is in the unit while cooking.
Prb5
Attempting to use the Probe with the Delay End function will cause the unit
to stop and display a “Prb5” error notice to the user.
Er1
The Temperature Sensor has overheated. Turn the unit off to cool. If the unit
is not working after it cools down, contact Customer Service.
Err1
A Temperature Sensor short circuit has happened.
Contact Customer Service.
Err2
The Temperature Sensor is open.
Contact Customer Service.
Grl1 The plug-in Grill is not properly connected in the cooking chamber.
Error Messages
Question about your Pro-Smart Grill?
Contact our friendly customer service staff from 7:30am to 4:30pm, Monday‒Friday at
877-689-2838 or reach us by email at
help@nuwavenow.com
The Pro-Smart Grill is engineered with an automatic shut-off feature to prevent over-
heating during use. However, if the Pro-Smart Grill does shut off to cool itself down, do
not be alarmed if an odor is detected.
To remedy the situation, simply unplug the Pro-Smart Grill and wait for it to completely
cool down. Once it has cooled, and assuming that there are no error messages on the
LED screen, reactivate the unit and initiate a cooking cycle. Once you can do that, the
Pro-Smart Grill is ready to go.
To prevent the Pro-Smart Grill from overheating, make sure that you do not cook foods
at higher temperatures or for longer times than recommended.
Overheat Protection
TROUBLESHOOTING GUIDE

nuwavenow.com | 31
Cleaning
Before First Use
1. Remove all the packaging materials,
including any tape and labels on the
appliance.
2. Clean the Wire Rack, plug-in Grill,
Air Fry Basket, Baking and Drip
Pan thoroughly with hot water, a
nonabrasive sponge, and mild dish
detergent, or in the dishwasher, top
rack only.
3. Wipe the inside and outside of the
Pro-Smart Grill with a damp dishcloth
or wet cloth and dry thoroughly.
4. Only hand-wash the Probe.
After Each Use
1. Allow the Pro-Smart Grill to cool
completely before cleaning.
2. Always unplug the Pro-Smart Grill
from the electrical outlet prior to
cleaning. NEVER clean the Pro-Smart
Grill while it is plugged in.
3. Never use harsh abrasive or corrosive
cleaning products, as they may
damage the finish. Wipe the exterior
with a clean, damp cloth and dry
thoroughly. NEVER spray a solution
directly on the unit, especially the
control panel. Apply the cleanser
directly to a cloth towel.
4. Clean the interior with a damp cloth,
mild liquid soap, and a clean cloth.
5. Never use steel wool pads, etc., When
cleaning the unit.
6. NEVER HANDLE A HOT GRILL. Allow
the plug-in Grill to completely cool
before cleaning, then wipe it with a
clean damp towel and rinse it in cool
water. Dry it completely. WARNING:
NEVER submerge or rinse a HOT Grill
in water as it may warp or break.
7. With the glass window cool, spray glass
cleaner on a clean cloth towel. Clean the
inside and outside of the window. Use
a damp cloth to rinse and then dry the
window with a clean towel.
8. Never operate the Pro-Smart Grill
without the Baking and Drip Pan in
place.
9. To remove baked-on grease, soak
the Wire Rack, plug-in Grill, Air Fry
Basket, and/or Baking and Drip Pan,
in hot, soapy water for a minimum of
10 minutes. Dry thoroughly.
IMPORTANT: Do not immerse the unit
in water or attempt to put it through the
dishwasher. Make sure it has cooled
completely prior to cleaning.
Storage
• Unplug the Pro-Smart Grill and let it
cool down completely.
• Make sure that all parts are clean and
dry.
• Never wrap the cord around the Pro-
Smart Grill.
Replacing the Light Bulb
Make sure to turn off and unplug the unit,
and allow the interior to fully cool before
replacing the light bulb. Failure to do so
could result in burns or damage to the glass
cover or the light bulb itself. Unscrew the light
bulb cover and the light bulb.
To order the light bulb, call Customer
Service at 1-877-689-2838 or emailing
help@nuwavenow.com. Use part number
BGP1. The light bulb can be found at your
local hardware store. The bulb used is an
incandescent light bulb 25W–120/125 Volt
-T6 E14 screw base.
CLEANING & MAINTENANCE

32 | nuwavenow.com
THE MANUFACTURER WARRANTS
The NuWave Pro-Smart Grill, including the plug-in Grill, Baking and Drip Pan, Air Fry Basket, Wire Rack,
Light Bulb, Light Bulb Cover, Temperature Probe, and all electrical components, are to be free from
manufacturer defects.
All electrical components are warrantied for 1 year from the date of purchase, under normal household
use, and when operated in accordance with the Manufacturer’s written instructions. The Manufacturer
will provide the necessary parts and labor to repair any part of the Pro-Smart Grill at NuWave LLC
Service Department. After the expiration of the warranty, the cost of the labor and parts will be the
responsibility of the owner.
THE WARRANTY DOES NOT COVER
The Limited Warranty is voided if repairs are made by an unauthorized dealer or the serial number
data plate is removed or defaced. Normal deterioration of nish due to use or exposure is not covered
by this Warranty. This Limited Warranty does not cover failure, damages or inadequate performance
due to accident, acts of God (such as lightning), uctuations in electric power, alterations, abuse,
misuse, misapplications, corrosive-type atmospheres, improper installation, failure to operate in
accordance with the Manufacturer’s written instructions, abnormal use or commercial use. NuWave
LLC reserves the right to void the Limited Warranty, where allowable by law, for products purchased
from an unauthorized dealer.
TO OBTAIN SERVICE
The owner shall have the obligation and responsibility to: pay for all services and parts not covered by
the warranty; prepay the freight to and from Service Department for any part or system returned under
this warranty; and carefully package the product using adequate padding material to prevent damage
in transit. The original container is ideal for this purpose. Include in the package the owner’s name,
address, daytime telephone number, a detailed description of the problem, and your “RGA number.”
(Call 1-877-689-2838) or email help@nuwavenow.com to obtain the RGA number (Return Goods
Authorization number). Provide the cooking system model & serial number and proof of date of purchase
(a copy of the receipt) when making claims under this warranty.
MANUFACTURER’S OBLIGATION
The Manufacturer’s obligation under this Limited Warranty is limited, to the extent allowable by law, to
repairing or replacing any part covered by this Limited Warranty which upon examination is found to
be defective under normal use. The Limited Warranty is applicable only within the continental United
States and only to the original purchaser of the manufacturer’s authorized channels of distribution.
THE LIMITED WARRANTY MAY NOT BE ALTERED, VARIED OR EXTENDED EXCEPT BY A
WRITTEN INSTRUMENT EXECUTED BY THE MANUFACTURER. THE REMEDY OF REPAIR OR
REPLACEMENT AS PROVIDED UNDER THIS LIMITED WARRANTY IS EXCLUSIVE. IN NO EVENT
SHALL THE MANUFACTURER BE LIABLE FOR ANY CONSEQUENTIAL OR INCIDENTAL DAMAGES
TO ANY PERSON, WHETHER OR NOT OCCASIONED BY NEGLIGENCE OF THE MANUFACTURER,
INCLUDING WITHOUT LIMITATION, DAMAGES FOR LOSS OF USE, COSTS OF SUBSTITUTION,
PROPERTY DAMAGE, OR OTHER MONEY LOSS.
Some states do not allow the exclusion or limitation of incidental or consequential damages, so the
above limitation exclusions may not apply. This Limited Warranty gives specic legal rights, and there
may also be other rights which vary from state to state. EXCEPT AS OTHERWISE EXPRESSLY
PROVIDED ABOVE, THE MANUFACTURER MAKES NO WARRANTIES EXPRESSED OR
IMPLIED ARISING BY LAW OR OTHERWISE, INCLUDING WITHOUT LIMITATION, THE IMPLIED
WARRANTIES OF MERCHANTABILITY AND FITNESS FOR A PARTICULAR PURPOSE TO ANY
OTHER PERSON. READ YOUR OWNER’S MANUAL. IF YOU STILL HAVE ANY QUESTIONS ABOUT
OPERATION OR WARRANTY OF THE PRODUCT, PLEASE CONTACT NUWAVE LLC.
LIMITED WARRANTY

nuwavenow.com | 33
DISPUTE RESOLUTION PROCEDURE
For disputes relating to use of the website or use or purchase of a NuWave product or service
(collectively “Disputes”), you agree to rst contact NuWave LLC at (877) 689-2838 (phone), (847)
367-5486 (facsimile), or help@nuwavenow.com (email). If we cannot resolve your dispute informally,
any and all disputes shall be submitted to nal and binding arbitration. You may start the arbitration
process by submitting in writing a demand to the American Arbitration Association (“AAA”) and sending
a copy to NuWave. NuWave will pay all ling costs. A single arbitrator of the AAA will conduct the
arbitration in a location convenient to you or by phone. The arbitrator’s award will be binding and may
be entered as a judgment in a court of competent jurisdiction. The arbitration will be conducted in
accordance with the provisions of AAA’s Commercial Arbitration Rules and Mediation Procedures in
effect at the Time of submission of your demand for arbitration. See https://www.adr.org/sites/default/
les/CommercialRules_Web.pdf. Except as may be required by law as determined by an arbitrator,
no party or arbitrator may disclose the existence, content, or results of any arbitration hereunder without
prior written consent of both parties.
A. WAIVER OF RIGHT TO SUE
By agreeing to arbitration you understand that, to the maximum extent permitted by law, you are
agreeing to waive your right to le suit in any court, to a court hearing, judge trial, and jury trial.
B. CLASS ACTION WAIVER
To the maximum extent permitted by law you expressly agree to refrain from bringing or joining any
claims in any representative or class-wide capacity, including but not limited to, bringing or joining any
claims in any class action or class-wide arbitration.
C. OPT OUT PROCEDURE
To opt out of arbitration you must contact NuWave. To request to opt out of arbitration contact us at
help@nuwavenow.com (email), NuWave LLC, 560 Bunker Ct., Vernon Hills, IL 60061, U.S.A., (847)
367-5486 (fax), or (877) 689-2838 or (224) 206-3019 (phone). You will have thirty (30) days from the
date of product delivery to opt out of arbitration with respect to any dispute arising out of or relating to
use or purchase of any NuWave product. If more than 30 days have passed you are not eligible to opt
out of arbitration and will have waived your right to sue or participate in a class action with respect to
the dispute arising out of your purchase or use of a NuWave product. For any dispute arising out of
your use of NuWave’s website, you have thirty (30) days from the date you provided information to the
website to opt out of arbitration. If more than 30 days have passed you are not eligible to opt out of
arbitration and you will have waived your right to sue and participate in a class action with respect to
the dispute arising out of your use of NuWave’s website.
D. SOME MATTERS ARE NOT SUBJECT TO ARBITRATION
Notwithstanding the foregoing, the following shall not be subject to arbitration and may be adjudicated
only in the state and federal courts of Illinois: (i) any dispute, controversy, or claim relating to or
contesting the validity of our intellectual property rights and proprietary rights, including without
limitation, patents, trademarks, service marks, copyrights, or trade secrets; (ii) an action by a
party for temporary, preliminary, or permanent injunctive relief, whether prohibitive or mandatory,
or other provisional relief; or (iii) interactions with governmental and regulatory authorities. (i) any
dispute, controversy, or claim relating to or contesting the validity of our intellectual property rights
and proprietary rights, including without limitation, patents, trademarks, service marks, copyrights,
or trade secrets; (ii) an action by a party for temporary, preliminary, or permanent injunctive relief,
whether prohibitive or mandatory, or other provisional relief; or (iii) interactions with governmental
and regulatory authorities. You expressly agree to refrain from bringing or joining any claims in any
representative or class-wide capacity, including but not limited to, bringing or joining any claims in any
class action or any class-wide arbitration.
READ YOUR OWNER’S MANUAL
If you still have any questions about operation or warranty of the product, please contact NuWave LLC
at:1-877-689-2838 or email help@nuwavenow.com (Mon-Fri 7:30am-4:30pm CST).
LIMITED WARRANTY

34 | nuwavenow.com
Rubber Gasket
Part #: BGP4
Part Image
Part Name
and Number
Part Description
Power Base
Stainless-Steel:
BGA1
Black: BGA6
Powers and controls the cooking process.
Plug-in Grill
BGA2
Non-stick, direct heat grill plate.
Air Fry Basket
BGA4
Made from 18-8 stainless-steel, it is perfect for
air frying and dehydrating.
Baking/Drip Pan
BGA3
Ideal for baking, roasting, and as a drip pan
when air frying.
Wire Rack
BGA5
To hold food or unit safe cooking vessels.
Temperature Probe
BGP3
Inserted into food; measure internal Tempera-
ture of food.
Light Bulb
BGP1
Used to light up the unit while cooking.
Light Bulb Cover
BGP2
Protective cover shields light bulb from heat.
Rubber Gasket
BGP4
Seals the cooking chamber to prevent heat
leakage.
Side Rubber
Gasket
BGP5
Seals the cooking chamber to prevent heat
leakage.
Ordering Parts
For extra and replacement parts for your Todd English Pro-Smart Grill, nd the number
for the part you want and call NuWave Customer Service at 877-689-2838 or visit
www.nuwavenow.com to order online.
REPLACEMENT PARTS

nuwavenow.com | 35
NOTES

BM38051
CB
07-18-22
FOR HOUSEHOLD USE ONLY
120V, 60Hz, 1800 Watts
Model: 38051 / 38151 / 38052 / 38152
For patent information please go to:
www.nuwavenow.com/legal/patent
Designed in France & Developed in USA
NuWave LLC
560 Bunker Ct.
Vernon Hills, IL 60061, U.S.A.
Tel: 1-877-689-2838
Mon - Fri 7:30 am to 4:30 pm (CST)
Email: help@nuwavenow.com
Made in China
©2022 NuWave LLC • All Rights Reserved.
PRO-SMART™ GRILL
TODD ENGLISH
Para la versión en español de este manual, visita www.nuwavenow.com