Loading ...
Loading ...
Loading ...
5
CLEANING AND MAINTENANCE
CAUTION
• Do not use any cleaning agent with chlorine or chlorine compounds on stainless steel fi nish. Chlorine and
chlorine compounds are corrosive to stainless steel
•Do not use a metal knife or any other metal tool to scrape stainless steel parts
•Do not permit citrus or tomato juice to remain on stainless steel surfaces, as citric acid will permanently
discolor stainless steel. Wipe up spills immediately.
•Do not use abrasive cleaners, steel wool pads, or abrasive cloths as they will scratch the fi nish.
1. Carefully remove protective plastic peel coat from each stainless steel surface. Clean stainless with stainless steel
cleaner in direction of grain. Clean the stainless with any product made for stainless. Always rub with the grain
direction. Rubbing across the grain direction may produce minor scratches. Some good cleaners are Stainless Steel
Magic™, and Sheila Shine™.
2. In a salt air environment, small amounts of rust may accumulate on stainless steel. A slightly more oily cleaner like
Sheila Shine™ will protect better against oxidation or slight surface rust. Cleaning the surfaces periodically will protect
the fi nish for many years.
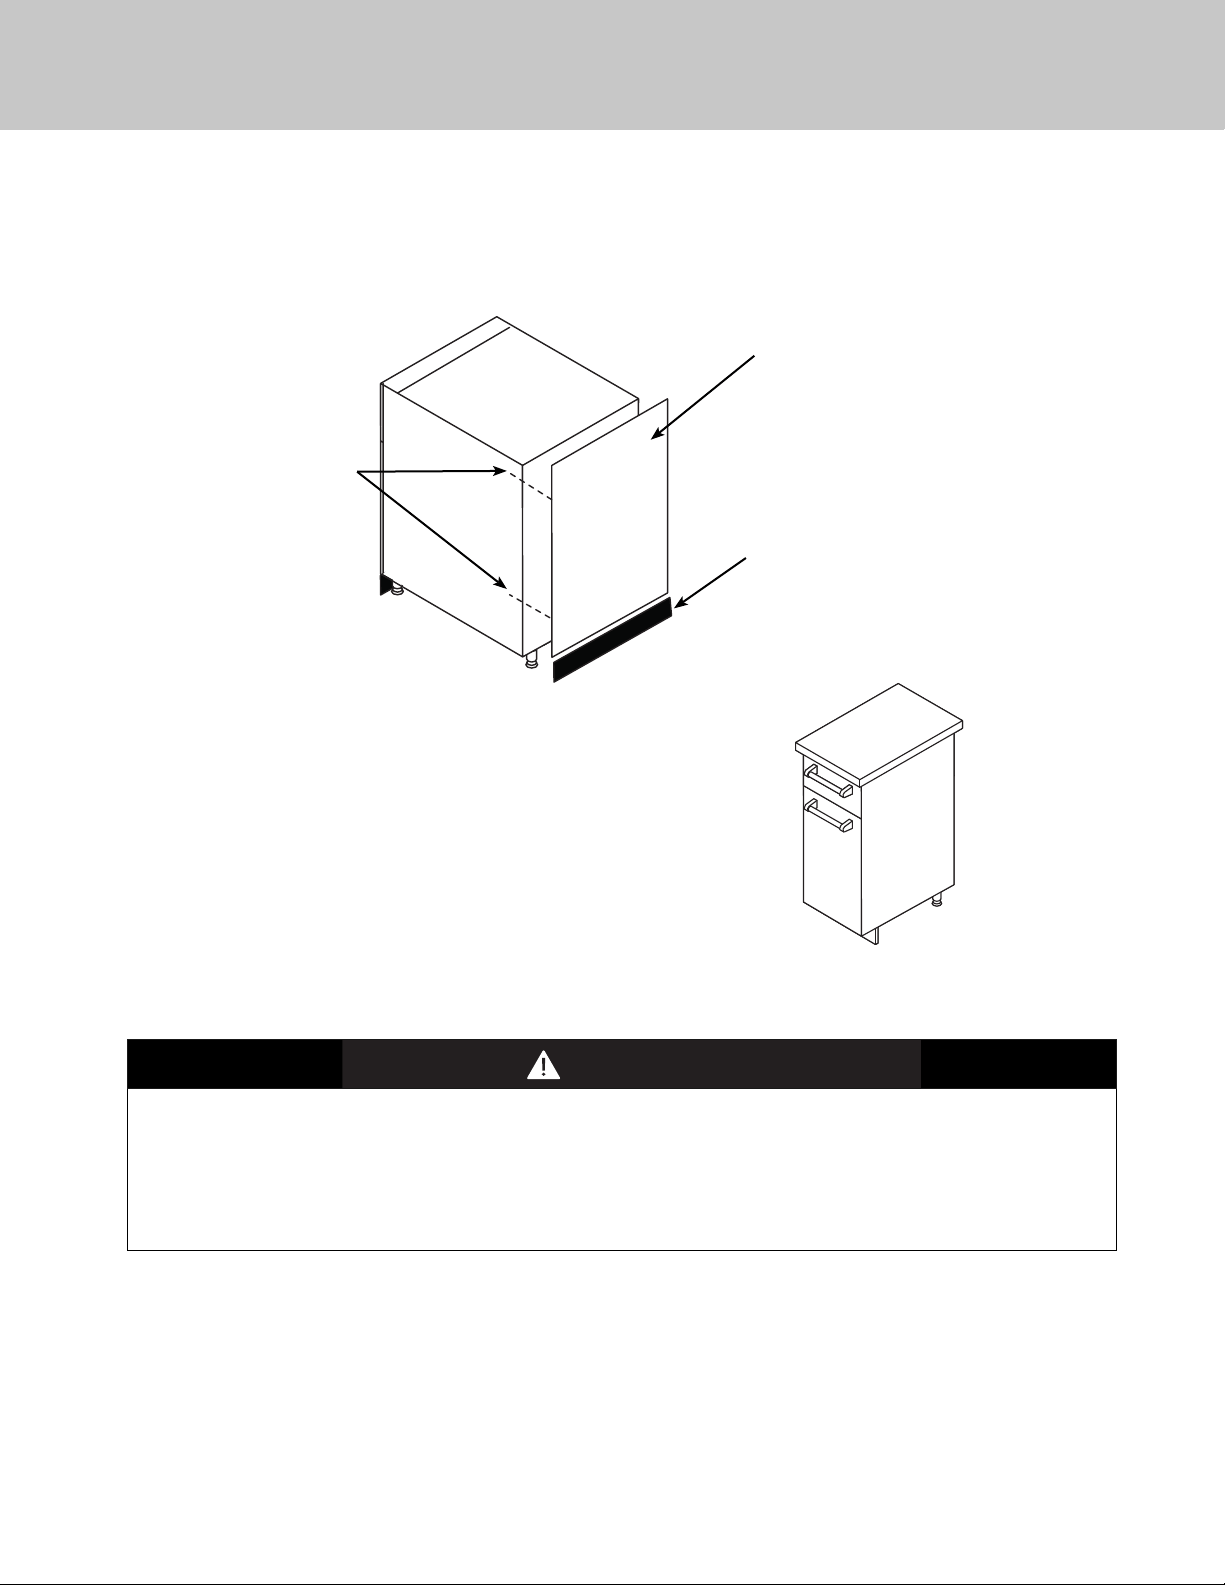
10. BACK PANEL INSTALLATION
• Remove all protective covering from panel and install using the 10 x 1/2” tek screws provided. (See Illustration #8).
• Attach rear toe kick to legs. (See illustration #8).
NOTE: For end of the run panels, the rear, front, and side toe kicks must be modifi ed. (See illustrations #7 & #8)
11. INSTALL LOCALLY SUPPLIED COUNTERTOP
Viking outdoor cabinets are designed for a minimum countertop
thickness of 1 1/8” (2.9 cm) such as you would fi nd with granite
or quartz material. If a countertop material thicker than 1 1/2”
(3.8 cm) is used, the appliances should be shimmed to the proper
height.
12. Install per appliance’s installation instructions.
INSTALLATION
1. Place rear panel into area of the
cabinet.
2. Attach from inside
with (4) tek screws
provided.
(front and rear)
Rear toe kick (C)
Illustration #8
3. After modifying rear toe kick (See
dimension chart at the bottom of page 4)
- snap toe kick into place
Loading ...
Loading ...
Loading ...