Loading ...
Loading ...
Loading ...
9
English
Fig. H
4
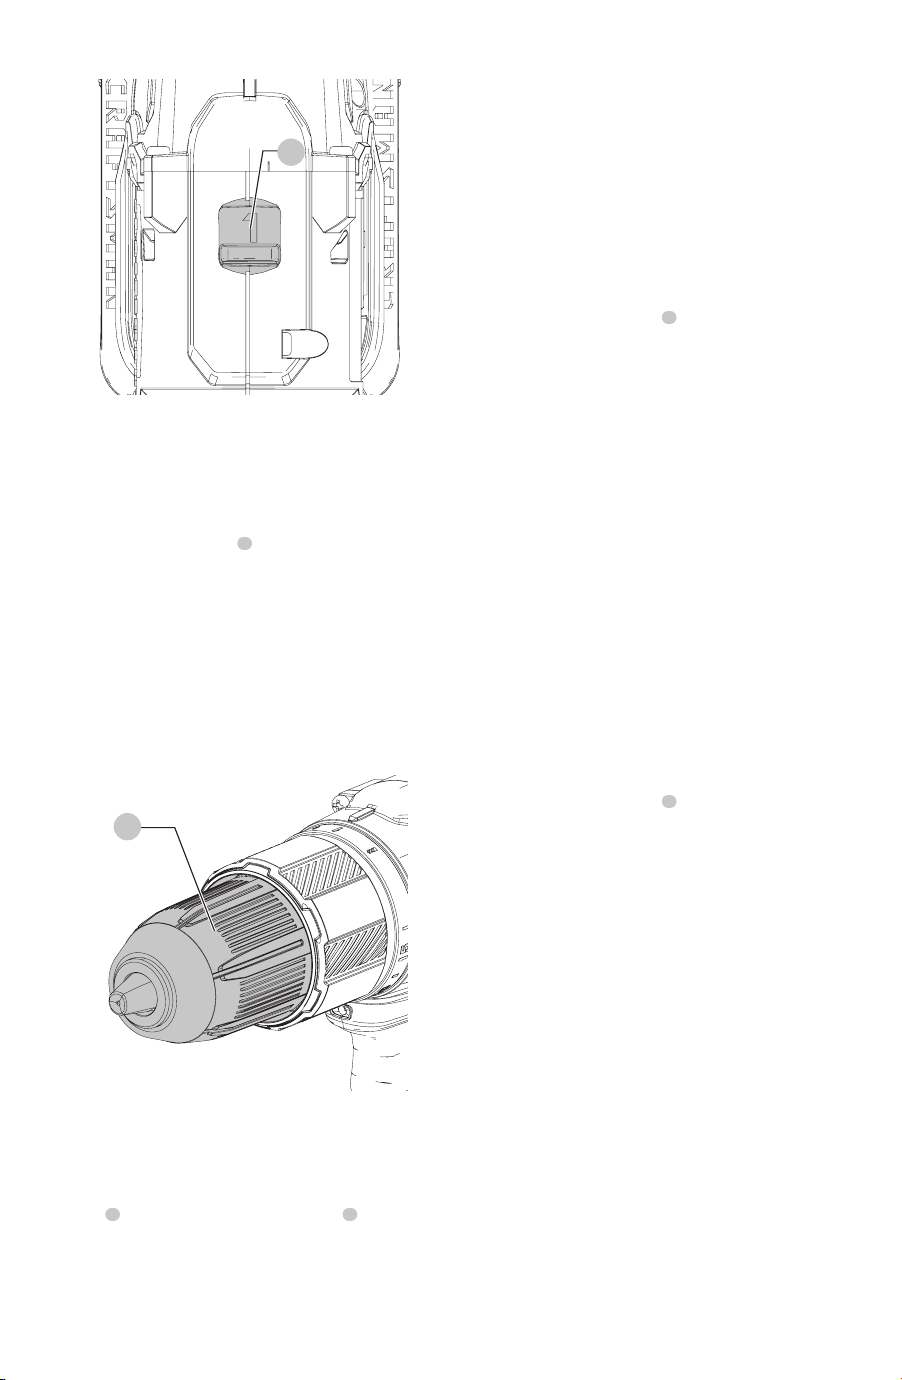
Keyless Chuck (Fig. I)
WARNING: Make certain the battery pack is removed
to prevent tool actuation before installing or
removingaccessories.
To insert a drill bit or other accessory:
1. Grasp the keyless chuck
5
and rotate it in the
counterclockwise direction, as viewed from the
chuckend.
2. Insert the bit or other accessory fully into the chuck, and
tighten securely by rotating the chuck in the clockwise
direction as viewed from the chuck end.
WARNING: Do not attempt to tighten or loosen drill
bits (or any other accessory) by gripping the front
part of the chuck and turning the tool on. Damage
to the chuck and personal injury may occur when
changingaccessories.
Fig. I
5
LED Work Light (Fig. A)
CAUTION: Do not stare into worklight. Serious eye
injury could result.
When impact driver is activated by pulling the trigger
switch
1
, the integrated LED work light
8
will
automatically illuminate the work area.
nOTE: The work light is for lighting the immediate work
surface and is not intended to be used as a flashlight.
Screw Driving
• For driving fasteners, the forward/reverse button should
be pushed to the left.
• Use reverse (button pushed to the right) for
removingfasteners.
nOTE: When moving from forward to reverse, or vice versa,
always release the trigger switch first.
Hammerdrilling (Fig. D)
• Select the desired speed/torque range using the gear
shifter to match the speed and torque to the planned
operation. Turn the collar
3
to the hammerdrillsymbol.
iMPORTAnT: Use carbide-tipped or masonry bits rated
for percussion drillingonly.
• Drill with just enough force on the hammer to keep
it from bouncing excessively or "rising" off the bit.
Too much force will cause slower drilling speeds,
overheating, and a lower drillingrate.
• Drill straight, keeping the bit at a right angle to the work.
Do not exert side pressure on the bit when drillling as
this will cause clogging of the bit flutes and a slower
drillingspeed.
• When drilling deep holes, if the hammer speed starts to
drop off, pull the bit partially out of the hole with tool
still running to help clear debris from thehole.
nOTE: A smooth, even flow of dust from the hole indicates
proper drillingrate.
Drilling
NOTICE: If drilling thin material, use a wood “backup”
block to prevent damage to the material.
• Select the desired speed/torque range using the gear
shifter to match the speed and torque to the planned
operation. Turn the collar
3
to the drill symbol.
• Use sharp drill bits only.
• Support and secure work properly, as instructed in the
General Power Tool Safety Warnings.
• Use appropriate and required safety equipment, as
instructed in the General Power Tool Safety Warnings.
• Secure and maintain work area, as instructed in the
General Power Tool Safety Warnings.
• Run the drill very slowly, using light pressure, until the
hole is started enough to keep the drill bit from slipping
out of it.
• Apply pressure in a straight line with the bit. Use
enough pressure to keep the bit biting but not so much
as to stall the motor or deflect the bit.
• Hold the drill firmly with two hands, one hand on the
handle, and the other grippingthe bottom around the
battery area or the auxillary handle if provided.
• DO NOT CLICK THE TRIGGER OF A STALLED DRILL OFF
AND ON IN AN ATTEMPT TO START IT. DAMAGE TO THE
DRILL CAN RESULT.
• Minimize stalling on breakthrough by reducing pressure
and slowly drilling through the last part of the hole.
Loading ...
Loading ...
Loading ...