Loading ...
Loading ...
Loading ...
www.XtremeAirUsa.com PAGE 6
\
9. INSTALLATION
STEP 3: PREPARE DUCTWORK & SINGLE OUTLET (SKIP THIS STEP IF DUCTWORK
ALREADY PRESENT)
A. Have 15amp, 120V, 60Hz, single outlet anywhere inside the chimney width lines (make
sure at least 2 inches below ceiling line for ceiling bracket mount).
B. Have 6 or 8 inch diameter ductwork (depending on your model requirements) brought
down from the ceiling to about the mark of mounting screws. (1-2 inches away from wall
is recommended since you need room to plug in the unit).
STEP 4: INSTALL CEILING BRACKET, MOUNTING ANCHORS & SCREWS
A. Place center of ceiling mount bracket in line with center line and all the way up to the
ceiling. Once in place, secure with screws.
B. Pre-drill holes (1/8”) where your mounting marks are.
C. Slowly tighten wall anchors (2 total) until it is flush with the wall surface.
D. Insert mounting screws inside the wall anchors then slowly tighten it down. Make sure
to
leave about 1/8” space away from the wall to the inside screw’s head.
STEP 5: HANG THE HOOD & CONNECTION
A. Carefully lift and hang the hood body on the wall, attaching it
to 2 mounting screws already in place.
B. Level the hood body by using horizontal level
C. Use hand screw driver to tighten those 2 mounting screws
D. Connect the exhaust on the hood to the ductwork above.
E. Use aluminum tape to make all joints secure and all tight
F. Find the three pronged plug and connect to an electrical outlet
CAUTION: Do not release the hood until you finish step 6 below.
STEP 2: MARKING ON THE WALL
A. Center: is the center of cook top or stove.
B. Chimney width: is the width of the chimney (Varies with each model).
C. Mounting screws: where the hood body will be positioned from.
FOR PX01, 02, 03 & 08 MODELS: please assemble body mounting bracket (BMB)
to the back of hood body first, so you can find
exact placement location. To do so, remove 6
screws located on the back of the hood and
place the bracket onto the hood with the
same 6 screws.
**MOUNTING SCREW HOLE DIMENSIONS:
WIDTH:
dimension from center to center of mounting bracket hole.
HEIGHT:
dimension from cook top to bottom of range hood (varies from 26” to
30”) plus from bottom of range hood to mounting bracket hole.
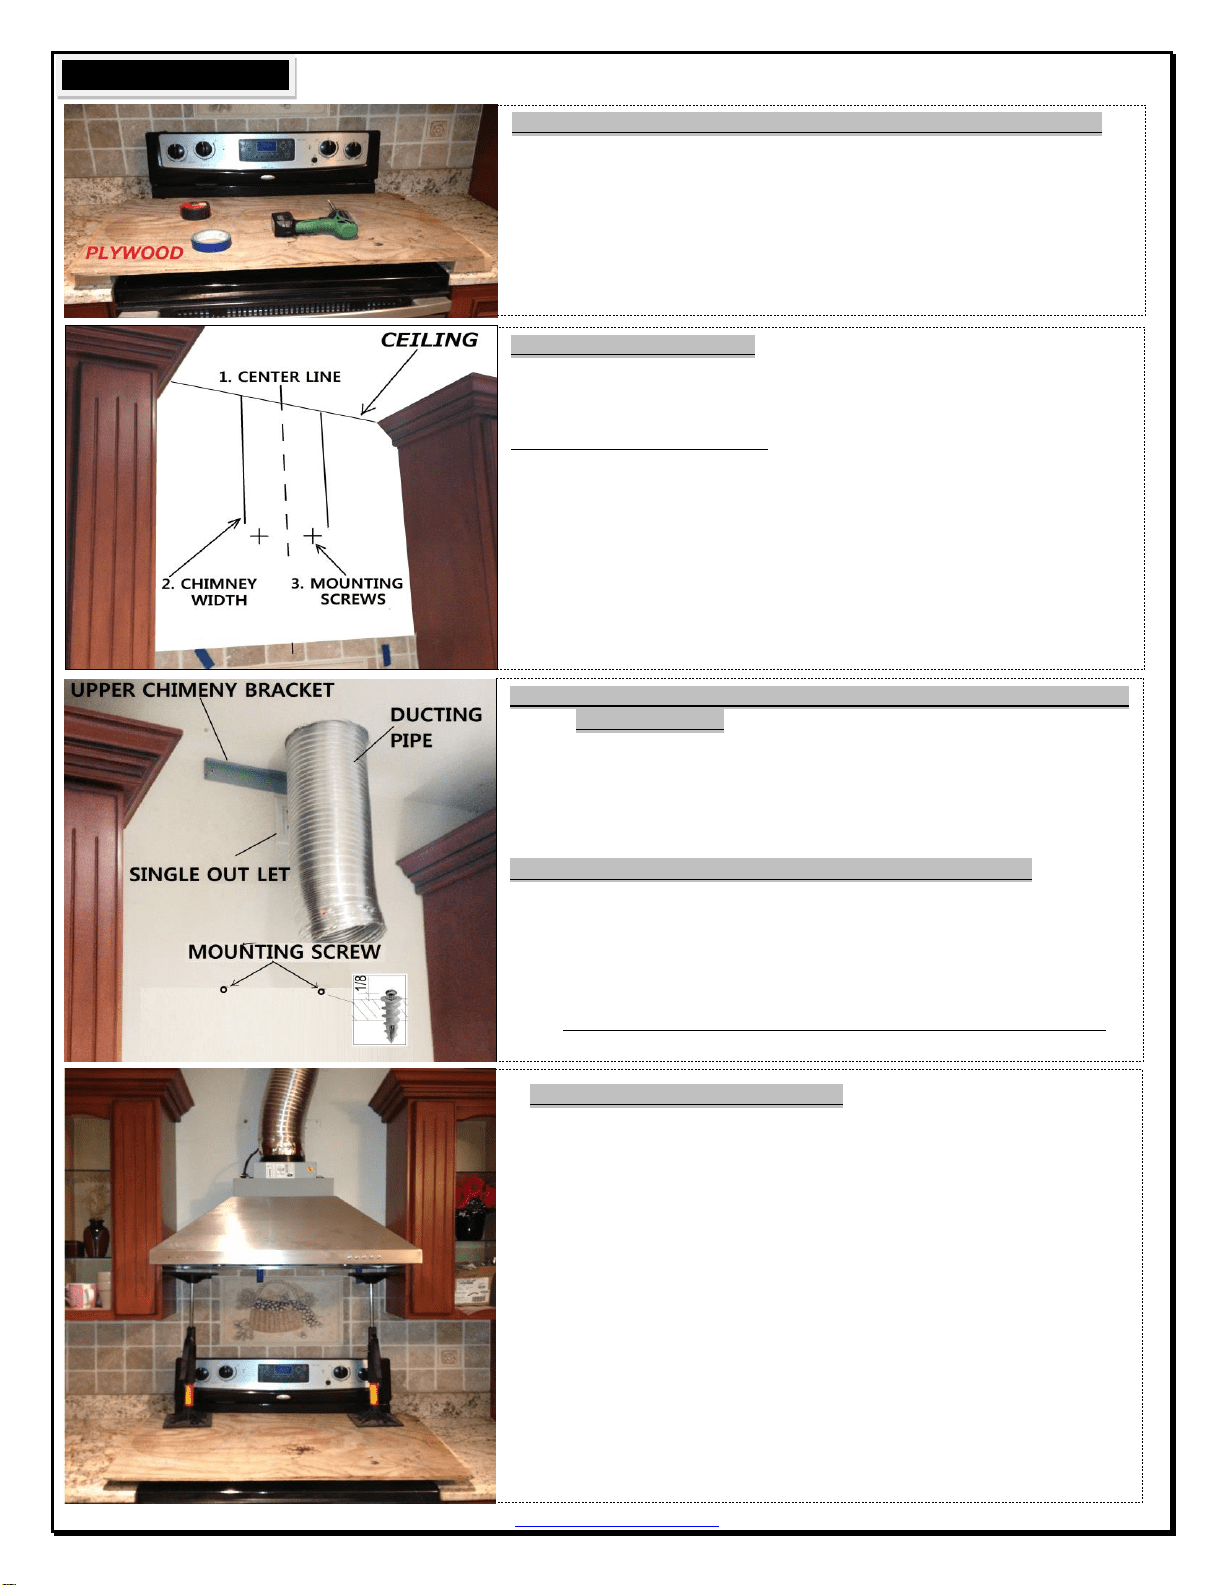
STEP 1: (OPTIONAL ONLY) PROTECT THE COOK TOP & CREATE WORK STATION
Have 2 pieces 2” x 4” x 20” on both sides of stove & plywood on top of them to protect cook
top or stove from damage or debris. This plywood will also create a comfortable work station
for easy installation of hood unit.
NOTE: FOR PX02/UL02 & PX15: please put on top of hood body in this order:
1. U bracket (leave foam tape strips on top of hood.)
2. Rubber gasket
3. Air Diverter
Loading ...
Loading ...
Loading ...